

Clean ceiling fan blades without breaking a sweat? Yes, you read that right! We’ve all been there, craning our necks, precariously balancing on a chair, and still ending up with a face full of dust. But what if I told you there’s a smarter, easier way to tackle this chore?
For generations, keeping our homes clean has been a symbol of pride and well-being. While the tools and techniques have evolved, the desire for a dust-free haven remains constant. Think about it – a sparkling clean ceiling fan not only looks better but also helps circulate air more efficiently, potentially saving you money on energy bills. Plus, it eliminates those pesky dust bunnies that can trigger allergies and irritate sensitive sinuses.
This DIY guide is your ticket to a spotless ceiling fan, achieved with minimal effort and maximum impact. I’m going to share a simple, yet incredibly effective, trick that will transform your cleaning routine. Forget the ladders and the sneezing fits! This method is so easy, you’ll wonder why you haven’t been doing it all along. So, grab your supplies, and let’s get ready to clean ceiling fan blades like a pro!
DIY Ceiling Fan Cleaning Hack: Sparkling Clean Blades in Minutes!
Okay, let’s be honest. Cleaning ceiling fans is one of those chores we all dread. It’s awkward, dusty, and you always seem to get a face full of grime. But fear not! I’ve got a super simple, incredibly effective hack that will have your ceiling fan blades sparkling clean in no time, with minimal effort and mess. Trust me, once you try this, you’ll never go back to balancing precariously on a ladder with a duster again.
What You’ll Need:
Before we dive in, let’s gather our supplies. This is a pretty low-cost project, and you probably already have most of these items on hand.
* Pillowcase (an old one you don’t mind getting dirty): This is the star of the show!
* All-Purpose Cleaner (or a mixture of warm water and dish soap): Choose your weapon of choice. I personally like using a gentle all-purpose cleaner, but a simple soap and water solution works just as well.
* Spray Bottle (optional): If you’re using a spray cleaner, you’ll need this.
* Ladder or Step Stool: Safety first! Make sure you have a stable way to reach your ceiling fan.
* Dry Cloth or Paper Towels: For any final touch-ups.
* Gloves (optional): If you’re sensitive to cleaning products or just don’t like getting your hands dirty.
The Pillowcase Cleaning Method: Step-by-Step
This method is so ingenious because it traps the dust and grime inside the pillowcase, preventing it from raining down on you and your furniture. It’s like magic, I tell you!
1. Prepare Your Cleaning Solution: If you’re using a concentrated all-purpose cleaner, dilute it according to the manufacturer’s instructions. If you’re going with the soap and water route, mix a few drops of dish soap into a bowl of warm water. If you’re using a spray cleaner, pour it into your spray bottle.
2. Position Your Ladder or Step Stool: Make sure your ladder or step stool is stable and positioned directly under the ceiling fan. You want to be able to comfortably reach each blade.
3. Spray the Pillowcase (Optional): If you’re using a spray cleaner, lightly spray the inside of the pillowcase with your cleaning solution. You don’t need to soak it, just a light misting will do. If you’re using a liquid cleaner, you can skip this step.
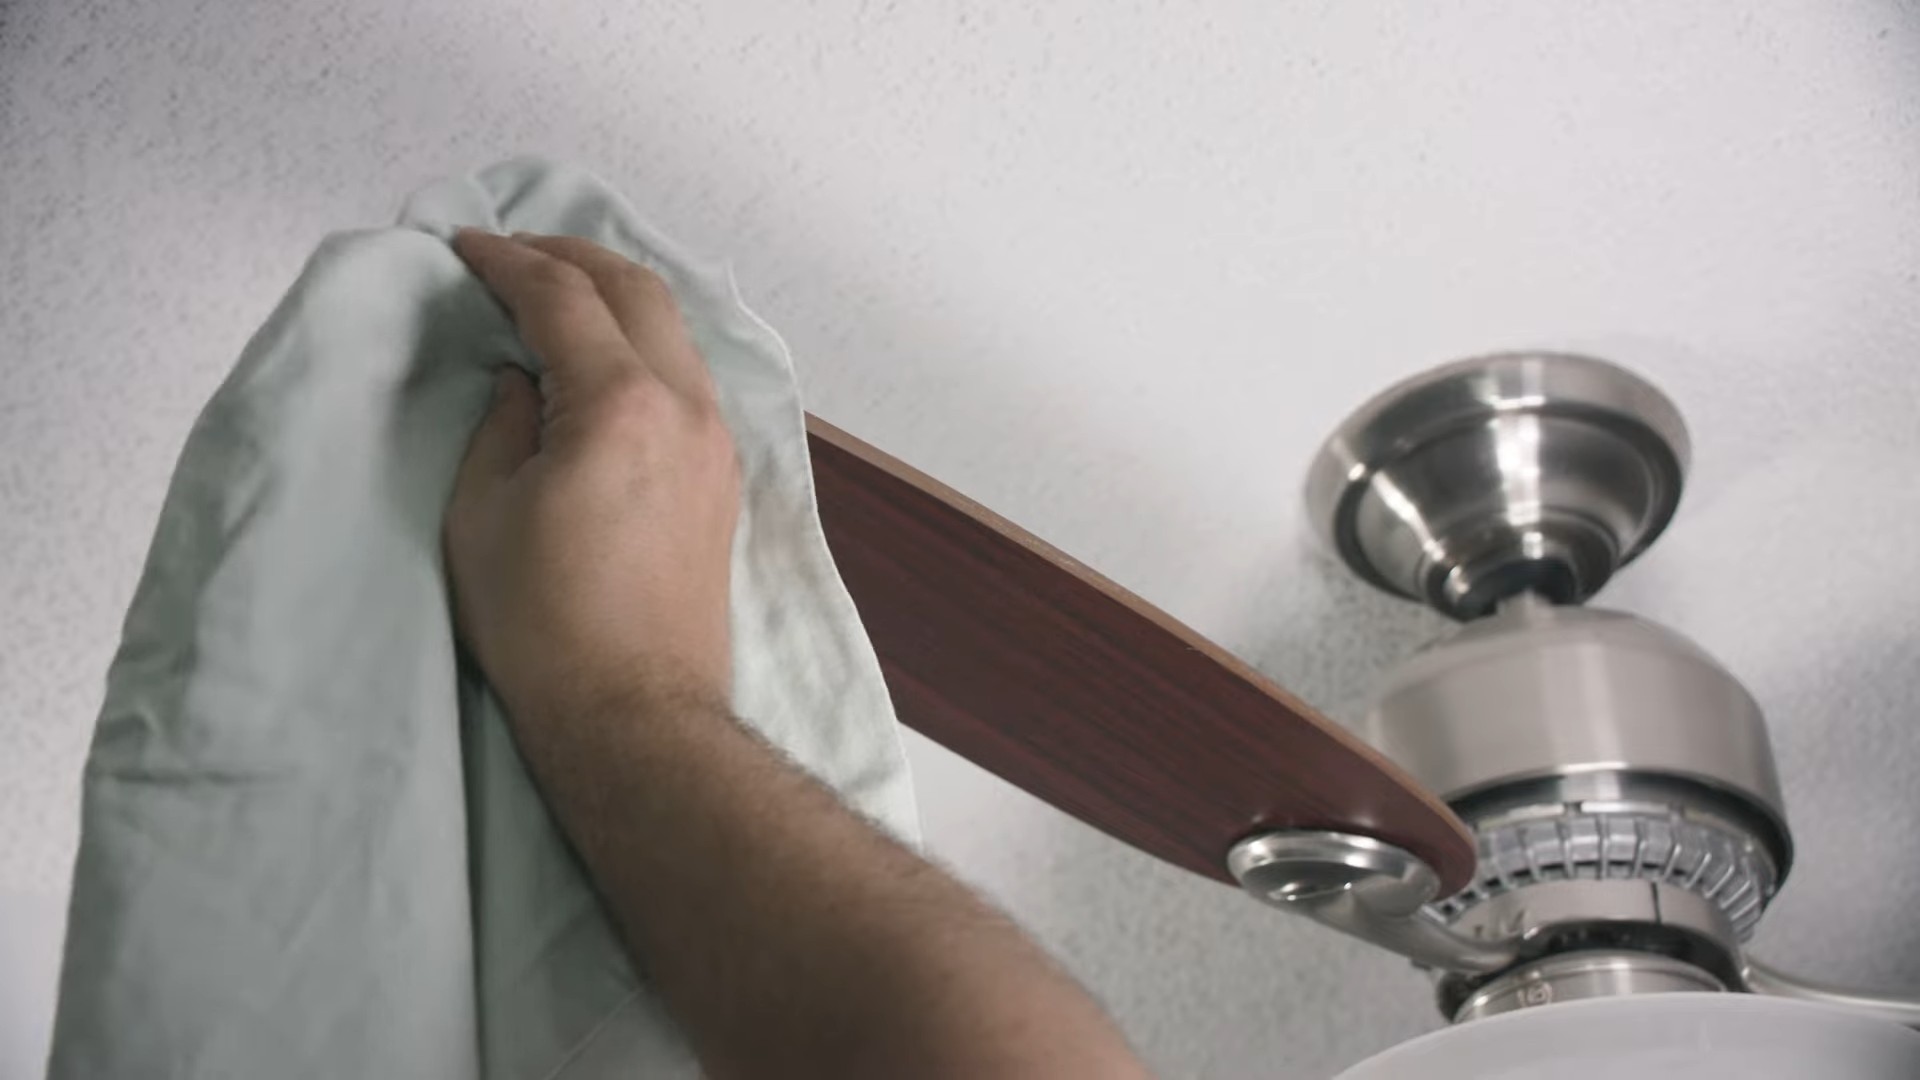
4. Slip the Pillowcase Over a Blade: Carefully slide the open end of the pillowcase over one of the ceiling fan blades, encasing the entire blade inside the pillowcase.
5. Wipe the Blade: Press the pillowcase firmly against the blade and slowly slide it off, pulling the pillowcase towards you. This will trap all the dust and grime inside the pillowcase.
6. Repeat for Each Blade: Repeat steps 4 and 5 for each of the remaining ceiling fan blades, using the clean part of the pillowcase for each blade.
7. Shake Out the Pillowcase: Once you’ve cleaned all the blades, take the pillowcase outside and shake it out to remove the accumulated dust and grime. You might be surprised (and slightly disgusted) by how much dirt comes out!
8. Wash the Pillowcase: Toss the pillowcase in the washing machine to clean it. You don’t want to use a dirty pillowcase next time you clean your ceiling fan.
9. Wipe Down the Fan Motor (Optional): While you’re up there, you might as well wipe down the fan motor housing with a damp cloth or paper towel. This area tends to collect dust as well.
10. Dry Any Remaining Moisture: Use a dry cloth or paper towel to wipe down the blades and the fan motor housing to remove any remaining moisture. This will prevent water spots and ensure a sparkling clean finish.
Dealing with Stubborn Grime
Sometimes, you might encounter some stubborn grime that doesn’t come off easily with just the pillowcase method. Don’t worry, I’ve got you covered!
* For Sticky Residue: If you have sticky residue on your fan blades (like from hairspray or cooking grease), try using a slightly damp cloth with a bit of dish soap to gently scrub the affected area. Be careful not to use too much water, as you don’t want to damage the fan motor.
* For Dried-On Dust: If you have layers of dried-on dust, you might need to pre-treat the blades before using the pillowcase method. You can do this by spraying the blades with your cleaning solution and letting it sit for a few minutes to loosen the dust. Then, use the pillowcase method as described above.
* For Hard-to-Reach Areas: If you have a ceiling fan with intricate details or hard-to-reach areas, you can use a cotton swab or a small brush to clean those areas. Dip the cotton swab or brush in your cleaning solution and gently scrub away the grime.
Maintaining Your Clean Ceiling Fan
Now that you’ve got your ceiling fan sparkling clean, you’ll want to keep it that way! Here are a few tips for maintaining your clean ceiling fan:
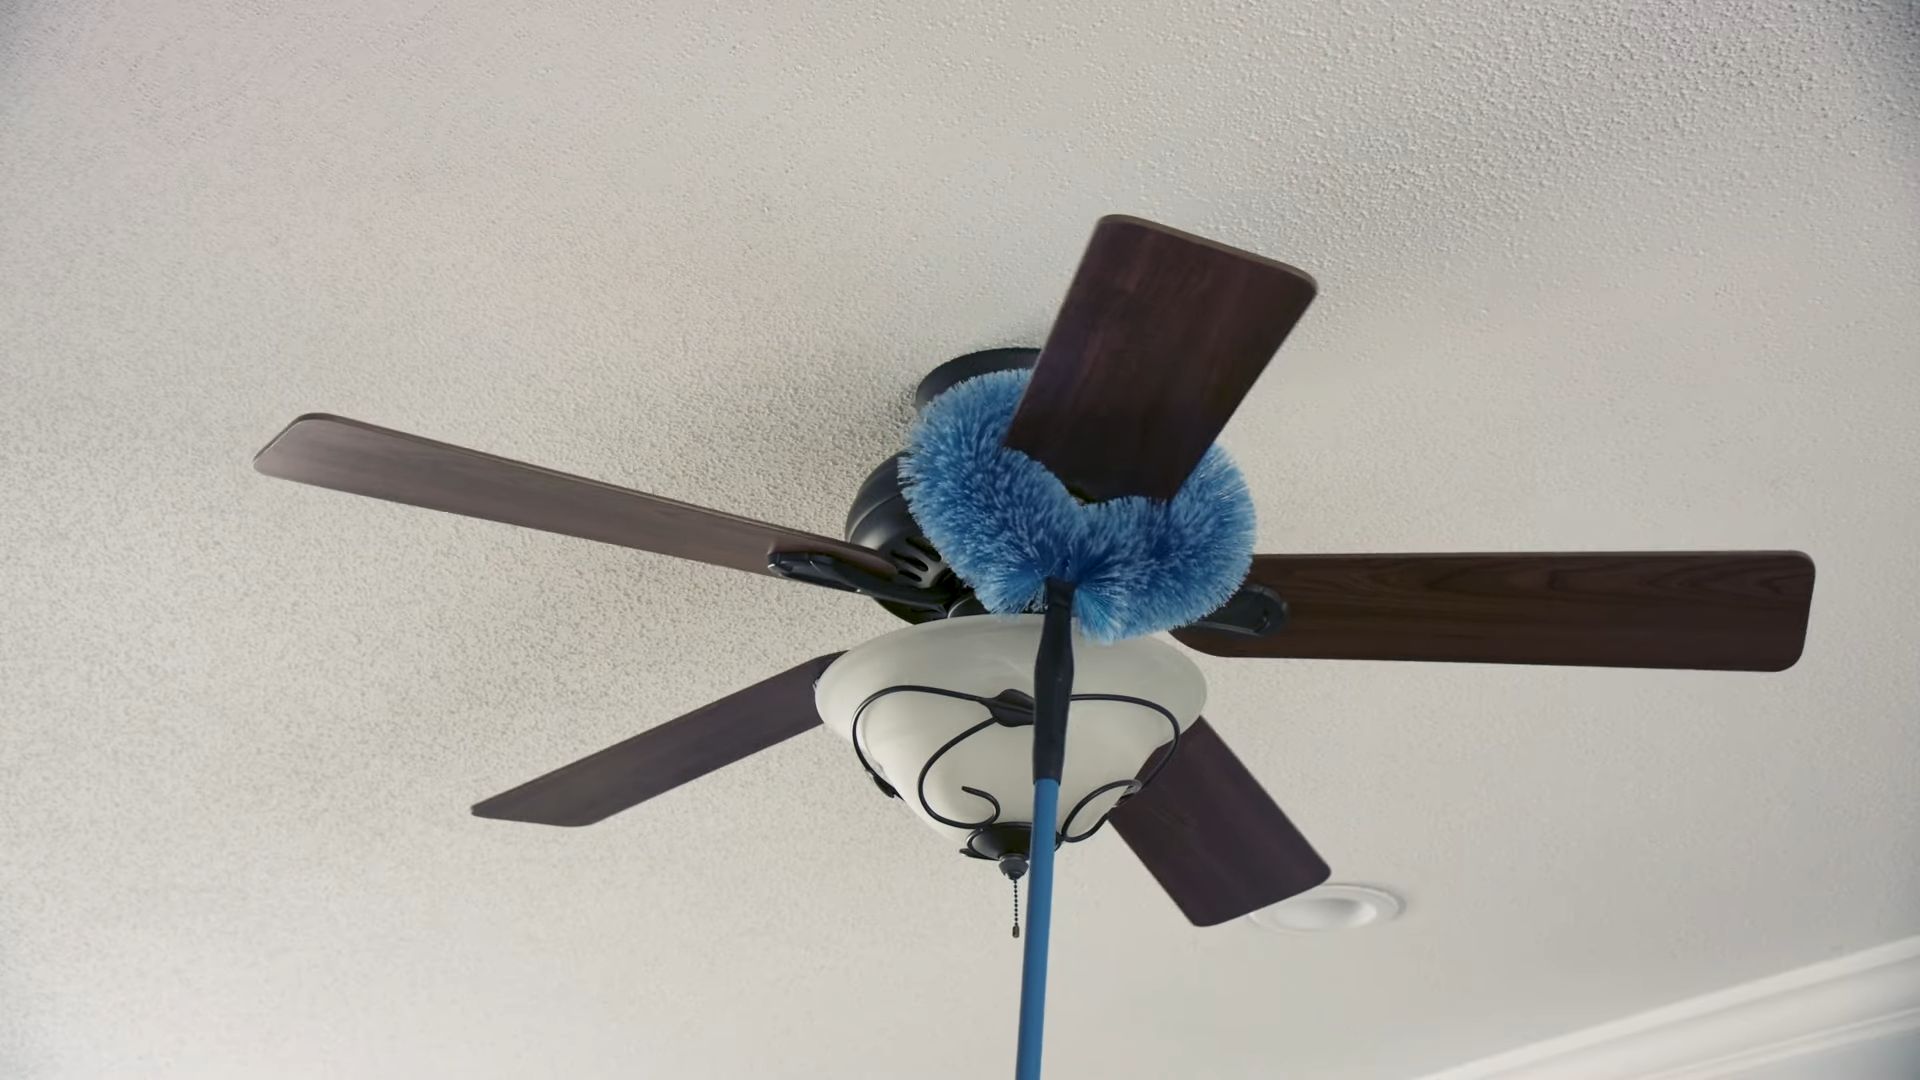
* Dust Regularly: The best way to keep your ceiling fan clean is to dust it regularly. I recommend dusting it at least once a month, or more often if you live in a dusty area. You can use the pillowcase method described above, or you can use a long-handled duster.
* Use a Ceiling Fan Duster: There are special dusters designed specifically for cleaning ceiling fans. These dusters have long handles and angled heads that make it easy to reach the blades without having to climb on a ladder.
* Consider a Ceiling Fan Cover: If you want to protect your ceiling fan from dust and grime, you can consider using a ceiling fan cover. These covers are made of fabric or plastic and fit over the entire fan, preventing dust from accumulating on the blades.
Why This Hack Works So Well
The beauty of this pillowcase hack lies in its simplicity and effectiveness. Here’s why it works so well:
* It Traps the Dust: The pillowcase acts as a barrier, preventing the dust from falling down on you and your furniture. This is a huge improvement over traditional dusting methods, which often just spread the dust around.
* It’s Easy to Use: The pillowcase method is incredibly easy to use. Even if you’re not a DIY expert, you can easily clean your ceiling fan using this method.
* It’s Cost-Effective: You probably already have a pillowcase on hand, so this hack is essentially free!
* It’s Quick: This method is much faster than traditional dusting methods. You can clean your entire ceiling fan in just a few minutes.
Safety First!
Before you start cleaning your ceiling fan, it’s important to take a few safety precautions:
* Turn Off the Fan: Make sure the fan is turned off before you start cleaning it. This will prevent you from accidentally getting your hand caught in the blades.
* Use a Stable Ladder or Step Stool: Make sure your ladder or step stool is stable and positioned on a level surface.
* Be Careful When Reaching: Be careful when reaching for the fan blades. Don’t overreach or lean too far, as this could cause you to lose your balance.
* Wear Gloves (Optional): If you’re sensitive to cleaning products or just don’t like getting your hands dirty, wear gloves.
So there you have it! My super simple, incredibly effective ceiling fan cleaning hack. Give it a try, and I promise you’ll be amazed at how easy it is to get your ceiling fan sparkling clean. Happy cleaning!
Conclusion
So, there you have it! Cleaning your ceiling fan doesn’t have to be a dreaded chore. This simple, DIY pillowcase trick transforms a dusty, grimy task into a quick, clean, and surprisingly satisfying experience. Forget precariously balancing on ladders with spray bottles and cloths, only to have dust rain down on you. This method traps the dust, keeping it contained and preventing it from spreading throughout your home.
Why is this DIY ceiling fan cleaning trick a must-try? Because it’s efficient, effective, and significantly reduces the mess. It saves you time and energy, allowing you to focus on more enjoyable activities. Plus, it utilizes a common household item – a pillowcase – making it an incredibly budget-friendly solution.
But the beauty of this method lies in its adaptability. While a standard pillowcase works wonders, consider these variations to tailor it to your specific needs:
* For heavily soiled fans: Pre-treat the fan blades with a damp cloth and a mild cleaning solution before using the pillowcase. This will loosen stubborn grime and make the cleaning process even easier.
* For high ceilings: Attach the pillowcase to an extension pole for added reach. This eliminates the need for a ladder, making the task safer and more accessible.
* Scented cleaning: Add a few drops of your favorite essential oil to the inside of the pillowcase for a subtle, fresh scent that will linger in the air after cleaning. Lavender, lemon, or eucalyptus are excellent choices.
* Microfiber magic: Use a microfiber pillowcase for even better dust absorption. Microfiber’s unique texture traps dust and dirt more effectively than traditional cotton.
* Dryer sheet boost: Before cleaning, wipe the fan blades with a dryer sheet. This will help repel dust and prevent it from accumulating as quickly in the future. The anti-static properties of the dryer sheet create a barrier that keeps dust at bay.
Don’t just take our word for it – try this DIY ceiling fan cleaning trick yourself! We’re confident that you’ll be amazed by the results. It’s a game-changer for anyone who wants to maintain a clean and healthy home environment without the hassle of traditional cleaning methods.
We encourage you to give this method a try and share your experience with us. Did you find it as effective as we did? Did you discover any variations that worked particularly well for you? Let us know in the comments below! Your feedback will help others discover the ease and effectiveness of this simple yet brilliant cleaning hack. Share your tips, tricks, and photos of your sparkling clean ceiling fans. Let’s make cleaning a little less of a chore, one pillowcase at a time! We are eager to hear how this DIY ceiling fan cleaning trick works for you!
Frequently Asked Questions (FAQ)
Q: What kind of pillowcase should I use?
A: A standard cotton pillowcase works perfectly well for this DIY ceiling fan cleaning trick. However, for even better results, consider using a microfiber pillowcase. Microfiber’s unique texture traps dust and dirt more effectively than traditional cotton. Avoid using pillowcases with embellishments or zippers that could scratch the fan blades. An old pillowcase that you don’t mind getting dusty is ideal.
Q: Will this method work on all types of ceiling fans?
A: Yes, this method is generally effective on most types of ceiling fans, regardless of the blade material (wood, metal, plastic, etc.). However, if your fan blades are particularly delicate or have intricate designs, exercise extra caution and use a gentle touch. For fans with fabric blades, consider using a dry microfiber cloth instead of a damp one to avoid damaging the material.
Q: How often should I clean my ceiling fan using this method?
A: The frequency of cleaning depends on several factors, including the amount of dust in your home, the presence of pets, and whether you smoke indoors. As a general guideline, aim to clean your ceiling fan every 1-3 months. If you notice a significant buildup of dust, clean it more frequently. Regular cleaning will prevent dust from accumulating and becoming more difficult to remove.
Q: What if the fan blades are really greasy or sticky?
A: If your fan blades are heavily soiled with grease or sticky residue, you may need to pre-treat them before using the pillowcase method. Mix a small amount of mild dish soap with warm water and dampen a clean cloth. Gently wipe the fan blades to loosen the grime. Then, proceed with the pillowcase method to remove the remaining dust and residue. Be sure to dry the blades thoroughly after cleaning to prevent water damage.
Q: Can I use this method on other hard-to-reach surfaces?
A: While this method is primarily designed for cleaning ceiling fans, it can also be adapted for cleaning other hard-to-reach surfaces, such as high shelves or light fixtures. Simply attach the pillowcase to an extension pole or broom handle for added reach. However, be careful not to apply too much pressure, as this could damage the surface you’re cleaning.
Q: Is it safe to use cleaning solutions inside the pillowcase?
A: While you can add a few drops of essential oil to the inside of the pillowcase for a fresh scent, it’s generally not recommended to use harsh cleaning solutions directly inside the pillowcase. The cleaning solution could damage the fabric or leave a residue on the fan blades. If you need to use a cleaning solution, apply it to a damp cloth and wipe the fan blades before using the pillowcase to remove the remaining dust and residue.
Q: What if I don’t have a pillowcase I want to use for cleaning?
A: If you don’t have a spare pillowcase, you can use a large microfiber cloth or an old t-shirt instead. Simply wrap the cloth or t-shirt around the fan blade and wipe it clean. However, a pillowcase is generally more effective because it traps the dust and prevents it from spreading. You can also purchase inexpensive pillowcases specifically for cleaning purposes.
Q: How do I clean the pillowcase after using it to clean the ceiling fan?
A: After cleaning your ceiling fan, remove the pillowcase and shake it out thoroughly outdoors to remove any loose dust and debris. Then, wash the pillowcase in your washing machine with warm water and a mild detergent. You can also add a cup of white vinegar to the wash to help remove any lingering odors or stains. Tumble dry on low heat or hang to dry.
Q: Can I use this method to clean outdoor ceiling fans?
A: Yes, this method can be used to clean outdoor ceiling fans, but you may need to take extra precautions. Outdoor fans are often exposed to more dirt, grime, and moisture than indoor fans. Before cleaning, inspect the fan for any signs of damage or corrosion. If necessary, use a brush or vacuum cleaner to remove any loose debris. When cleaning the fan blades, use a damp cloth and a mild cleaning solution to remove any stubborn grime. Be sure to dry the blades thoroughly after cleaning to prevent water damage.
Q: Will this method scratch my ceiling fan blades?
A: This method is generally safe for most ceiling fan blades, but it’s always a good idea to exercise caution, especially if your fan blades are made of delicate materials. Avoid using excessive pressure when wiping the blades, and be sure to use a clean pillowcase or cloth to prevent scratching. If you’re concerned about scratching, test the method on a small, inconspicuous area of the fan blade first.

Leave a Comment