

Grow Bell Peppers at Home – imagine plucking a vibrant, crisp bell pepper straight from your own garden, ready to add a burst of flavor to your next meal! Forget those bland, store-bought peppers; this year, we’re diving headfirst into the rewarding world of homegrown goodness. For centuries, bell peppers have been a culinary staple, tracing their roots back to South America and spreading across the globe, adding color and zest to countless dishes.
But let’s be honest, sometimes gardening feels more like a battle than a blissful escape. That’s where these DIY tricks and hacks come in! I’m going to share my secrets to successfully grow bell peppers at home, even if you’re a beginner or have limited space.
Why do you need these tips? Because growing your own bell peppers isn’t just about saving money (though that’s a definite perk!). It’s about enjoying fresher, healthier produce, connecting with nature, and experiencing the pure joy of nurturing something from seed to harvest. Plus, knowing exactly where your food comes from gives you peace of mind. So, grab your gardening gloves, and let’s get started on this exciting journey to pepper paradise!
Growing Bell Peppers: From Seed to Table (DIY Guide)
Hey there, fellow gardening enthusiasts! I’m so excited to share my tried-and-true method for growing vibrant, delicious bell peppers right in your own backyard (or even on your balcony!). Forget those bland, overpriced peppers from the grocery store – with a little patience and these simple steps, you’ll be harvesting your own sweet and crunchy peppers in no time.
What You’ll Need: The Bell Pepper Arsenal
Before we dive in, let’s gather our supplies. Having everything ready beforehand will make the whole process smoother and more enjoyable.
* **Bell Pepper Seeds:** Choose your favorite varieties! I personally love the classic green bell peppers, but yellow, orange, and red varieties are equally rewarding. Look for seeds from reputable suppliers to ensure good germination rates.
* **Seed Starting Trays or Small Pots:** These will be your pepper seedlings’ first homes.
* **Seed Starting Mix:** This is a lightweight, sterile soil mix specifically designed for starting seeds. It provides the perfect environment for delicate seedlings.
* **Grow Lights (Optional but Recommended):** If you don’t have a sunny windowsill, grow lights will provide the necessary light for healthy seedling development.
* **Larger Pots (for Transplanting):** Once your seedlings have grown a bit, they’ll need to be transplanted into larger pots before going into the garden. Choose pots that are at least 6 inches in diameter.
* **Potting Mix:** A good quality potting mix is essential for healthy pepper plants.
* **Gardening Gloves:** Protect your hands from dirt and potential irritants.
* **Watering Can or Hose:** For gentle watering.
* **Fertilizer:** A balanced fertilizer formulated for vegetables will help your pepper plants thrive.
* **Stakes or Cages:** Bell pepper plants can get quite heavy with fruit, so staking or caging them will prevent them from toppling over.
* **Hand Trowel:** For transplanting.
* **Pest Control (Optional):** Be prepared to deal with potential pests like aphids or slugs. Insecticidal soap or neem oil are good organic options.
Phase 1: Starting Your Bell Pepper Seeds Indoors
Bell peppers have a relatively long growing season, so starting them indoors is crucial, especially if you live in a cooler climate. I usually start my seeds about 8-10 weeks before the last expected frost.
1. **Prepare Your Seed Starting Trays:** Fill your seed starting trays or small pots with seed starting mix. Gently press the soil down to create a firm surface.
2. **Sow the Seeds:** Make a small indentation (about ¼ inch deep) in the soil in each cell or pot. Place 2-3 bell pepper seeds in each indentation. This increases the chances of at least one seed germinating.
3. **Cover the Seeds:** Gently cover the seeds with a thin layer of seed starting mix.
4. **Water Thoroughly:** Water the soil gently using a watering can or spray bottle. Make sure the soil is moist but not waterlogged.
5. **Provide Warmth:** Bell pepper seeds need warmth to germinate. The ideal temperature is between 75-85°F (24-29°C). You can use a heat mat to provide consistent warmth.
6. **Provide Light:** Place the seed starting trays under grow lights or on a sunny windowsill. If using grow lights, keep them about 2-4 inches above the soil surface.
7. **Maintain Moisture:** Keep the soil consistently moist but not soggy. Check the soil daily and water as needed.
8. **Wait for Germination:** Bell pepper seeds can take anywhere from 7-21 days to germinate, so be patient!
9. **Thin the Seedlings:** Once the seedlings have emerged and have a few sets of true leaves (the leaves that look like miniature pepper leaves), thin them out by snipping off the weaker seedlings at the soil line. Leave only the strongest seedling in each cell or pot.
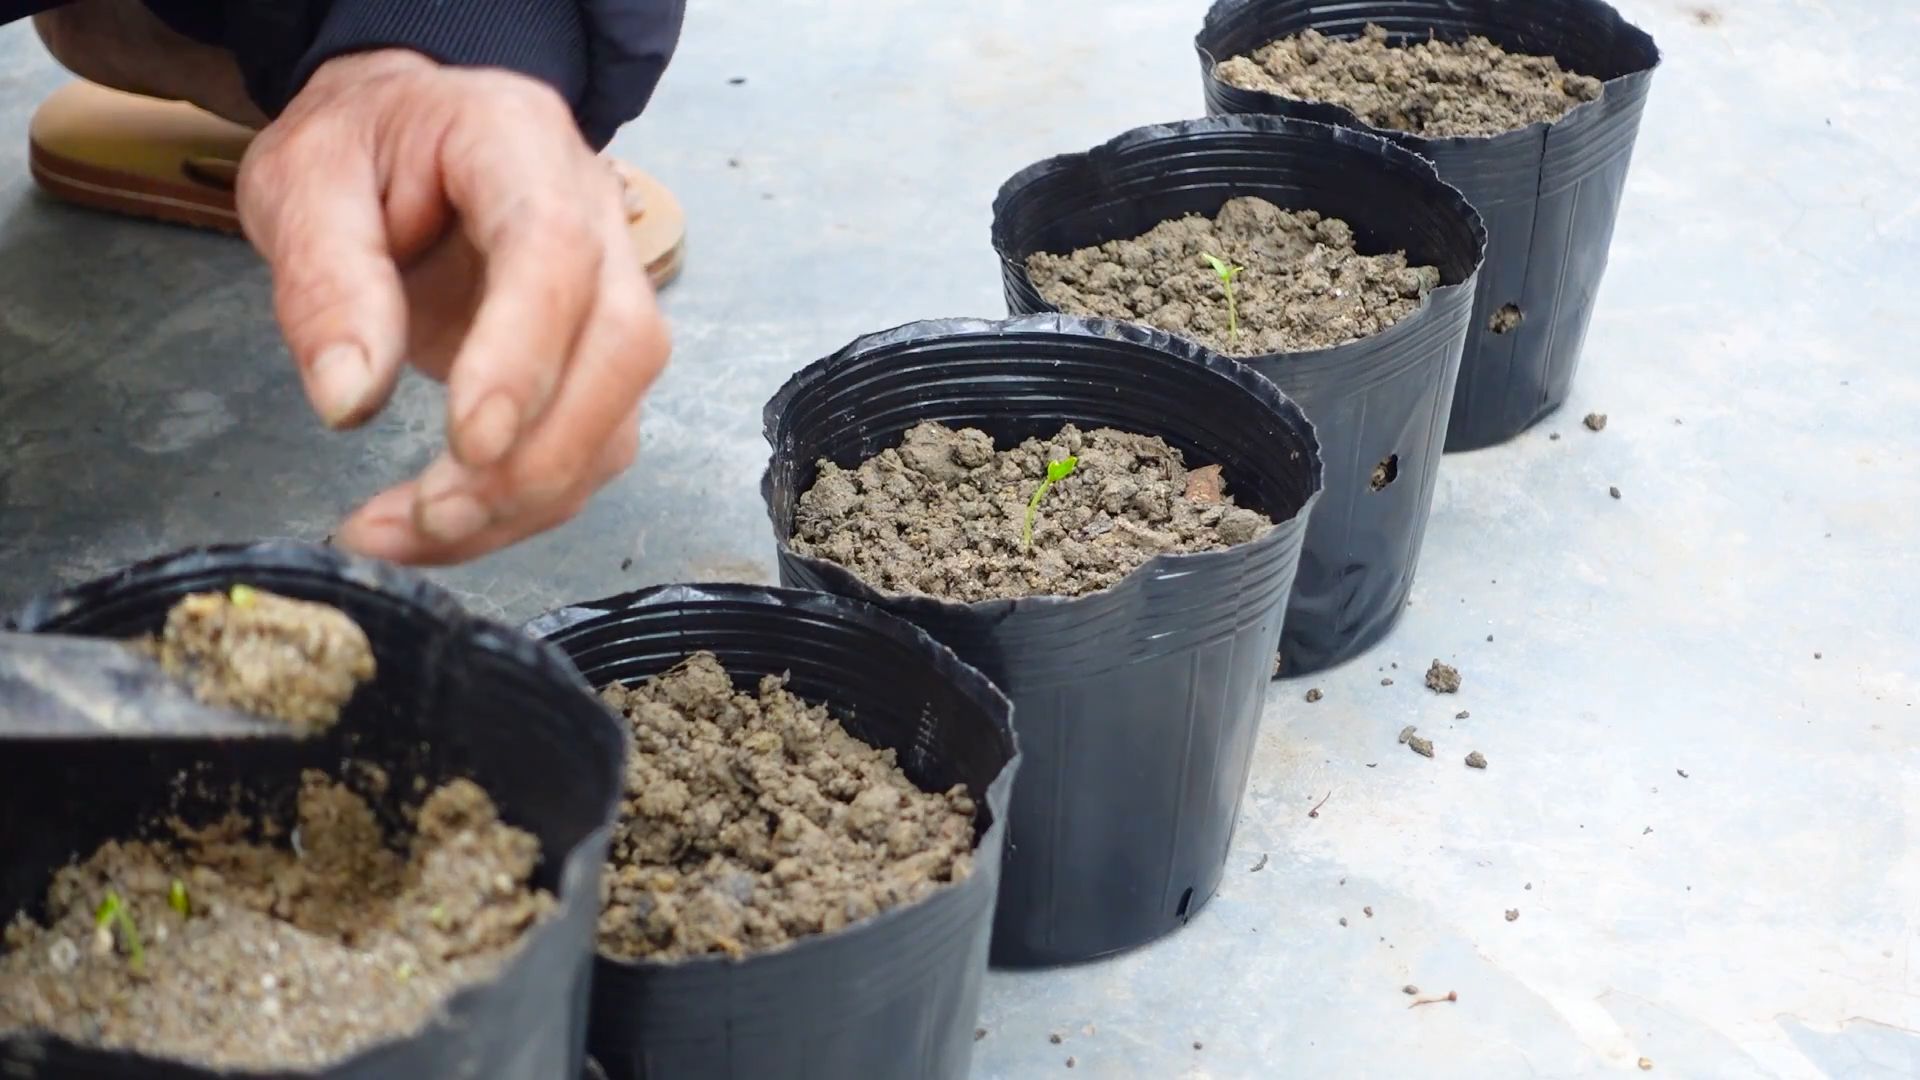
Phase 2: Transplanting Your Bell Pepper Seedlings
Once your seedlings have grown a bit larger and have developed a strong root system, it’s time to transplant them into larger pots. This will give them more room to grow and develop before being transplanted into the garden.
1. **Prepare Your Larger Pots:** Fill your larger pots (at least 6 inches in diameter) with potting mix.
2. **Gently Remove the Seedlings:** Carefully remove the seedlings from their seed starting trays or small pots. Be gentle to avoid damaging the roots. I like to use a small spoon or fork to help loosen the soil around the roots.
3. **Transplant the Seedlings:** Make a hole in the potting mix in each larger pot that is large enough to accommodate the root ball of the seedling. Place the seedling in the hole and gently backfill with potting mix.
4. **Water Thoroughly:** Water the seedlings thoroughly after transplanting.
5. **Provide Light and Warmth:** Place the transplanted seedlings under grow lights or on a sunny windowsill. Continue to provide warmth and maintain consistent moisture.
Phase 3: Hardening Off Your Bell Pepper Seedlings
Before transplanting your bell pepper seedlings into the garden, it’s important to “harden them off.” This process gradually acclimates the seedlings to outdoor conditions, such as sunlight, wind, and temperature fluctuations. This will prevent transplant shock and help them thrive in their new environment.
1. **Start Slowly:** Begin by placing the seedlings outdoors in a sheltered location for just a few hours each day. Choose a spot that is protected from direct sunlight and strong winds.
2. **Gradually Increase Exposure:** Over the course of a week or two, gradually increase the amount of time the seedlings spend outdoors each day. Also, gradually expose them to more sunlight and wind.
3. **Monitor the Seedlings:** Keep a close eye on the seedlings during the hardening off process. If they show signs of stress, such as wilting or sunburn, bring them back indoors and reduce their exposure to the elements.
4. **Transplant After Hardening Off:** Once the seedlings have been hardened off, they are ready to be transplanted into the garden.
Phase 4: Planting Your Bell Pepper Plants in the Garden
Now for the exciting part – planting your bell pepper plants in the garden! Choose a sunny location with well-drained soil. Bell peppers need at least 6-8 hours of sunlight per day to thrive.
1. **Prepare the Soil:** Before planting, amend the soil with compost or other organic matter. This will improve drainage and provide essential nutrients for your pepper plants.
2. **Dig the Holes:** Dig holes that are slightly larger than the root balls of your bell pepper plants. Space the holes about 18-24 inches apart.
3. **Transplant the Plants:** Carefully remove the bell pepper plants from their pots. Gently loosen the roots before placing them in the holes.
4. **Backfill with Soil:** Backfill the holes with soil, gently firming it around the base of the plants.
5. **Water Thoroughly:** Water the plants thoroughly after transplanting.
6. **Add Support:** Install stakes or cages to support the plants as they grow. This will prevent them from toppling over when they are laden with fruit.
7. **Mulch:** Apply a layer of mulch around the base of the plants. This will help to retain moisture, suppress weeds, and regulate soil temperature.
Phase 5: Caring for Your Bell Pepper Plants
Once your bell pepper plants are in the garden, it’s important to provide them with proper care to ensure a bountiful harvest.
1. **Water Regularly:** Water your bell pepper plants regularly, especially during hot, dry weather. Aim to keep the soil consistently moist but not waterlogged.
2. **Fertilize:** Fertilize your bell pepper plants every 2-3 weeks with a balanced fertilizer formulated for vegetables. Follow the instructions on the fertilizer label.
3. **Pest Control:** Monitor your plants regularly for pests. If you notice any signs of infestation, take action immediately. Insecticidal soap or neem oil are good organic options for controlling common pests like aphids and whiteflies.
4. **Pruning (Optional):** Pruning bell pepper plants can help to improve air circulation and encourage fruit production. Remove any suckers (small shoots that grow from the base of the plant) and any yellowing or diseased leaves.
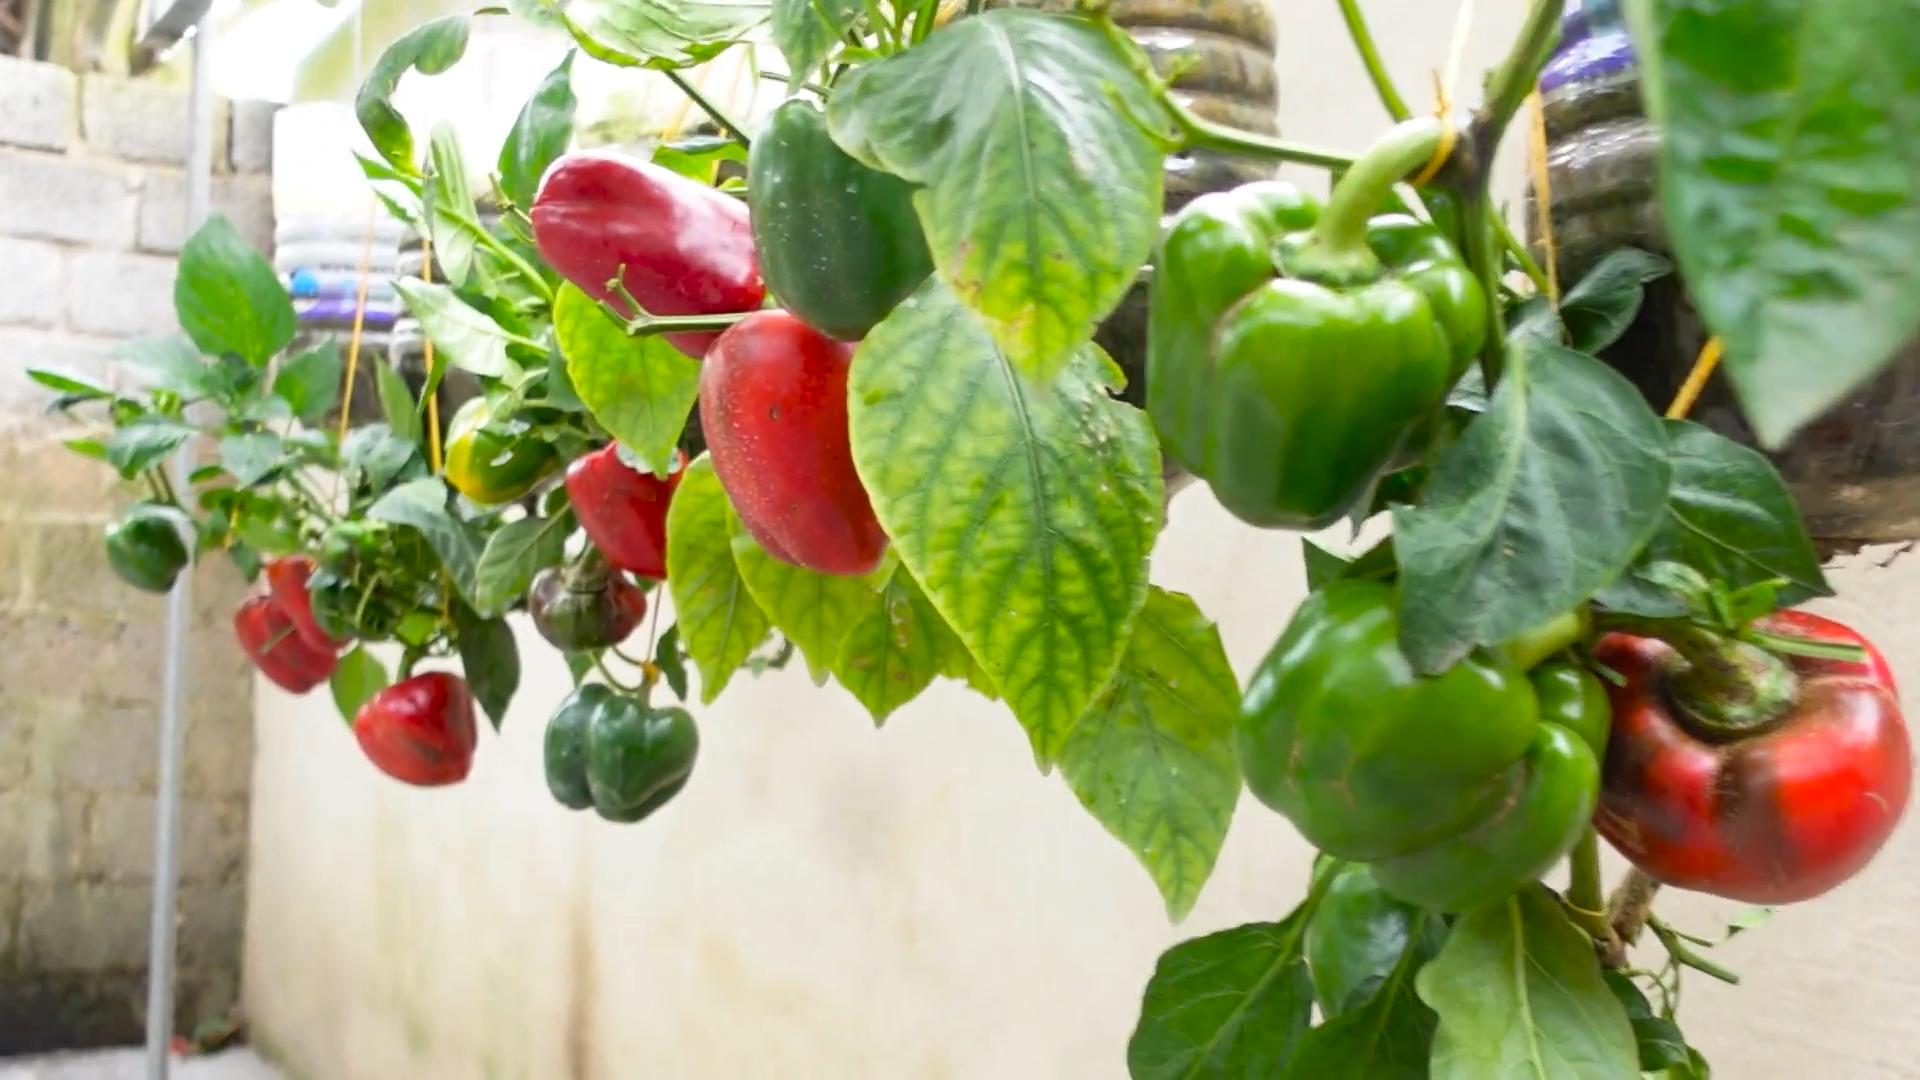
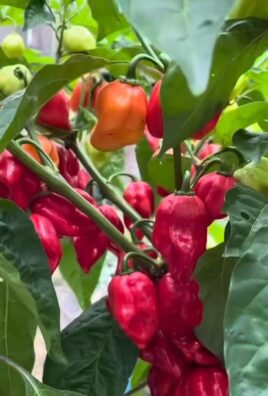
5. **Harvesting:** Bell peppers are typically ready to harvest about 60-80 days after transplanting. The peppers should be firm and have a glossy skin. You can harvest them at any stage of ripeness, but they will be sweetest when they are fully colored. To harvest, simply cut the peppers from the plant using a sharp knife or pruning shears.
Troubleshooting: Common Bell Pepper Problems
Even with the best care, you might encounter some challenges along the way. Here are a few common problems and how to address them:
* **Blossom End Rot:** This is caused by a calcium deficiency in the soil. To prevent blossom end rot, make sure your soil is well-drained and that you are watering your plants consistently. You can also add calcium to the soil
Conclusion
So, there you have it! Growing bell peppers at home isn’t just a gardening project; it’s an investment in fresh, flavorful produce, a sustainable lifestyle, and a rewarding connection with nature. We’ve walked through the essential steps, from selecting the right seeds to nurturing your plants and harvesting those vibrant, crisp peppers.
Why is this DIY trick a must-try? Because it empowers you to control the entire process, ensuring you get the highest quality, pesticide-free bell peppers possible. Store-bought peppers, while convenient, often lack the intense flavor and satisfying crunch of homegrown varieties. Plus, there’s an undeniable sense of accomplishment that comes with nurturing a plant from seed to table. Imagine the pride you’ll feel serving a salad featuring bell peppers you grew yourself!
But the benefits extend beyond just taste and satisfaction. Growing your own food reduces your carbon footprint by minimizing transportation and packaging. It also encourages you to eat seasonally and appreciate the natural rhythms of the earth. And let’s not forget the therapeutic benefits of gardening – the simple act of tending to plants can be incredibly calming and stress-relieving.
Ready to take your bell pepper game to the next level? Consider these variations and suggestions:
* Experiment with different varieties: Don’t limit yourself to just green bell peppers! Try growing red, yellow, orange, or even purple varieties for a colorful and flavorful harvest. Each color offers a slightly different taste profile, adding depth and complexity to your dishes.
* Companion planting: Enhance your bell pepper patch by planting companion plants like basil, marigolds, and carrots. These plants can help deter pests, attract beneficial insects, and improve soil health.
* Vertical gardening: If you’re short on space, consider growing your bell peppers in containers on a balcony or patio. Vertical gardening techniques, such as using trellises or hanging baskets, can maximize your growing area.
* Preserving your harvest: When you have a bumper crop of bell peppers, don’t let them go to waste! Explore different preservation methods like freezing, pickling, or roasting and storing in olive oil. This will allow you to enjoy the taste of summer all year round.
* Seed saving: If you’re feeling adventurous, try saving seeds from your best-performing bell pepper plants. This will allow you to develop your own unique varieties that are perfectly adapted to your local climate.
Growing bell peppers at home is a journey, not a destination. There will be challenges along the way, but the rewards are well worth the effort. So, grab your seeds, get your hands dirty, and embark on this exciting adventure. We are confident that you will enjoy the process and the delicious results.
We encourage you to try this DIY trick and share your experiences with us! Post photos of your bell pepper plants, share your favorite recipes, and let us know what you’ve learned along the way. Together, we can create a community of passionate gardeners who are dedicated to growing their own food and living a more sustainable lifestyle. Let us know in the comments below how your bell pepper growing journey is going!
Frequently Asked Questions (FAQ)
What is the best time to start growing bell peppers from seed?
The ideal time to start growing bell peppers from seed indoors is typically 6-8 weeks before the last expected frost in your area. This allows the seedlings to develop a strong root system before being transplanted outdoors. Check your local weather forecasts and planting calendars to determine the best timing for your region. If you live in a warmer climate with a longer growing season, you can start seeds later or even sow them directly into the garden after the danger of frost has passed.
How much sunlight do bell peppers need?
Bell peppers thrive in full sun, requiring at least 6-8 hours of direct sunlight per day. Insufficient sunlight can lead to leggy plants, reduced fruit production, and smaller, less flavorful peppers. Choose a planting location that receives ample sunlight throughout the day. If you’re growing bell peppers in containers, make sure to rotate them regularly to ensure even sun exposure on all sides of the plant. If you live in a very hot climate, some afternoon shade may be beneficial to prevent the peppers from scorching.
What kind of soil is best for growing bell peppers?
Bell peppers prefer well-drained, fertile soil that is rich in organic matter. The ideal soil pH is between 6.0 and 7.0. Before planting, amend your soil with compost, aged manure, or other organic materials to improve drainage, fertility, and water retention. Avoid heavy clay soils, as they can become waterlogged and inhibit root growth. If you’re growing bell peppers in containers, use a high-quality potting mix that is specifically formulated for vegetables.
How often should I water my bell pepper plants?
Bell pepper plants need consistent moisture, especially during hot, dry weather. Water deeply and regularly, aiming to keep the soil consistently moist but not waterlogged. Avoid overhead watering, as this can promote fungal diseases. Instead, water at the base of the plant, using a soaker hose or drip irrigation system. Check the soil moisture regularly by sticking your finger into the soil. If the top inch feels dry, it’s time to water.
What are some common pests and diseases that affect bell peppers?
Bell peppers can be susceptible to various pests and diseases, including aphids, flea beetles, tomato hornworms, blossom end rot, and fungal diseases like powdery mildew and early blight. Regularly inspect your plants for signs of pests or diseases. Use organic pest control methods, such as insecticidal soap, neem oil, or handpicking, to control pests. To prevent diseases, ensure good air circulation, avoid overhead watering, and use disease-resistant varieties. Blossom end rot is often caused by calcium deficiency, so amend your soil with calcium-rich amendments like bone meal or crushed eggshells.
When are bell peppers ready to harvest?
Bell peppers are typically ready to harvest 60-90 days after transplanting, depending on the variety. The peppers should be firm, smooth, and brightly colored. You can harvest green bell peppers when they reach their mature size, or you can wait until they turn red, yellow, or orange for a sweeter flavor. Use pruning shears or a sharp knife to cut the peppers from the plant, leaving a short stem attached. Regular harvesting encourages the plant to produce more peppers.
Can I grow bell peppers in containers?
Yes, bell peppers can be successfully grown in containers, making them a great option for gardeners with limited space. Choose a container that is at least 12 inches in diameter and 12 inches deep to provide enough room for the roots to grow. Use a high-quality potting mix and ensure the container has drainage holes. Place the container in a sunny location and water regularly. You may also need to fertilize your container-grown bell peppers more frequently than those grown in the ground.
How do I prevent blossom end rot on my bell peppers?
Blossom end rot is a common problem that affects bell peppers, causing a dark, sunken spot to appear on the bottom of the fruit. It is typically caused by calcium deficiency, which can be exacerbated by inconsistent watering or poor soil drainage. To prevent blossom end rot, ensure your soil is well-drained and rich in calcium. Amend your soil with bone meal or crushed eggshells before planting. Water your plants consistently and avoid letting the soil dry out completely. You can also use a calcium-containing foliar spray to help prevent blossom end rot.
Can I save seeds from my bell peppers to plant next year?
Yes, you can save seeds from your bell peppers to plant next year, but keep in mind that bell peppers are often cross-pollinated, so the offspring may not be true to type. To save seeds, allow the peppers to fully ripen on the plant until they are soft and wrinkled. Cut the peppers open and scoop out the seeds. Rinse the seeds thoroughly and spread them out on a paper towel to dry completely. Store the dried seeds in an airtight container in a cool, dark place.
What are some good companion plants for bell peppers?
Companion planting can help improve the health and productivity of your bell pepper plants. Some good companion plants for bell peppers include basil, marigolds, carrots, onions, and garlic. Basil helps repel pests and attract beneficial insects. Marigolds also deter pests and improve soil health. Carrots loosen the soil and improve drainage. Onions and garlic repel pests and have antifungal properties. Avoid planting bell peppers near fennel, as it can inhibit their growth.
Leave a Comment