

Growing Dill Indoors: Imagine fresh, fragrant dill sprigs readily available, even when the snow is falling outside! No more sad, wilted bunches from the grocery store – just vibrant, flavorful dill whenever your recipe calls for it. That’s the magic of growing dill indoors, and I’m here to show you how surprisingly easy it is!
Dill, with its feathery leaves and distinctive anise-like flavor, has been cherished for centuries. Ancient Egyptians used it for medicinal purposes, while Romans believed it brought good fortune. Today, it’s a culinary staple, adding a bright, herbaceous note to everything from pickles and dips to fish and salads. But let’s face it, buying fresh dill can be a gamble. It often goes bad quickly, leaving you with a slimy, unusable mess.
That’s where this DIY guide comes in! I’m going to share my best tips and tricks for successfully growing dill indoors. Whether you’re a seasoned gardener or a complete beginner, you’ll learn everything you need to know to cultivate your own thriving dill plant right on your windowsill. Say goodbye to expensive, subpar dill and hello to a constant supply of fresh, homegrown flavor. Let’s get started!
Growing Dill Indoors: A Beginner’s Guide to Fresh Herbs Year-Round
Okay, so you want fresh dill all year round, even when the snow’s piling up outside? I get it! Dill is amazing – that fresh, slightly tangy flavor is just perfect in so many dishes. And the good news is, growing dill indoors is totally doable, even if you don’t have a green thumb. I’m going to walk you through everything you need to know to get started.
What You’ll Need
Before we dive into the nitty-gritty, let’s gather our supplies. Having everything ready beforehand will make the whole process smoother and less stressful. Trust me, I’ve learned that lesson the hard way!
* **Dill Seeds:** Obviously! You can find these at most garden centers or online. Make sure you’re getting seeds specifically for dill ( *Anethum graveolens*).
* **Potting Mix:** Don’t just grab any old dirt from your backyard. Dill needs well-draining soil, so a good quality potting mix is essential. I recommend a mix specifically formulated for herbs or vegetables.
* **Pots:** Choose pots that are at least 6 inches deep and wide. Dill has a taproot, so it needs room to grow downwards. Make sure the pots have drainage holes! This is super important to prevent root rot.
* **Grow Lights (Optional, but Recommended):** Dill needs a lot of sunlight, and unless you have a south-facing window that gets direct sun for at least 6 hours a day, you’ll probably need grow lights. I’ve had the best luck with LED grow lights.
* **Watering Can or Spray Bottle:** For gentle watering.
* **Small Shovel or Trowel:** For planting the seeds.
* **Seed Starting Tray (Optional):** You can start the seeds in a seed starting tray and then transplant them to larger pots, but it’s not strictly necessary. I often skip this step to save time and space.
* **Plant Food (Optional):** A balanced liquid fertilizer can help your dill thrive, but it’s not essential, especially if you’re using a good quality potting mix.
Getting Started: Planting Your Dill Seeds
This is where the magic happens! Planting the seeds is the first step towards your own indoor dill garden.
1. **Prepare Your Pots:** Fill your pots with potting mix, leaving about an inch of space at the top. Gently pat down the soil to remove any air pockets.
2. **Sow the Seeds:** Sprinkle the dill seeds evenly over the surface of the soil. You don’t need to plant them too deep – about ¼ inch is perfect. I usually plant a few extra seeds in each pot, just in case some don’t germinate.
3. **Cover the Seeds:** Lightly cover the seeds with a thin layer of potting mix.
4. **Water Gently:** Use a watering can or spray bottle to gently water the soil. You want to moisten the soil without disturbing the seeds.
5. **Provide Warmth:** Dill seeds germinate best in warm temperatures (around 70-75°F). You can place the pots in a warm spot in your house or use a heat mat to speed up germination.
6. **Cover with Plastic Wrap (Optional):** Covering the pots with plastic wrap can help retain moisture and create a greenhouse effect. Just make sure to remove the plastic wrap once the seeds start to germinate.
Caring for Your Dill Plants
Once your dill seeds have sprouted, it’s time to focus on providing them with the care they need to grow into healthy, flavorful plants.
1. **Light:** Dill needs at least 6 hours of sunlight per day. If you don’t have enough natural light, use grow lights. Position the grow lights a few inches above the plants and keep them on for 12-14 hours a day. I rotate my plants every few days to ensure they get even light exposure.
2. **Watering:** Water your dill plants when the top inch of soil feels dry to the touch. Be careful not to overwater, as this can lead to root rot. Water thoroughly, allowing the excess water to drain out of the drainage holes. I usually water my dill plants every 2-3 days, but this will vary depending on the temperature and humidity in your home.
3. **Temperature:** Dill prefers temperatures between 60-70°F. Avoid placing your plants near drafts or sources of extreme heat or cold.
4. **Fertilizing (Optional):** If you want to give your dill plants a boost, you can fertilize them every few weeks with a balanced liquid fertilizer. Follow the instructions on the fertilizer label. I usually dilute the fertilizer to half strength to avoid burning the plants.
5. **Thinning (If Necessary):** If you planted a lot of seeds in each pot, you may need to thin out the seedlings once they’re a few inches tall. Choose the strongest, healthiest seedlings and remove the weaker ones. This will give the remaining plants more room to grow.
6. **Pinching:** Pinching the tips of the dill plants can encourage them to branch out and produce more foliage. Simply snip off the top few leaves with your fingers or scissors.
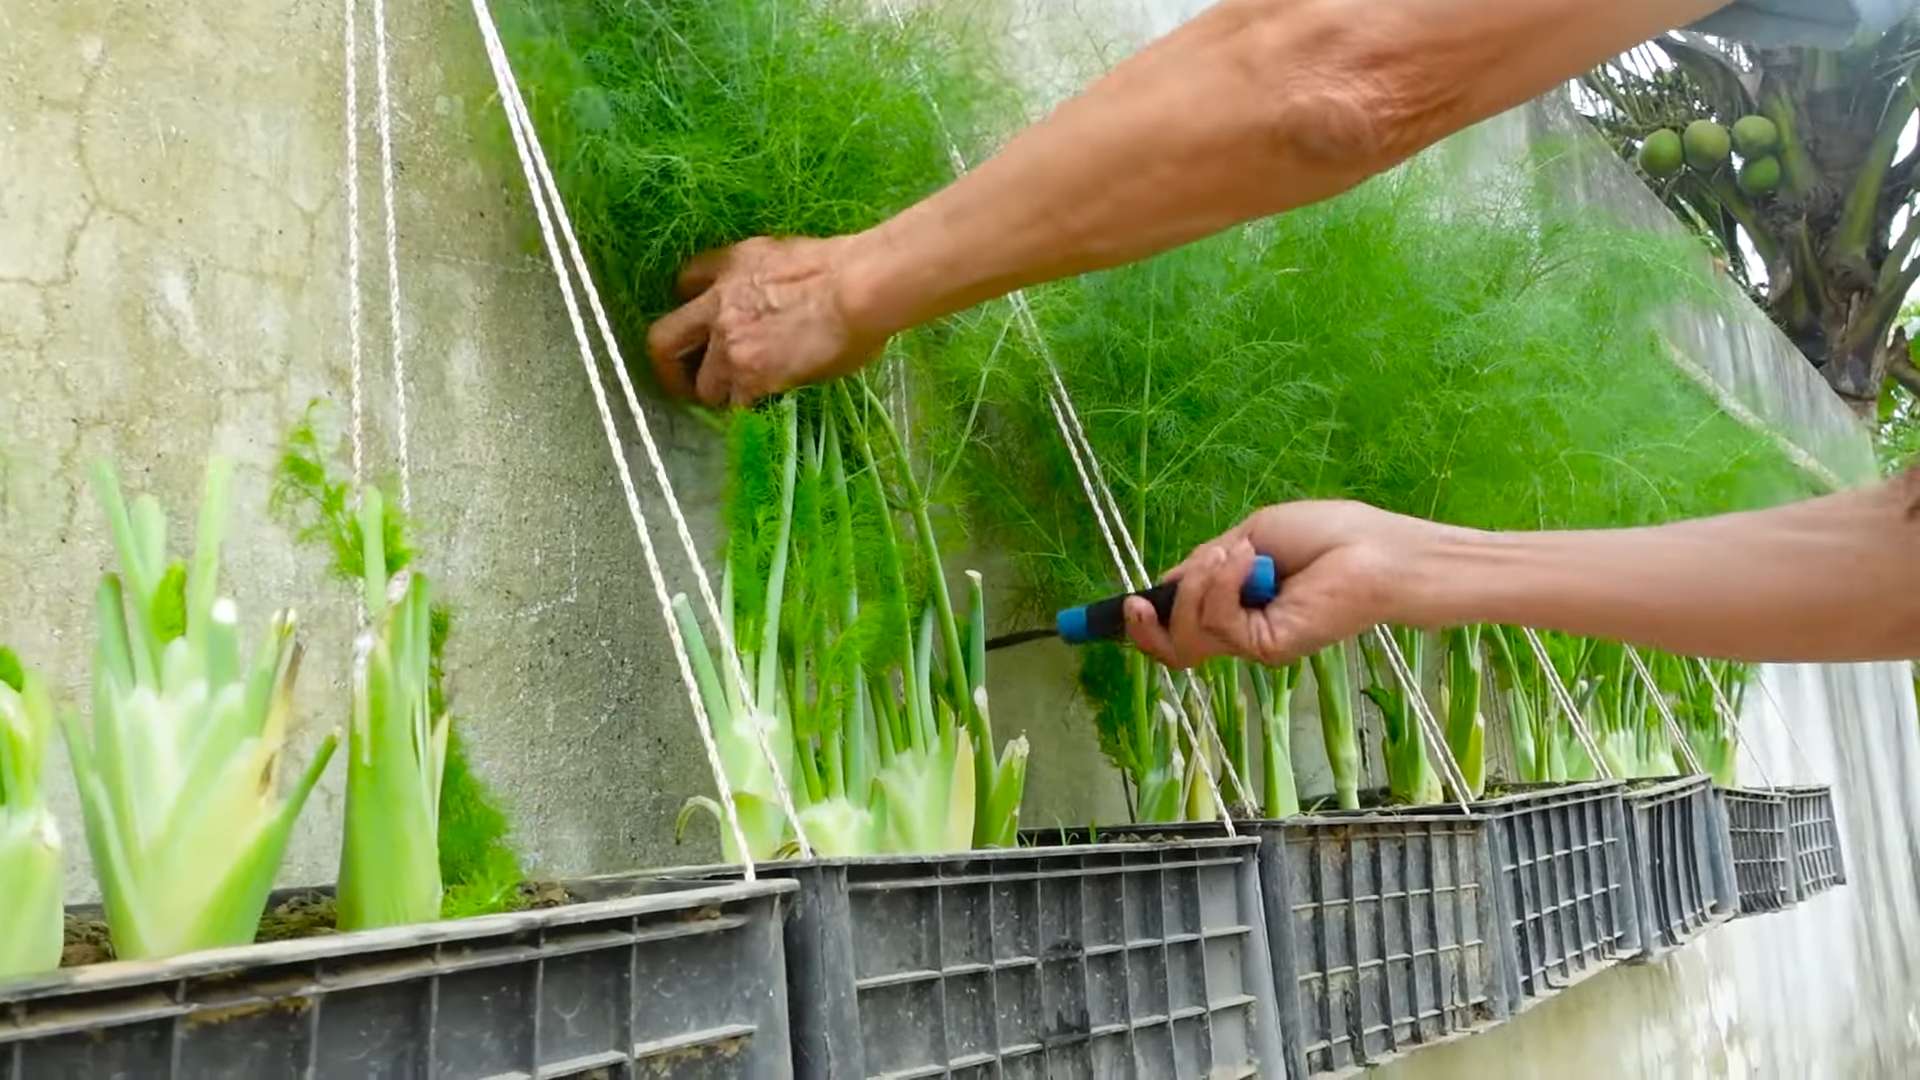
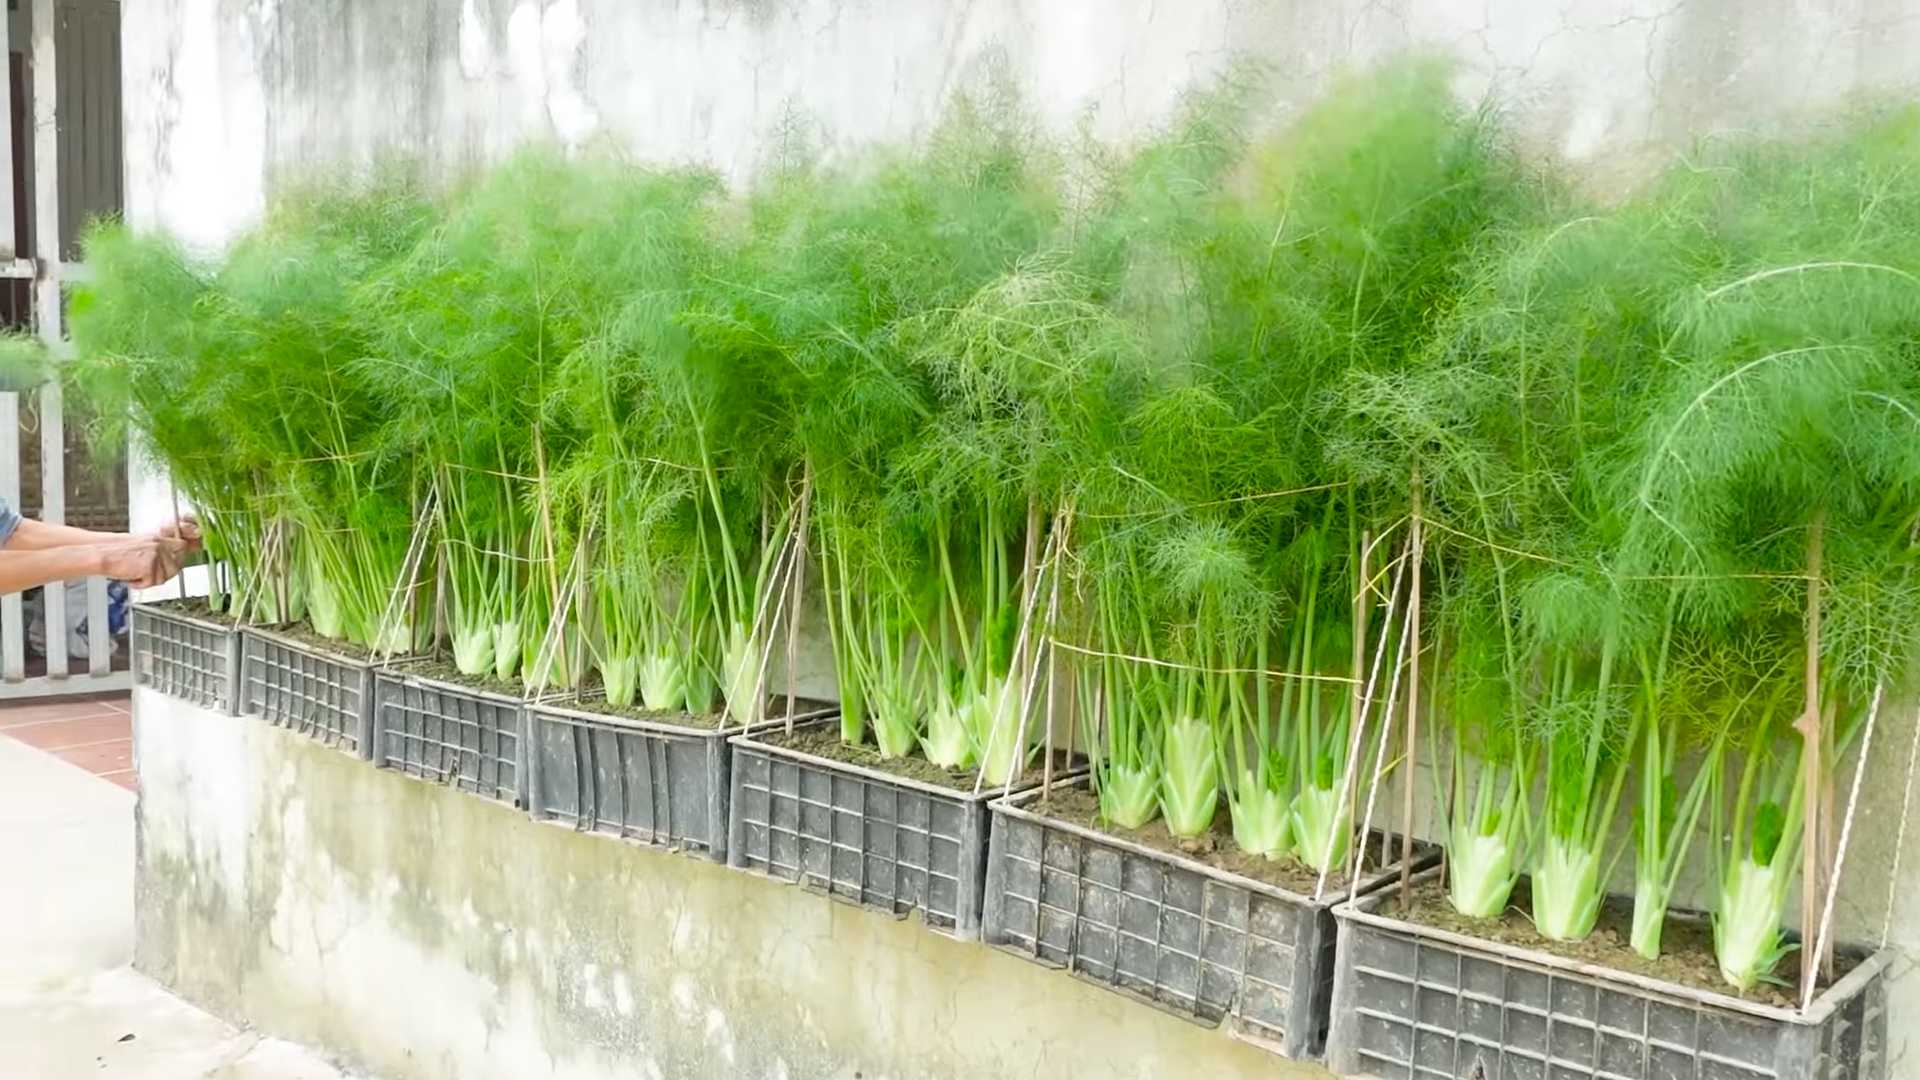
7. **Support (If Needed):** As your dill plants grow taller, they may need some support to prevent them from flopping over. You can use small stakes or a tomato cage to provide support.
Harvesting Your Dill
The best part! Harvesting your own fresh dill is incredibly satisfying.
1. **When to Harvest:** You can start harvesting dill leaves once the plants are about 6-8 inches tall.
2. **How to Harvest:** Use scissors or your fingers to snip off the leaves. You can harvest individual leaves or entire stems.
3. **Harvest Regularly:** Harvesting regularly will encourage the plants to produce more foliage.
4. **Flowering:** Dill plants will eventually flower. Once they start to flower, the leaves will become less flavorful. If you want to prolong the harvest, you can pinch off the flower buds as they appear. However, you can also let the plants flower and collect the seeds for future planting.
5. **Preserving Dill:** If you have more dill than you can use fresh, you can preserve it by drying it, freezing it, or making dill vinegar.
Troubleshooting
Even with the best care, you might encounter some problems while growing dill indoors. Here are a few common issues and how to address them:
* **Yellowing Leaves:** This could be a sign of overwatering, underwatering, or nutrient deficiency. Check the soil moisture and adjust your watering accordingly. If the soil is consistently moist, you’re probably overwatering. If the soil is dry, you’re probably underwatering. You can also try fertilizing the plants with a balanced liquid fertilizer.
* **Leggy Growth:** This is usually caused by insufficient light. Make sure your dill plants are getting enough sunlight or grow light exposure.
* **Pests:** Dill can be susceptible to pests like aphids and spider mites. Inspect your plants regularly for signs of infestation. If you find pests, you can try spraying them with insecticidal soap or neem oil.
* **Root Rot:** This is caused by overwatering and poor drainage. Make sure your pots have drainage holes and that you’re not overwatering your plants. If you suspect root rot, you can try repotting the plants in fresh potting mix.
Enjoying Your Homegrown Dill
Now that you’ve successfully grown your own dill indoors, it’s time to enjoy the fruits (or rather, herbs) of your labor! Use your fresh dill to flavor soups, salads, sauces, dips, and more. It’s also delicious sprinkled on fish, chicken, and vegetables. I love adding it to my homemade pickles!
Growing dill indoors is a rewarding experience that allows you to enjoy fresh herbs year-round. With a little bit of care and attention, you can have a thriving dill garden right in your own home. Happy growing!
Conclusion
So, there you have it! Growing dill indoors is not only achievable, but it’s also a rewarding experience that brings a touch of freshness and vibrant flavor to your kitchen year-round. Forget relying solely on grocery store herbs that can wilt before you even get them home. With a little effort and the right conditions, you can have a constant supply of this aromatic herb right at your fingertips.
Why is this DIY trick a must-try? Because it empowers you to control the quality and freshness of your dill. Imagine snipping fresh sprigs of dill to garnish your favorite dishes, adding a burst of flavor that store-bought dried dill simply can’t match. Think of the satisfaction of nurturing a plant from seed to harvest, knowing you’ve created something delicious and sustainable. Plus, it’s a fantastic way to add a touch of greenery to your indoor space, creating a more inviting and vibrant atmosphere.
But the benefits don’t stop there. Growing your own dill indoors allows for experimentation and customization. Want to try different varieties? Go for it! Explore options like ‘Bouquet’ dill, known for its compact size and abundant foliage, or ‘Fernleaf’ dill, prized for its feathery leaves and slow bolting. You can also adjust the growing conditions to suit your specific preferences. For example, if you prefer a more intense flavor, try providing slightly less water and more sunlight.
Consider these variations to elevate your indoor dill garden:
* Succession Planting: Plant new seeds every few weeks to ensure a continuous harvest throughout the year. This way, you’ll always have fresh dill available when you need it.
* Companion Planting: Dill is a great companion plant for tomatoes, cucumbers, and lettuce. Consider placing your indoor dill near these plants to help deter pests and improve their growth.
* Hydroponic Dill: For a more advanced approach, try growing dill hydroponically. This method involves growing plants without soil, using a nutrient-rich water solution. It can be a fun and efficient way to grow dill indoors.
* Dill Vinegar: Harvest some of your dill and infuse it into vinegar for a flavorful addition to salads and marinades. Simply steep fresh dill sprigs in white wine vinegar for a few weeks, then strain and enjoy.
* Dill Oil: Similarly, you can create a delicious dill-infused oil by steeping dill in olive oil. This oil is perfect for drizzling over grilled vegetables, fish, or pasta.
Ultimately, the best way to discover the joys of growing dill indoors is to simply give it a try. Don’t be intimidated if you’re new to gardening. Dill is a relatively easy herb to grow, and with a little patience and attention, you’ll be rewarded with a bountiful harvest.
We encourage you to embark on this exciting culinary adventure. Start small, experiment with different techniques, and most importantly, have fun! Once you’ve experienced the satisfaction of growing your own dill, you’ll never want to go back to store-bought herbs again.
So, grab some seeds, find a sunny spot, and get ready to enjoy the fresh, vibrant flavor of homegrown dill. And don’t forget to share your experiences with us! We’d love to hear about your successes, challenges, and creative ways you’re using your homegrown dill. Share your photos and tips in the comments below, and let’s inspire each other to create thriving indoor herb gardens. Let’s all become experts at growing dill indoors!
Frequently Asked Questions (FAQ)
What kind of pot and soil should I use for growing dill indoors?
For growing dill indoors, choose a pot that is at least 6-8 inches in diameter to allow for adequate root growth. Make sure the pot has drainage holes to prevent waterlogging, which can lead to root rot. As for soil, a well-draining potting mix is essential. You can use a commercial potting mix specifically formulated for herbs or create your own by combining equal parts of potting soil, perlite, and vermiculite. This mixture will provide good drainage and aeration, which dill needs to thrive. Avoid using garden soil, as it can be too heavy and compact for container gardening.
How much sunlight does indoor dill need?
Dill thrives in bright sunlight, requiring at least 6-8 hours of direct sunlight per day. If you don’t have a sunny windowsill, you can supplement with grow lights. Place the grow lights about 6-12 inches above the dill plants and keep them on for 12-14 hours per day. Insufficient sunlight can lead to leggy growth and reduced flavor. Rotate the pot regularly to ensure that all sides of the plant receive equal sunlight.
How often should I water my indoor dill?
Water dill regularly, keeping the soil consistently moist but not waterlogged. Check the soil moisture by sticking your finger about an inch deep into the soil. If it feels dry, it’s time to water. Water deeply until excess water drains out of the drainage holes. Avoid overwatering, as this can lead to root rot. During the warmer months, you may need to water more frequently than during the cooler months.
How do I harvest dill from my indoor plant?
You can start harvesting dill leaves once the plant is about 6-8 inches tall. Snip off the leaves with scissors or pruning shears, cutting them close to the stem. Avoid removing more than one-third of the plant at a time, as this can stress the plant and slow its growth. You can harvest dill leaves throughout the growing season. For dill seeds, allow the flower heads to dry completely on the plant. Once they are dry, you can harvest the seeds by gently shaking the flower heads over a container.
Why is my indoor dill plant turning yellow?
Yellowing leaves on your indoor dill plant can be caused by several factors, including overwatering, underwatering, nutrient deficiencies, or pests. Check the soil moisture to ensure that you are not overwatering or underwatering. If the soil is consistently wet, reduce the frequency of watering. If the soil is dry, water more frequently. You can also fertilize your dill plant with a balanced liquid fertilizer every 2-4 weeks to provide essential nutrients. Inspect the plant for pests, such as aphids or spider mites, and treat accordingly.
How do I prevent dill from bolting indoors?
Bolting, or premature flowering, can occur when dill is exposed to high temperatures or stress. To prevent bolting indoors, keep the plant in a cool location with consistent temperatures. Avoid exposing the plant to direct sunlight during the hottest part of the day. You can also pinch off any flower buds that appear to encourage leaf production. Choose bolt-resistant varieties of dill, such as ‘Fernleaf’ dill, which are less likely to bolt in warm conditions.
Can I grow dill from seed indoors?
Yes, growing dill from seed indoors is a great way to start your indoor herb garden. Sow the seeds directly into the pot, about ¼ inch deep. Keep the soil moist and warm, and the seeds should germinate in about 7-14 days. Once the seedlings emerge, thin them out to one plant per pot. Provide plenty of sunlight or grow lights, and water regularly.
What are some common pests that affect indoor dill plants?
Common pests that can affect indoor dill plants include aphids, spider mites, and whiteflies. These pests can suck the sap from the leaves, causing them to yellow and wilt. Inspect your dill plant regularly for signs of pests, such as small insects or webbing on the leaves. You can treat infestations with insecticidal soap or neem oil. You can also try washing the plant with a strong stream of water to dislodge the pests.
How long does it take for dill to grow indoors?
Dill typically takes about 60-70 days to mature from seed to harvest. You can start harvesting dill leaves once the plant is about 6-8 inches tall. The time it takes for dill to grow indoors can vary depending on the growing conditions, such as sunlight, temperature, and watering.
Is growing dill indoors worth it?
Absolutely! Growing dill indoors provides you with a constant supply of fresh, flavorful dill for your culinary creations. It’s a rewarding and sustainable way to add a touch of greenery to your home and enjoy the benefits of homegrown herbs. Plus, it’s a fun and educational activity for gardeners of all levels. The superior taste of fresh, homegrown dill compared to dried or store-bought options makes growing dill indoors a worthwhile endeavor for any food enthusiast.
Leave a Comment