

Clean Keyboard Safely: Is your keyboard a sticky, dusty, germ-filled nightmare? Don’t worry, you’re not alone! We’ve all been there, battling crumbs and mysterious grime lurking between the keys. But before you reach for that harsh cleaner or consider a complete keyboard replacement, let’s explore some simple and effective DIY tricks to restore your keyboard to its former glory.
For centuries, people have sought ways to maintain their tools and workspaces. While the modern keyboard is a relatively recent invention, the desire for cleanliness and efficiency is timeless. Think of ancient scribes meticulously caring for their quills and parchment! Today, a clean keyboard isn’t just about aesthetics; it’s about hygiene and performance. A grimy keyboard can harbor bacteria and even affect your typing speed and accuracy.
That’s why I’m so excited to share these easy-to-follow DIY methods to clean keyboard safely. These hacks will not only save you money but also give you the satisfaction of knowing you’re extending the life of your valuable tech. From simple compressed air techniques to more in-depth cleaning strategies, we’ll cover everything you need to know to keep your keyboard sparkling and functioning at its best. So, let’s dive in and banish that keyboard clutter for good!
DIY: Revive Your Grimy Keyboard with These Simple Cleaning Hacks!
Okay, let’s be honest, how often do you *really* clean your keyboard? I know, I know, it’s one of those things that easily gets overlooked. But trust me, a clean keyboard isn’t just about aesthetics; it’s about hygiene and even prolonging the life of your trusty typing companion. So, let’s dive into how to safely and effectively clean your keyboard using stuff you probably already have around the house!
What You’ll Need: Your Cleaning Arsenal
Before we get started, let’s gather our supplies. Having everything ready will make the process smooth and efficient. Here’s what I recommend:
* Compressed Air: This is your best friend for blasting away loose debris.
* Small Brush: A soft-bristled brush (like an old toothbrush or a small paint brush) is perfect for gently dislodging stubborn dirt.
* Microfiber Cloths: These are lint-free and ideal for wiping down surfaces without scratching.
* Isopropyl Alcohol (70% or higher): This is our cleaning agent. The higher the percentage, the faster it evaporates, which is what we want.
* Cotton Swabs: Perfect for getting into those hard-to-reach nooks and crannies.
* Bowl of Warm Water: For mixing with a little bit of dish soap.
* Mild Dish Soap: Just a drop or two will do.
* Keycap Puller (Optional but Recommended): Makes removing keycaps much easier and safer. You can find these online for pretty cheap.
* Small Container or Ziploc Bag: For washing the keycaps.
* Screwdriver (If needed to disassemble the keyboard): Some keyboards are easier to clean if you can take them apart. Check your keyboard’s manual or look up a tutorial online before attempting this.
Phase 1: The Pre-Cleaning Blast-Off
This phase is all about removing the loose stuff before we get into the serious cleaning.
1. Unplug Your Keyboard: This is absolutely crucial! We don’t want any accidental keystrokes or, worse, electrical shocks.
2. Turn It Upside Down and Shake: Give your keyboard a good shake over a trash can or a sheet of paper. You’ll be surprised at how much stuff comes out!
3. Compressed Air Attack: Now, grab your compressed air and use short bursts to blow out any remaining debris from between the keys. Hold the can at an angle and use the nozzle to direct the air precisely. Pay special attention to the spaces around the keys and any crevices. I like to go over the entire keyboard a few times, changing the angle each time.
4. Brush It Off: Use your small brush to gently loosen any stubborn dirt or grime that the compressed air couldn’t remove. Be careful not to press too hard, especially around the keycaps.
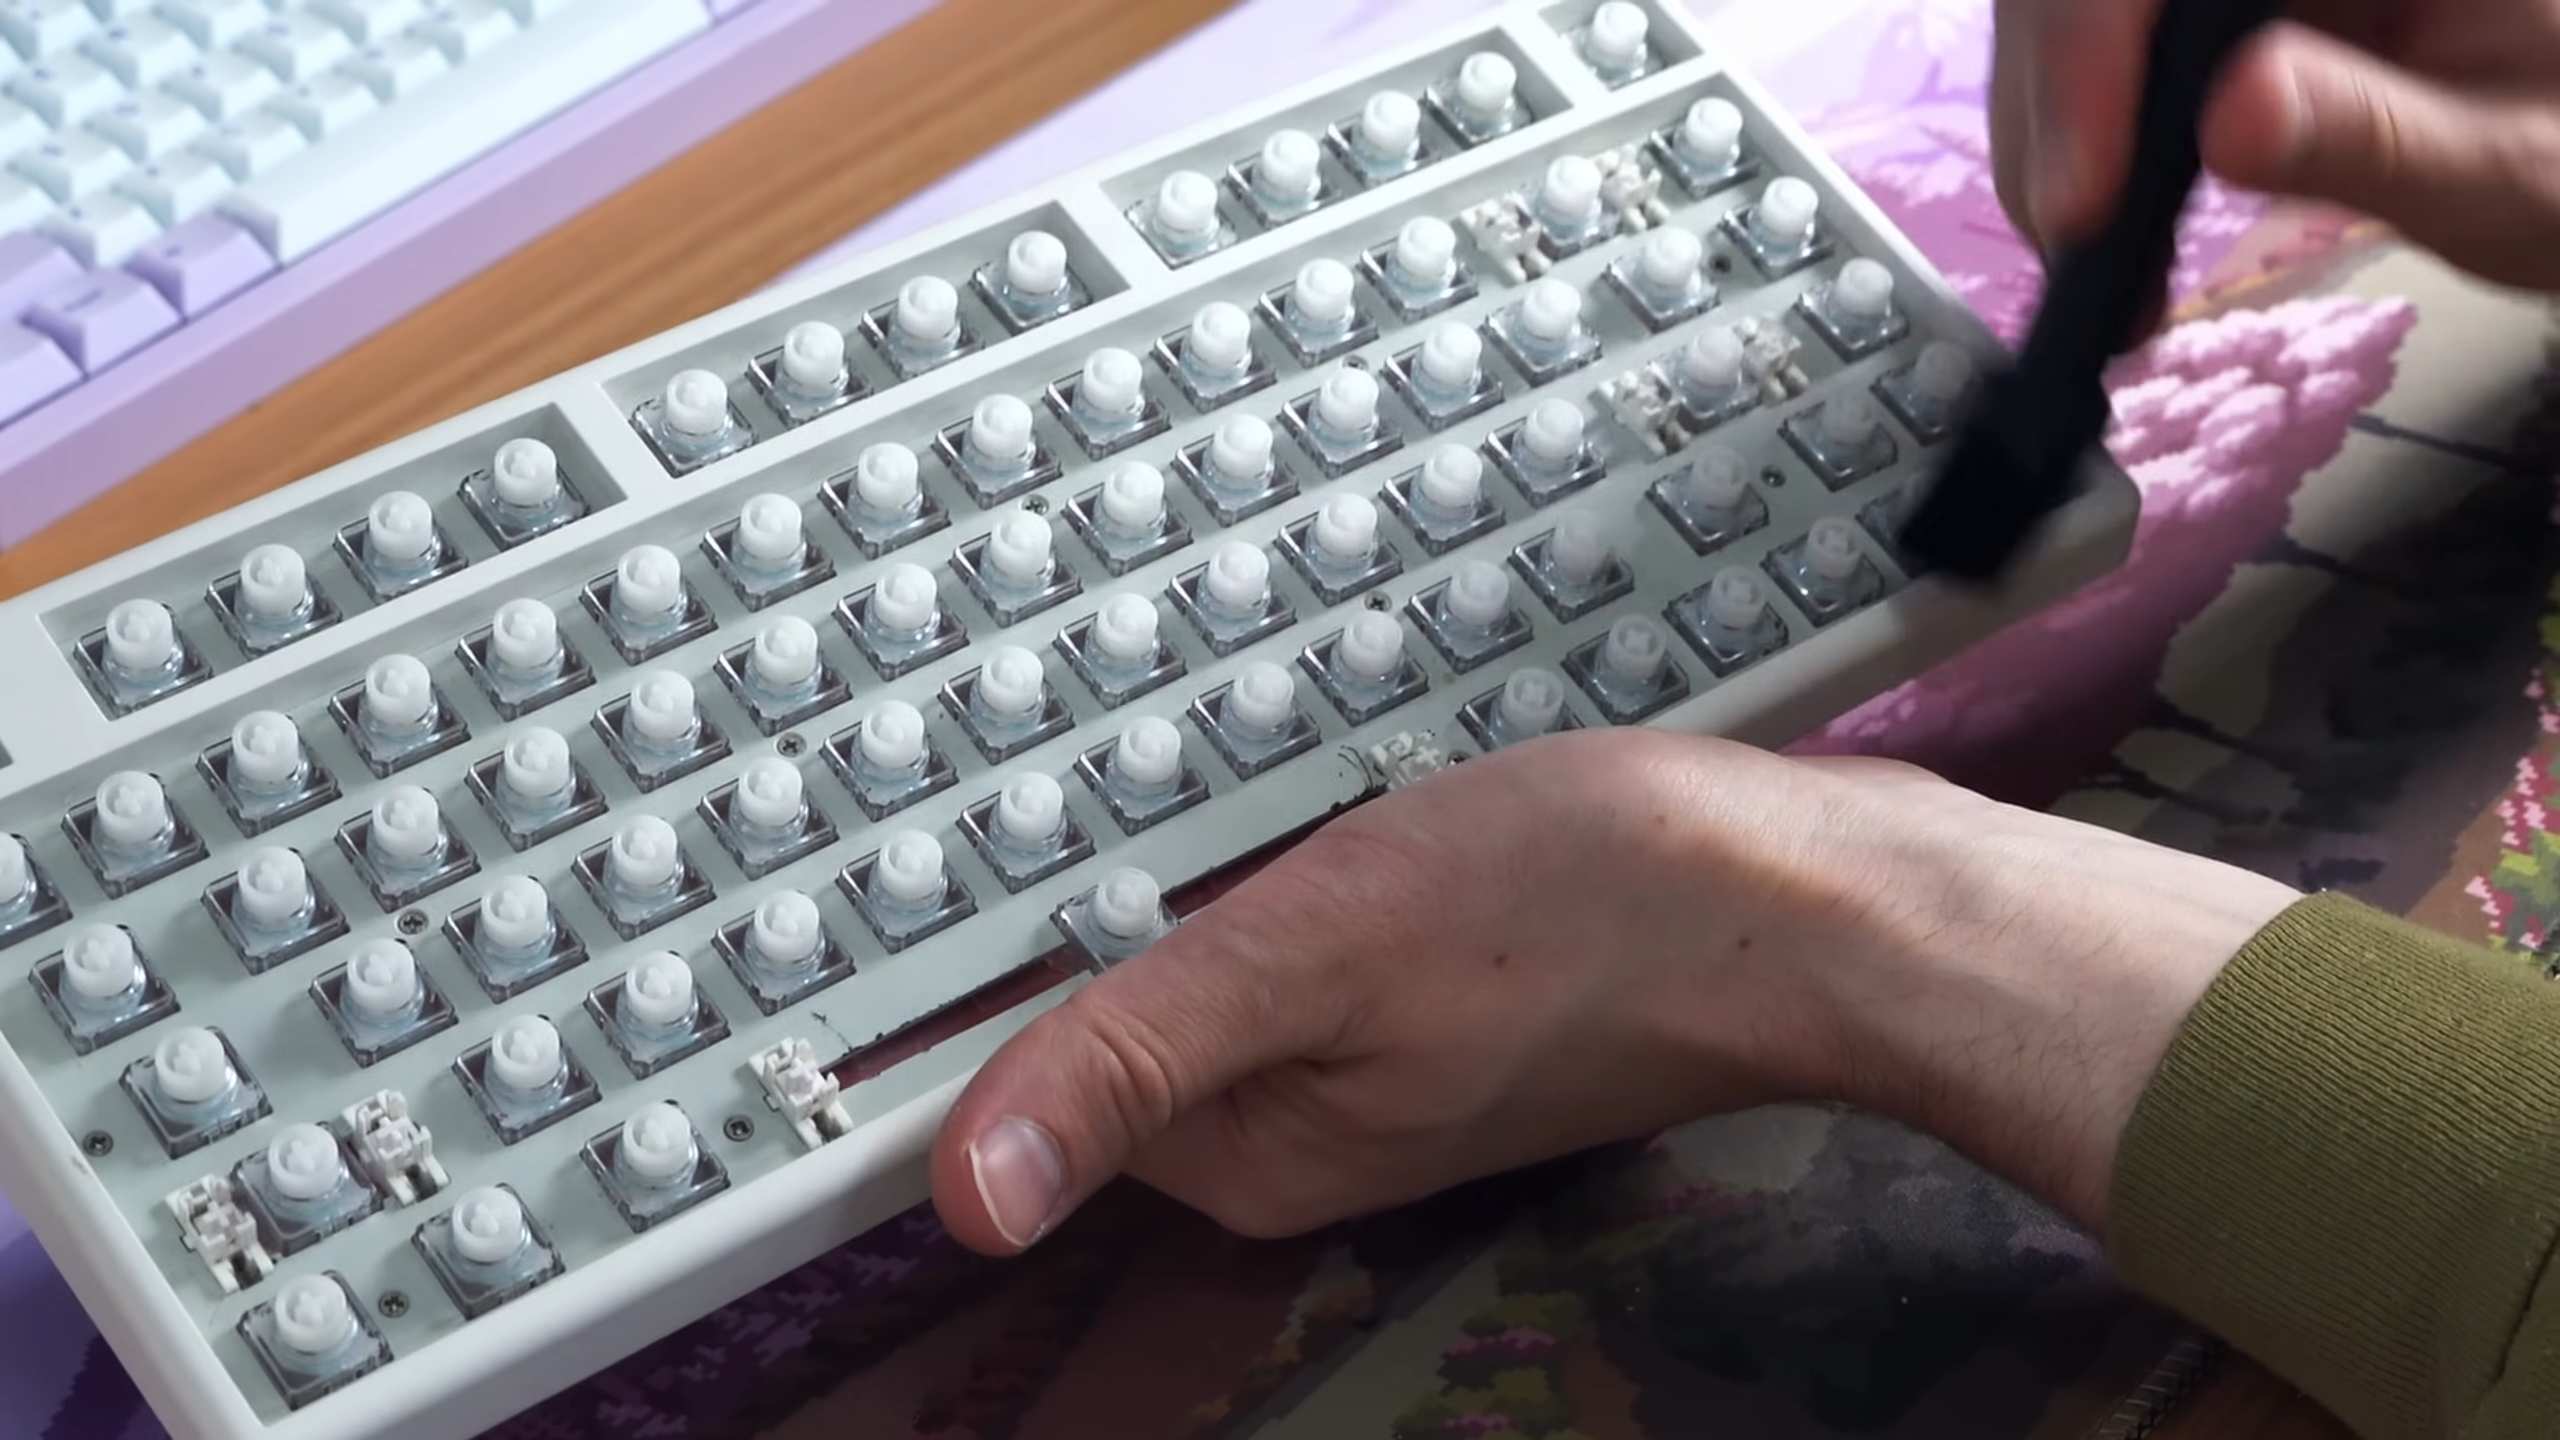
Phase 2: Keycap Removal and Cleaning (The Deep Dive!)
This is where we get into the nitty-gritty. Removing the keycaps allows us to clean them thoroughly and access the dirt and grime underneath.
1. Photograph Your Keyboard Layout: Before you start removing keycaps, take a picture of your keyboard! This will save you a *ton* of frustration when it comes time to put them back on. Trust me, you’ll thank me later.
2. Remove the Keycaps: Using your keycap puller (or carefully using your fingers if you don’t have one), gently remove the keycaps. Start with the keys that are easiest to access and work your way around the keyboard. Be careful not to force them, as you could damage the keycaps or the keyboard. If you’re using your fingers, try to wiggle the keycap gently from side to side while pulling upwards.
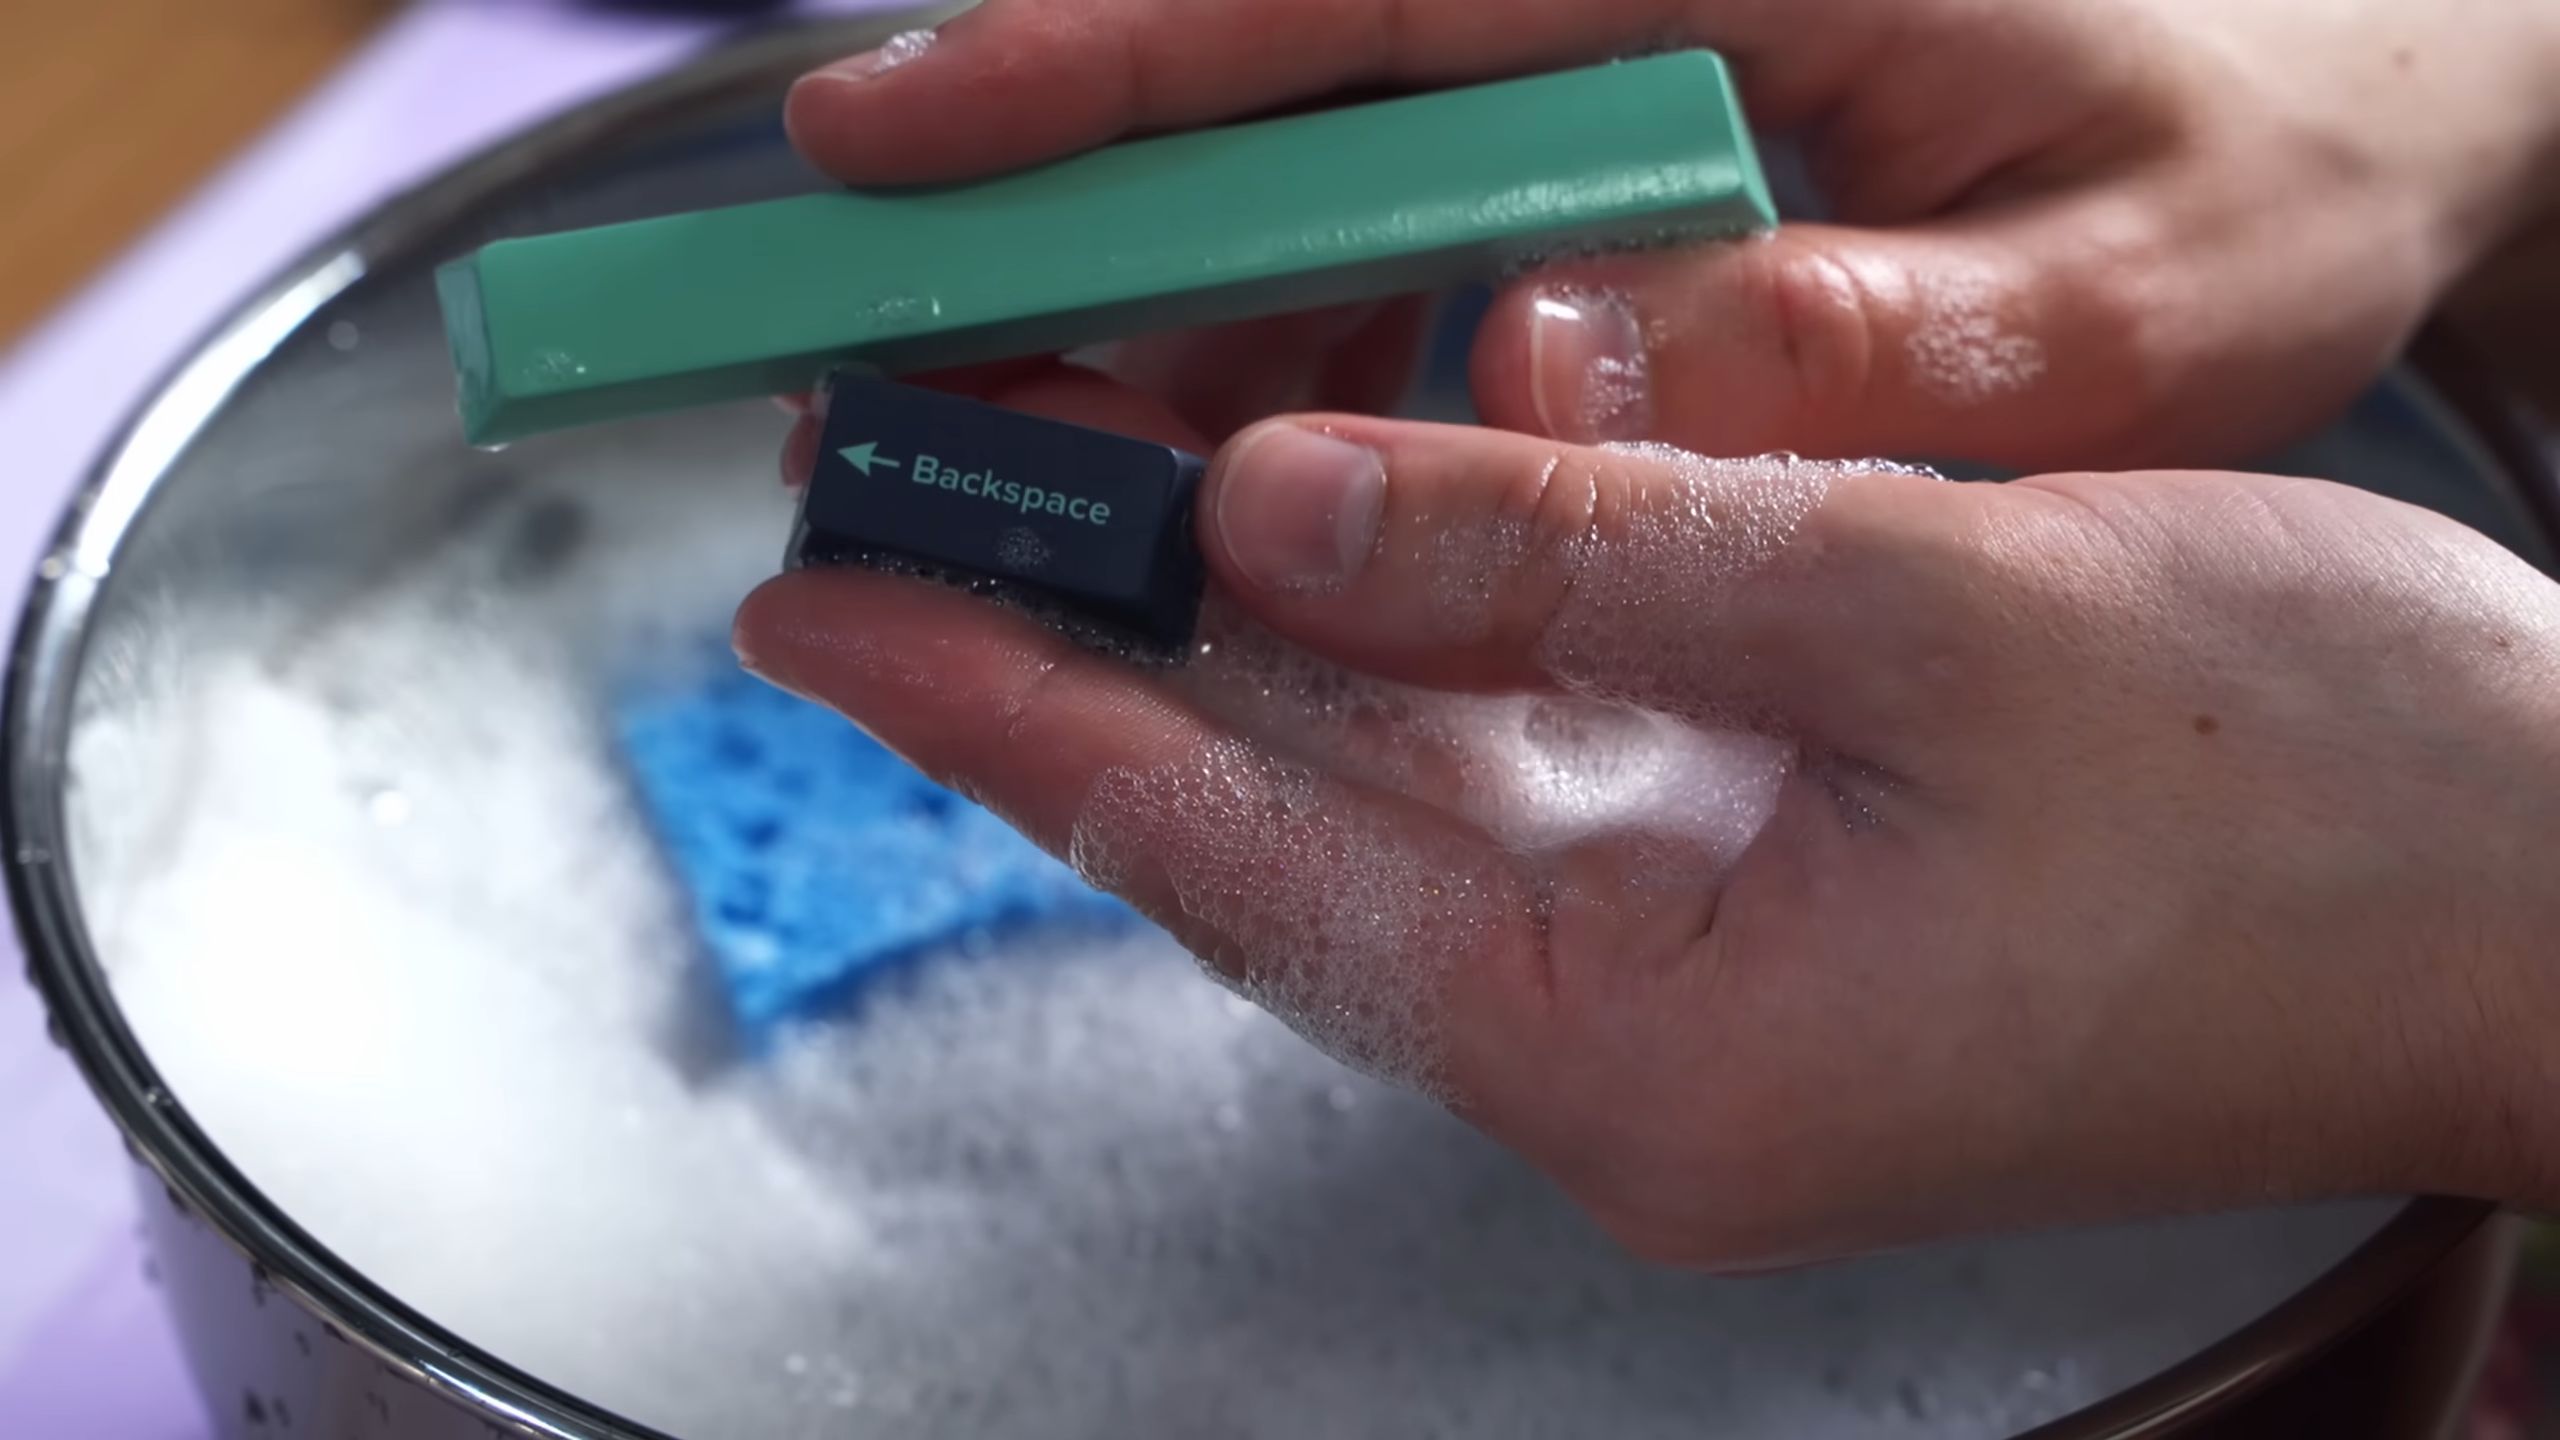
3. Soak and Wash the Keycaps: Place the removed keycaps in your small container or Ziploc bag. Add warm water and a drop or two of mild dish soap. Gently swirl the keycaps around to loosen any dirt and grime. Let them soak for about 15-20 minutes.
4. Rinse and Dry the Keycaps: After soaking, rinse the keycaps thoroughly with clean water. Spread them out on a clean microfiber cloth to air dry completely. Make sure they are completely dry before putting them back on the keyboard. I usually leave them overnight to be absolutely sure.
Phase 3: Cleaning the Keyboard Base (The Underworld)
Now that the keycaps are out of the way, we can focus on cleaning the keyboard base itself. This is where a lot of dust, crumbs, and other gunk tends to accumulate.
1. Compressed Air, Round Two: Give the keyboard base another blast with compressed air to remove any loose debris that was hidden under the keycaps.
2. Isopropyl Alcohol Wipe Down: Dampen a microfiber cloth with isopropyl alcohol. Make sure the cloth is damp, not soaking wet. Gently wipe down the entire keyboard base, paying special attention to the areas around the key switches.
3. Cotton Swab Detail Work: Use cotton swabs dipped in isopropyl alcohol to clean any hard-to-reach areas, such as the corners and crevices around the key switches.
4. Stubborn Stain Removal: For any stubborn stains or grime, you can use a slightly more concentrated solution of isopropyl alcohol on a cotton swab. Gently scrub the affected area until the stain is removed.
5. Dry Thoroughly: Use a clean, dry microfiber cloth to wipe down the keyboard base and remove any excess isopropyl alcohol. Make sure the keyboard is completely dry before moving on to the next step.
Phase 4: Reassembly and Final Touches (The Grand Finale)
Now for the satisfying part: putting everything back together!
1. Ensure Everything is Dry: Before reassembling, double-check that both the keycaps and the keyboard base are completely dry. Any moisture could damage the keyboard.
2. Reattach the Keycaps: Using the photo you took earlier as a guide, carefully reattach the keycaps to the keyboard. Press down firmly on each keycap until it clicks into place.
3. Final Wipe Down: Give the entire keyboard a final wipe down with a clean microfiber cloth to remove any fingerprints or smudges.
4. Plug It In and Test: Plug your keyboard back in and test all the keys to make sure they are working properly. If any keys are sticking or not working, double-check that the keycaps are properly seated.
Optional: Disassembling the Keyboard for Deeper Cleaning
Some keyboards are designed to be easily disassembled, which allows for even deeper cleaning. If you’re comfortable doing so, you can disassemble your keyboard to access the internal components and clean them more thoroughly.
1. Consult Your Keyboard’s Manual: Before attempting to disassemble your keyboard, consult the manual or look up a tutorial online. This will help you understand how the keyboard is put together and avoid damaging any components.
2. Remove Screws and Panels: Carefully remove any screws or panels that are holding the keyboard together.
3. Clean Internal Components: Use compressed air and a small brush to clean the internal components of the keyboard. Be careful not to damage any delicate parts.
4. Reassemble the Keyboard: Once you’ve cleaned the internal components, carefully reassemble the keyboard, making sure all the screws and panels are properly secured.
Tips and Tricks for Keeping Your Keyboard Clean
* Regular Cleaning: Make it a habit to clean your keyboard regularly, even if it doesn’t look dirty. A quick wipe down with a microfiber cloth once a week can help prevent dirt and grime from building up.
* Don’t Eat Over Your Keyboard: This is a big one! Avoid eating over your keyboard to prevent crumbs and spills from getting into the keys.
* Wash Your Hands: Wash your hands regularly, especially before using your keyboard. This will help prevent the transfer of dirt and germs.
* Use a Keyboard Cover: Consider using a keyboard cover to protect your keyboard from dust, spills, and other debris.
And there you have it! A sparkling clean keyboard that’s ready for action. I hope this guide helps you keep your keyboard in tip-top shape. Happy typing!
Conclusion
So, there you have it! Mastering the art of how to clean keyboard safely at home is not only incredibly simple, but also remarkably effective. Forget those expensive cleaning kits and questionable sprays – this DIY method utilizes items you likely already have in your pantry and bathroom, making it a budget-friendly and eco-conscious choice.
Why is this a must-try? Because a clean keyboard isn’t just about aesthetics; it’s about hygiene and performance. Think about all the crumbs, dust, and oils that accumulate between the keys. This grime can harbor bacteria and even affect the responsiveness of your keyboard, leading to frustrating typing errors and potential health concerns. By regularly cleaning your keyboard using this safe and effective method, you’re not only extending its lifespan but also creating a healthier workspace.
Beyond the basic method outlined, there are a few variations you can explore to personalize your cleaning routine. For instance, if you’re dealing with particularly stubborn grime, consider using a slightly damp (not wet!) cotton swab dipped in isopropyl alcohol (70% or higher) to gently scrub around the affected keys. Be sure to test this in an inconspicuous area first to ensure it doesn’t damage the keycaps. Alternatively, for a deeper clean, you can carefully remove the keycaps (if your keyboard allows) and soak them in warm, soapy water before thoroughly drying them and reattaching them to the keyboard. Remember to take a picture of your keyboard layout before removing the keycaps to make reassembly easier!
We understand that trying a new DIY method can sometimes feel daunting, but trust us, this one is foolproof. The satisfaction of seeing your keyboard sparkling clean and functioning optimally is well worth the minimal effort involved. Plus, you’ll be saving money and reducing your reliance on harsh chemicals.
We wholeheartedly encourage you to give this DIY keyboard cleaning trick a try. Once you’ve experienced the difference a clean keyboard makes, you’ll never go back to a dusty, grimy one again. And most importantly, we want to hear about your experience! Share your before-and-after photos, any variations you tried, and any tips you discovered along the way in the comments section below. Let’s build a community of clean keyboard enthusiasts and help each other maintain healthy and productive workspaces. Your feedback will not only help others but also inspire us to continue sharing valuable DIY tips and tricks. So go ahead, give your keyboard the spa day it deserves! You’ll be amazed at the results.
Frequently Asked Questions (FAQ)
Q: How often should I clean my keyboard?
A: The frequency of cleaning depends on your usage habits and environment. If you use your keyboard heavily or work in a dusty environment, you should aim to clean it at least once a week. For lighter users, cleaning every two to four weeks may suffice. However, if you notice visible dirt, crumbs, or stickiness, it’s time for a cleaning session regardless of your regular schedule. Regular cleaning prevents the buildup of grime and makes the cleaning process easier in the long run.
Q: What kind of cloth should I use to clean my keyboard?
A: A microfiber cloth is ideal for cleaning your keyboard. Microfiber cloths are soft, lint-free, and highly absorbent, making them perfect for wiping away dust, dirt, and smudges without scratching the keycaps. Avoid using abrasive cloths or paper towels, as these can damage the surface of your keyboard. If you don’t have a microfiber cloth, a soft cotton cloth can also be used, but be sure to check for lint before using it.
Q: Is it safe to use compressed air to clean my keyboard?
A: Yes, compressed air is a great tool for dislodging dust and debris from between the keys. However, it’s important to use it correctly. Hold the can of compressed air upright and use short bursts to avoid spraying liquid propellant onto your keyboard. Direct the nozzle at an angle to reach under the keycaps and blow out any trapped particles. Be careful not to hold the nozzle too close to the keyboard, as this can damage the keys.
Q: Can I use disinfectant wipes to clean my keyboard?
A: While disinfectant wipes can be used to clean your keyboard, it’s important to choose the right type and use them sparingly. Avoid wipes that contain harsh chemicals or bleach, as these can damage the keycaps. Opt for wipes that are specifically designed for electronics or those that are alcohol-based (70% isopropyl alcohol or higher). Wring out any excess liquid before wiping the keyboard to prevent moisture from seeping into the internal components. After wiping, allow the keyboard to air dry completely before using it.
Q: What if I spill liquid on my keyboard?
A: Spilling liquid on your keyboard can be a disaster, but quick action can minimize the damage. Immediately unplug the keyboard from the power source. Turn the keyboard upside down to allow the liquid to drain out. Use a clean, absorbent cloth to soak up any remaining liquid. If the liquid was sugary or sticky, you may need to remove the keycaps and clean them individually with warm, soapy water. Allow the keyboard to dry completely for at least 24 hours before plugging it back in. If the keyboard is still not functioning properly, you may need to take it to a professional for repair.
Q: How do I remove stubborn stains or grime from my keyboard?
A: For stubborn stains or grime, you can use a slightly damp cotton swab dipped in isopropyl alcohol (70% or higher). Gently scrub the affected area, being careful not to apply too much pressure. Test the alcohol on an inconspicuous area first to ensure it doesn’t damage the keycaps. You can also use a mixture of warm water and mild dish soap to clean the keycaps. Remove the keycaps and soak them in the soapy water for a few minutes, then scrub them gently with a soft brush. Rinse the keycaps thoroughly with clean water and allow them to dry completely before reattaching them to the keyboard.
Q: My keyboard has a lot of crumbs stuck under the keys. How can I remove them?
A: In addition to using compressed air, you can use a small brush, such as a toothbrush or a paintbrush, to dislodge crumbs from under the keys. Gently brush around the keys to loosen any trapped particles, then use compressed air to blow them away. You can also use a vacuum cleaner with a brush attachment to suck up the crumbs. Be careful not to apply too much pressure, as this can damage the keys.
Q: Is it safe to use a vacuum cleaner to clean my keyboard?
A: Yes, a vacuum cleaner with a brush attachment can be used to clean your keyboard, but it’s important to use it carefully. Use a low suction setting to avoid damaging the keys. Hold the brush attachment slightly above the keyboard and gently move it back and forth to suck up dust and debris. Avoid pressing the brush attachment directly onto the keys, as this can scratch them.
Q: What are some other tips for keeping my keyboard clean?
A: Here are a few additional tips for keeping your keyboard clean:
* Wash your hands regularly, especially before using your keyboard.
* Avoid eating or drinking near your keyboard.
* Use a keyboard cover to protect your keyboard from dust and spills.
* Store your keyboard in a clean and dry place when not in use.
* Consider using a keyboard cleaning gel to pick up dust and debris from between the keys.
By following these tips and regularly cleaning your keyboard, you can keep it in good condition and extend its lifespan. Remember, a clean keyboard is a happy keyboard! And a happy keyboard leads to a more productive and enjoyable computing experience. Taking the time to clean keyboard safely is an investment in your equipment and your well-being.

Leave a Comment