

Growing Bitter Melon at Home might seem daunting, but trust me, it’s a rewarding adventure! Have you ever dreamt of strolling into your backyard and harvesting your own vibrant, slightly quirky, and incredibly healthy bitter melon? Well, dream no more! This guide is packed with DIY tricks and hacks that will transform your garden into a bitter melon paradise, even if you’re a complete beginner.
Bitter melon, also known as bitter gourd or karela, has a rich history deeply intertwined with traditional medicine and culinary practices across Asia, Africa, and the Caribbean. For centuries, it’s been revered for its medicinal properties, believed to aid in digestion, boost immunity, and even regulate blood sugar. Beyond its health benefits, bitter melon adds a unique and intriguing flavor profile to dishes, offering a delightful contrast to sweet and savory ingredients.
But why should you bother growing bitter melon at home? Simple! Store-bought bitter melon can sometimes be expensive and lack the freshness and flavor of homegrown produce. Plus, knowing exactly where your food comes from and how it’s grown gives you peace of mind. With a few clever DIY tricks, you can bypass the grocery store and enjoy a constant supply of this nutritious and delicious vegetable. I’m here to show you how to cultivate your own thriving bitter melon patch, using simple, cost-effective methods that anyone can master. Let’s get started!
Growing Bitter Melon at Home: A Comprehensive DIY Guide
Hey there, fellow gardening enthusiasts! I’m so excited to share my experience and guide you through growing your own bitter melon at home. It might seem intimidating at first, but trust me, with a little patience and these simple steps, you’ll be harvesting your own bitter gourds in no time. Bitter melon, also known as bitter gourd or karela, is a nutritious and flavorful vegetable that’s a staple in many Asian cuisines. Let’s get started!
Choosing the Right Variety and Starting Seeds
First things first, let’s talk about choosing the right variety of bitter melon. There are several types available, differing in size, shape, and bitterness. Some popular varieties include:
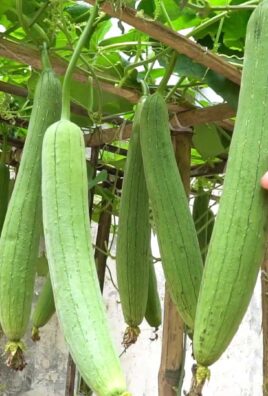
- Chinese Bitter Melon: These are typically longer and lighter green with smoother skin. They tend to be less bitter than other varieties.
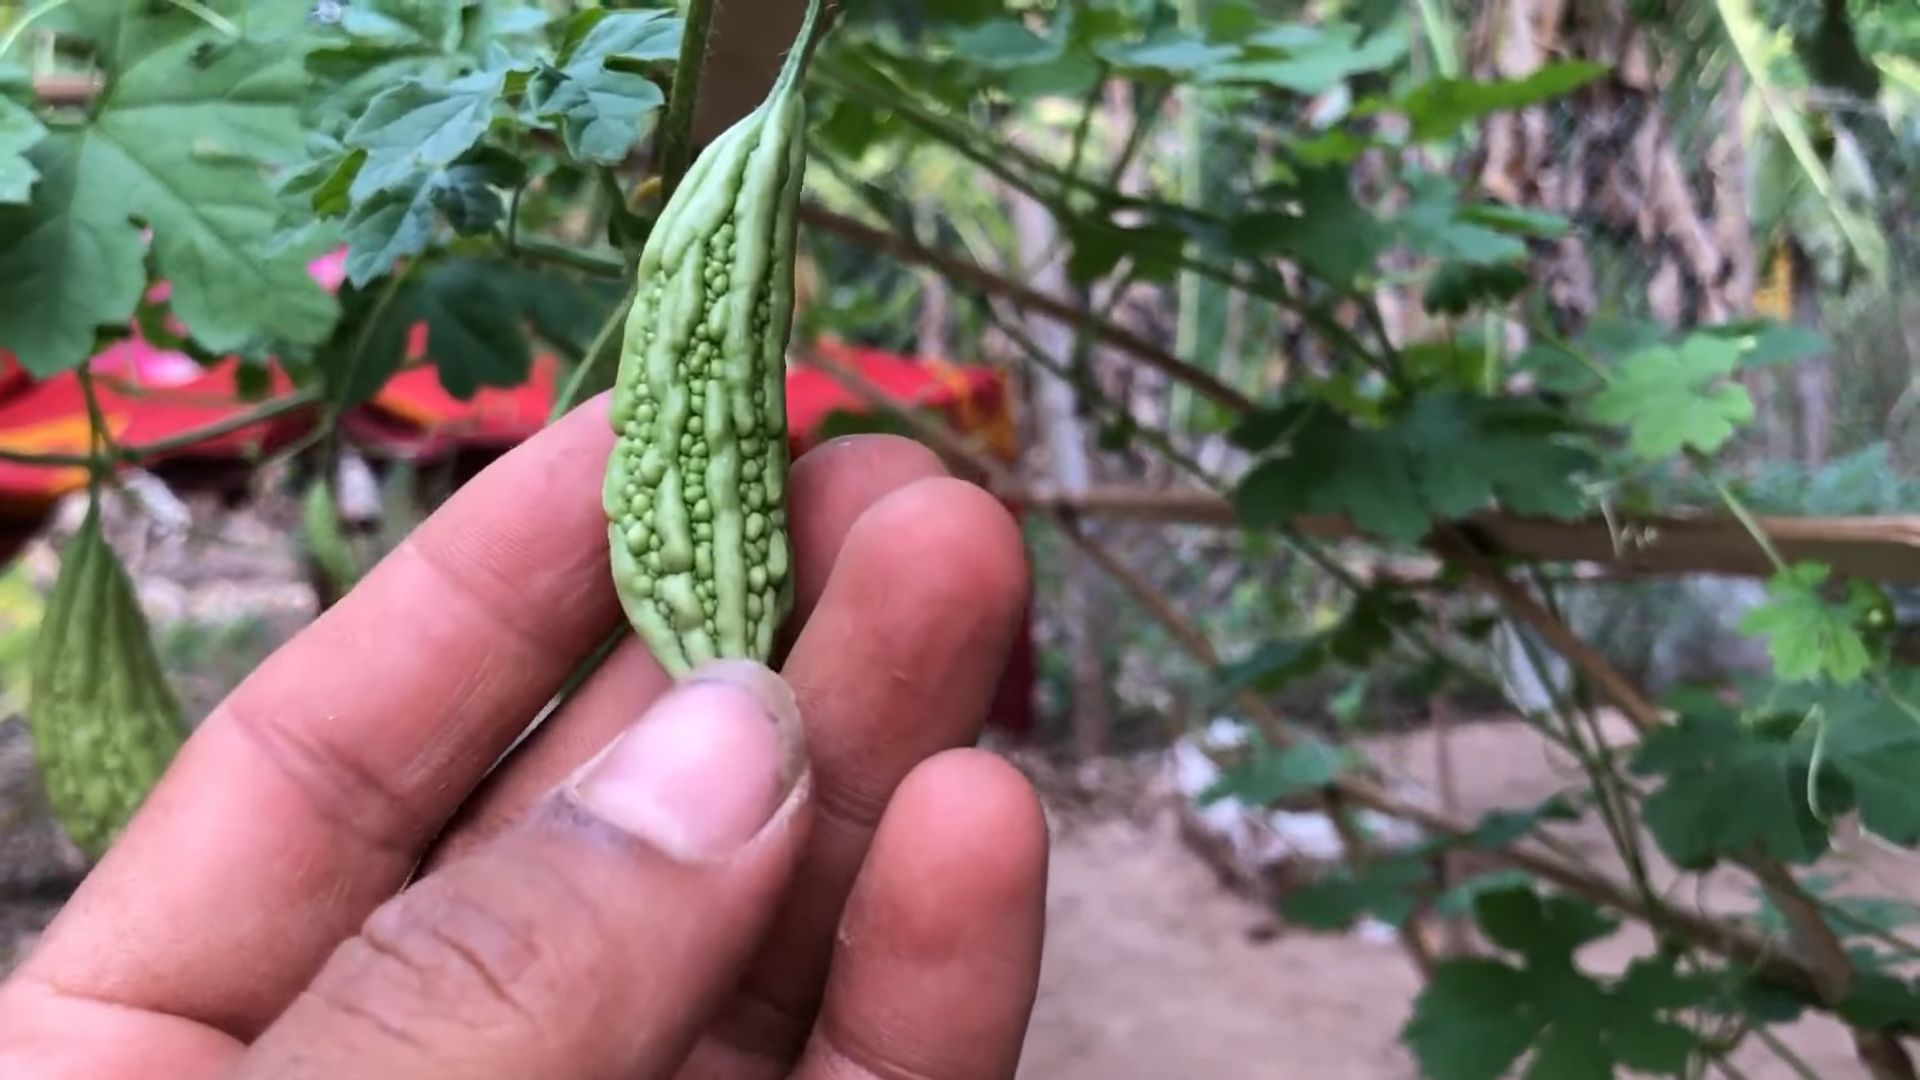
- Indian Bitter Melon: These are smaller, darker green, and have a more bumpy, ridged skin. They are generally more bitter.
- Japanese Bitter Melon: These are medium-sized and have a slightly sweet taste compared to other varieties.
I personally prefer the Chinese variety because of its milder flavor, but feel free to experiment and find what you like best!
Now, let’s move on to starting the seeds. Bitter melon seeds have a tough outer shell, so scarifying and soaking them will significantly improve germination rates.
Here’s what you’ll need:
- Bitter melon seeds
- Sandpaper or a nail file
- A small bowl
- Warm water
- Seed starting tray or small pots
- Seed starting mix
Step-by-Step Instructions:
1. Scarify the Seeds: Gently rub each seed with sandpaper or a nail file to lightly scratch the outer coating. Be careful not to damage the inner part of the seed. This helps water penetrate the seed more easily.
2. Soak the Seeds: Place the scarified seeds in a small bowl and cover them with warm water. Let them soak for 24-48 hours. You’ll notice they start to swell up, which is a good sign!
3. Prepare the Seed Starting Tray: Fill your seed starting tray or small pots with seed starting mix. Make sure the mix is moist but not soggy.
4. Plant the Seeds: Make a small hole (about 1/2 inch deep) in the center of each pot or cell. Place one seed in each hole and cover it gently with the seed starting mix.
5. Water Gently: Water the seeds gently using a spray bottle or a watering can with a fine rose. Avoid overwatering, as this can lead to rot.
6. Provide Warmth and Light: Bitter melon seeds need warmth to germinate. Place the seed starting tray in a warm location, such as a sunny windowsill or under a grow light. The ideal temperature is between 75-85°F (24-29°C).
7. Keep the Soil Moist: Check the soil moisture regularly and water as needed to keep it consistently moist.
8. Wait for Germination: Germination usually takes about 7-14 days. Be patient, and you’ll soon see tiny seedlings emerging from the soil!
Preparing the Garden Bed and Transplanting Seedlings
Once your seedlings have developed a few true leaves (usually after 2-3 weeks), it’s time to transplant them into your garden bed. Bitter melon plants need plenty of sunlight, well-drained soil, and a sturdy trellis to climb on.
Here’s what you’ll need:
- Healthy bitter melon seedlings
- A sunny location in your garden
- Well-drained soil
- Compost or other organic matter
- A trellis or other support structure
- Gardening gloves
- A trowel
- Watering can
Step-by-Step Instructions:
1. Choose a Sunny Location: Select a spot in your garden that receives at least 6-8 hours of direct sunlight per day.
2. Prepare the Soil: Bitter melon plants thrive in well-drained soil that is rich in organic matter. Amend the soil with compost or other organic matter to improve its fertility and drainage. I usually add a generous amount of compost to my garden bed before planting.
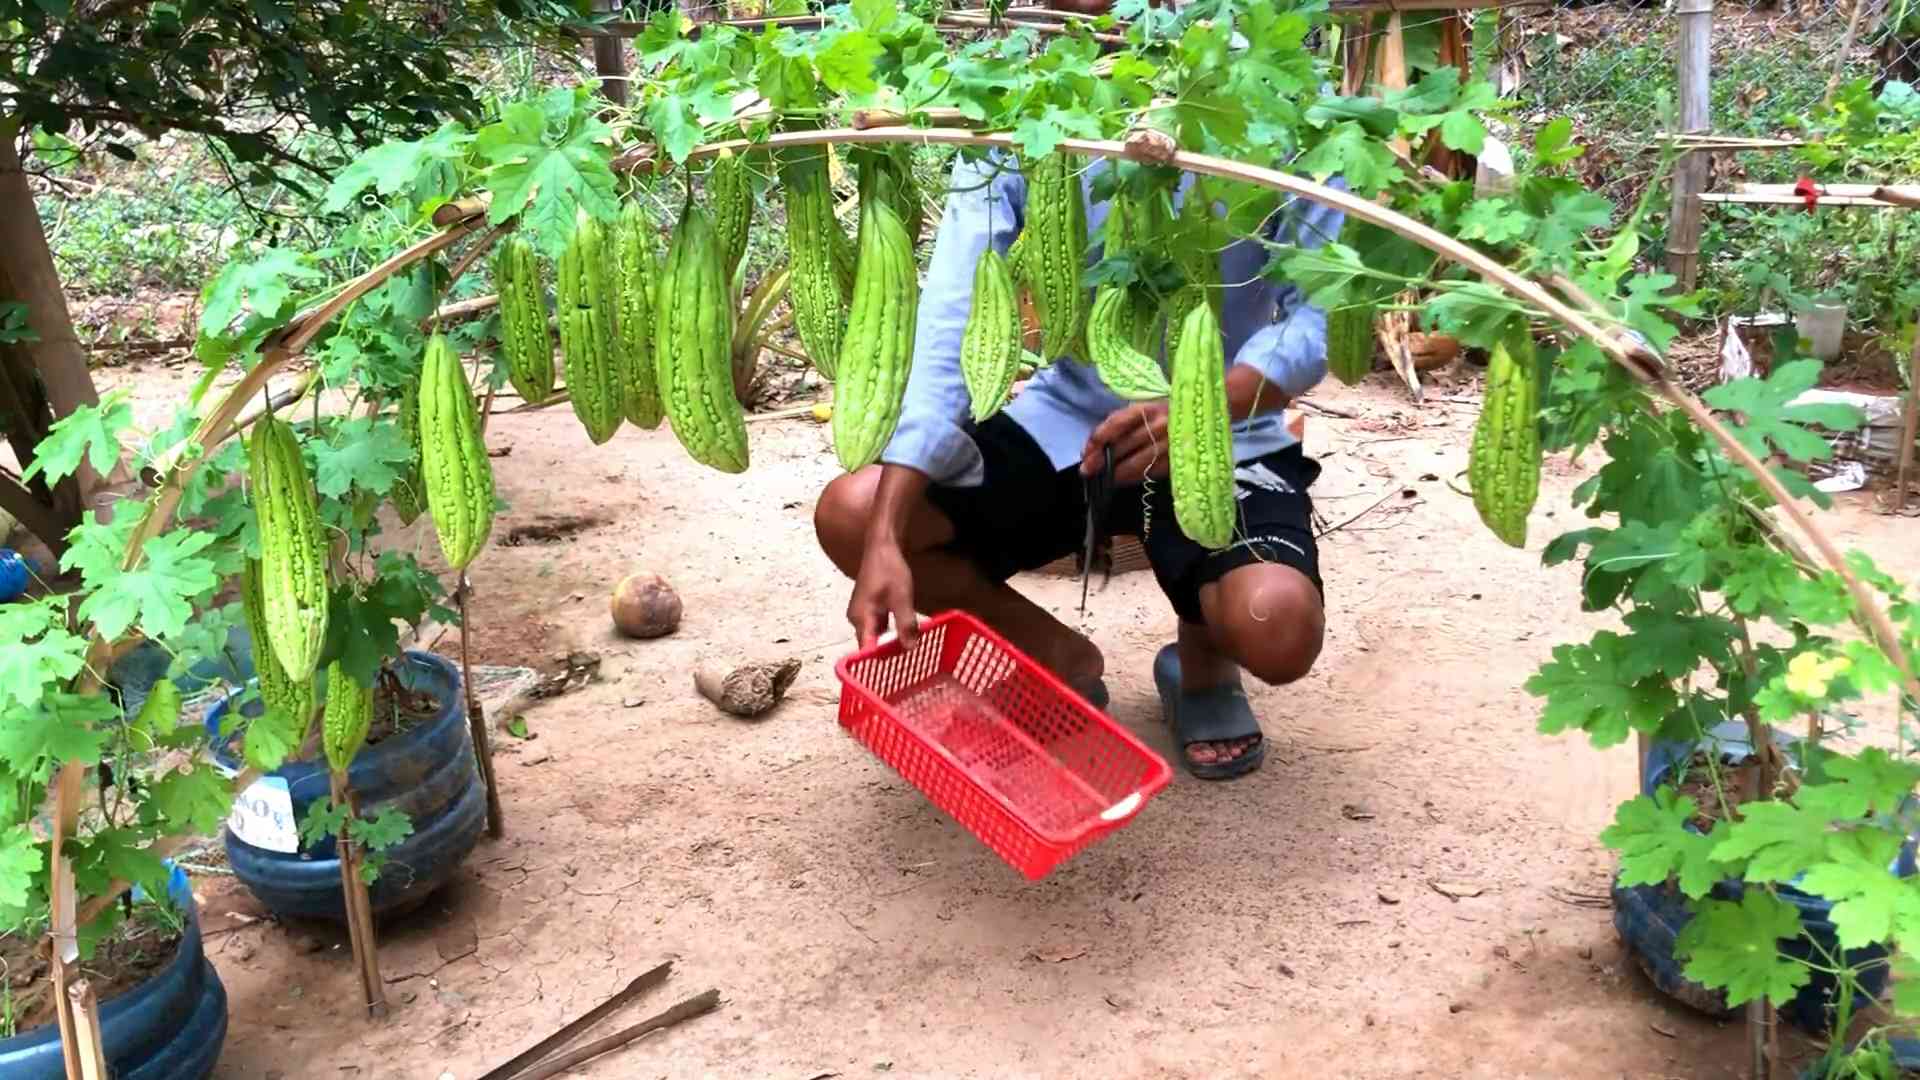
3. Install a Trellis: Bitter melon vines can grow quite long, so they need a sturdy trellis or other support structure to climb on. You can use a wooden trellis, a metal fence, or even a sturdy bamboo structure. Make sure the trellis is tall enough to accommodate the mature size of the vines. I’ve found that a trellis that’s at least 6 feet tall works well.
4. Dig Planting Holes: Dig holes that are slightly larger than the root balls of your seedlings. Space the holes about 18-24 inches apart.
5. Carefully Remove Seedlings: Gently remove the seedlings from their pots or cells, being careful not to damage the roots.
6. Transplant the Seedlings: Place each seedling in a planting hole and backfill with soil. Gently firm the soil around the base of the plant.
7. Water Thoroughly: Water the newly transplanted seedlings thoroughly to help them establish their roots.
8. Mulch Around the Plants: Apply a layer of mulch around the base of the plants to help retain moisture, suppress weeds, and regulate soil temperature. I like to use straw or wood chips as mulch.
Caring for Your Bitter Melon Plants
Now that your bitter melon plants are in the ground, it’s important to provide them with the care they need to thrive. This includes regular watering, fertilizing, and pest control.
Here’s what you’ll need:
- Watering can or hose
- Balanced fertilizer (e.g., 10-10-10)
- Organic pest control solutions (e.g., neem oil, insecticidal soap)
- Gardening gloves
- Pruning shears (optional)
Step-by-Step Instructions:
1. Water Regularly: Bitter melon plants need consistent moisture, especially during hot, dry weather. Water deeply and regularly, ensuring that the soil stays moist but not waterlogged. I usually water my plants every 2-3 days, depending on the weather.
2. Fertilize Regularly: Feed your bitter melon plants with a balanced fertilizer every 2-3 weeks to promote healthy growth and fruit production. Follow the instructions on the fertilizer package for application rates. I prefer using a liquid fertilizer diluted in water.
3. Train the Vines: As the vines grow, gently train them to climb up the trellis. You can use plant ties or twine to secure the vines to the trellis.
4. Prune if Necessary: Pruning is not essential, but you can prune the vines to encourage branching and improve air circulation. Remove any dead or yellowing leaves.
5. Monitor for Pests and Diseases: Keep an eye out for common pests such as aphids, spider mites, and squash bugs. Treat infestations promptly with organic pest control solutions such as neem oil or insecticidal soap. Also, watch for signs of fungal diseases, such as powdery mildew, and treat them with appropriate fungicides. I always try to catch pests early before they become a major problem.
6. Hand Pollination (Optional): While bitter melon plants are self-pollinating, hand pollination can increase fruit set, especially in areas with low bee activity. Use a small paintbrush to transfer pollen from the male flowers to the female flowers. You can identify female flowers by the small fruit that forms behind the flower.
Harvesting Your Bitter Melon
The moment you’ve been waiting for! Harvesting your own homegrown bitter melon is incredibly rewarding.
Here’s what you’ll need:
- Gardening gloves
- Sharp knife or pruning shears
Step-by-Step Instructions:
1. Know When to Harvest: Bitter melons are typically ready to harvest about 2-3 months after planting. The fruits should be firm, green (or white, depending on the variety), and about 6-8 inches long. They will start to turn yellow or orange as they ripen, but it’s best to harvest them before they become too ripe, as they will become more bitter.
2. Harvest Carefully: Use a sharp knife or pruning shears to cut the bitter melon from the vine. Leave a small stem attached to the fruit.
3. Handle with Care: Bitter melons are delicate, so handle them with care to avoid bruising.
4. Store Properly: Store harvested bitter melons in the refrigerator for up to a week.
Enjoying Your Harvest
Now that you’ve harvested your bitter melons, it’s time to enjoy them! Bitter melon can be used in a variety of dishes, from stir-fries
Conclusion
So, there you have it! Growing bitter melon at home, while it might seem daunting initially, is an incredibly rewarding experience. You’re not just cultivating a unique and nutritious vegetable; you’re embarking on a journey of self-sufficiency and connecting with the natural world. The satisfaction of harvesting your own, organically grown bitter melon, knowing exactly where it came from and how it was nurtured, is unparalleled.
This DIY approach to growing bitter melon offers several compelling advantages. Firstly, you have complete control over the growing environment, ensuring that your plants are free from harmful pesticides and chemicals. This is particularly important for a vegetable like bitter melon, which is often consumed for its health benefits. Secondly, growing your own bitter melon allows you to select the specific variety that best suits your taste and culinary preferences. Whether you prefer a milder, less bitter variety or one with a more intense flavor, the choice is entirely yours.
Beyond the health and flavor benefits, growing bitter melon at home is also a fantastic way to reduce your carbon footprint. By sourcing your own produce, you’re minimizing the environmental impact associated with transportation and commercial farming practices. Plus, it’s a great way to get some exercise and fresh air!
Don’t be afraid to experiment with different growing techniques and variations. Try growing your bitter melon on a trellis to maximize space and improve air circulation. Consider companion planting with herbs like basil or marigolds to deter pests and attract beneficial insects. You can even try growing different varieties of bitter melon side-by-side to compare their flavors and textures.
Growing bitter melon is not just about the end product; it’s about the entire process. It’s about learning, experimenting, and connecting with nature. It’s about the joy of nurturing a plant from seed to harvest and the satisfaction of sharing your homegrown bounty with friends and family.
We wholeheartedly encourage you to give this DIY trick a try. Start small, be patient, and don’t be afraid to make mistakes. Every gardener, no matter how experienced, has faced challenges along the way. The key is to learn from your mistakes and keep experimenting.
Once you’ve harvested your first crop of homegrown bitter melon, we’d love to hear about your experience. Share your tips, tricks, and photos with us in the comments section below. Let’s create a community of passionate bitter melon growers and inspire others to embrace the joys of homegrown produce. Happy gardening!
Frequently Asked Questions (FAQ)
What is the best time of year to plant bitter melon?
Bitter melon thrives in warm weather, so the best time to plant it is during the late spring or early summer, after the last frost has passed. The soil temperature should be at least 65 degrees Fahrenheit for optimal germination. If you live in a region with a short growing season, you can start the seeds indoors 4-6 weeks before the last expected frost. This will give your plants a head start and ensure a longer harvest period.
How much sunlight does bitter melon need?
Bitter melon requires at least 6-8 hours of direct sunlight per day to thrive. Choose a planting location that receives plenty of sunlight throughout the day. If you’re growing bitter melon indoors, you may need to supplement with artificial lighting, especially during the winter months.
What type of soil is best for growing bitter melon?
Bitter melon prefers well-drained, fertile soil that is rich in organic matter. Amend your soil with compost or well-rotted manure before planting to improve its drainage and fertility. The ideal soil pH for bitter melon is between 6.0 and 7.0. You can test your soil pH using a soil testing kit and adjust it accordingly.
How often should I water bitter melon?
Bitter melon needs consistent watering, especially during hot, dry weather. Water deeply and regularly, ensuring that the soil remains moist but not waterlogged. Avoid overhead watering, as this can increase the risk of fungal diseases. Drip irrigation is an excellent way to water bitter melon, as it delivers water directly to the roots and minimizes water waste.
How do I fertilize bitter melon?
Bitter melon is a heavy feeder and benefits from regular fertilization. Apply a balanced fertilizer (e.g., 10-10-10) at planting time and then every 2-3 weeks throughout the growing season. You can also use organic fertilizers, such as compost tea or fish emulsion. Avoid over-fertilizing, as this can lead to excessive vegetative growth and reduced fruit production.
What are some common pests and diseases that affect bitter melon?
Common pests that affect bitter melon include aphids, spider mites, and squash bugs. These pests can be controlled with insecticidal soap or neem oil. Common diseases that affect bitter melon include powdery mildew and downy mildew. These diseases can be prevented by ensuring good air circulation and avoiding overhead watering. If you notice signs of disease, treat your plants with a fungicide.
How do I harvest bitter melon?
Bitter melon is typically harvested when the fruits are still green and firm, before they begin to turn yellow or orange. The exact size and color of the fruit at harvest will depend on the specific variety. Use a sharp knife or pruning shears to cut the fruit from the vine, leaving a short stem attached.
How do I store bitter melon?
Bitter melon can be stored in the refrigerator for up to a week. Wrap the fruits in plastic wrap or place them in a plastic bag to prevent them from drying out.
Is bitter melon really that bitter? How can I reduce the bitterness?
Yes, bitter melon is known for its distinctively bitter taste. However, there are several ways to reduce the bitterness. Soaking the sliced bitter melon in salted water for 30 minutes before cooking can help to draw out some of the bitterness. You can also blanch the bitter melon in boiling water for a few minutes before cooking. Another trick is to remove the white pith and seeds from the center of the fruit, as this is where most of the bitterness is concentrated.
Can I grow bitter melon in a container?
Yes, you can grow bitter melon in a container, provided that the container is large enough to accommodate the plant’s root system. Choose a container that is at least 12 inches in diameter and 12 inches deep. Use a well-draining potting mix and provide a trellis or other support for the vines to climb on. Container-grown bitter melon may require more frequent watering and fertilization than plants grown in the ground.

Leave a Comment