

Clean dirty oven tips – are you tired of staring into the abyss of your oven, a blackened landscape of burnt food and greasy residue? I know I have been! Let’s face it, oven cleaning is nobody’s favorite chore. It’s right up there with scrubbing toilets and doing taxes. But what if I told you that conquering that grime doesn’t have to involve harsh chemicals, hours of back-breaking labor, or a hazmat suit?
For generations, resourceful homemakers have passed down secrets for tackling tough cleaning tasks using simple, readily available ingredients. Think of your grandmother’s wisdom, passed down through generations, now adapted for the modern kitchen! These aren’t just cleaning hacks; they’re a testament to ingenuity and a connection to a time when resourcefulness was a way of life.
In today’s busy world, who has time to spend an entire weekend wrestling with a dirty oven? That’s where these DIY clean dirty oven tips come in. I’m going to share some of my favorite, tried-and-true methods for getting your oven sparkling clean with minimal effort and maximum impact. Not only will a clean oven improve your cooking results (no more smoky flavors!), but it will also extend the life of your appliance and create a healthier cooking environment for you and your family. So, ditch the harsh chemicals and let’s get started on transforming that oven from a greasy mess to a gleaming masterpiece!
DIY Oven Cleaning Hack: Sparkling Clean Without Harsh Chemicals
Okay, let’s face it, cleaning the oven is probably on everyone’s list of least favorite chores. But a dirty oven affects cooking performance and can even be a fire hazard! So, I’m going to share my go-to method for cleaning a seriously grimy oven using ingredients you probably already have in your pantry. This method is effective, budget-friendly, and avoids those harsh chemical fumes. Get ready to say goodbye to baked-on grease and hello to a sparkling clean oven!
What You’ll Need:
* Baking soda
* White vinegar
* Water
* Spray bottle
* Spatula or scraper
* Old cloths or sponges
* Rubber gloves (optional, but recommended)
* Small bowl
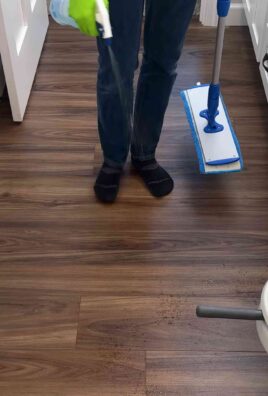
* Trash bags or newspaper (to protect your floor)
Step-by-Step Instructions:
1. Prep Your Oven: First things first, unplug your oven! Safety first, always. Remove the oven racks, pizza stone, or anything else inside. I usually soak my racks in hot, soapy water in the bathtub while I’m cleaning the oven itself. This gives them a good head start. Place trash bags or newspaper on the floor around your oven to catch any drips or spills. This will save you from extra cleanup later.
2. Create the Baking Soda Paste: In a small bowl, mix together about 1/2 cup of baking soda with enough water to form a thick, spreadable paste. The consistency should be similar to frosting. You might need to add a little more water or baking soda to get it just right.
3. Coat the Oven Interior: Now comes the fun (or not-so-fun) part! Using your hands (with gloves on, if you prefer) or a spatula, spread the baking soda paste all over the inside surfaces of your oven. This includes the back, sides, top, bottom, and even the inside of the oven door. Avoid the heating elements! I usually try to make the layer fairly thick, especially on areas with heavy grease buildup.
4. Let it Sit (and Work its Magic!): This is the most important step: patience! Let the baking soda paste sit in your oven for at least 12 hours, or even overnight. The longer it sits, the more time it has to loosen the baked-on grime. I usually do this before I go to bed so it can work its magic while I sleep.
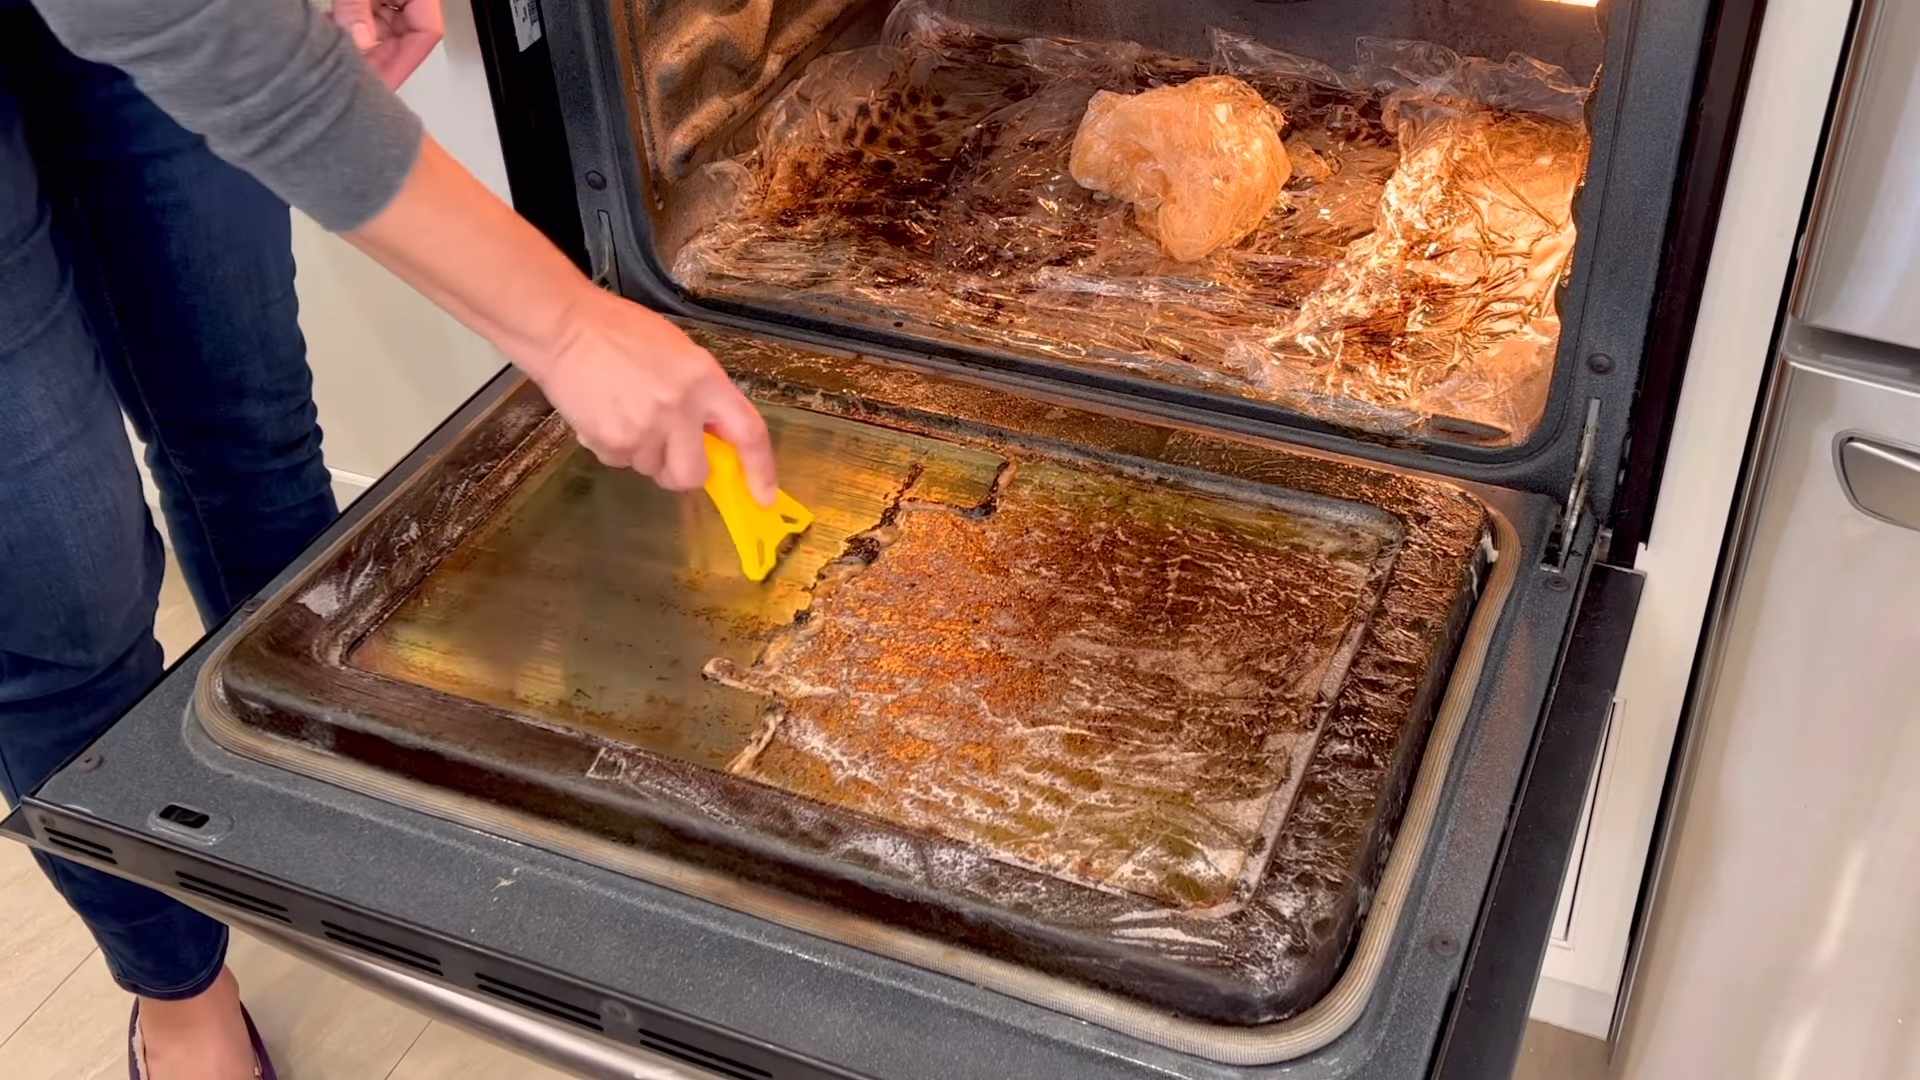
5. Wipe Away the Baking Soda: After the baking soda has had its time to work, grab your damp cloths or sponges and start wiping away the paste. You’ll probably need to use a little elbow grease, especially in those stubborn areas. A spatula or scraper can be helpful for removing thicker patches of grime. Rinse your cloths frequently in clean water.
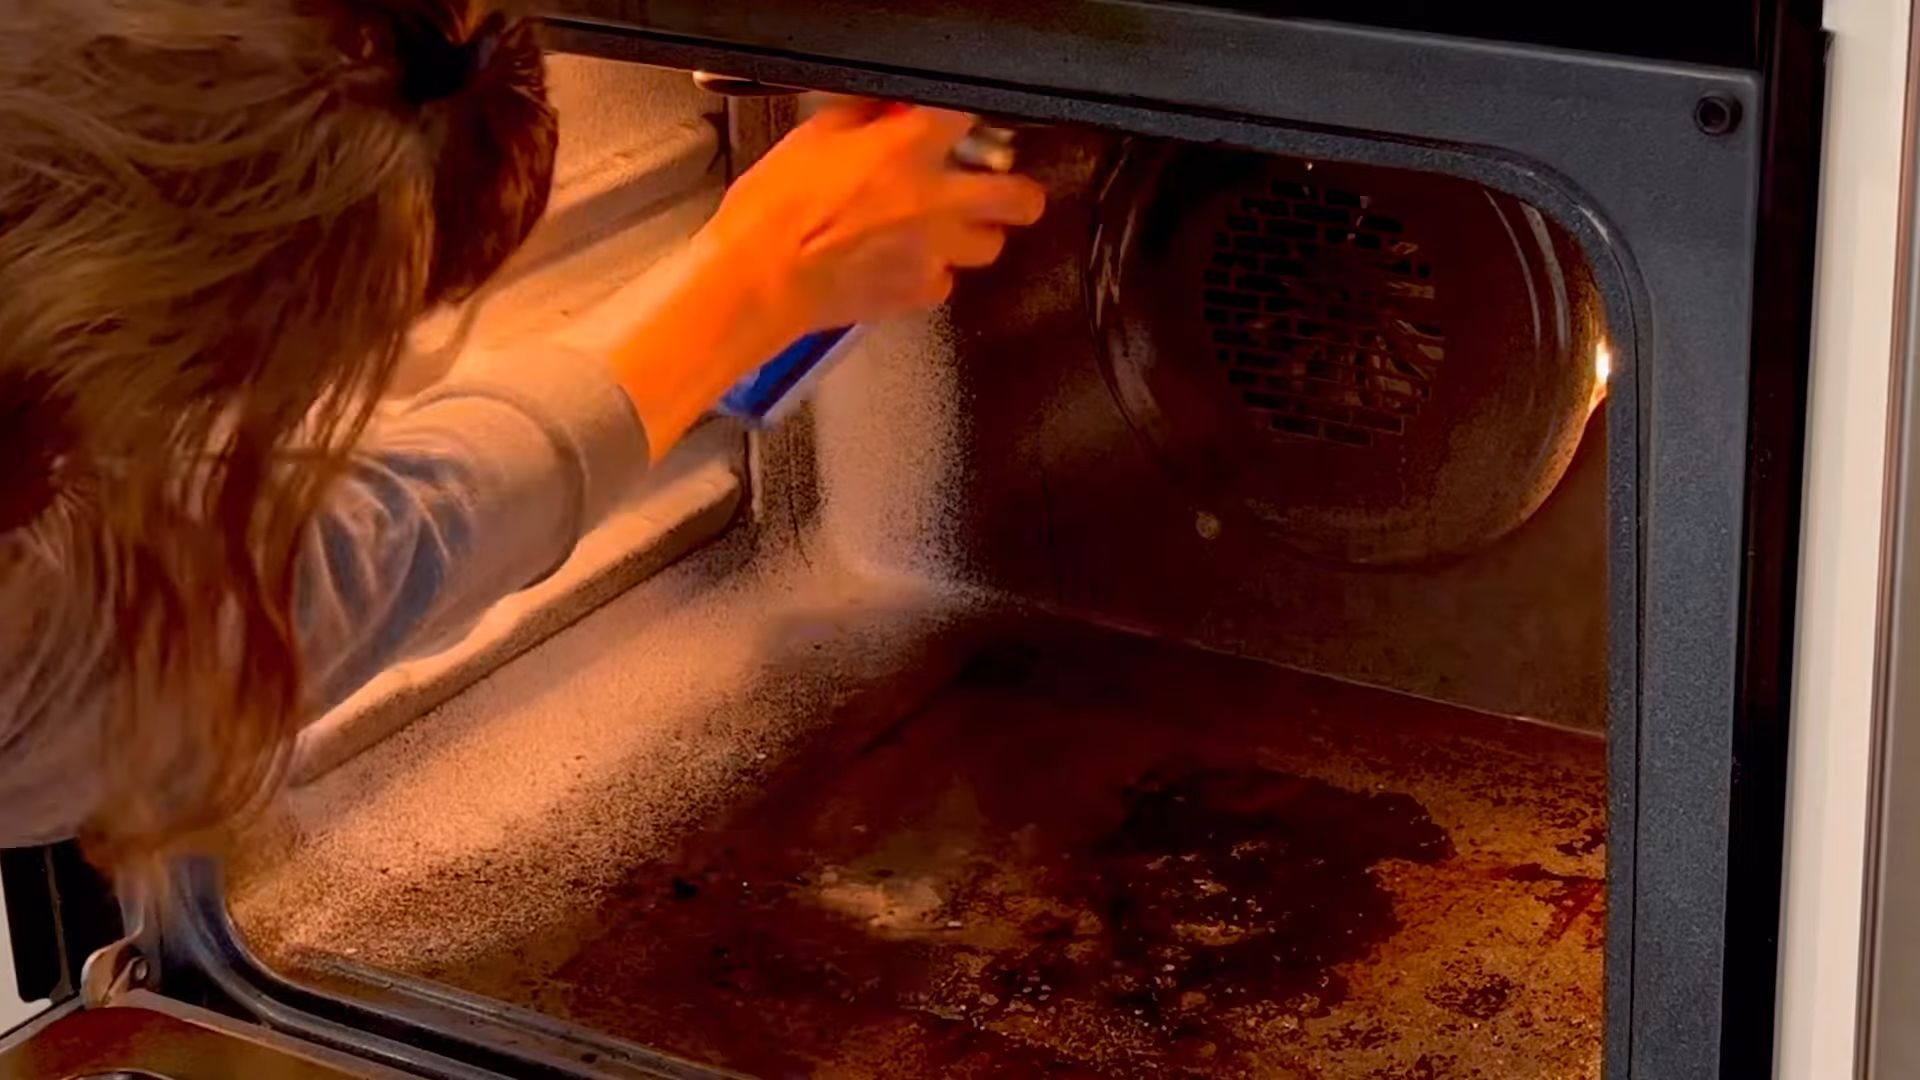
6. The Vinegar Spray: Once you’ve removed as much of the baking soda paste as possible, it’s time for the vinegar! Pour some white vinegar into a spray bottle. Spray the inside of your oven with vinegar. The vinegar will react with any remaining baking soda, creating a foamy mixture. Don’t worry, this is normal!
7. Final Wipe Down: Use clean cloths or sponges to wipe away the vinegar and any remaining residue. Again, rinse your cloths frequently. You might need to repeat this step a few times to get everything completely clean.
8. Clean the Oven Door: Don’t forget the oven door! If your oven door has a lot of baked-on grease, you can apply the baking soda paste to the inside of the door as well, let it sit, and then wipe it clean. For the outside of the door, a simple wipe down with a damp cloth and some mild dish soap usually does the trick.
9. Reassemble and Dry: Once you’re satisfied with the cleanliness of your oven, replace the oven racks (hopefully, they’re nice and clean from their bath!). Leave the oven door open for a few hours to allow the interior to air dry completely.
10. The Final Touch: Once the oven is completely dry, you can plug it back in. I like to run the oven on low heat (around 200 degrees Fahrenheit) for about 15-20 minutes to ensure that any lingering moisture evaporates. Keep an eye on it, and if you smell any lingering vinegar, let it air out a bit longer.
Dealing with Stubborn Spots:
Sometimes, you’ll encounter areas with particularly stubborn grease or baked-on food. Here are a few tips for tackling those tough spots:
* Extra Baking Soda Paste: Apply a thicker layer of baking soda paste to the stubborn area and let it sit for even longer – maybe even 24 hours.
* Vinegar Soak: Soak a cloth in white vinegar and place it directly on the stubborn spot for a few hours. This can help to loosen the grime.
* Baking Soda and Salt Scrub: For extra scrubbing power, mix baking soda with a little bit of salt to create a slightly abrasive scrub. Use this mixture sparingly and gently to avoid scratching the oven surface.
* Commercial Oven Cleaner (Use with Caution!): If all else fails, you can resort to a commercial oven cleaner. However, be sure to follow the instructions carefully and wear appropriate protective gear, such as gloves and a mask, to avoid inhaling the fumes. I always try the natural methods first before resorting to harsh chemicals.
Cleaning the Oven Racks:
As I mentioned earlier, I usually soak my oven racks in the bathtub while I’m cleaning the oven. Here’s a more detailed breakdown of how I clean them:
1. Soak in Hot, Soapy Water: Fill your bathtub (or a large utility sink) with hot water and add a generous amount of dish soap. Submerge the oven racks in the water and let them soak for at least a few hours, or even overnight.
2. Scrub Away the Grime: After soaking, use a scrub brush or sponge to scrub away the loosened grime. You might need to use a little elbow grease, especially in areas with heavy buildup.
3. Baking Soda Paste (Again!): For stubborn spots on the racks, you can apply the baking soda paste that you used for the oven interior. Let it sit for a while, and then scrub it away.
4. Rinse and Dry: Rinse the oven racks thoroughly with clean water and allow them to air dry completely before placing them back in the oven.
Preventative Measures:
The best way to avoid having to deep-clean your oven is to prevent it from getting too dirty in the first place! Here are a few tips for keeping your oven cleaner for longer:
* Use Oven Liners: Oven liners can catch drips and spills, preventing them from baking onto the bottom of your oven.
* Clean Up Spills Immediately: If something spills in your oven, clean it up as soon as possible before it has a chance to bake on.
* Regular Wipe Downs: Give your oven a quick wipe down with a damp cloth after each use to remove any splatters or spills.
* Self-Cleaning Cycle (Use Sparingly): If your oven has a self-cleaning cycle, use it sparingly. While it can be effective, it can also generate a lot of heat and fumes.
Important Considerations:
* Self-Cleaning Ovens: If you have a self-cleaning oven, consult your owner’s manual for specific instructions on how to use the self-cleaning cycle. While this DIY method is generally safe, it’s always best to follow the manufacturer’s recommendations.
* Gas Ovens: If you have a gas oven, be extra careful to avoid getting any baking soda paste or vinegar on the gas burner or pilot light.
* Ventilation: Make sure your kitchen is well-ventilated while you’re cleaning your oven. Open windows or turn on your range hood to help dissipate any fumes.
* Test in an Inconspicuous Area: Before applying the baking soda paste to the entire oven interior, test it in a small, inconspicuous area to make sure it doesn’t damage the surface.
Why This Method Works:
Baking soda is a mild alkali, which means it can help to dissolve grease and grime. When combined with water, it forms a paste that can penetrate and loosen baked-on food particles. Vinegar is a mild acid that reacts with baking soda to create a fizzing action that helps to lift away dirt and debris. Together, these two ingredients create a powerful cleaning combination that is both effective and safe for your oven.
I hope this detailed guide helps you get your oven sparkling clean without the use of harsh chemicals! It might take a little time and effort, but the results are definitely worth it. Happy cleaning!
Conclusion
So, there you have it! Ditching harsh chemicals and embracing this simple, effective DIY oven cleaning trick is a game-changer for any home cook. Not only will you save money and reduce your exposure to potentially harmful substances, but you’ll also be amazed at how easily you can restore your oven to its sparkling glory. This method is particularly effective because it leverages the power of steam and natural ingredients to loosen baked-on grime, making it a breeze to wipe away.
Why is this a must-try? Because it’s safe, affordable, and incredibly effective. Think about it: no more holding your breath while spraying toxic fumes, no more expensive specialty cleaners, and no more dreading oven cleaning day. This DIY approach transforms a dreaded chore into a manageable task.
But the beauty of this method lies in its adaptability. Feel free to experiment with variations to suit your specific needs and preferences. For instance, if you have particularly stubborn stains, you can add a few drops of essential oils like lemon or tea tree to the baking soda paste for extra cleaning power and a pleasant scent. Another variation involves using a slightly stronger vinegar solution for ovens with heavy buildup. Just remember to test a small, inconspicuous area first to ensure it doesn’t damage the oven’s surface.
Consider using a pumice stone (carefully!) for particularly stubborn baked-on messes after the initial cleaning. Make sure the oven surface is still damp and use gentle pressure to avoid scratching.
We also recommend investing in oven liners to prevent future messes from sticking in the first place. These are inexpensive and can save you a lot of cleaning time in the long run.
Ultimately, the best way to discover the full potential of this DIY oven cleaning trick is to try it yourself. We’re confident that you’ll be thrilled with the results. It’s a simple, effective, and eco-friendly way to keep your oven clean and your kitchen smelling fresh.
Don’t just take our word for it! We encourage you to give this method a try and share your experience with us. Let us know in the comments below how it worked for you, what variations you tried, and any tips you discovered along the way. Your feedback will help other readers discover the best ways to achieve a sparkling clean oven using this fantastic DIY method. We can’t wait to hear your success stories and learn from your experiences! So, grab your baking soda, vinegar, and a little elbow grease, and get ready to say goodbye to oven grime for good!
Frequently Asked Questions (FAQ)
Q: Is this DIY oven cleaning method safe for all types of ovens?
A: Generally, yes, this method is safe for most standard ovens, including electric and gas ovens. However, it’s always a good idea to check your oven’s manual for any specific cleaning instructions or warnings. For self-cleaning ovens, it’s crucial to disable the self-cleaning function before using this DIY method. The high heat of the self-cleaning cycle can react negatively with the baking soda and vinegar residue. Also, avoid getting the baking soda paste on the heating elements or gas burners. If you have a convection oven, ensure that the fan is turned off and that no baking soda residue gets into the fan mechanism. If you are unsure, test a small, inconspicuous area first to ensure there are no adverse reactions.
Q: How often should I clean my oven using this method?
A: The frequency of cleaning depends on how often you use your oven and how much it tends to get dirty. For average use, cleaning your oven every 2-3 months is usually sufficient. However, if you cook frequently or tend to have a lot of spills, you might want to clean it more often, perhaps once a month. Regular cleaning prevents buildup and makes the process much easier each time. Using oven liners can also significantly reduce the need for frequent cleaning.
Q: What if I have a self-cleaning oven? Can I still use this method?
A: Yes, you can absolutely use this method on a self-cleaning oven, but it’s crucial to disable the self-cleaning function first. As mentioned earlier, the high heat of the self-cleaning cycle can react negatively with the baking soda and vinegar residue. In fact, many people prefer this DIY method over the self-cleaning function because it’s gentler on the oven and doesn’t produce the unpleasant odors associated with the self-cleaning cycle. After cleaning with the baking soda and vinegar, be sure to thoroughly wipe away any residue before using your oven again.
Q: The baking soda paste is hard to spread. What can I do?
A: If the baking soda paste is too thick and difficult to spread, try adding a little more water, one teaspoon at a time, until you achieve a smoother, more spreadable consistency. The ideal consistency should be similar to that of a thick frosting. Avoid adding too much water, as this will make the paste too runny and less effective. You can also try warming the water slightly before mixing it with the baking soda, which can help to create a smoother paste.
Q: How do I clean the oven door glass?
A: The oven door glass can often accumulate stubborn grease and grime. For this, you can use the same baking soda paste. Apply a thin layer of the paste to the glass, let it sit for about 15-20 minutes, and then scrub gently with a non-abrasive sponge or cloth. For particularly stubborn stains, you can use a razor blade scraper (carefully!) to remove the buildup. Be sure to hold the scraper at a shallow angle to avoid scratching the glass. After scrubbing, wipe the glass clean with a damp cloth and dry it thoroughly. You can also use a glass cleaner for a streak-free finish.
Q: What if the vinegar doesn’t seem to be doing anything?
A: The vinegar reacts with the baking soda to create a fizzing action that helps to loosen the grime. If you’re not seeing much of a reaction, it could be that the baking soda paste has dried out too much. Try spraying the paste with a little more vinegar to re-activate the fizzing. Also, make sure you’re using white vinegar, as other types of vinegar may not be as effective. If the grime is particularly stubborn, you may need to repeat the vinegar spraying and wiping process several times.
Q: Can I use this method to clean my microwave?
A: While this specific method is designed for ovens, a similar principle can be applied to cleaning your microwave. You can place a microwave-safe bowl filled with a mixture of water and vinegar (equal parts) in the microwave and heat it on high for a few minutes until the mixture boils and the microwave is filled with steam. This steam will help to loosen the grime, making it easier to wipe away. Be careful when removing the bowl, as it will be hot. Wipe down the interior of the microwave with a damp cloth. You can also use a baking soda paste to scrub away any stubborn stains.
Q: What are some other natural cleaning alternatives I can use?
A: Besides baking soda and vinegar, there are several other natural cleaning alternatives you can use in your home. Lemon juice is a great natural degreaser and can be used to clean countertops, cutting boards, and even your microwave. Hydrogen peroxide is a natural disinfectant and can be used to clean bathrooms and kitchens. Castile soap is a versatile cleaner that can be used for a variety of tasks, from washing dishes to cleaning floors. Essential oils, such as tea tree, lavender, and eucalyptus, have antibacterial and antifungal properties and can be added to your cleaning solutions for extra cleaning power and a pleasant scent.
Q: How can I prevent my oven from getting so dirty in the first place?
A: Prevention is key to keeping your oven clean and reducing the need for frequent deep cleaning. Using oven liners is a great way to catch spills and prevent them from baking onto the bottom of your oven. You can also place a baking sheet on the rack below dishes that are likely to spill. When cooking messy dishes, consider covering them with foil or a lid to prevent splattering. Wiping up spills as soon as they happen will also prevent them from hardening and becoming more difficult to remove later. Finally, avoid overfilling dishes, as this increases the likelihood of spills.


Leave a Comment