

Growing Sweet Pears at Home might seem like a dream reserved for sprawling orchards, but I’m here to tell you it’s absolutely achievable, even in a small backyard or patio! Have you ever bitten into a perfectly ripe, juicy pear, the kind that bursts with flavor and melts in your mouth? Imagine harvesting those pears yourself, knowing you nurtured them from blossom to fruit. That’s the magic we’re unlocking today.
For centuries, pears have been cherished across cultures, from ancient Rome where they were a symbol of prosperity, to China where they represent immortality. Their sweet taste and versatility have made them a culinary staple, enjoyed fresh, baked into pies, or preserved for later. But beyond their deliciousness, pears offer a rewarding gardening experience.
Let’s face it, store-bought pears often lack the intense flavor and satisfying texture of homegrown varieties. Plus, knowing exactly where your food comes from and how it was grown is incredibly empowering. That’s why I’m so excited to share these simple yet effective DIY tricks and hacks that will empower you to successfully growing sweet pears at home. Whether you’re a seasoned gardener or just starting out, these tips will help you overcome common challenges and enjoy a bountiful harvest of your own delicious pears. Get ready to roll up your sleeves and transform your garden into a pear paradise!
Growing Sweet Pears at Home: A DIY Guide to Pear-adise!
Okay, pear lovers, gather ’round! I’m going to walk you through the wonderful world of growing your own sweet, juicy pears right in your backyard. It might seem daunting, but trust me, with a little patience and these easy-to-follow steps, you’ll be biting into homegrown goodness before you know it.
Choosing the Right Pear Tree
First things first, you can’t just plant any old pear tree and expect a bounty of fruit. Choosing the right variety and rootstock is crucial for success.
* Variety Selection: Consider your climate! Some pear varieties thrive in warmer regions, while others are more cold-hardy.
* European Pears (Pyrus communis): These are the classic pears you find in the grocery store, like Bartlett, Bosc, and Anjou. They generally need a bit more chill hours (periods of cold weather) to produce fruit.
* Asian Pears (Pyrus pyrifolia): These are often rounder and crisper than European pears, and they tend to be more disease-resistant. Popular varieties include Hosui, Shinseiki, and 20th Century.
* Consider Cross-Pollination: Most pear trees aren’t self-pollinating, meaning they need another pear tree nearby to produce fruit. Choose two different varieties that bloom around the same time for best results. Check with your local nursery for compatible pairings.
* Rootstock Matters: The rootstock is the base of the tree, and it affects its size, disease resistance, and overall vigor.
* Dwarf Rootstock: These rootstocks result in smaller trees, making them easier to manage and harvest. They also tend to fruit earlier.
* Semi-Dwarf Rootstock: A good compromise between size and vigor.
* Standard Rootstock: These produce full-sized trees, which can be great if you have the space, but they take longer to mature and require more pruning.
My Recommendation: If you’re a beginner, I suggest starting with a semi-dwarf Asian pear variety that’s known for its disease resistance. It’s a bit more forgiving and will give you a quicker return on your investment.
Preparing the Planting Site
Now that you’ve chosen your pear tree, it’s time to get the planting site ready. This is a crucial step, so don’t skip it!
* Sunlight: Pear trees need at least 6-8 hours of direct sunlight per day. Choose a location that gets plenty of sun throughout the growing season.
* Soil: Well-drained soil is essential. Pear trees don’t like to sit in soggy soil, as this can lead to root rot.
* Soil Testing: It’s a good idea to get your soil tested to determine its pH and nutrient levels. You can usually get a soil test kit from your local extension office or garden center.
* Amendments: Amend the soil with compost or other organic matter to improve drainage and fertility.
* Spacing: Give your pear trees plenty of room to grow. The spacing will depend on the rootstock you choose.
* Dwarf Trees: 8-10 feet apart
* Semi-Dwarf Trees: 12-15 feet apart
* Standard Trees: 20-25 feet apart
My Tip: Dig your planting hole at least twice as wide as the root ball and just as deep. This will give the roots plenty of room to spread out and establish themselves.
Planting Your Pear Tree
Alright, let’s get that pear tree in the ground!
1. Carefully Remove the Tree from its Container: Gently loosen the roots if they are circling the pot. You can use your fingers or a small tool to tease them apart.
2. Position the Tree in the Hole: Make sure the top of the root ball is level with the surrounding soil.
3. Backfill the Hole: Use the amended soil to fill in around the root ball. Gently tamp down the soil to remove any air pockets.
4. Water Thoroughly: Give the newly planted tree a good soaking to help settle the soil.
5. Mulch: Apply a layer of mulch around the base of the tree to help retain moisture, suppress weeds, and regulate soil temperature. Keep the mulch a few inches away from the trunk to prevent rot.
6. Stake the Tree (Optional): If you live in a windy area, you may want to stake the tree to provide support. Use soft ties to avoid damaging the trunk.
Important Note: When planting bare-root trees, soak the roots in water for a few hours before planting.
Caring for Your Pear Tree
Planting is just the beginning! Here’s how to keep your pear tree happy and healthy.
* Watering: Water regularly, especially during dry periods. Young trees need more frequent watering than established trees. Aim for deep, infrequent watering rather than shallow, frequent watering.
* Fertilizing: Fertilize in the spring with a balanced fertilizer. Follow the instructions on the fertilizer package. Avoid over-fertilizing, as this can lead to excessive growth and reduced fruit production.
* Pruning: Pruning is essential for shaping the tree, removing dead or diseased branches, and promoting fruit production.
* Dormant Pruning: Prune in late winter or early spring, before the tree starts to grow.
* Summer Pruning: You can also do some light pruning in the summer to remove water sprouts (vigorous, upright shoots) and improve air circulation.
* Pest and Disease Control: Pear trees can be susceptible to various pests and diseases.
* Common Pests: Aphids, pear psylla, codling moths
* Common Diseases: Fire blight, pear scab
* Prevention: Monitor your trees regularly for signs of pests or diseases. Use organic pest control methods whenever possible.
* Treatment: If you do find pests or diseases, treat them promptly with appropriate insecticides or fungicides. Consult with your local extension office for recommendations.
My Pruning Philosophy: I like to prune my pear trees to an open center shape, which allows for good air circulation and sunlight penetration. This helps to prevent diseases and promotes even fruit ripening.
Pollination: Getting Those Pears!
As I mentioned earlier, most pear trees need cross-pollination to produce fruit. Here’s what you need to know:
* Planting Two Varieties: The easiest way to ensure pollination is to plant two different pear varieties that bloom around the same time.
* Pollination Chart: Check with your local nursery or online resources for a pollination chart that shows which pear varieties are compatible.
* Pollinators: Bees are the primary pollinators of pear trees. Encourage bees to visit your garden by planting flowering plants nearby.
* Hand-Pollination (If Necessary): If you’re having trouble with pollination, you can try hand-pollinating your trees. Use a small paintbrush to transfer pollen from one flower to another.
Pollination Pro-Tip: Even if you only have room for one pear tree, you can sometimes graft a branch of a different variety onto your existing tree to provide pollination.
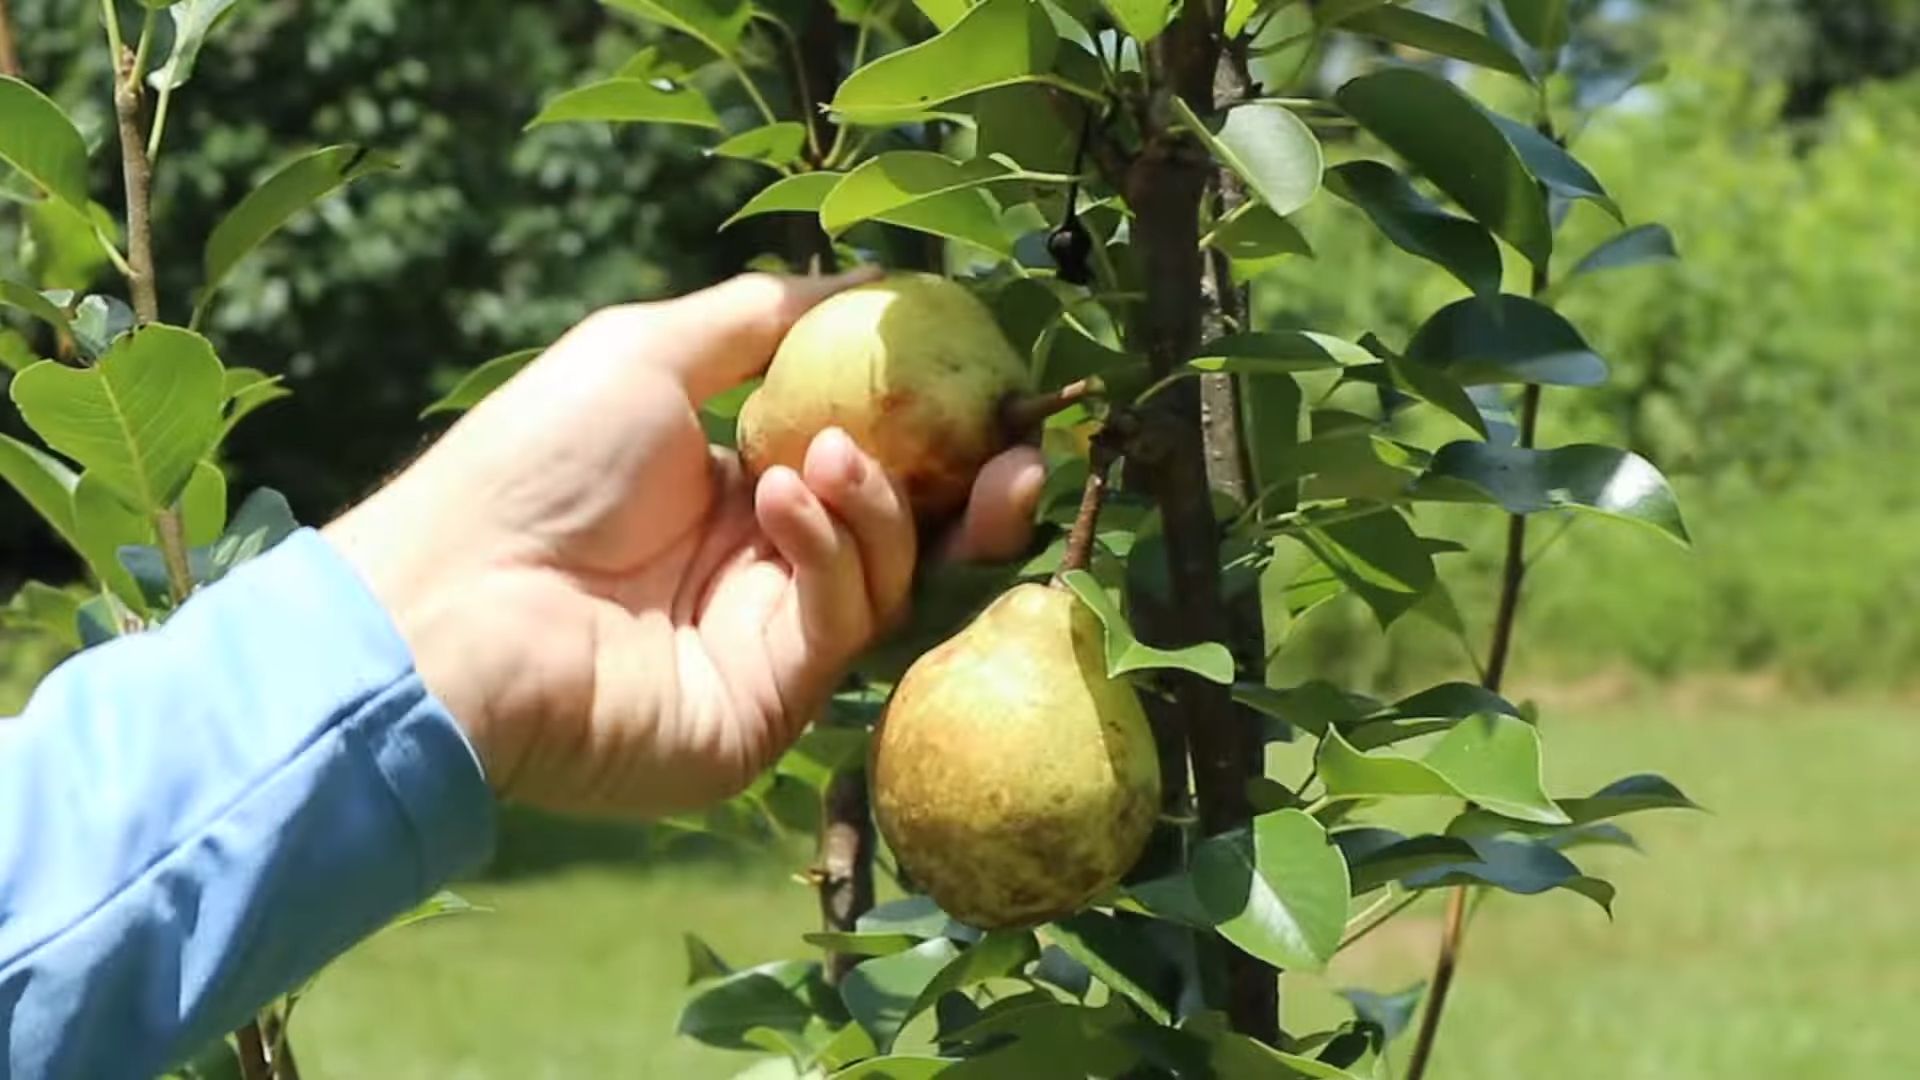
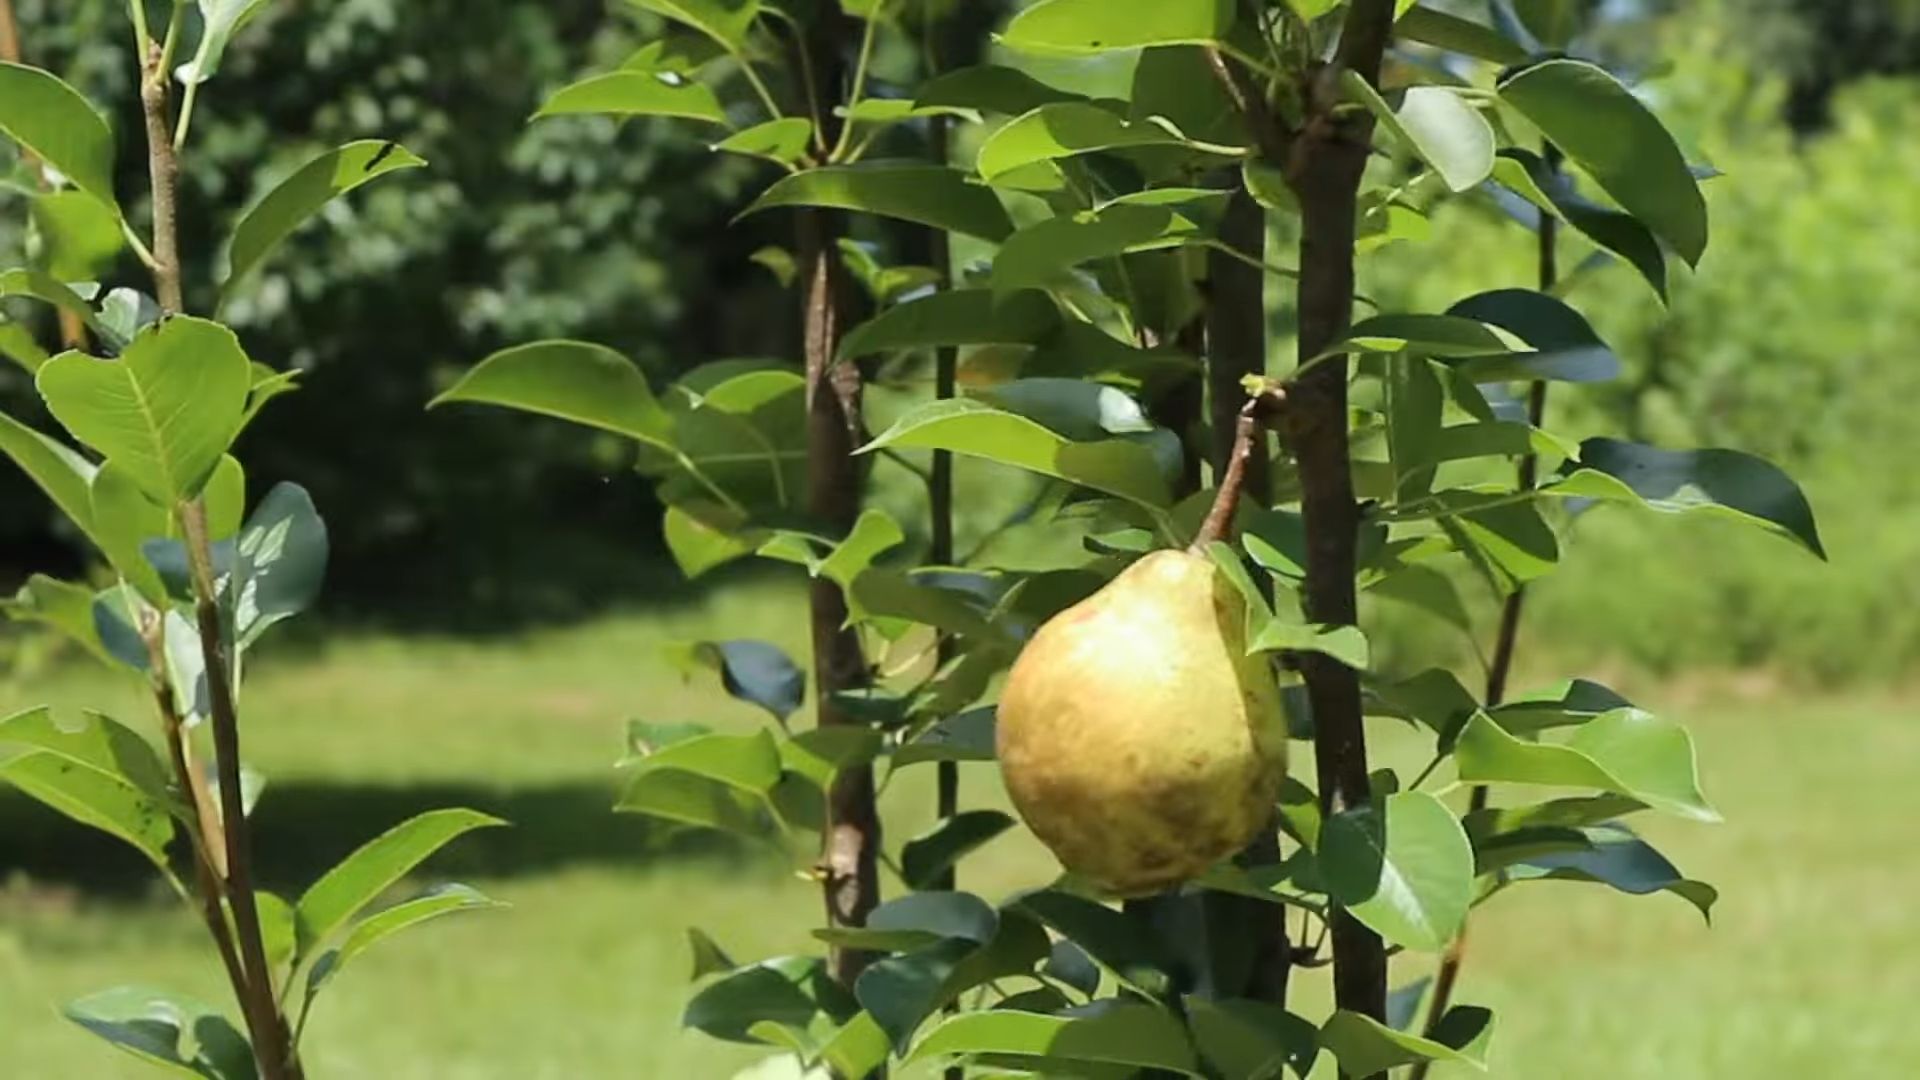
Harvesting Your Pears
The moment you’ve been waiting for! Harvesting your own homegrown pears is incredibly rewarding.
* Timing: Pears are best harvested when they are mature but still firm. They will ripen fully off the tree.
* Testing for Ripeness: Gently lift the pear and twist it. If it comes off easily, it’s ready to harvest.
* Handling: Handle pears carefully to avoid bruising.
* Ripening: Place the harvested pears in a cool, dark place to ripen. You can speed up the ripening process by placing them in a paper bag with a banana or apple.
Harvesting Secret: Pears ripen from the inside out, so don’t wait until they are completely soft on the outside. They will be mushy by then!
Dealing with Common Pear Tree Problems
Even with the best care, you might encounter some problems along the way. Here are a few common issues and how to deal with them:
* Fire Blight: This bacterial disease can cause branches to die back. Prune out infected branches well below the affected area and disinfect your pruning tools.
* Pear Scab: This fungal disease causes dark spots on the leaves and fruit. Apply a fungicide in the spring to prevent infection.
* Codling Moths: These pests lay eggs on the fruit, and the larvae burrow inside. Use pheromone traps to monitor for codling moths and apply an insecticide if necessary.
* Aphids: These small insects suck sap from the leaves, causing them to curl and distort. Spray with insecticidal soap or neem oil
Conclusion
So, there you have it! Growing sweet pears at home, while it might seem daunting at first, is an incredibly rewarding experience that brings the taste of orchard-fresh fruit right to your backyard. We’ve covered everything from selecting the right pear variety for your climate and space, to the essential steps of planting, pruning, and protecting your precious pear trees from pests and diseases.
But why is this DIY trick a must-try? Simply put, the flavor of a homegrown pear, ripened on the tree and picked at its peak, is unlike anything you can find in a grocery store. The sweetness is more intense, the texture is more succulent, and the overall experience is simply unmatched. Plus, you have complete control over the growing process, ensuring that your pears are free from harmful chemicals and pesticides. You’re not just growing fruit; you’re cultivating a healthier, more sustainable lifestyle.
Beyond the unparalleled flavor, growing your own pears offers a unique connection to nature. Watching your trees blossom in the spring, nurturing the developing fruit throughout the summer, and finally harvesting your bounty in the fall is a deeply satisfying process. It’s a chance to slow down, appreciate the natural world, and connect with the seasons.
And the possibilities don’t end there! Feel free to experiment with different pear varieties to find your personal favorites. Consider espaliering your pear tree against a wall or fence to save space and create a beautiful focal point in your garden. You can also explore different pruning techniques to maximize fruit production and maintain the health of your tree.
For those with limited space, consider dwarf or semi-dwarf pear varieties, which are well-suited for container gardening. Just be sure to choose a large, sturdy pot with good drainage and provide adequate support for the tree as it grows. You can even try grafting different pear varieties onto a single tree to create a “fruit salad tree” with a diverse selection of pears.
Don’t be afraid to get your hands dirty and embrace the challenges that come with growing your own fruit. Remember, even experienced gardeners face setbacks from time to time. The key is to learn from your mistakes, adapt your approach, and never give up on your dream of harvesting sweet, juicy pears from your own backyard.
We wholeheartedly encourage you to give this DIY trick a try. Start small, be patient, and enjoy the journey. And most importantly, don’t forget to share your experiences with us! We’d love to hear about your successes, your challenges, and any tips or tricks you’ve discovered along the way. Share your photos, your stories, and your questions in the comments below. Let’s build a community of pear-growing enthusiasts and help each other cultivate the sweetest, most delicious pears imaginable. Growing sweet pears at home is an adventure worth embarking on!
Frequently Asked Questions (FAQs)
What is the best time of year to plant a pear tree?
The best time to plant a pear tree is typically in the early spring or late fall, when the tree is dormant. This allows the tree to establish its roots before the heat of summer or the cold of winter sets in. If you live in an area with mild winters, fall planting is often preferred, as it gives the tree more time to develop its root system before the growing season begins. However, if you live in an area with harsh winters, spring planting may be a better option, as it allows the tree to recover from the transplant shock before facing the challenges of winter.
How much sunlight does a pear tree need?
Pear trees need at least 6-8 hours of direct sunlight per day to thrive and produce fruit. Choose a planting location that receives full sun throughout the day. If your tree is shaded for part of the day, it may not produce as much fruit, and the fruit that it does produce may not be as sweet or flavorful.
How often should I water my pear tree?
Water your pear tree deeply and regularly, especially during the first year after planting. Aim to water the tree deeply once or twice a week, depending on the weather conditions and the soil type. The soil should be moist but not waterlogged. As the tree matures, you can reduce the frequency of watering, but be sure to provide supplemental water during periods of drought. A good rule of thumb is to water when the top inch of soil feels dry to the touch.
What kind of fertilizer should I use for my pear tree?
Pear trees benefit from regular fertilization, especially during the growing season. Use a balanced fertilizer that is specifically formulated for fruit trees. Apply the fertilizer in the spring, just before the tree begins to bloom. Follow the instructions on the fertilizer package carefully, and avoid over-fertilizing, as this can damage the tree. You can also amend the soil with compost or other organic matter to improve its fertility and drainage.
How do I prune my pear tree?
Pruning is essential for maintaining the health and productivity of your pear tree. Prune your tree in the late winter or early spring, before the buds begin to swell. Remove any dead, damaged, or diseased branches. Also, prune to open up the canopy of the tree, allowing sunlight to penetrate to the interior branches. This will improve air circulation and reduce the risk of disease. When pruning, make clean cuts at a 45-degree angle, just above a bud or branch.
How do I protect my pear tree from pests and diseases?
Pear trees are susceptible to a variety of pests and diseases, including aphids, pear psylla, fire blight, and scab. Monitor your tree regularly for signs of infestation or disease. If you detect any problems, take action immediately to control the pests or diseases. You can use organic pesticides or fungicides to treat your tree, or you can try cultural control methods, such as removing infected branches or improving air circulation.
How long does it take for a pear tree to produce fruit?
It typically takes 3-5 years for a pear tree to begin producing fruit. The exact time will depend on the variety of pear, the age of the tree when it was planted, and the growing conditions. Be patient, and continue to care for your tree properly, and you will eventually be rewarded with a bountiful harvest of sweet, juicy pears.
Do I need to plant more than one pear tree for pollination?
Most pear varieties require cross-pollination to produce fruit. This means that you need to plant at least two different pear varieties that are compatible with each other. Check with your local nursery to determine which pear varieties are good pollinators for each other. If you only have room for one pear tree, you can consider grafting a branch of a different variety onto your tree to provide cross-pollination.
How do I know when my pears are ripe?
Pears are best harvested when they are mature but not fully ripe. To test for ripeness, gently lift the pear and twist it slightly. If the pear comes off the tree easily, it is ready to be harvested. The color of the pear may also change slightly as it ripens, but this will vary depending on the variety. Once harvested, pears will continue to ripen at room temperature.
Can I grow pear trees in containers?
Yes, you can grow pear trees in containers, especially dwarf or semi-dwarf varieties. Choose a large, sturdy pot with good drainage. Use a well-draining potting mix that is specifically formulated for fruit trees. Water the tree regularly, and fertilize it as needed. Container-grown pear trees may need to be protected from frost in colder climates.
Leave a Comment