

Growing Shallots Backyard can seem daunting, but trust me, it’s one of the most rewarding experiences a home gardener can have! Imagine stepping outside your back door and harvesting fresh, flavorful shallots to elevate your cooking. No more bland dishes – just vibrant, aromatic goodness straight from your garden.
Shallots, with their delicate onion-garlic flavor, have been cultivated for centuries, tracing their roots back to Central and Southeast Asia. They’ve been prized in various cuisines for their unique taste and versatility. From French sauces to Asian stir-fries, shallots add a depth of flavor that’s simply unmatched.
But why should you consider growing shallots in your backyard? Well, for starters, store-bought shallots can be expensive and sometimes lack the freshness you desire. Plus, growing shallots backyard allows you to control the entire process, ensuring you’re using organic methods and avoiding harmful pesticides. This DIY guide will provide you with simple, effective tricks and hacks to cultivate a thriving shallot patch, even if you’re a complete beginner. I’ll show you how to choose the right varieties, prepare your soil, and protect your precious shallots from pests and diseases. Get ready to unlock the secrets to a bountiful shallot harvest – your taste buds (and your wallet) will thank you!
Growing Shallots: A Beginner’s Guide to Bountiful Backyard Harvests
Hey there, fellow garden enthusiasts! I’m so excited to share my experience and knowledge on growing shallots in your backyard. Shallots, with their delicate onion-garlic flavor, are a fantastic addition to any culinary garden. They’re relatively easy to grow, and the satisfaction of harvesting your own homegrown shallots is truly rewarding. Let’s dive into the wonderful world of shallot cultivation!
Choosing the Right Shallots and Location
Before we get our hands dirty, let’s talk about selecting the right shallots and finding the perfect spot in your backyard.
* Shallot Varieties: There are several shallot varieties to choose from, each with its own unique flavor profile and characteristics. Some popular choices include ‘French Red,’ ‘Dutch Yellow,’ and ‘Gray Griselle.’ I personally love ‘French Red’ for its robust flavor and beautiful color. Experiment to find your favorite!
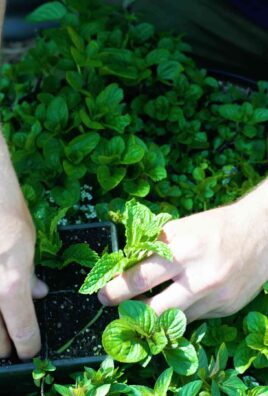
* Starting from Sets vs. Seeds: You can grow shallots from sets (small, immature bulbs) or from seeds. I highly recommend starting with sets, especially for beginners. They’re much easier to handle and establish quickly. Seeds require more patience and attention.
* Sunlight Requirements: Shallots thrive in full sun, meaning they need at least 6-8 hours of direct sunlight per day. Choose a location in your backyard that receives ample sunlight throughout the day.
* Soil Preparation: Well-drained soil is crucial for shallot growth. They don’t like soggy conditions. Amend your soil with compost or well-rotted manure to improve drainage and fertility. A slightly acidic to neutral pH (6.0-7.0) is ideal.
* Spacing: Give your shallots enough room to grow. Plant sets about 6-8 inches apart in rows that are 12-18 inches apart. This allows for proper air circulation and prevents overcrowding.
Planting Your Shallots: A Step-by-Step Guide
Now for the fun part – planting! Follow these steps for a successful shallot planting experience:
1. Prepare the Soil: Loosen the soil in your chosen planting area with a garden fork or tiller. Remove any rocks, weeds, or debris. Incorporate compost or well-rotted manure into the soil to improve its fertility and drainage. I usually add a generous amount – about 2-3 inches worked into the top 6-8 inches of soil.
2. Create Planting Holes: Dig small holes, about 2-3 inches deep, at the recommended spacing (6-8 inches apart).
3. Plant the Sets: Place a shallot set in each hole, pointy end facing up. Gently cover the set with soil, leaving the very tip of the bulb exposed. Don’t bury the entire bulb, as this can hinder growth.
4. Water Thoroughly: After planting, water the shallots thoroughly to settle the soil and provide moisture.
5. Mulch (Optional): Apply a layer of mulch around the shallots to help retain moisture, suppress weeds, and regulate soil temperature. Straw, shredded leaves, or wood chips work well. I find that mulching makes a huge difference in weed control.
Caring for Your Shallots: Watering, Fertilizing, and Pest Control
Once your shallots are planted, it’s important to provide them with proper care to ensure a healthy and abundant harvest.
* Watering: Shallots need consistent moisture, especially during dry periods. Water deeply whenever the top inch of soil feels dry to the touch. Avoid overwatering, as this can lead to bulb rot. I usually water every 2-3 days, depending on the weather.
* Fertilizing: Shallots are not heavy feeders, but they benefit from a light feeding of fertilizer during the growing season. Use a balanced fertilizer (e.g., 10-10-10) or a fertilizer specifically formulated for onions and garlic. Apply the fertilizer according to the package instructions. I prefer using a slow-release fertilizer to avoid burning the plants.
* Weed Control: Keep the area around your shallots free of weeds. Weeds compete with shallots for nutrients and water. Hand-pull weeds regularly or use a hoe to cultivate the soil. Mulching also helps to suppress weed growth.
* Pest and Disease Control: Shallots are generally resistant to pests and diseases, but they can occasionally be affected by onion maggots, thrips, or fungal diseases. Inspect your plants regularly for any signs of problems. If you notice any pests or diseases, take action promptly.
* Onion Maggots: These pests can damage the roots of shallots. Use row covers to prevent adult flies from laying eggs near your plants.
* Thrips: These tiny insects can suck the sap from shallot leaves. Spray plants with insecticidal soap or neem oil to control thrips.
* Fungal Diseases: Fungal diseases, such as downy mildew and botrytis blight, can cause leaf spots and bulb rot. Improve air circulation around your plants and avoid overhead watering to prevent fungal diseases. If necessary, use a fungicide to control the spread of disease.
Harvesting Your Shallots: When and How
The moment we’ve all been waiting for – harvesting! Knowing when and how to harvest your shallots is crucial for getting the best flavor and storage life.
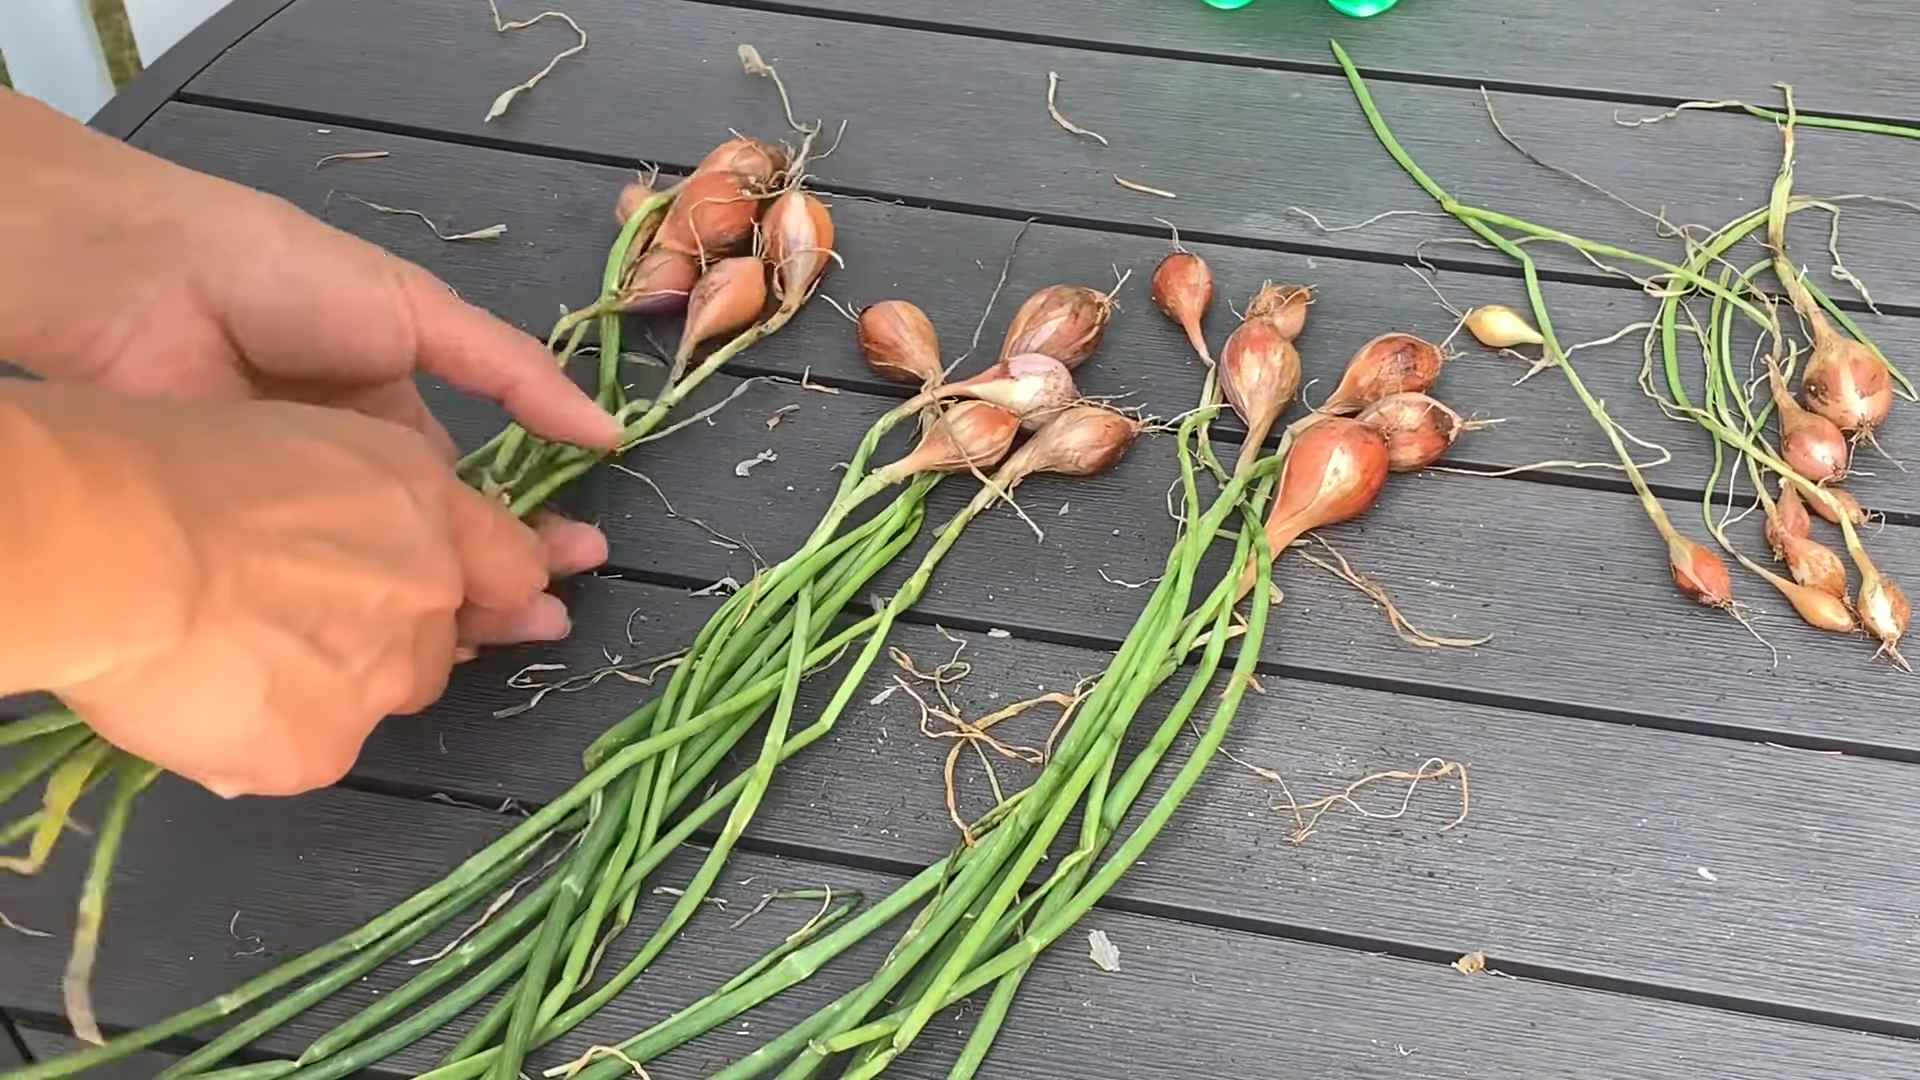
* When to Harvest: Shallots are typically ready to harvest in late summer or early fall, about 90-120 days after planting. The leaves will start to turn yellow and brown, and the bulbs will begin to emerge from the soil. This is a sign that it’s time to harvest.
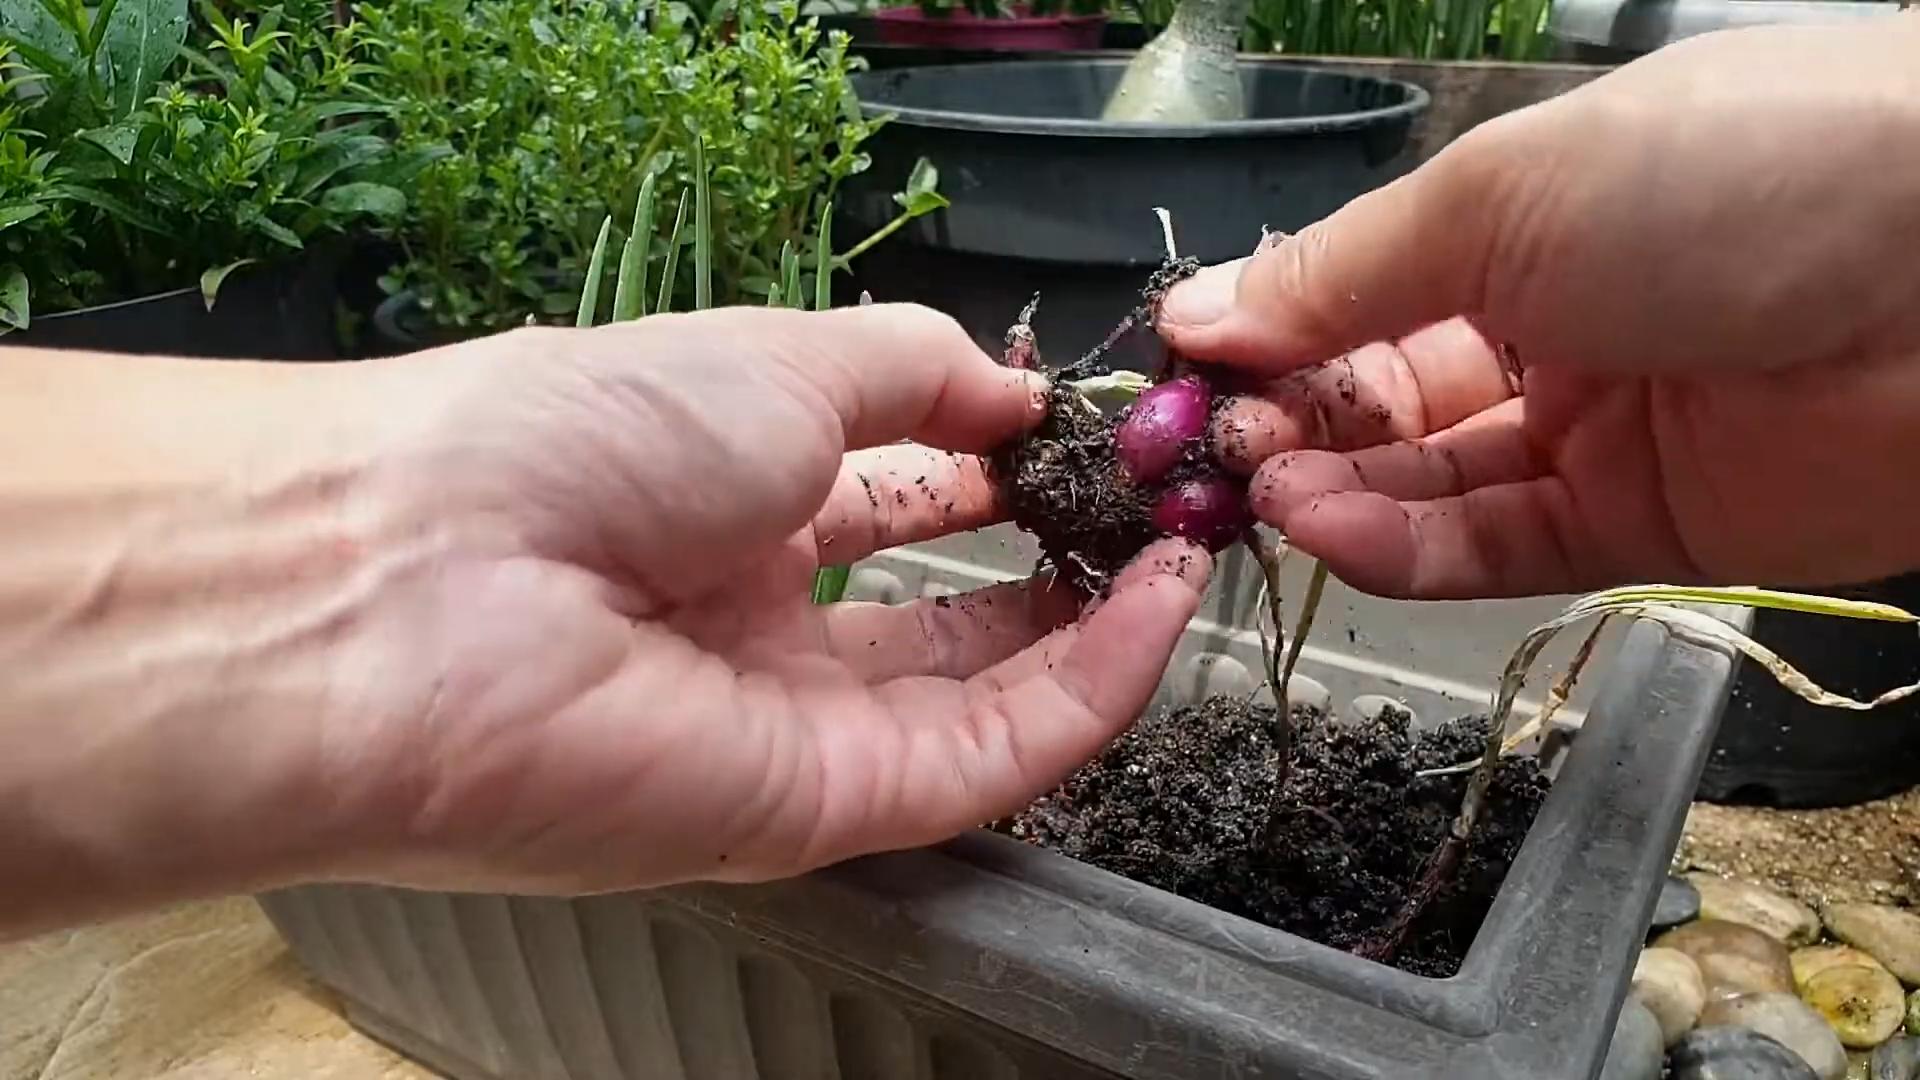
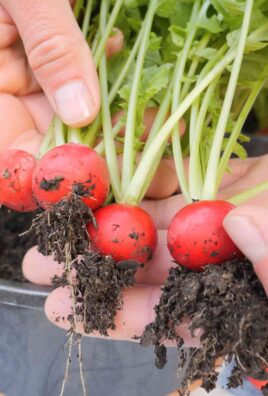
* How to Harvest: Gently loosen the soil around the shallots with a garden fork or trowel. Carefully lift the bulbs from the soil, being careful not to damage them.
* Curing: After harvesting, cure the shallots in a warm, dry, and well-ventilated place for 2-3 weeks. This allows the outer layers of the bulbs to dry and harden, which helps to prevent rot during storage. I usually cure mine in my garage, spread out on a wire rack.
* Storing: Store cured shallots in a cool, dry, and dark place, such as a pantry or basement. They should last for several months if stored properly. Avoid storing them in the refrigerator, as this can cause them to sprout. I like to braid the dried leaves together and hang them in my pantry.
Troubleshooting Common Shallot Growing Problems
Even with the best care, you might encounter some challenges while growing shallots. Here are some common problems and how to address them:
* Yellowing Leaves: Yellowing leaves can be caused by several factors, including nutrient deficiencies, overwatering, or pests. Check the soil moisture and nutrient levels, and inspect your plants for pests.
* Small Bulbs: Small bulbs can be caused by overcrowding, poor soil fertility, or insufficient sunlight. Thin out your plants if they are too close together, fertilize the soil, and ensure that your shallots are getting enough sunlight.
* Bulb Rot: Bulb rot is a fungal disease that can cause shallots to rot in the ground. Avoid overwatering and improve air circulation around your plants to prevent bulb rot.
* Bolting: Bolting is when shallots send up a flower stalk prematurely. This can be caused by stress, such as extreme temperatures or drought. Remove the flower stalk as soon as you see it to prevent the plant from putting its energy into seed production instead of bulb growth.
Enjoying Your Homegrown Shallots
Congratulations! You’ve successfully grown your own shallots. Now it’s time to enjoy the fruits (or rather, bulbs) of your labor. Shallots can be used in a variety of culinary applications, from soups and stews to sauces and salads. Their delicate flavor adds a unique touch to any dish.
Here are a few of my favorite ways to use homegrown shallots:
* Shallot Vinaigrette: A simple and delicious vinaigrette made with minced shallots, olive oil, vinegar, and herbs.
* Caramelized Shallots: Slow-cooked shallots that are sweet and savory. Perfect as a topping for burgers, pizzas, or roasted vegetables.
* French Onion Soup: A classic soup made with caramelized onions and shallots.
* Shallot Butter: A flavorful butter infused with minced shallots and herbs. Great for spreading on bread or topping grilled meats.
Growing shallots is a rewarding experience that anyone can enjoy. With a little bit of planning and care, you can harvest a bountiful crop of these delicious bulbs from your own backyard. Happy gardening!
Conclusion
So, there you have it! Growing shallots in your backyard, even if you’re a complete beginner, is not only achievable but incredibly rewarding. We’ve walked you through the simple steps, from choosing the right shallot sets to harvesting your flavorful bounty. But why should you bother with this DIY project when you can simply buy shallots at the grocery store? The answer lies in the unparalleled freshness and flavor you’ll experience with homegrown shallots. Imagine the rich, nuanced taste elevating your favorite dishes, knowing you nurtured them from the ground up. That’s a satisfaction you simply can’t buy.
Beyond the superior flavor, growing your own shallots offers a connection to nature and a sense of accomplishment. It’s a sustainable practice that reduces your reliance on commercially grown produce, often transported long distances. Plus, you have complete control over the growing process, ensuring your shallots are free from harmful pesticides and chemicals.
But the fun doesn’t stop there! Feel free to experiment with different shallot varieties. Some are known for their mild sweetness, while others pack a more pungent punch. Try growing French Grey shallots for their delicate flavor or Dutch Yellow shallots for their robust taste. You can also explore different planting methods. While we focused on planting sets, you can also grow shallots from seed, although it requires a longer growing season.
Consider companion planting to further enhance your shallot garden. Carrots, beets, and chamomile are excellent companions that can deter pests and improve soil health. And don’t forget to save some of your harvested shallots to plant next year, creating a continuous cycle of homegrown goodness.
Ready to embark on your shallot-growing adventure? We wholeheartedly encourage you to give it a try. It’s a simple, satisfying, and delicious way to connect with nature and elevate your culinary creations. Don’t be afraid to get your hands dirty and experiment. Every garden is unique, and the best way to learn is by doing.
Once you’ve harvested your first batch of homegrown shallots, we’d love to hear about your experience! Share your tips, tricks, and triumphs in the comments below. Let’s build a community of backyard shallot growers and inspire others to discover the joys of homegrown food. Happy gardening!
Frequently Asked Questions (FAQ)
What are shallots, and why should I grow them?
Shallots are a member of the onion family, known for their mild, sweet flavor and delicate texture. They are a culinary staple in many cuisines and can be used in a variety of dishes, from sauces and soups to salads and stir-fries. Growing your own shallots allows you to enjoy superior flavor and freshness compared to store-bought varieties. You also have control over the growing process, ensuring your shallots are free from harmful chemicals. Plus, it’s a fun and rewarding gardening experience!
When is the best time to plant shallots?
The best time to plant shallots depends on your climate. In general, you can plant shallots in the fall (September-November) for a summer harvest or in the early spring (February-April) for a fall harvest. Fall planting is ideal in regions with mild winters, as it allows the shallots to establish roots before the ground freezes. Spring planting is better suited for colder climates where the ground freezes solid during the winter months. Check your local gardening calendar for specific planting dates in your area.
How do I choose the right shallot sets for planting?
When selecting shallot sets, look for firm, healthy bulbs that are free from blemishes or signs of rot. Choose sets that are appropriate for your climate and growing conditions. Consider the flavor profile you prefer – some shallot varieties are sweeter, while others are more pungent. Local nurseries and garden centers are excellent resources for finding shallot sets that are well-suited to your region.
What kind of soil do shallots need?
Shallots thrive in well-drained soil that is rich in organic matter. Amend your soil with compost or well-rotted manure before planting to improve its fertility and drainage. Shallots prefer a slightly acidic to neutral soil pH (around 6.0 to 7.0). You can test your soil pH with a home testing kit or by sending a sample to your local agricultural extension office.
How much sunlight do shallots need?
Shallots need at least 6 hours of direct sunlight per day to thrive. Choose a planting location that receives plenty of sunlight throughout the growing season. If you live in a particularly hot climate, some afternoon shade may be beneficial to prevent the shallots from scorching.
How often should I water shallots?
Water shallots regularly, especially during dry periods. Keep the soil consistently moist but not waterlogged. Avoid overhead watering, as this can promote fungal diseases. Instead, water at the base of the plants. Mulching around the shallots can help retain moisture and suppress weeds.
How do I fertilize shallots?
Shallots benefit from regular fertilization throughout the growing season. Apply a balanced fertilizer (such as 10-10-10) at planting time and then side-dress with a nitrogen-rich fertilizer every few weeks. Avoid over-fertilizing, as this can lead to excessive foliage growth at the expense of bulb development.
What are some common pests and diseases that affect shallots?
Common pests that affect shallots include onion maggots, thrips, and aphids. Diseases that can affect shallots include downy mildew, white rot, and botrytis leaf blight. Practice good garden hygiene to prevent pest and disease problems. Rotate your crops regularly, remove any infected plants promptly, and consider using organic pest control methods if necessary.
How do I know when my shallots are ready to harvest?
Shallots are typically ready to harvest when the tops begin to yellow and fall over. This usually occurs in late summer or early fall. Gently lift the shallots from the soil with a garden fork. Cure the shallots by allowing them to dry in a warm, well-ventilated place for a week or two. Once cured, store the shallots in a cool, dry place.
Can I grow shallots in containers?
Yes, you can grow shallots in containers. Choose a container that is at least 8 inches deep and wide. Use a well-draining potting mix and provide the shallots with plenty of sunlight and water. Container-grown shallots may require more frequent fertilization than those grown in the ground.
Can I save shallots from my harvest to plant next year?
Absolutely! Select the largest and healthiest shallots from your harvest to save for planting next year. Store them in a cool, dry place until planting time. This is a great way to create a continuous cycle of homegrown shallots.

Leave a Comment