

Wood Heat Stain Removal: Has your beautiful wooden furniture fallen victim to unsightly white rings left by hot mugs or dishes? Don’t despair! Before you resign yourself to living with those blemishes, or worse, shelling out for expensive refinishing, I’m here to tell you that you can tackle those heat stains yourself with some simple DIY tricks.
For generations, wood has been a cherished material in our homes, bringing warmth and natural beauty to our living spaces. From handcrafted furniture passed down through families to the intricate woodwork in historic homes, wood holds a special place in our hearts. But let’s face it, wood and heat aren’t always the best of friends. Those dreaded white rings, caused by moisture trapped beneath the finish, can seem like a permanent mark of carelessness.
But here’s the good news: you don’t need to be a professional to restore your wood’s natural beauty. This article is packed with easy-to-follow DIY solutions for wood heat stain removal. I’ll guide you through proven methods using common household items, saving you time, money, and the heartache of damaged furniture. Learn how to banish those heat stains and keep your wood looking its best for years to come! So, let’s get started and reclaim the beauty of your wooden treasures!
DIY Wood Heat Stain Removal: Revive Your Furniture!
Hey there, fellow DIY enthusiasts! Have you ever set a hot mug or pan down on your beautiful wood furniture and cringed as you saw that dreaded white heat stain appear? Don’t panic! I’ve been there, and I’m here to tell you that you can often remove those pesky stains yourself without resorting to expensive professional refinishing. This guide will walk you through several methods, starting with the gentlest and working our way up to more assertive techniques. Let’s get started!
Understanding Heat Stains
Before we dive in, it’s important to understand what’s actually happening when you get a heat stain. That white ring isn’t actually a burn. It’s moisture trapped *underneath* the finish. The heat causes the finish to cloud up, creating that opaque white appearance. Our goal is to draw that moisture back out.
Method 1: The Ironing Board Trick (Gentle Heat)
This is usually my first go-to method because it’s relatively gentle and often effective for fresh, light stains.
Materials You’ll Need:
* Clean, soft cloth (an old t-shirt works great)
* Iron (dry, no steam!)
* Water (optional, for a slightly damp cloth)
Step-by-Step Instructions:
1. Prepare the Surface: Make sure the area you’re working on is clean and dry. Wipe away any dust or debris with a clean, dry cloth.
2. Position the Cloth: Lay the clean cloth directly over the heat stain. Make sure it completely covers the affected area.
3. Ironing Time: Set your iron to a low to medium setting. Make sure the steam function is OFF! We don’t want to add more moisture.
4. Gentle Ironing: Gently press the iron onto the cloth and move it in a circular motion. Don’t leave the iron in one spot for too long, as you could damage the finish.
5. Check Progress: Lift the cloth every few seconds to check if the stain is disappearing. You should see it gradually fading.
6. Repeat as Needed: If the stain is still visible, repeat steps 4 and 5. You can try slightly increasing the heat of the iron, but be cautious!
7. Slightly Damp Cloth (Optional): If the dry cloth isn’t working, you can try *very slightly* dampening the cloth. Wring it out thoroughly so it’s barely damp. The added moisture can sometimes help draw out the trapped moisture. Repeat the ironing process as described above.
8. Buff the Area: Once the stain is gone (or significantly reduced), remove the cloth and buff the area with a clean, dry cloth to restore the shine.
Method 2: The Hair Dryer Approach (Another Gentle Option)
Similar to the ironing method, this uses gentle heat to coax the moisture out.
Materials You’ll Need:
* Hair dryer
* Clean, soft cloth
Step-by-Step Instructions:
1. Clean the Area: As always, start with a clean and dry surface.
2. Apply Heat: Set your hair dryer to a medium heat setting. Hold it a few inches away from the stain and move it back and forth.
3. Monitor Progress: Keep an eye on the stain. You should see it gradually lighten.
4. Wipe Away Moisture: As the moisture is drawn out, wipe the area with a clean, soft cloth.
5. Repeat if Necessary: Repeat the process until the stain is gone or significantly reduced.
6. Buff to Shine: Finish by buffing the area with a clean, dry cloth.
Method 3: Mayonnaise (Believe It or Not!)
This might sound crazy, but mayonnaise contains oils that can help to rehydrate the finish and draw out the trapped moisture.
Materials You’ll Need:
* Mayonnaise (full-fat is best)
* Clean, soft cloth
* Spatula or spoon (optional)
Step-by-Step Instructions:
1. Apply the Mayonnaise: Generously apply a thick layer of mayonnaise directly onto the heat stain. You can use a spatula or spoon to spread it evenly.
2. Let it Sit: Let the mayonnaise sit on the stain for at least a few hours, or even overnight. The longer it sits, the better chance it has of working.
3. Wipe Away the Mayonnaise: After the waiting period, wipe away the mayonnaise with a clean, soft cloth.
4. Buff the Area: Buff the area with a clean, dry cloth to remove any remaining residue and restore the shine.
5. Repeat if Needed: If the stain is still visible, repeat the process.
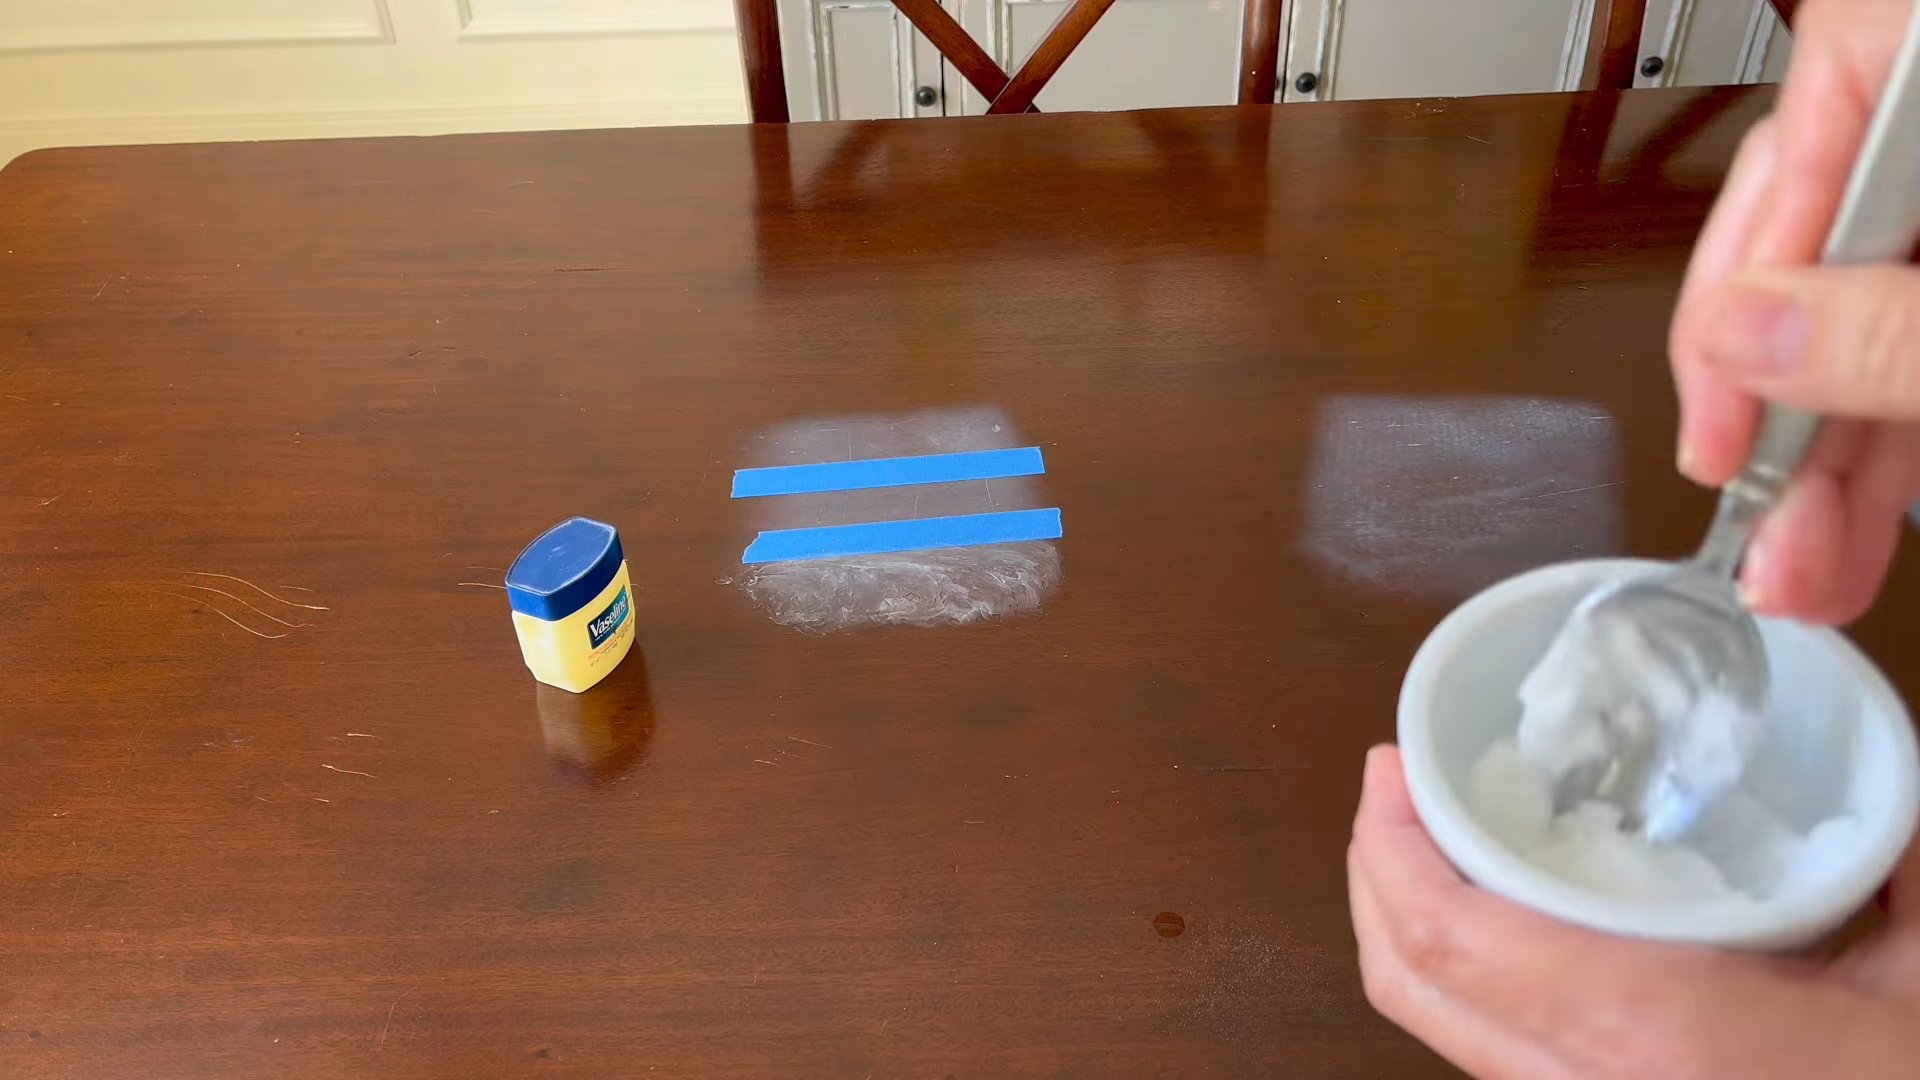
Method 4: Petroleum Jelly (Another Oily Solution)
Similar to mayonnaise, petroleum jelly can help rehydrate the finish.
Materials You’ll Need:
* Petroleum jelly (Vaseline)
* Clean, soft cloth
Step-by-Step Instructions:
1. Apply Petroleum Jelly: Apply a generous amount of petroleum jelly to the heat stain.
2. Let it Sit: Let it sit overnight.
3. Wipe and Buff: Wipe away the petroleum jelly with a clean cloth and then buff the area until the residue is gone and the shine is restored.
4. Repeat if Needed: Repeat the process if the stain persists.
Method 5: Toothpaste (Mild Abrasive)
This method uses a mild abrasive to gently buff away the stain. Use this method with caution, as it can potentially scratch the finish. Test it in an inconspicuous area first!
Materials You’ll Need:
* Non-gel toothpaste (plain white toothpaste)
* Clean, soft cloth
* Damp cloth
Step-by-Step Instructions:
1. Apply Toothpaste: Apply a small amount of toothpaste to the heat stain.
2. Gently Rub: Gently rub the toothpaste into the stain in a circular motion. Use very light pressure.
3. Wipe Away Toothpaste: Wipe away the toothpaste with a damp cloth.
4. Dry and Buff: Dry the area with a clean, soft cloth and then buff to restore the shine.
5. Inspect for Scratches: Carefully inspect the area for any scratches. If you see scratches, stop using this method.
6. Repeat with Caution: If the stain is still visible and you didn’t notice any scratches, you can repeat the process with even lighter pressure.
Method 6: Steel Wool and Oil (For More Stubborn Stains)
This is a more aggressive method and should be used as a last resort. It can definitely damage the finish if you’re not careful. Test in an inconspicuous area first!
Materials You’ll Need:
* 0000-grade steel wool (very fine)
* Mineral oil or lemon oil
* Clean, soft cloth
Step-by-Step Instructions:
1. Apply Oil: Apply a small amount of mineral oil or lemon oil to the steel wool.
2. Gently Rub: Gently rub the steel wool over the heat stain in the direction of the wood grain. Use very light pressure.
3. Wipe Away Residue: Wipe away the residue with a clean, soft cloth.
4. Buff to Shine: Buff the area with a clean, dry cloth to restore the shine.
5. Inspect Carefully: Carefully inspect the area for any damage to the finish.
6. Repeat Sparingly: If the stain is still visible, repeat the process with even lighter pressure. Be extremely cautious!
Important Considerations and Tips:
* Test in an Inconspicuous Area: Before trying any of these methods, test them in a hidden area of the furniture (like underneath a table leaf or on the back of a leg) to make sure they don’t damage the finish.
* Start Gentle: Always start with the gentlest method and work your way up to more aggressive techniques only if necessary.
* Patience is Key: Removing heat stains can take time and patience. Don’t get discouraged if the stain doesn’t disappear immediately.
* Prevention is Best: The best way to deal with heat stains is to prevent them in the first place. Always use coasters, trivets, or placemats to protect your wood furniture from heat and moisture.
* Type of Finish Matters: The type of finish on your furniture can affect how easily heat stains are removed. Lacquer finishes are generally more delicate than polyurethane finishes.
* Old vs. New Stains: Fresh heat stains are usually easier to remove than old ones.
* When to Call a Professional:
Conclusion
So, there you have it! Removing wood heat stains doesn’t have to be a daunting task involving harsh chemicals or expensive professional services. This simple, DIY trick offers a cost-effective and surprisingly efficient solution to restore the natural beauty of your wood surfaces. We’ve walked you through the process, highlighting the ease and accessibility of the required materials – things you likely already have in your pantry!
The beauty of this method lies not only in its effectiveness but also in its gentle approach. Unlike abrasive cleaners that can damage the wood’s finish, this technique works to lift the stain without compromising the integrity of the surface. This is particularly important for antique furniture or cherished wooden items where preserving the original character is paramount.
But don’t just take our word for it! We strongly encourage you to give this DIY wood heat stain removal method a try. You might be amazed at the results. Imagine transforming a heat-stained tabletop back to its former glory, or rescuing a beloved wooden coaster from unsightly rings. The satisfaction of achieving professional-looking results with minimal effort is truly rewarding.
And remember, there’s always room for experimentation and adaptation. For instance, if you’re dealing with a particularly stubborn stain, you could try increasing the concentration of the vinegar or letting the paste sit for a longer period. For delicate wood finishes, test the solution on an inconspicuous area first to ensure compatibility. You could also try adding a few drops of essential oil, like lemon or orange, to the paste for a pleasant scent.
Beyond the basic method, consider these variations:
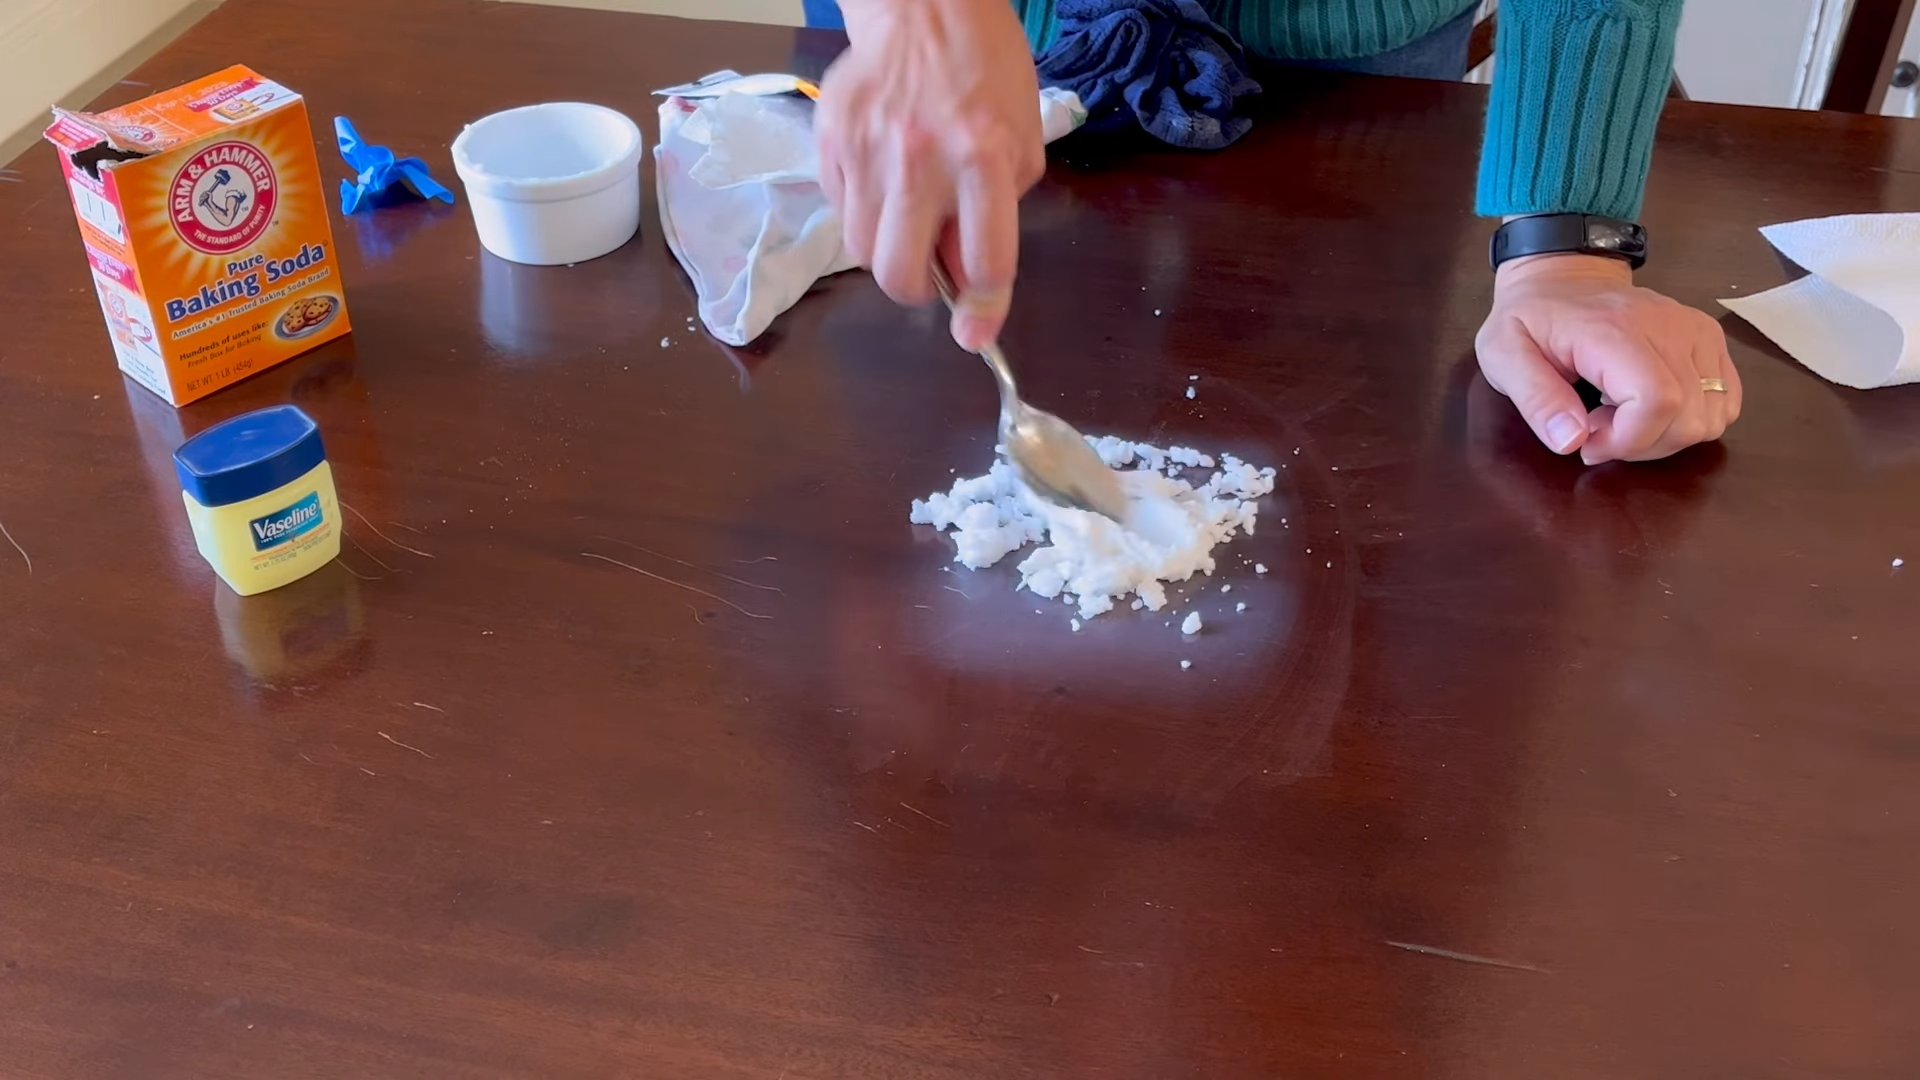
* For lighter stains: A simple paste of baking soda and water might suffice. Apply, let sit for a few minutes, and gently wipe away.
* For darker stains: You can try adding a small amount of hydrogen peroxide to the baking soda and vinegar paste. However, use this with caution and always test on an hidden area first, as hydrogen peroxide can have a bleaching effect.
* Preventative measures: Once you’ve successfully removed the stain, protect your wood surfaces with coasters, placemats, and heat-resistant pads to prevent future damage. Regular dusting and polishing will also help maintain their beauty.
Ultimately, the best way to discover the full potential of this DIY trick is to experience it firsthand. We’re confident that you’ll be pleased with the results. More importantly, we’d love to hear about your experiences! Share your before-and-after photos, tips, and variations in the comments section below. Your insights could help other readers tackle their own wood heat stain challenges and rediscover the beauty of their wooden treasures. Let’s build a community of DIY enthusiasts who are passionate about restoring and preserving the natural elegance of wood! So go ahead, give it a try and let us know how this DIY wood heat stain removal worked for you!
Frequently Asked Questions (FAQ)
What exactly causes wood heat stains?
Wood heat stains are typically caused by the heat from hot objects, like mugs, plates, or even laptops, reacting with the finish on the wood surface. This heat can cause moisture to become trapped beneath the finish, leading to a cloudy or white discoloration. The severity of the stain depends on the temperature of the object, the duration of contact, and the type of finish on the wood. Some finishes are more susceptible to heat damage than others.
Will this DIY method work on all types of wood?
While this method is generally safe for most types of wood, it’s always best to test it on an inconspicuous area first. Different types of wood have varying levels of porosity and react differently to cleaning solutions. Hardwoods like oak and maple are generally more durable, while softwoods like pine may require more gentle treatment. Antique furniture with delicate finishes should be handled with extra care. If you’re unsure about the type of wood or finish, consult a professional before proceeding.
How long should I leave the paste on the stain?
The duration depends on the severity of the stain. For lighter stains, 15-30 minutes may be sufficient. For more stubborn stains, you can leave the paste on for up to an hour or even longer. However, it’s crucial to monitor the area closely and check for any adverse reactions. If you notice any discoloration or damage, remove the paste immediately.
What if the stain doesn’t come out completely after the first attempt?
Don’t be discouraged! Some stains may require multiple applications. Repeat the process, allowing the paste to sit for a longer period each time. You can also try slightly increasing the concentration of the vinegar or adding a small amount of hydrogen peroxide (with caution and after testing). If the stain persists after several attempts, it may be deeply embedded in the wood, and you might need to consider professional refinishing.
Can I use a hairdryer to speed up the process?
While it might seem tempting to use a hairdryer to accelerate the drying process, it’s generally not recommended. Excessive heat can potentially damage the wood finish or cause the stain to set further. It’s best to allow the paste to dry naturally at room temperature.
What type of vinegar should I use?
White distilled vinegar is the most effective and readily available option for this DIY method. Avoid using other types of vinegar, such as apple cider vinegar or balsamic vinegar, as they may contain pigments that could stain the wood.
Is baking soda abrasive? Will it scratch my wood?
Baking soda is a mild abrasive, but when used with water or vinegar to form a paste, it’s generally safe for most wood surfaces. However, it’s still important to use a soft cloth and gentle circular motions when applying and removing the paste. Avoid scrubbing aggressively, as this could potentially scratch the finish.
How can I prevent wood heat stains in the future?
Prevention is always better than cure! Use coasters, placemats, and heat-resistant pads under hot objects to protect your wood surfaces. Avoid placing hot items directly on wood furniture. Regular dusting and polishing will also help maintain the finish and prevent stains from setting in. Consider using a furniture polish that contains UV protection to prevent fading and discoloration from sunlight.
What if I accidentally damage the wood finish while trying to remove the stain?
If you accidentally damage the wood finish, don’t panic! Depending on the extent of the damage, you may be able to repair it yourself with a touch-up kit or furniture repair marker. For more significant damage, it’s best to consult a professional furniture restorer.
Where can I find the materials needed for this DIY trick?
The materials needed for this DIY trick – baking soda, white distilled vinegar, water, and a soft cloth – are readily available at most grocery stores and household supply stores. You likely already have them in your pantry!


Leave a Comment