

Cleaning overlooked household items – it’s probably not the most glamorous topic, but trust me, it’s one of the most satisfying! How many times have you looked around your home and thought, “Everything *looks* clean,” only to realize later that you’ve completely missed some key areas? I know I’ve been there!
Think about it: We diligently scrub our countertops and vacuum our floors, but what about the remote control that everyone touches daily? Or the light switches that accumulate fingerprints like a magnet? These often-forgotten spots are breeding grounds for germs and grime, impacting not only the cleanliness of your home but also your health. Historically, maintaining a clean home has been a cornerstone of well-being across cultures, reflecting a sense of order and promoting hygiene. While our ancestors might have used different methods, the underlying principle remains the same: a clean environment contributes to a healthier and happier life.
That’s why I’m so excited to share these simple yet effective DIY tricks and hacks for cleaning overlooked household items. This isn’t just about aesthetics; it’s about creating a truly clean and healthy living space for you and your loved ones. These easy-to-follow tips will help you tackle those hidden dirt traps and breathe new life into your home, one overlooked item at a time. Get ready to be amazed at how much fresher and cleaner your home feels after addressing these often-neglected areas!
DIY Deep Clean: Overlooked Household Items You’re Forgetting to Clean (and How to Do It!)
Okay, let’s be honest. We all have those household items that we *know* we should clean, but they just keep getting pushed to the bottom of the to-do list. Well, no more! Today, we’re tackling those forgotten grime magnets and giving them the TLC they deserve. I’m going to walk you through cleaning some of the most commonly overlooked items in your home, step-by-step. Get ready to feel the satisfaction of a truly clean house!
Cleaning Your Washing Machine (Yes, It Needs Cleaning!)
It might seem counterintuitive, but your washing machine needs regular cleaning. Think about it: it’s constantly dealing with dirt, detergent residue, and hard water. Over time, this can lead to mold, mildew, and a funky smell. Here’s how to give your washing machine a deep clean:
* Frequency: Aim to clean your washing machine every month or two, depending on how often you use it.
* What You’ll Need: White vinegar, baking soda, a clean cloth or sponge, and an old toothbrush.
Step-by-Step Instructions:
1. Empty the Washing Machine: Make sure there are no clothes inside. Obvious, I know, but worth mentioning!
2. Clean the Dispenser: Remove the detergent and fabric softener dispensers (if removable). Rinse them thoroughly with warm water to remove any built-up residue. Use an old toothbrush to scrub away any stubborn gunk. Let them air dry completely before putting them back.
3. Run a Hot Water Cycle with Vinegar: Pour 2 cups of white vinegar directly into the washing machine drum. Set the machine to the hottest water setting and the largest load size. Run a complete cycle. This will help to loosen any grime and kill bacteria.
4. Baking Soda Power: After the vinegar cycle is complete, sprinkle about ½ cup of baking soda into the drum. Run another hot water cycle. The baking soda will help to deodorize the machine and further break down any remaining residue.
5. Clean the Rubber Gasket (Front Loaders): This is where mold and mildew love to hide! Carefully peel back the rubber gasket around the door. Use a cloth or sponge dampened with a mixture of equal parts white vinegar and water to wipe away any visible mold or grime. Pay close attention to the folds and crevices. For stubborn mold, you can let the vinegar solution sit for a few minutes before wiping it away.
6. Wipe Down the Exterior: Use a damp cloth to wipe down the exterior of the washing machine, including the control panel and any other surfaces.
7. Leave the Door Ajar: After cleaning, leave the washing machine door ajar to allow it to air dry completely. This will help to prevent mold and mildew from growing back.
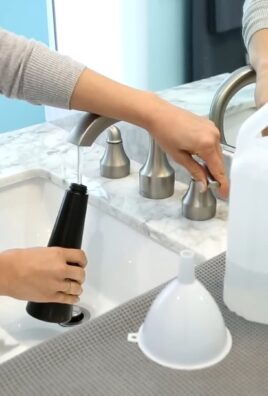
Tackling Your Dishwasher
Just like your washing machine, your dishwasher needs regular cleaning to function properly and prevent unpleasant odors. Food particles, grease, and hard water can build up over time, reducing its cleaning power.
* Frequency: Clean your dishwasher every month.
* What You’ll Need: White vinegar, baking soda, a dishwasher-safe cup, and an old toothbrush.
Step-by-Step Instructions:
1. Empty the Dishwasher: Make sure there are no dishes inside.
2. Clean the Filter: Locate the dishwasher filter (usually at the bottom of the dishwasher). Remove it and rinse it thoroughly under warm water. Use an old toothbrush to scrub away any food particles or debris. Make sure the filter is completely clean before putting it back.
3. Vinegar Steam Clean: Place a dishwasher-safe cup filled with 1 cup of white vinegar on the top rack of the dishwasher. Run a hot water cycle. The vinegar will help to dissolve grease, remove hard water stains, and deodorize the dishwasher.
4. Baking Soda Freshen Up: After the vinegar cycle is complete, sprinkle about 1 cup of baking soda on the bottom of the dishwasher. Let it sit overnight.
5. Final Rinse: In the morning, run a short hot water cycle to rinse away the baking soda.
6. Wipe Down the Door and Seals: Use a damp cloth to wipe down the dishwasher door, including the edges and seals. Pay attention to any areas where food particles or grime may have accumulated.
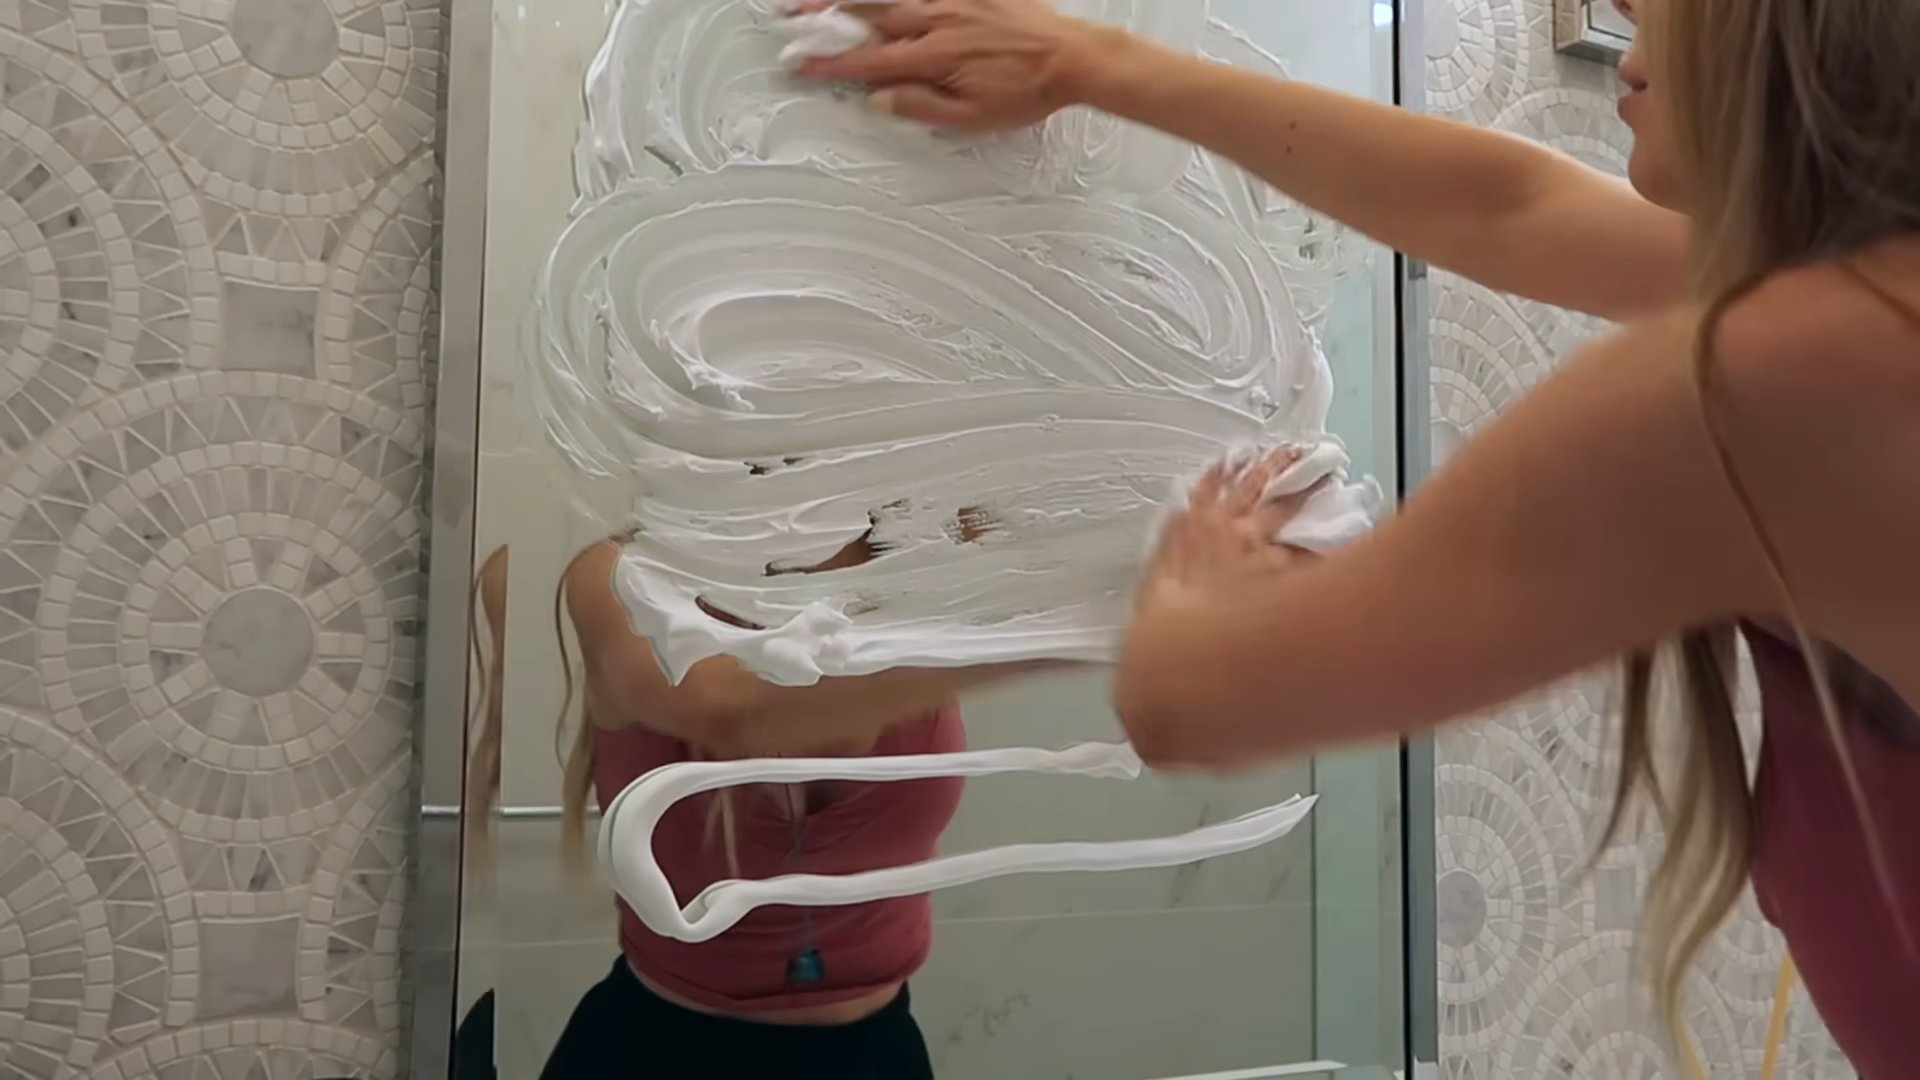
Cleaning Your Showerhead
Hard water deposits can clog your showerhead, reducing water pressure and affecting the spray pattern. Here’s how to restore your showerhead to its former glory:
* Frequency: Clean your showerhead every 3-6 months, depending on the hardness of your water.
* What You’ll Need: White vinegar, a plastic bag, a rubber band or twist tie, and an old toothbrush.
Step-by-Step Instructions:
1. Fill the Bag with Vinegar: Pour enough white vinegar into the plastic bag to completely submerge the showerhead.
2. Secure the Bag: Attach the bag to the showerhead using a rubber band or twist tie. Make sure the showerhead is fully immersed in the vinegar.
3. Soak Overnight: Let the showerhead soak in the vinegar overnight. This will allow the vinegar to dissolve the mineral deposits.
4. Remove and Rinse: In the morning, remove the bag and discard the vinegar. Rinse the showerhead thoroughly with warm water.
5. Scrub Away Stubborn Deposits: Use an old toothbrush to scrub away any remaining mineral deposits. Pay attention to the spray nozzles.
6. Run the Shower: Turn on the shower and let the water run for a few minutes to flush out any remaining vinegar and debris.
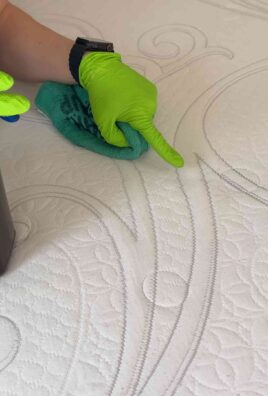
Don’t Forget Your Mattress!
We spend a significant portion of our lives sleeping on our mattresses, so it’s important to keep them clean and fresh. Dust mites, dead skin cells, and other allergens can accumulate over time, affecting our sleep quality and overall health.
* Frequency: Clean your mattress every 6 months.
* What You’ll Need: Vacuum cleaner with upholstery attachment, baking soda, a clean cloth, and a spray bottle filled with a mixture of equal parts water and white vinegar (optional).
Step-by-Step Instructions:
1. Strip the Bed: Remove all bedding, including sheets, blankets, and pillows. Wash them in hot water to kill any dust mites.
2. Vacuum the Mattress: Use the upholstery attachment of your vacuum cleaner to thoroughly vacuum the entire mattress surface, including the sides and seams. Pay attention to any areas where dust or debris may have accumulated.
3. Deodorize with Baking Soda: Sprinkle a generous layer of baking soda over the entire mattress surface. Let it sit for at least 30 minutes, or even better, for a few hours. The baking soda will absorb odors and moisture.
4. Vacuum Again: After the baking soda has sat for the desired amount of time, vacuum it up thoroughly.
5. Spot Clean (Optional): If you have any stains on your mattress, you can spot clean them with a mixture of equal parts water and white vinegar. Spray the solution onto a clean cloth and gently blot the stain. Avoid saturating the mattress.
6. Air Dry: Allow the mattress to air dry completely before putting on clean bedding. You can speed up the drying process by opening windows or using a fan.
Cleaning Your Remote Controls
Think about how often you touch your remote controls – and then think about how often you clean them. They’re a breeding ground for germs!
* Frequency: Clean your remote controls weekly.
* What You’ll Need: Disinfecting wipes or a microfiber cloth dampened with rubbing alcohol, cotton swabs.
Step-by-Step Instructions:
1. Remove the Batteries: This is important for safety!
2. Wipe Down the Surface: Use a disinfecting wipe or a microfiber cloth dampened with rubbing alcohol to thoroughly wipe down the entire surface of the remote control, including the buttons.
3. Clean Between the Buttons: Use a cotton swab dampened with rubbing alcohol to clean between the buttons. This will help to remove any dirt or grime that may have accumulated.
4. Dry Thoroughly: Allow the remote control to air dry completely before replacing the batteries.
Cleaning Your Computer Keyboard
Just like remote controls, computer keyboards are magnets for germs and debris. Crumbs, dust, and oil can accumulate between the keys, making them sticky and difficult to use.
* Frequency: Clean your keyboard weekly.
* What You’ll Need: Canned air, disinfecting wipes or a microfiber cloth dampened with rubbing alcohol, cotton swabs.
Step-by-Step Instructions:
1. Turn Off and Unplug: Turn off your computer and unplug the keyboard.
2. Blast Away Debris: Use canned air to blast away any loose debris from between the keys. Hold the can at
Conclusion
So, there you have it! Mastering the art of cleaning those often-overlooked household items doesn’t have to be a daunting task. By incorporating these simple yet effective DIY tricks into your cleaning routine, you’ll not only extend the lifespan of your belongings but also create a healthier and more pleasant living environment. Think about it: a cleaner home is a happier home, and a happier home starts with paying attention to the details.
This isn’t just about ticking off items on a cleaning checklist; it’s about investing in the longevity and hygiene of your space. From the humble toothbrush holder to the often-neglected showerhead, these items harbor hidden grime and bacteria that can impact your well-being. By taking the time to address these areas, you’re actively contributing to a cleaner, healthier, and more comfortable home for yourself and your family.
One of the best things about these DIY cleaning solutions is their versatility. Feel free to experiment with variations to suit your specific needs and preferences. For instance, if you’re sensitive to vinegar, you can substitute it with lemon juice for a gentler cleaning solution. Or, if you prefer a more fragrant approach, add a few drops of your favorite essential oil to the cleaning mixture. The possibilities are endless!
Remember, consistency is key. Incorporating these DIY cleaning tricks into your regular routine will prevent buildup and make the cleaning process much easier in the long run. Set aside a few minutes each week to tackle these often-overlooked areas, and you’ll be amazed at the difference it makes.
We strongly encourage you to try these DIY cleaning tricks and experience the benefits firsthand. Not only will you be saving money on expensive cleaning products, but you’ll also be using natural and eco-friendly solutions that are better for your health and the environment.
Don’t just take our word for it – give it a try! We’re confident that you’ll be impressed with the results. And most importantly, we want to hear about your experience. Share your tips, tricks, and variations in the comments below. Let’s create a community of clean-home enthusiasts and inspire each other to maintain a healthy and happy living space. Let us know which of these **DIY cleaning** methods worked best for you, or if you have any other overlooked items you’d like us to cover in a future article. Your feedback is invaluable!
Frequently Asked Questions (FAQs)
Why is it so important to clean these often-overlooked household items?
It’s crucial to clean these items because they often harbor bacteria, mold, and grime that can negatively impact your health and the overall cleanliness of your home. These items are frequently touched or exposed to moisture, creating a breeding ground for unwanted microorganisms. Regular cleaning prevents the buildup of these contaminants, contributing to a healthier and more hygienic living environment. Furthermore, cleaning these items extends their lifespan and prevents them from becoming unsightly or malfunctioning.
How often should I be cleaning these overlooked items?
The frequency of cleaning depends on the item and how often it’s used. For items like toothbrush holders and kitchen sponges, daily or every-other-day cleaning is recommended to prevent bacterial growth. Showerheads, coffee makers, and washing machines should be cleaned monthly or quarterly to remove mineral buildup and prevent mold. Other items, like remote controls and light switches, can be cleaned weekly or bi-weekly. Establishing a regular cleaning schedule will help you stay on top of things and prevent buildup.
What are some natural alternatives to harsh chemical cleaners?
Many effective natural alternatives can be used to clean these items. Vinegar is a powerful disinfectant and deodorizer that can be used to clean showerheads, coffee makers, and washing machines. Baking soda is a gentle abrasive that can be used to scrub surfaces and remove stains. Lemon juice is a natural degreaser and disinfectant that can be used to clean cutting boards and other kitchen items. Essential oils, such as tea tree oil and lavender oil, have antibacterial and antifungal properties and can be added to cleaning solutions for an extra boost.
Can I use these DIY cleaning methods on all types of materials?
It’s important to consider the material of the item you’re cleaning before using any DIY cleaning method. For delicate materials like wood or leather, use gentle cleaning solutions and avoid harsh abrasives. Test the cleaning solution on a small, inconspicuous area first to ensure it doesn’t damage the material. For porous materials like grout, use a stiff brush to scrub away dirt and grime. Always follow the manufacturer’s instructions for cleaning specific items.
What if I don’t have vinegar or baking soda on hand? What are some other options?
If you don’t have vinegar or baking soda, you can use other common household ingredients as substitutes. Lemon juice can be used in place of vinegar for its acidic cleaning properties. Hydrogen peroxide is a good disinfectant and can be used to clean surfaces and remove stains. Dish soap can be used as a general-purpose cleaner for many items. In a pinch, even plain water and a good scrub can make a difference.
How can I prevent these items from getting dirty so quickly in the first place?
Prevention is key to keeping these items clean and reducing the need for frequent deep cleaning. For example, wipe down surfaces after each use to prevent spills and splatters from drying and hardening. Use a toothbrush holder with drainage holes to prevent water from pooling and creating a breeding ground for bacteria. Run a cleaning cycle in your washing machine regularly to prevent buildup. By taking these simple preventative measures, you can keep your home cleaner and healthier with less effort.
Are there any safety precautions I should take when using these DIY cleaning methods?
Yes, it’s important to take certain safety precautions when using DIY cleaning methods. Always wear gloves to protect your hands from harsh chemicals or irritants. Ensure proper ventilation when using cleaning solutions, especially in enclosed spaces. Avoid mixing different cleaning products together, as this can create dangerous fumes. Keep cleaning products out of reach of children and pets. If you experience any irritation or allergic reaction, discontinue use and consult a doctor.
How do I clean a washing machine effectively using DIY methods?
To clean a washing machine effectively using DIY methods, start by adding two cups of white vinegar to the detergent dispenser. Run the washing machine on the hottest water setting with an empty drum. Once the cycle is complete, add half a cup of baking soda directly to the drum and run another hot water cycle. This will help to remove any remaining dirt, grime, and odors. Finally, wipe down the inside of the drum and the rubber seal with a clean cloth. Repeat this process every month or two to keep your washing machine clean and fresh.
What’s the best way to clean a showerhead to remove mineral buildup?
The best way to clean a showerhead to remove mineral buildup is to soak it in vinegar. Remove the showerhead from the shower arm, if possible. Fill a plastic bag with white vinegar and submerge the showerhead in the vinegar, securing the bag with a rubber band. Let it soak for at least 30 minutes, or preferably overnight. Remove the showerhead from the bag and scrub away any remaining mineral deposits with a toothbrush. Rinse the showerhead thoroughly with water before reattaching it to the shower arm.
Where can I find more information about DIY cleaning solutions and techniques?
There are many resources available online and in libraries that provide more information about DIY cleaning solutions and techniques. Search for reputable websites and blogs that focus on natural cleaning methods. Look for books and articles that provide detailed instructions and safety guidelines. You can also consult with cleaning professionals or home improvement experts for advice and recommendations. Remember to always do your research and choose cleaning methods that are safe and effective for your specific needs.

Leave a Comment