

Growing cabbage in plastic bottles might sound like something out of a science fiction novel, but trust me, it’s a surprisingly effective and eco-friendly way to cultivate this nutritious vegetable! Have you ever dreamt of a thriving garden, bursting with fresh produce, even if you’re short on space or dealing with challenging soil conditions? Well, this DIY trick is your answer!
For centuries, cabbage has been a staple in diets across the globe, from the hearty stews of Eastern Europe to the vibrant slaws of North America. Its resilience and nutritional value have made it a beloved crop. But what if I told you that you could bypass the traditional garden bed and embrace a more innovative approach?
That’s where the magic of upcycling comes in. In today’s world, where sustainability is more important than ever, finding creative ways to reuse materials is crucial. This method of growing cabbage in plastic bottles not only reduces waste but also offers several advantages. It protects your precious plants from soil-borne pests and diseases, provides better drainage, and allows you to easily move your cabbage around to find the perfect sun exposure. Plus, it’s a fantastic conversation starter! So, let’s dive in and discover how you can transform discarded plastic bottles into miniature cabbage gardens, bringing fresh, homegrown goodness right to your doorstep.
DIY Cabbage Patch: Growing Cabbage in Recycled Plastic Bottles
Hey there, fellow gardening enthusiasts! Are you short on space but still dreaming of fresh, homegrown cabbage? Well, I’ve got a fantastic solution for you: growing cabbage in recycled plastic bottles! It’s a fun, eco-friendly way to cultivate these leafy greens, even if you only have a balcony or a small patio. Trust me, it’s easier than you think, and the results are incredibly rewarding. Let’s dive in!
What You’ll Need
Before we get started, let’s gather all the necessary materials. This will make the whole process smoother and more enjoyable.
* Plastic Bottles: The star of the show! I recommend using bottles that are at least 2 liters in size. Larger bottles (like those from water coolers) will give your cabbage more room to grow, but smaller ones work too, especially for smaller cabbage varieties. Make sure they are clean and free of any residue.
* Potting Mix: A good quality potting mix is crucial for healthy cabbage growth. Avoid using garden soil directly, as it can be too heavy and may contain pests or diseases. I prefer a mix that’s well-draining and rich in organic matter.
* Cabbage Seeds or Seedlings: You can start your cabbage from seeds or purchase seedlings from a local nursery. Starting from seeds gives you more control over the variety, but seedlings will give you a head start.
* Scissors or a Utility Knife: For cutting the plastic bottles. Be careful!
* Drill or Nail: To create drainage holes in the bottles.
* Watering Can or Hose: For watering your cabbage plants.
* Fertilizer (Optional): A balanced fertilizer can help boost growth, especially during the early stages. I like to use a slow-release granular fertilizer or a liquid fertilizer diluted to half strength.
* Gloves (Optional): To keep your hands clean.
* Measuring Cup or Spoon (Optional): For measuring fertilizer.
Preparing the Plastic Bottles
This is a crucial step to ensure your cabbage has a comfortable and well-drained home.
1. Clean the Bottles: Thoroughly wash the plastic bottles with soap and water to remove any dirt or residue. Rinse them well and let them dry completely.
2. Cut the Bottles: There are a couple of ways you can cut the bottles, depending on how you want to arrange them.
* Option 1: Horizontal Cut: Cut the bottle horizontally, about two-thirds of the way up from the bottom. This creates a larger planting area and is ideal for larger cabbage varieties. You can discard the top portion or use it as a mini-greenhouse cover during the early stages.
* Option 2: Vertical Cut: Cut the bottle vertically, starting from the top and stopping a few inches from the bottom. This creates two separate containers, perfect for smaller cabbage varieties or for maximizing space.
3. Create Drainage Holes: This is essential to prevent waterlogging, which can lead to root rot. Use a drill or a nail to create several drainage holes in the bottom of each bottle. I usually make about 4-5 holes, evenly spaced.
Planting Your Cabbage
Now for the fun part – getting those cabbage plants into their new homes!
1. Fill the Bottles with Potting Mix: Fill the prepared plastic bottles with potting mix, leaving about an inch of space at the top. Gently pat down the soil to remove any air pockets.
2. Plant the Seeds or Seedlings:
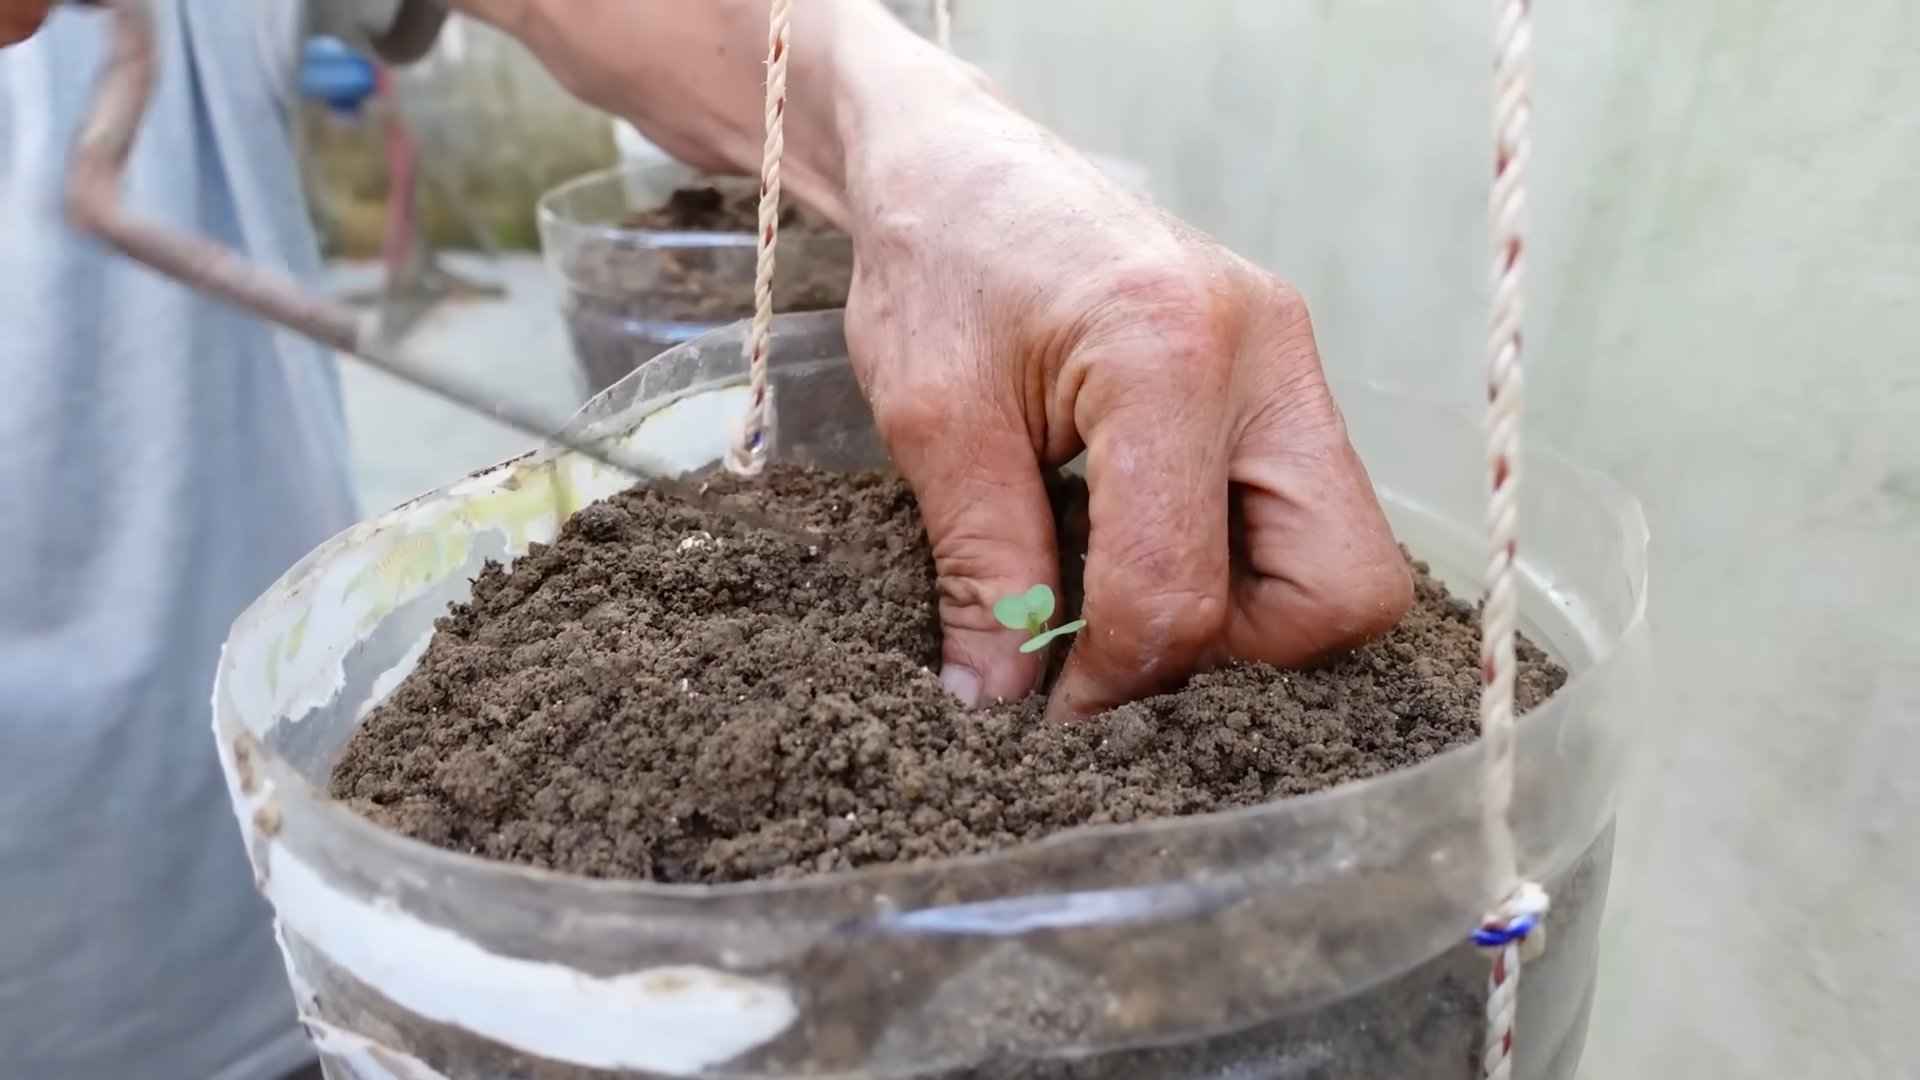
* From Seeds: Sow the cabbage seeds about half an inch deep in the potting mix. Space the seeds about 2-3 inches apart. Cover them lightly with soil and water gently. You may need to thin out the seedlings later, keeping only the strongest ones.
* From Seedlings: Gently remove the seedlings from their containers. Loosen the roots slightly and place the seedling in the center of the bottle. Make sure the top of the root ball is level with the surface of the potting mix. Fill in around the seedling with more potting mix and gently pat it down.
3. Water Thoroughly: After planting, water the cabbage plants thoroughly until the water drains out of the drainage holes. This will help settle the soil and ensure the roots are well-hydrated.
Caring for Your Cabbage Plants
Consistent care is key to growing healthy and delicious cabbage.
1. Sunlight: Cabbage needs at least 6 hours of sunlight per day. Place your plastic bottle planters in a sunny location, such as a balcony, patio, or windowsill. If you don’t have enough natural light, you can supplement with grow lights.
2. Watering: Water your cabbage plants regularly, especially during hot and dry weather. The soil should be consistently moist, but not waterlogged. Check the soil moisture by sticking your finger into the soil. If the top inch feels dry, it’s time to water.
3. Fertilizing: Cabbage is a heavy feeder, so it benefits from regular fertilization. Start fertilizing about 2-3 weeks after planting. Use a balanced fertilizer, following the instructions on the package. I like to use a slow-release granular fertilizer, which provides a steady supply of nutrients over time. You can also use a liquid fertilizer diluted to half strength, applied every 2-3 weeks.
4. Pest Control: Cabbage plants can be susceptible to various pests, such as cabbage worms, aphids, and slugs. Inspect your plants regularly for signs of infestation.
* Cabbage Worms: These green caterpillars can quickly devour your cabbage leaves. Handpick them off the plants or use a biological insecticide like Bacillus thuringiensis (Bt).
* Aphids: These tiny insects suck the sap from the leaves, causing them to curl and distort. Spray them off with a strong stream of water or use insecticidal soap.
* Slugs: These slimy creatures can damage the leaves, especially at night. Use slug bait or traps to control them.
5. Weed Control: Keep the area around your cabbage plants free of weeds. Weeds can compete with your cabbage for nutrients and water. Hand-pull any weeds that appear.
6. Support (Optional): As your cabbage grows larger, it may need some support to prevent it from toppling over. You can use stakes or cages to provide support.
Harvesting Your Cabbage
The moment you’ve been waiting for! Harvesting your homegrown cabbage is incredibly satisfying.
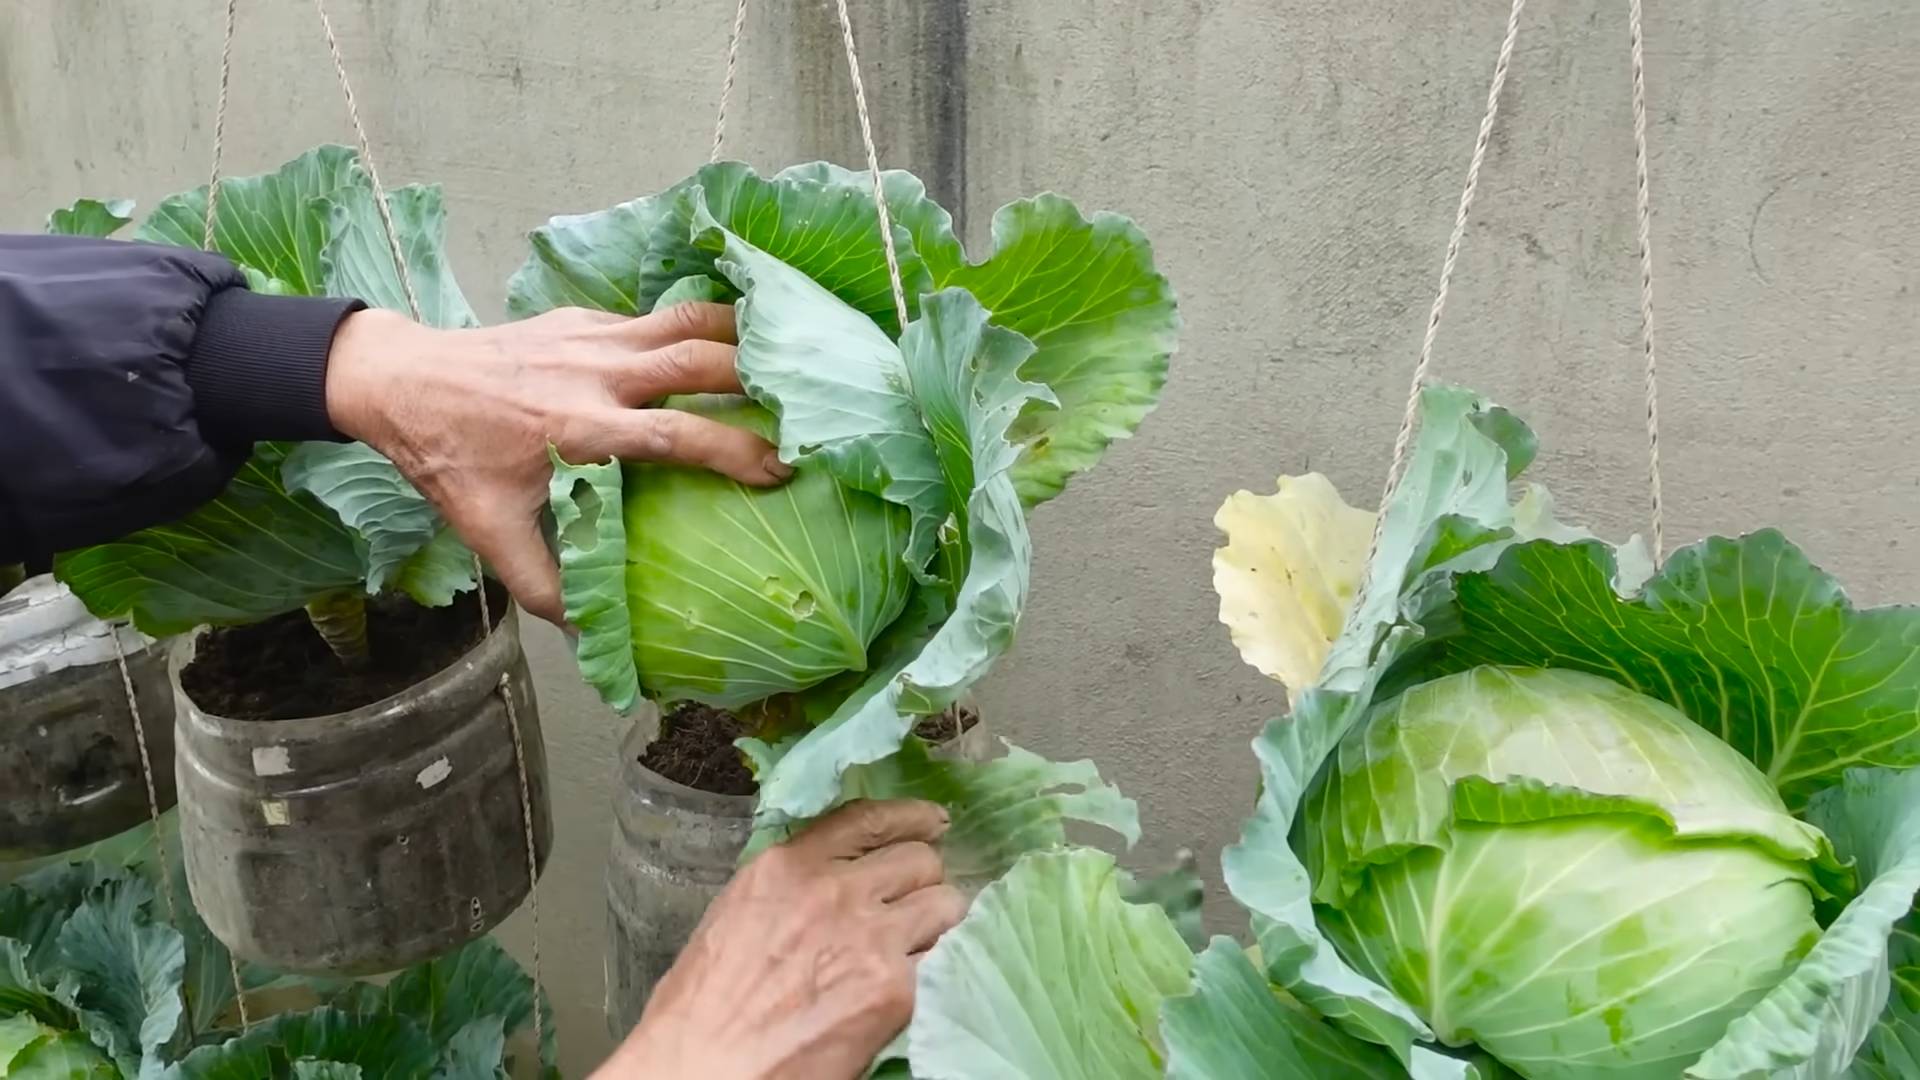
1. Check for Maturity: Cabbage is typically ready to harvest when the head is firm and compact. The size of the head will vary depending on the variety.
2. Harvesting: Use a sharp knife to cut the cabbage head from the stem, leaving a few outer leaves attached.
3. Storage: Store your harvested cabbage in the refrigerator. It will keep for several weeks.
Choosing the Right Cabbage Variety
Not all cabbage varieties are created equal, especially when growing in containers. Here are a few of my favorites that do well in plastic bottles:
* Dwarf Morden: This is a compact variety that’s perfect for small spaces. It produces small, round heads that are ready to harvest in about 70 days.
* Golden Acre: Another early-maturing variety that’s well-suited for container gardening. It produces small to medium-sized heads with a mild flavor.
* Red Acre: If you’re looking for a colorful addition to your garden, Red Acre is a great choice. It produces beautiful red heads that are packed with nutrients.
* Savoy Cabbage: Savoy cabbage has crinkled leaves and a mild, sweet flavor. It’s a bit larger than the other varieties, so you’ll need a larger plastic bottle.
Troubleshooting
Even with the best care, you might encounter some challenges along the way. Here are a few common problems and how to fix them:
* Yellowing Leaves: This could be a sign of nutrient deficiency. Try fertilizing your plants with a balanced fertilizer.
* Stunted Growth: This could be caused by a lack of sunlight, water, or nutrients. Make sure your plants are getting enough of all three.
* Root Rot: This is caused by overwatering. Make sure your plastic bottles have adequate drainage holes and avoid overwatering.
* Pest Infestation: As mentioned earlier, cabbage plants can be susceptible to various pests. Inspect your plants regularly and take action as soon as you notice any signs of infestation.
Tips for Success
Here are a few extra tips to help you grow the best cabbage possible in plastic bottles:
* Rotate Your Crops: Don’t plant cabbage in the same plastic bottle year after year. This can help prevent the buildup of pests and diseases.
* Use Companion Planting: Plant companion plants alongside your cabbage to help deter pests and attract beneficial insects. Some good companion plants for cabbage include marigolds, nasturtiums, and dill.
*
Conclusion
So, there you have it! Growing cabbage in plastic bottles isn’t just a quirky gardening experiment; it’s a game-changer for small spaces, a budget-friendly solution, and a surprisingly effective way to cultivate healthy, delicious cabbages. We’ve explored the step-by-step process, from preparing your bottles to nurturing your seedlings, and hopefully, dispelled any doubts you might have had about the viability of this method.
Why is this a must-try? Because it democratizes gardening. It removes the barriers of large plots of land and expensive equipment, allowing anyone, anywhere, to enjoy the satisfaction of growing their own food. Imagine the pride of serving a salad made with cabbage you nurtured from a tiny seed, all within the confines of a recycled plastic bottle. It’s a testament to resourcefulness and a step towards a more sustainable lifestyle.
But the beauty of this method lies in its adaptability. Feel free to experiment with different varieties of cabbage. Red cabbage, savoy cabbage, even bok choy – the possibilities are endless! Consider adding companion plants like marigolds or nasturtiums to your bottle gardens to deter pests naturally. You can also adjust the size of the bottles to accommodate different cabbage varieties or your available space. For larger cabbage varieties, consider using larger water cooler bottles or even repurposed buckets.
Don’t be afraid to get creative with your setup. Stack your bottle gardens vertically to maximize space, or hang them from a balcony railing for a visually stunning and productive display. You can even paint the bottles to add a touch of personality to your urban garden. Remember to consider the drainage needs of your cabbage plants. While we’ve discussed drainage holes, you might want to add a layer of gravel or pebbles at the bottom of the bottle to further improve drainage and prevent root rot.
We understand that venturing into new gardening techniques can be daunting, but we assure you, the rewards are well worth the effort. The joy of watching your cabbage seedlings sprout and flourish, the satisfaction of harvesting your own homegrown produce, and the knowledge that you’re contributing to a more sustainable future – these are experiences that no store-bought cabbage can ever replicate.
We strongly encourage you to give this DIY trick a try. Start small, perhaps with just a few bottles, and gradually expand your operation as you gain confidence. And most importantly, share your experience with us! We’d love to hear about your successes, your challenges, and any innovative modifications you’ve made to the process. Post pictures of your bottle gardens on social media using #BottleCabbage or tag us in your posts. Let’s create a community of bottle cabbage enthusiasts and inspire others to embrace this simple yet powerful gardening technique.
Ultimately, growing cabbage in plastic bottles is more than just a gardening hack; it’s a statement. It’s a statement about our commitment to sustainability, our resourcefulness, and our desire to connect with nature, even in the most urban of environments. So, grab your bottles, your seeds, and your potting mix, and let’s get growing! You’ll be amazed at what you can achieve with a little ingenuity and a few recycled materials. This method of **growing cabbage** is truly a rewarding experience.
Frequently Asked Questions (FAQ)
What kind of plastic bottles are best for growing cabbage?
Ideally, you should use food-grade plastic bottles, such as those used for water, juice, or soda. Avoid bottles that have contained harsh chemicals or cleaning products, as these could contaminate your soil and affect the growth of your cabbage. PET (Polyethylene Terephthalate) bottles, commonly used for water and soda, are a good choice. Make sure to thoroughly clean the bottles before using them to remove any residue. Darker colored bottles might absorb more heat, which could be beneficial in cooler climates but detrimental in hotter ones. Clear bottles allow you to monitor the soil moisture levels more easily.
How often should I water my cabbage plants in plastic bottles?
The frequency of watering depends on several factors, including the weather, the type of potting mix you’re using, and the size of the bottle. Generally, you should water your cabbage plants when the top inch of soil feels dry to the touch. Avoid overwatering, as this can lead to root rot. Ensure that the drainage holes in your bottles are functioning properly to prevent water from accumulating at the bottom. During hot, dry weather, you may need to water your plants daily, while in cooler, wetter weather, you may only need to water them every few days. A good rule of thumb is to check the soil moisture regularly and adjust your watering schedule accordingly.
What type of soil is best for growing cabbage in plastic bottles?
Cabbage plants thrive in well-draining, nutrient-rich soil. A good potting mix for growing cabbage in plastic bottles should consist of a combination of compost, peat moss (or coco coir as a sustainable alternative), and perlite or vermiculite. Compost provides essential nutrients, peat moss (or coco coir) helps retain moisture, and perlite or vermiculite improves drainage. You can also add a slow-release fertilizer to the potting mix to provide a steady supply of nutrients to your cabbage plants. Avoid using garden soil, as it can be too heavy and may contain pests or diseases.
How much sunlight do cabbage plants need when grown in plastic bottles?
Cabbage plants need at least 6 hours of direct sunlight per day to thrive. Choose a location for your bottle gardens that receives ample sunlight throughout the day. If you live in a particularly hot climate, you may need to provide some shade during the hottest part of the afternoon to prevent the leaves from scorching. If you don’t have access to a sunny outdoor space, you can supplement with grow lights. Position the grow lights a few inches above the plants and provide them with 12-16 hours of light per day.
How do I protect my cabbage plants from pests and diseases when growing them in plastic bottles?
Growing cabbage in plastic bottles can actually help reduce the risk of pest infestations, as the bottles provide a physical barrier between the plants and the soil. However, it’s still important to take precautions to protect your plants from pests and diseases. Regularly inspect your plants for signs of pests, such as aphids, cabbage worms, or slugs. You can remove these pests by hand or use insecticidal soap or neem oil. To prevent diseases, ensure that your plants have good air circulation and avoid overwatering. You can also use a fungicide if necessary. Companion planting with herbs like rosemary or thyme can also help deter pests naturally.
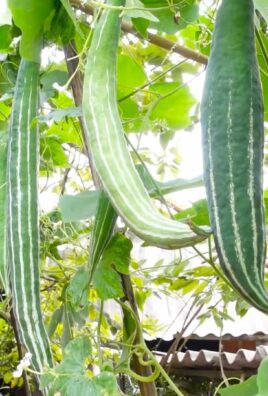
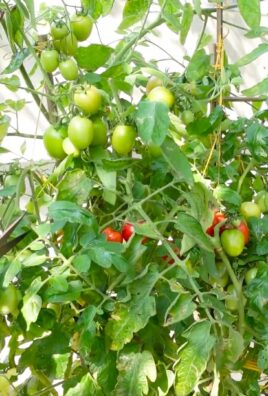
Can I grow other vegetables in plastic bottles using the same method?
Yes, absolutely! The plastic bottle gardening method is versatile and can be used to grow a variety of other vegetables, herbs, and flowers. Some popular choices include lettuce, spinach, kale, tomatoes, peppers, strawberries, and basil. The key is to choose plants that are well-suited to container gardening and that have similar growing requirements. Be sure to adjust the size of the bottle and the type of potting mix to suit the specific needs of each plant.
How do I harvest my cabbage when it’s grown in a plastic bottle?
Harvest your cabbage when the head is firm and has reached the desired size. Use a sharp knife to cut the head from the stem, leaving a few outer leaves intact. You can harvest the entire head at once, or you can harvest individual leaves as needed. After harvesting, you can leave the roots in the bottle and allow them to decompose, which will add nutrients to the soil. You can then reuse the bottle to grow another crop.
What do I do with the plastic bottles after I’m done growing cabbage?
One of the great things about this method is that it promotes recycling. After you’re done growing cabbage, you can clean the bottles and reuse them for another crop. If the bottles are damaged or no longer suitable for gardening, you can recycle them properly. Alternatively, you can get creative and repurpose the bottles for other uses, such as making planters, bird feeders, or even art projects.

Leave a Comment