

Planting Jicama at Home might sound intimidating, but trust me, it’s a rewarding experience that brings a taste of the tropics right to your backyard! Have you ever dreamt of biting into a crisp, sweet, and slightly nutty root vegetable you grew yourself? Well, dream no more! This DIY guide will walk you through every step, from selecting the perfect seeds to harvesting your very own jicama bounty.
Jicama, also known as the Mexican turnip, has a rich history deeply rooted in Mesoamerican cultures. For centuries, it’s been a staple in their diets, celebrated not only for its delicious flavor but also for its nutritional benefits. Imagine connecting with that ancient tradition by cultivating this amazing vegetable in your own garden!
Why should you embark on this planting jicama at home adventure? Because store-bought jicama simply can’t compare to the freshness and satisfaction of harvesting your own. Plus, you’ll know exactly what went into growing it – no harmful pesticides or questionable practices. In this article, I’ll share my favorite tips and tricks to ensure your jicama thrives, even if you’re a complete beginner. Get ready to roll up your sleeves and discover the joy of homegrown jicama!
Planting Jicama at Home: A Beginner’s Guide
Hey there, fellow gardening enthusiasts! Ever thought about growing your own jicama? It’s surprisingly easy and incredibly rewarding. Jicama, also known as Mexican turnip, is a delicious and crunchy root vegetable that’s perfect for salads, snacks, or even stir-fries. I’m going to walk you through the entire process, from choosing the right seeds to harvesting your very own jicama crop. Let’s get started!
Choosing Your Jicama Seeds and Preparing for Planting
Before we get our hands dirty, let’s talk about seeds and preparation. This is a crucial step to ensure a successful jicama harvest.
* Seed Selection: Look for high-quality jicama seeds from a reputable source. You can find them online or at your local garden center. Make sure the seeds are specifically labeled as “jicama” or “Mexican turnip.”
* Timing is Key: Jicama needs a long growing season (around 150-200 days), so it’s best to start your seeds indoors about 8-10 weeks before the last expected frost. If you live in a warmer climate with a longer growing season, you can direct sow the seeds after the danger of frost has passed.
* Soaking the Seeds: Jicama seeds have a hard outer shell, so soaking them in warm water for 24 hours before planting will help them germinate faster. I usually put them in a small bowl with warm water and let them sit overnight.
* Preparing Seedling Trays: Use seedling trays or small pots filled with a well-draining seed-starting mix. Avoid using garden soil, as it can be too heavy and may contain diseases.
Step-by-Step Planting Guide: From Seed to Sprout
Now for the fun part – planting! Follow these steps carefully to give your jicama seeds the best possible start.
1. Fill Your Trays: Fill your seedling trays or pots with the seed-starting mix, leaving about half an inch of space at the top. Gently tap the trays to settle the soil.
2. Planting the Seeds: Make a small hole (about ½ inch deep) in the center of each cell or pot. Place one or two soaked jicama seeds in each hole.
3. Cover and Water: Gently cover the seeds with the seed-starting mix and lightly water the soil. You want the soil to be moist but not soggy.
4. Creating a Greenhouse Effect: To help with germination, cover the trays with a clear plastic lid or plastic wrap. This will create a humid environment that the seeds love.
5. Finding the Right Spot: Place the trays in a warm location (around 70-80°F or 21-27°C) with indirect sunlight. A heat mat can also be helpful, especially if your home is cooler.
6. Monitoring and Watering: Check the soil moisture daily and water as needed to keep it consistently moist. Remove the plastic lid or wrap once the seedlings start to emerge.
7. Providing Light: Once the seedlings emerge, they’ll need plenty of light. If you don’t have a sunny windowsill, consider using a grow light. Place the light a few inches above the seedlings and keep it on for about 14-16 hours per day.
8. Thinning Seedlings: If you planted two seeds per cell and both germinate, thin them out by snipping off the weaker seedling at the soil line. This will give the stronger seedling more room to grow.
Transplanting Your Jicama Seedlings
Once your seedlings have developed a few sets of true leaves (usually after about 4-6 weeks), they’re ready to be transplanted outdoors.
* Hardening Off: Before transplanting, you’ll need to “harden off” your seedlings. This means gradually exposing them to outdoor conditions over a period of about a week. Start by placing them outside in a sheltered location for a few hours each day, gradually increasing the amount of time they spend outdoors.
* Choosing the Right Location: Jicama needs full sun (at least 6-8 hours of direct sunlight per day) and well-draining soil. Choose a location in your garden that meets these requirements.
* Preparing the Soil: Amend the soil with compost or other organic matter to improve drainage and fertility. Jicama prefers slightly acidic soil with a pH of around 6.0-6.8.
* Spacing: Space your jicama plants about 12-18 inches apart in rows that are 3-4 feet apart. This will give them enough room to grow and spread.
Step-by-Step Transplanting Guide
Let’s get those seedlings into the ground!
1. Digging the Holes: Dig holes that are slightly larger than the root balls of your seedlings.
2. Removing Seedlings: Gently remove the seedlings from their trays or pots, being careful not to damage the roots. If the roots are tightly bound, gently loosen them with your fingers.
3. Planting the Seedlings: Place each seedling in a hole and backfill with soil, gently firming it around the base of the plant. Make sure the top of the root ball is level with the surrounding soil.
4. Watering Thoroughly: Water the newly transplanted seedlings thoroughly to help them settle in.
5. Mulching: Apply a layer of mulch around the plants to help retain moisture, suppress weeds, and regulate soil temperature. I like to use straw or wood chips.
Caring for Your Jicama Plants
Now that your jicama plants are in the ground, it’s important to provide them with the care they need to thrive.
* Watering: Jicama needs consistent moisture, especially during hot, dry weather. Water deeply whenever the top inch of soil feels dry to the touch.
* Fertilizing: Fertilize your jicama plants every 4-6 weeks with a balanced fertilizer. Follow the instructions on the fertilizer package. Avoid over-fertilizing, as this can lead to excessive vine growth and smaller roots.
* Weeding: Keep the area around your jicama plants free of weeds. Weeds can compete with your plants for nutrients and water.
* Support: Jicama plants are vines and will benefit from support. You can use stakes, trellises, or even a fence to support the vines. This will also help to keep the roots from rotting.
* Pest and Disease Control: Jicama is relatively pest-resistant, but it can be susceptible to aphids, spider mites, and nematodes. Inspect your plants regularly for signs of pests or diseases and take action as needed. Insecticidal soap or neem oil can be effective for controlling aphids and spider mites. For nematodes, consider using a soil amendment like beneficial nematodes.
Harvesting Your Jicama
The moment we’ve all been waiting for – harvesting!
* Timing: Jicama is typically ready to harvest about 150-200 days after planting. The roots should be about 4-6 inches in diameter.
* Checking for Readiness: Gently dig around the base of the plant to check the size of the roots. If they’re large enough, you can harvest them.
* Harvesting Technique: Use a garden fork or shovel to carefully lift the jicama roots from the ground. Be careful not to damage the roots.
* Cleaning and Storing: Brush off any excess soil from the roots and let them dry in the sun for a few hours. Store the jicama roots in a cool, dry place. They can be stored for several months if properly stored.
Troubleshooting Common Jicama Growing Problems
Even with the best care, you might encounter some problems while growing jicama. Here are a few common issues and how to address them:
* Poor Germination: If your jicama seeds aren’t germinating, make sure the soil is warm enough and that you’re keeping it consistently moist. Soaking the seeds before planting can also help.
* Slow Growth: If your jicama plants are growing slowly, make sure they’re getting enough sunlight and nutrients. Fertilize them regularly and water them deeply.
* Yellowing Leaves: Yellowing leaves can be a sign of nutrient deficiency or overwatering. Check the soil moisture and adjust your watering schedule accordingly. You may also need to fertilize your plants.
* Pest Infestations: If you notice pests on your jicama plants, take action immediately. Insecticidal soap or neem oil can be effective for controlling many common pests.
Enjoying Your Homegrown Jicama
Congratulations! You’ve successfully grown your own jicama. Now it’s time to enjoy the fruits (or rather, roots) of your labor. Jicama can be eaten raw or cooked. It’s delicious in salads, slaws, stir-fries, and even as a crunchy snack. I love to peel it, cut it into sticks, and dip it in hummus or guacamole.
Here are a few ideas for using your

Conclusion
So, there you have it! Planting jicama at home is not only achievable, but it’s also a deeply rewarding experience that connects you to the food you eat. Forget those bland, store-bought jicama roots that lack the vibrant flavor of freshly grown produce. With a little patience and these simple steps, you can cultivate your own supply of crisp, sweet jicama right in your backyard or even in containers on your patio.
Why is this DIY trick a must-try? Because it empowers you to control the quality of your food, reduces your reliance on commercially grown produce (often shipped long distances), and offers a unique gardening challenge that’s both educational and satisfying. Imagine the pride you’ll feel serving a salad featuring jicama you nurtured from seed to harvest!
But the fun doesn’t stop there. Feel free to experiment with different varieties of jicama. Some are sweeter than others, and some mature faster. You can also try companion planting to enhance growth and deter pests. Marigolds, for example, are known to repel nematodes, a common jicama pest. Consider interplanting with beans or peas to fix nitrogen in the soil, benefiting your jicama plants. Another variation is to explore different trellising methods. While jicama is a vine, it can be trained to grow vertically, saving space and improving air circulation.
Don’t be intimidated if you’re a beginner gardener. Jicama is surprisingly resilient, and the steps outlined above are designed to be easy to follow. The key is to provide the right conditions: plenty of sunlight, well-draining soil, and consistent watering. And remember, even experienced gardeners encounter challenges. Don’t be discouraged by setbacks; learn from them and keep trying.
We wholeheartedly encourage you to give this DIY jicama planting trick a try. The satisfaction of harvesting your own fresh, crunchy jicama is truly unparalleled. And once you’ve tasted the difference between homegrown and store-bought, you’ll never go back.
More importantly, we want to hear about your experience! Share your photos, tips, and challenges in the comments section below. Let’s create a community of jicama enthusiasts and learn from each other. Did you try a particular variety? Did you encounter any pests or diseases? What was your biggest success? Your insights will be invaluable to other readers who are embarking on their own jicama-growing journey. Let’s unlock the secrets to successful planting jicama at home together!
Frequently Asked Questions (FAQ)
What is the best time of year to plant jicama?
Jicama thrives in warm weather and requires a long growing season (at least 150 days). Therefore, the best time to plant jicama is after the last frost in spring, when the soil has warmed up to at least 65°F (18°C). If you live in a region with a short growing season, you can start seeds indoors 6-8 weeks before the last frost and transplant them outdoors once the weather is suitable. In warmer climates, you can plant jicama directly in the ground in spring or early summer.
How much sunlight does jicama need?
Jicama needs at least 6-8 hours of direct sunlight per day to thrive. Choose a planting location that receives ample sunlight throughout the day. If you are growing jicama in containers, make sure to place them in a sunny spot. Insufficient sunlight can result in poor growth and smaller tubers.
What type of soil is best for growing jicama?
Jicama prefers well-draining, sandy loam soil with a pH between 6.0 and 7.0. Heavy clay soil can lead to root rot, so it’s important to amend the soil with organic matter, such as compost or well-rotted manure, to improve drainage and aeration. Avoid soils that are overly acidic or alkaline. A soil test can help you determine the pH of your soil and make necessary adjustments.
How often should I water jicama plants?
Jicama plants need consistent moisture, especially during hot, dry weather. Water deeply and regularly, ensuring that the soil remains moist but not waterlogged. Avoid overhead watering, as this can promote fungal diseases. A good rule of thumb is to water when the top inch of soil feels dry to the touch. Mulching around the plants can help retain moisture and suppress weeds.
Do I need to fertilize jicama plants?
Jicama is a relatively heavy feeder and benefits from regular fertilization. Apply a balanced fertilizer (e.g., 10-10-10) at planting time and then every 4-6 weeks throughout the growing season. You can also use organic fertilizers, such as compost tea or fish emulsion. Avoid over-fertilizing, as this can lead to excessive foliage growth at the expense of tuber development.
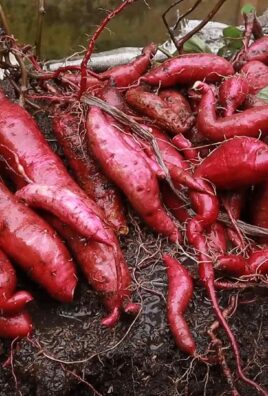
How do I know when jicama is ready to harvest?
Jicama tubers are typically ready to harvest 4-5 months after planting. The leaves will start to turn yellow and die back, indicating that the plant is nearing maturity. To check if the tubers are ready, gently dig around the base of the plant and feel for the size of the tuber. They are usually harvested when they reach 4-6 inches in diameter. Be careful not to damage the tubers during harvesting.
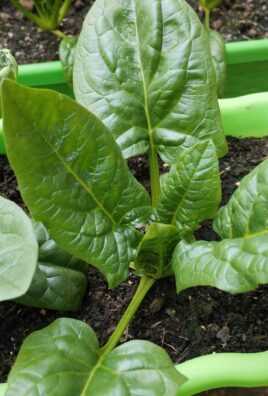
Can I eat the leaves or seeds of the jicama plant?
No, the leaves and seeds of the jicama plant are toxic and should not be consumed. They contain rotenone, a natural insecticide that can be harmful to humans and animals. Only the tuberous root is edible.
How do I store jicama after harvesting?
Jicama tubers can be stored for several months in a cool, dry, and dark place. The ideal storage temperature is between 50°F (10°C) and 60°F (15°C). Avoid storing jicama in the refrigerator, as this can cause it to become mushy. Before storing, brush off any excess soil and allow the tubers to dry completely.
What are some common pests and diseases that affect jicama?
Common pests that affect jicama include aphids, spider mites, and nematodes. Diseases that can affect jicama include root rot, fungal leaf spots, and powdery mildew. To prevent pests and diseases, practice good garden hygiene, such as removing weeds and debris, and ensure proper air circulation. You can also use organic pest control methods, such as insecticidal soap or neem oil.
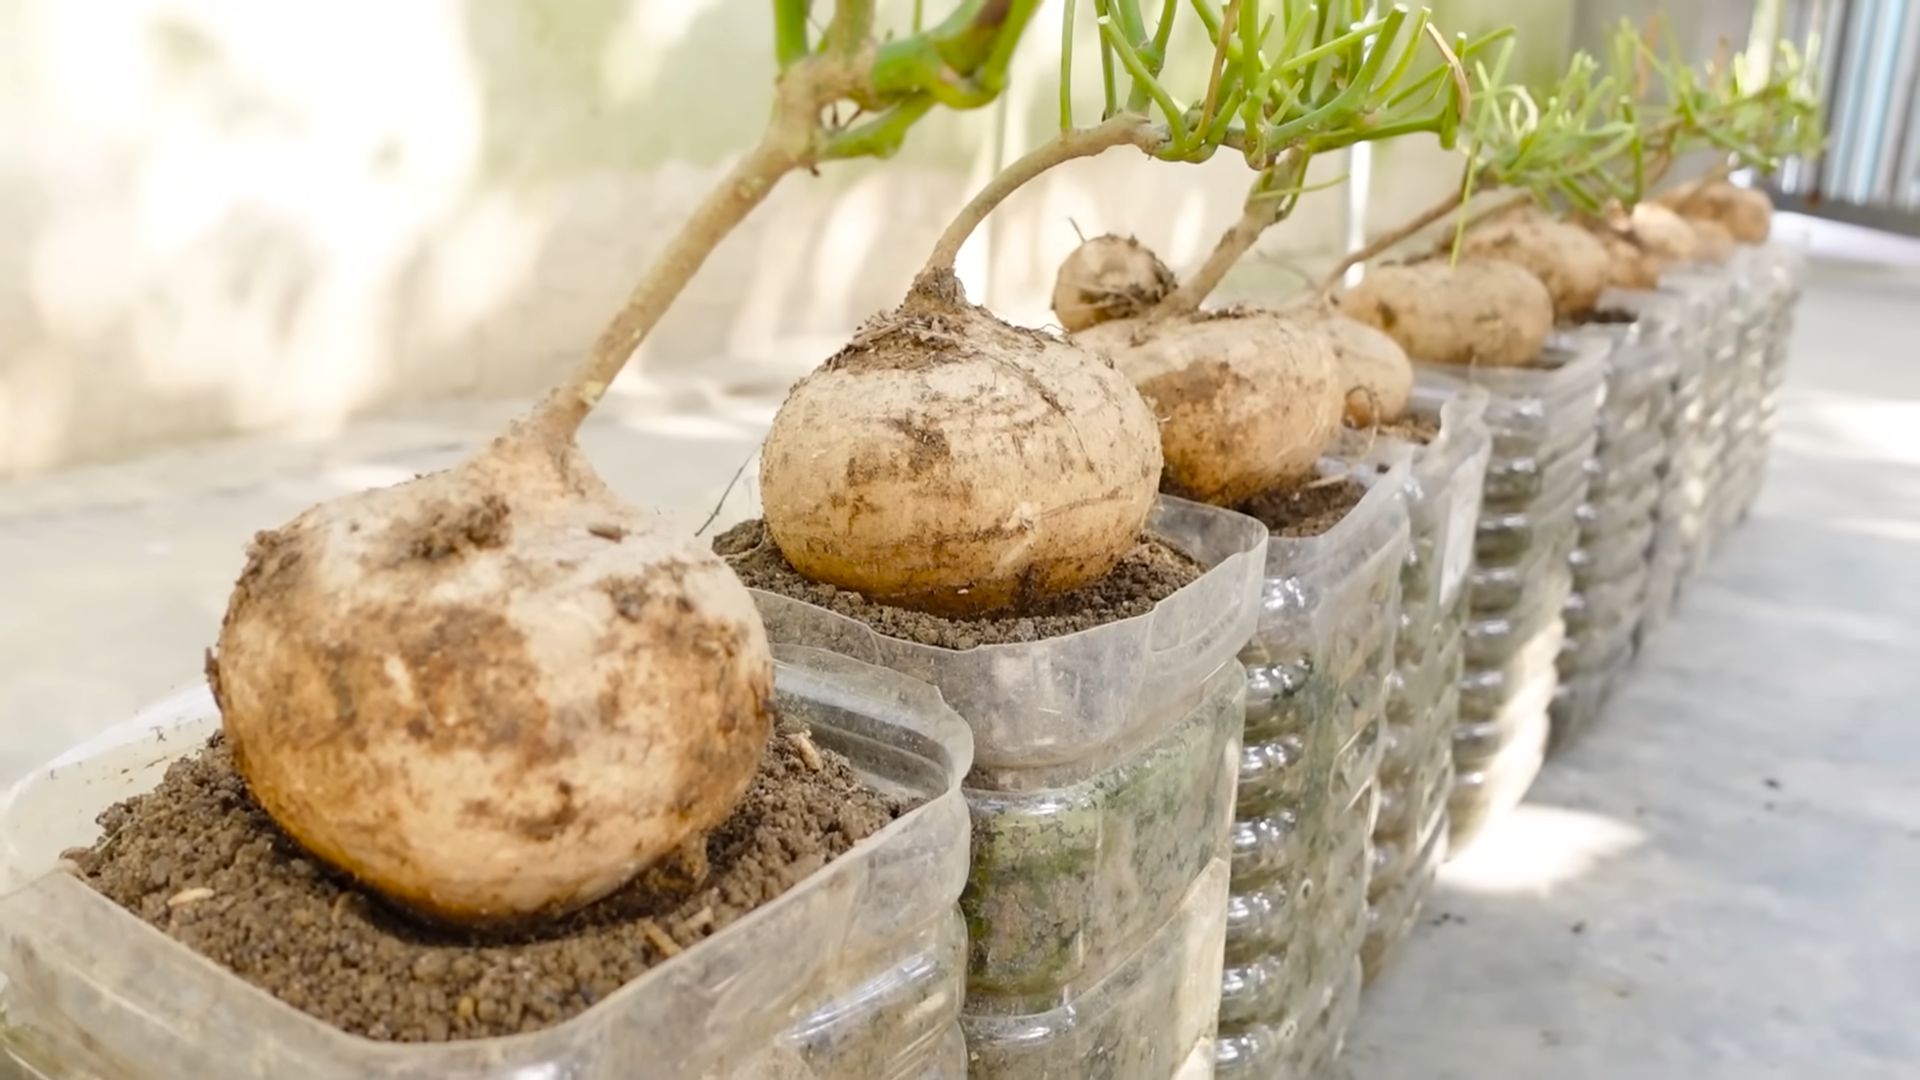
Can I grow jicama in containers?
Yes, jicama can be grown successfully in containers, especially if you have limited space. Choose a large container (at least 15 gallons) with good drainage holes. Use a well-draining potting mix and provide adequate sunlight and water. You may need to fertilize container-grown jicama more frequently than those grown in the ground. Also, consider providing a trellis or support for the vines to climb.

Leave a Comment