

Easy Cleaning Hacks – who doesn’t need them? Let’s be honest, cleaning isn’t exactly anyone’s favorite pastime. We all dream of sparkling homes, but the reality of scrubbing, dusting, and vacuuming can feel overwhelming. But what if I told you that achieving a clean and tidy space doesn’t have to be a monumental chore? What if I shared some secrets that could transform your cleaning routine from a dreaded task into a manageable, even enjoyable, activity?
Throughout history, cultures around the world have developed ingenious methods for maintaining cleanliness, often relying on natural ingredients and clever techniques passed down through generations. Think of ancient Egyptians using natron (a naturally occurring salt mixture) for cleaning or the traditional Japanese practice of using bamboo charcoal to absorb odors. These time-tested methods highlight the enduring human desire for clean and healthy living spaces.
In today’s busy world, time is precious. That’s why these easy cleaning hacks are so essential. They’re designed to save you time, money, and energy, allowing you to focus on the things you truly love. From tackling stubborn stains with everyday household items to streamlining your cleaning process with simple DIY solutions, these tips and tricks will empower you to create a cleaner, healthier, and happier home without breaking a sweat. So, let’s dive in and discover how to make cleaning a breeze!
DIY Cleaning Hacks That Will Save You Time and Money!
Okay, let’s be honest, cleaning isn’t exactly anyone’s favorite pastime. But a clean home is a happy home, right? So, I’ve compiled some of my absolute favorite DIY cleaning hacks that are not only super effective but also use ingredients you probably already have in your pantry! Get ready to ditch those expensive, chemical-laden cleaners and embrace a sparkling clean home the natural way!
Cleaning Your Microwave Like a Pro
Microwaves are notorious for splatters and spills. Instead of scrubbing for ages, try this simple steam cleaning method. It’s a game-changer!
What You’ll Need:
* 1 cup of water
* 1/4 cup of white vinegar (or lemon juice)
* Microwave-safe bowl
Step-by-Step Instructions:
1. Mix it up: In your microwave-safe bowl, combine the water and white vinegar (or lemon juice). The vinegar helps to loosen grime, while the lemon juice adds a fresh scent.
2. Microwave Magic: Place the bowl in your microwave and heat on high for 5-7 minutes. You want the mixture to boil and create steam inside the microwave.
3. Let it Sit: Once the timer goes off, don’t open the door immediately! Let the steam work its magic for another 3-5 minutes. This will soften all the stuck-on food particles.
4. Wipe it Down: Carefully remove the bowl (it will be hot!). Then, using a clean cloth or sponge, wipe down the inside of the microwave. You’ll be amazed at how easily the grime comes off! For stubborn spots, you might need a little extra elbow grease, but it should be significantly easier than scrubbing from the start.
5. Final Touches: Wipe down the turntable and the outside of the microwave for a completely clean appliance.
De-Gunking Your Showerhead
Hard water deposits can clog your showerhead, reducing water pressure and making your shower less enjoyable. Here’s how to restore it to its former glory.
What You’ll Need:
* White vinegar
* Plastic bag (a sandwich bag works well)
* Rubber band or twist tie
Step-by-Step Instructions:
1. Vinegar Bath: Fill the plastic bag with enough white vinegar to completely submerge the showerhead.
2. Secure the Bag: Carefully attach the bag to the showerhead, using the rubber band or twist tie to secure it in place. Make sure the showerhead is fully immersed in the vinegar.
3. Soak Time: Let the showerhead soak in the vinegar for at least 30 minutes, or even better, overnight. The longer it soaks, the more effectively the vinegar will dissolve the mineral deposits.
4. Remove and Rinse: Remove the bag and discard the vinegar. Turn on the shower and let the water run for a few minutes to flush out any remaining vinegar and loosened debris.
5. Scrub if Needed: If you still see some stubborn deposits, use an old toothbrush to gently scrub them away.
6. Enjoy Your Shower: Now, enjoy a shower with improved water pressure!
Cleaning Your Grout Like a Boss
Dirty grout can make even the cleanest tiles look dingy. This baking soda paste is a natural and effective way to brighten your grout lines.
What You’ll Need:
* Baking soda
* Water
* Old toothbrush
* Spray bottle (optional)
* White vinegar (optional, for extra cleaning power)
Step-by-Step Instructions:
1. Make the Paste: In a small bowl, mix baking soda with just enough water to form a thick paste.
2. Apply the Paste: Using your fingers or a small spatula, apply the baking soda paste to the grout lines. Make sure to cover the entire area you want to clean.
3. Scrub-a-Dub-Dub: Use an old toothbrush to scrub the grout lines vigorously. The baking soda acts as a gentle abrasive to lift dirt and grime.
4. Rinse and Repeat: Rinse the area with water. If the grout is still dirty, repeat the process.
5. Vinegar Boost (Optional): For extra cleaning power, you can spray the grout lines with white vinegar after scrubbing with the baking soda paste. The vinegar will react with the baking soda, creating a fizzing action that helps to loosen stubborn dirt. Let it fizz for a few minutes, then rinse thoroughly with water.
6. Dry and Admire: Dry the area with a clean cloth and admire your sparkling clean grout!
Freshening Up Your Garbage Disposal
Garbage disposals can get pretty stinky. Here’s a simple way to freshen them up and keep them running smoothly.
What You’ll Need:
* Ice cubes
* Lemon or lime wedges
* Salt
Step-by-Step Instructions:
1. Ice, Ice, Baby: Fill your garbage disposal with ice cubes.
2. Citrus Power: Add a few lemon or lime wedges to the disposal.
3. Salt Sprinkle: Sprinkle a generous amount of salt over the ice and citrus.
4. Grind Away: Turn on the cold water and run the garbage disposal until all the ice is gone. The ice helps to scrub the disposal blades, while the citrus freshens the scent and the salt helps to break down grease and grime.
5. Repeat as Needed: Repeat this process every few weeks to keep your garbage disposal clean and fresh.
Cleaning Your Blinds Without the Hassle
Cleaning blinds can be a tedious task. But this sock trick makes it much easier and faster!
What You’ll Need:
* Old sock (clean, of course!)
* White vinegar
* Water
* Bowl
Step-by-Step Instructions:
1. Vinegar Solution: In a bowl, mix equal parts white vinegar and water.
2. Sock It To ‘Em: Put the sock on your hand and dip it into the vinegar solution. Wring out any excess liquid.
3. Blind Cleaning Time: Use your sock-covered hand to wipe down each slat of the blinds. The sock will pick up dust and dirt easily.
4. Rinse and Repeat: If the sock gets too dirty, rinse it in the vinegar solution and wring it out again.
5. Dry and Admire: Once you’ve cleaned all the slats, let the blinds air dry. You can also use a clean, dry sock to wipe them down for a faster drying time.
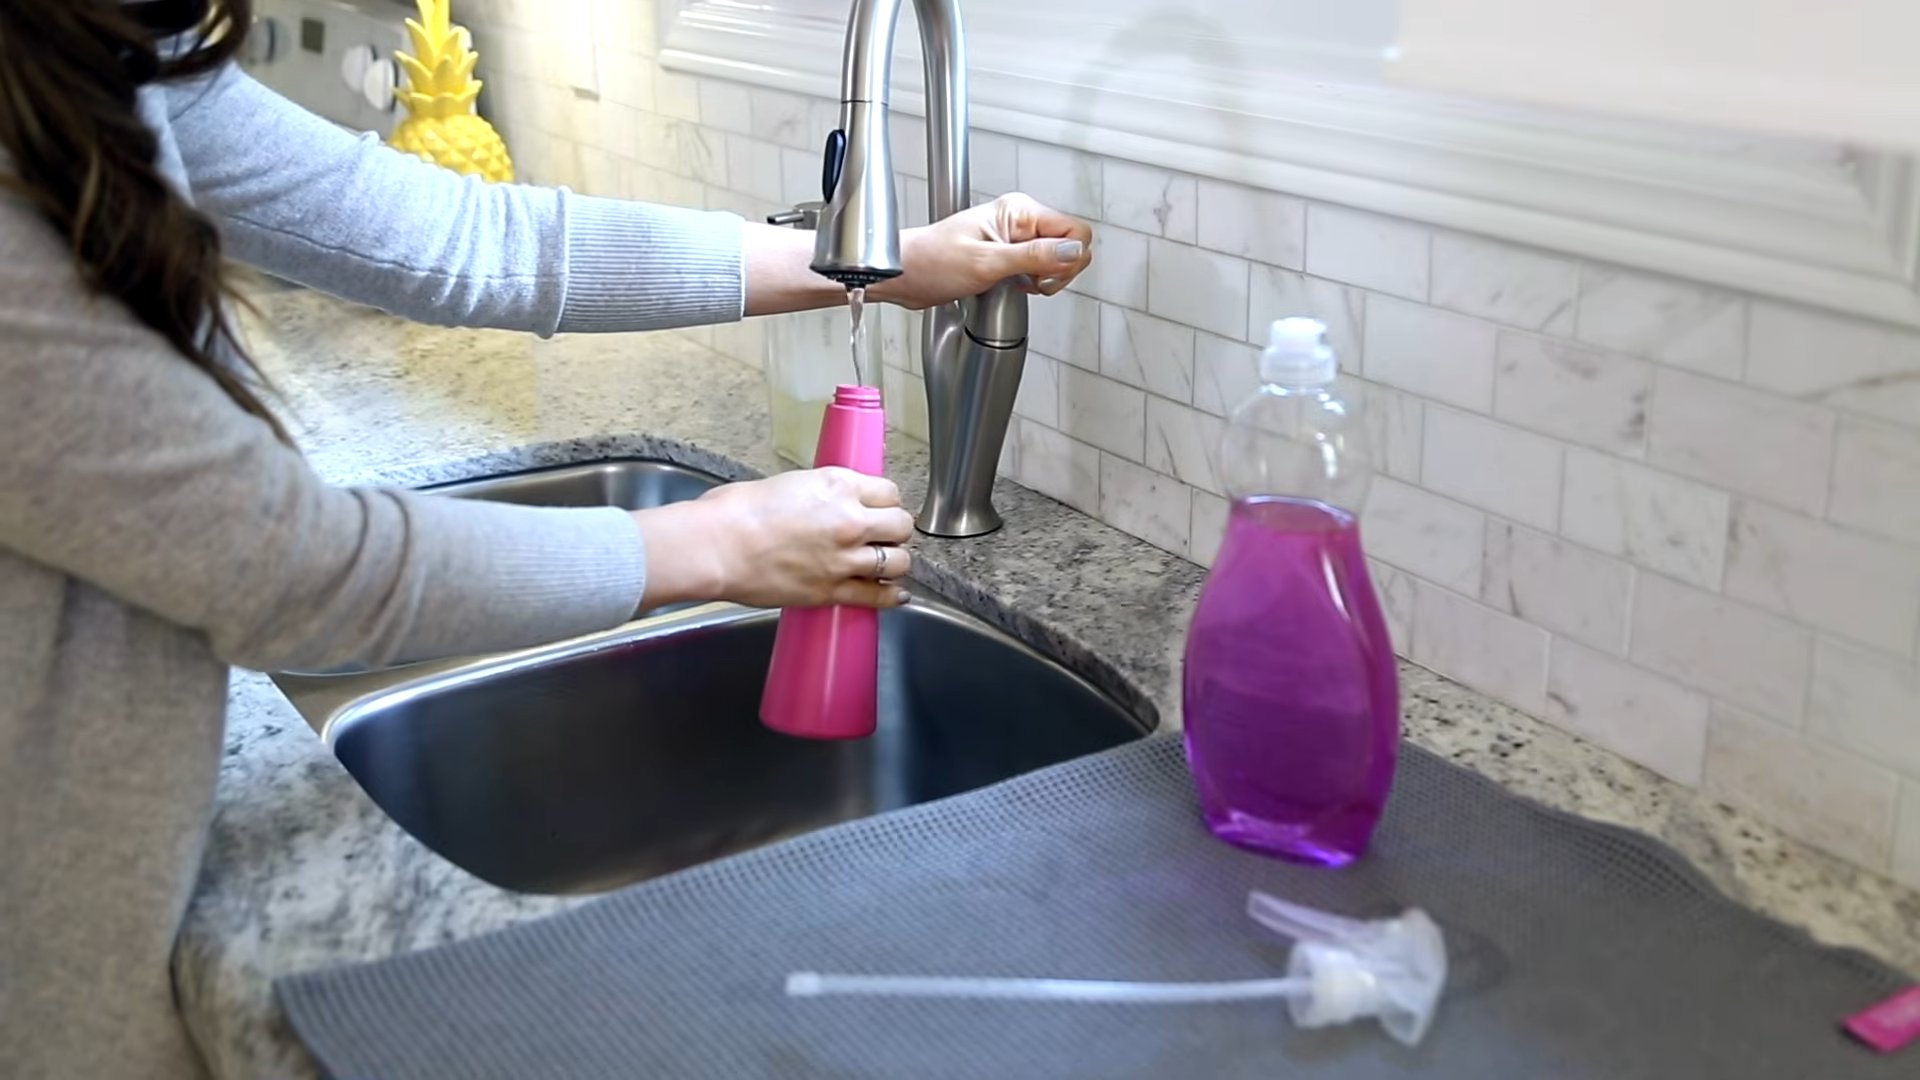
Making Your Own All-Purpose Cleaner
Why buy expensive all-purpose cleaners when you can make your own with just a few simple ingredients? This recipe is effective, eco-friendly, and smells great!
What You’ll Need:
* Spray bottle
* 1/4 cup white vinegar
* 1 tablespoon baking soda
* Water
* 10-15 drops of essential oil (lemon, lavender, or tea tree are great choices)
Step-by-Step Instructions:
1. Baking Soda First: Pour the baking soda into the spray bottle.
2. Vinegar Power: Slowly add the white vinegar. It will fizz, so add it gradually to avoid overflow.
3. Water Fill: Fill the rest of the spray bottle with water.
4. Essential Oil Boost: Add your favorite essential oil for fragrance and extra cleaning power.
5. Shake It Up: Shake the bottle gently to combine all the ingredients.
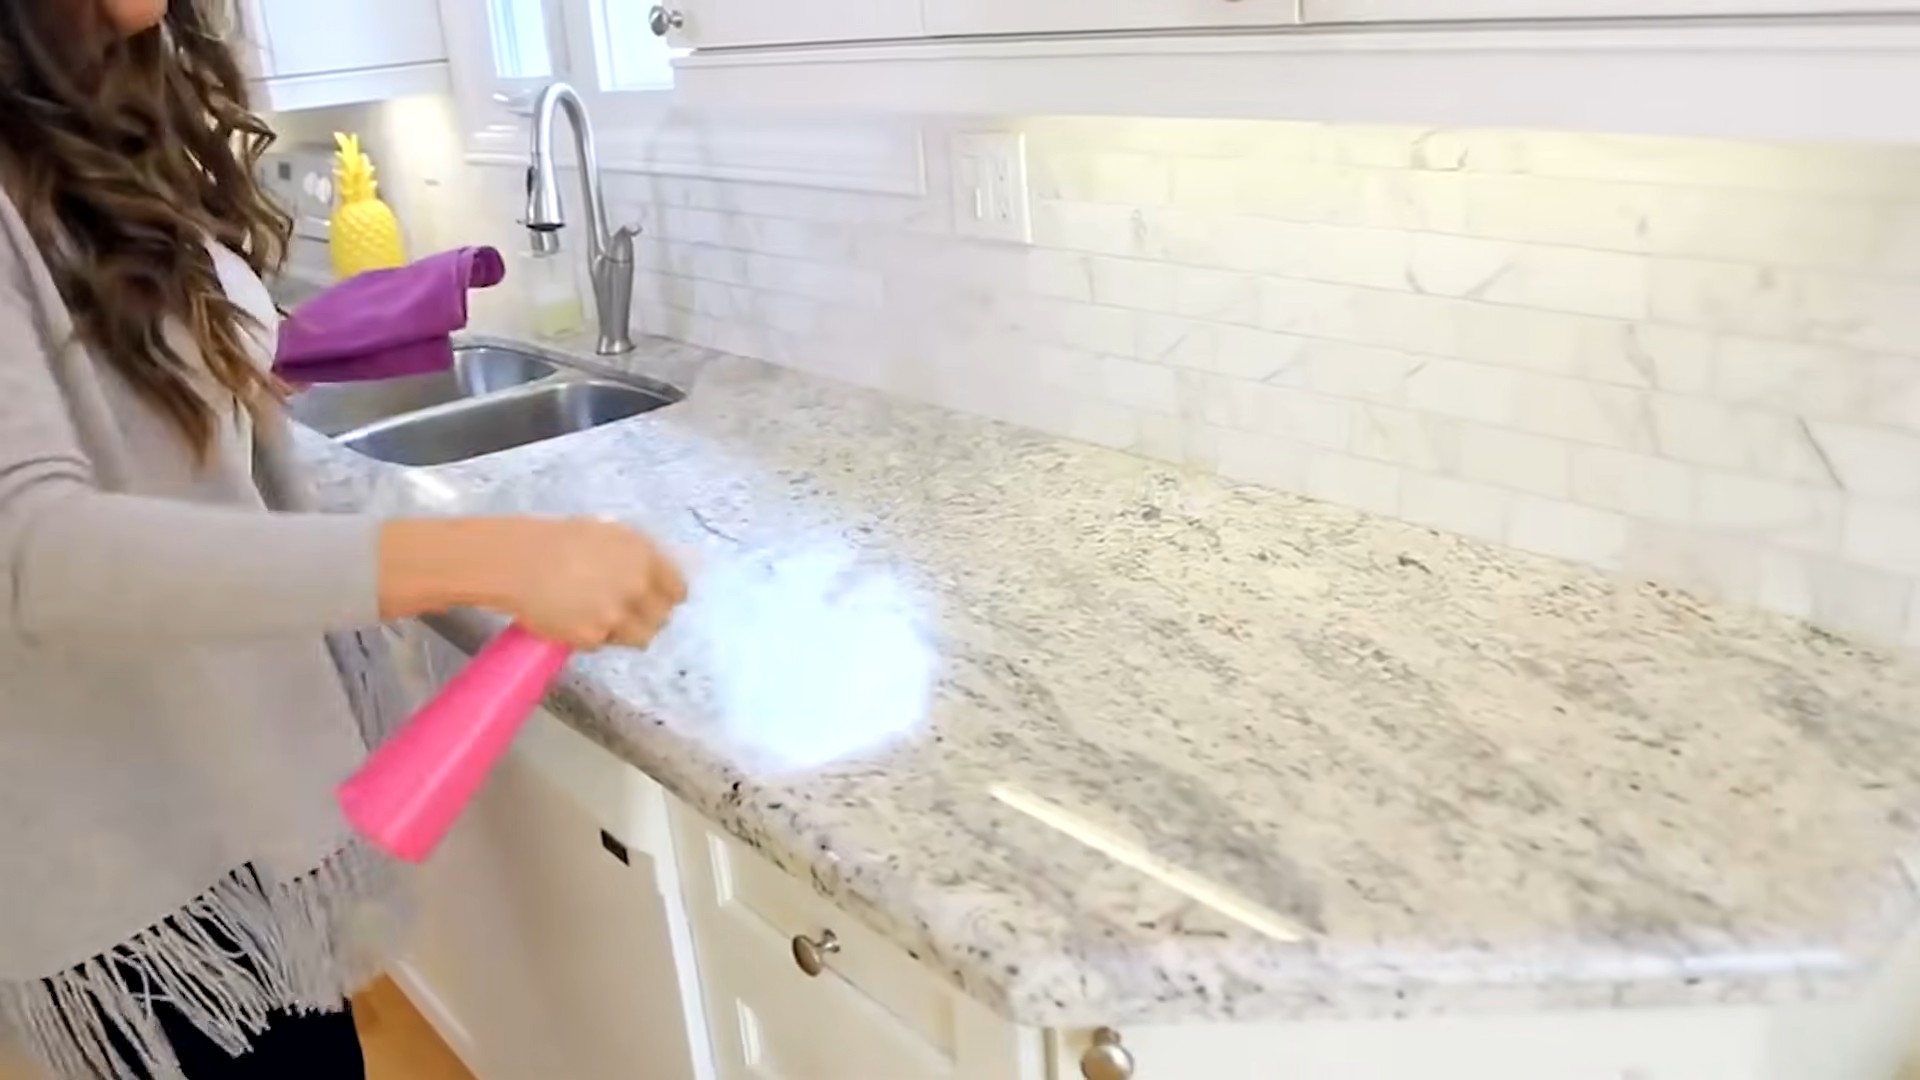
6. Spray and Wipe: Spray the cleaner onto surfaces and wipe clean with a cloth or sponge. This cleaner is great for countertops, sinks, and other non-porous surfaces.
Removing Stubborn Stains from Carpets
Accidents happen! But don’t despair, this DIY carpet stain remover can tackle even the toughest stains.
What You’ll Need:
* Spray bottle
* 1/2 cup white vinegar
* 2 cups water
* 1 tablespoon dish soap (clear, non-bleach)
* Clean cloth or sponge
Step-by-Step Instructions:
1. Mix the Solution: In the spray bottle, combine the white vinegar, water, and dish soap.
2. Spray the Stain: Spray the stain generously with the solution.
3. Blot, Don’t Rub: Using a clean cloth or sponge, blot the stain gently. Avoid rubbing, as this can spread the stain and damage the carpet fibers.
4. Repeat as Needed: Repeat the process until the stain is gone.
5. Rinse with Water: Once the stain is removed, rinse the area with clean water to remove any soap residue.
6. Dry Thoroughly: Blot the area with
Conclusion
So, there you have it! This easy cleaning hack isn’t just about saving money; it’s about reclaiming your time and creating a healthier, happier home. We’ve shown you how simple it is to whip up your own effective cleaning solution using ingredients you likely already have in your pantry. Forget harsh chemicals and expensive store-bought cleaners – this DIY approach is gentle on your surfaces, your wallet, and the environment.
But why is this a must-try? Because it works! You’ll be amazed at how effectively this homemade cleaner tackles grime, grease, and everyday messes. Plus, you have complete control over the ingredients, allowing you to customize the scent and strength to your liking.
Feeling adventurous? Here are a few variations to consider:
* **For extra degreasing power:** Add a tablespoon of washing soda to the mix. Be sure to wear gloves when handling washing soda, as it can be irritating to the skin.
* **For a fresh, citrusy scent:** Infuse your vinegar with citrus peels (lemon, orange, grapefruit) for a few weeks before using it in the recipe. This will not only add a pleasant aroma but also boost the cleaning power.
* **For a disinfectant boost:** Add a few drops of tea tree oil or eucalyptus oil to the spray bottle. These essential oils have natural antibacterial and antifungal properties.
* **For a gentle abrasive:** Add a tablespoon of baking soda directly to the surface you’re cleaning, then spray with your homemade cleaner and scrub. This is great for tackling stubborn stains in sinks and tubs.
We’re confident that once you try this easy cleaning hack, you’ll be hooked. It’s a game-changer for anyone looking to simplify their cleaning routine and create a more sustainable home.
Don’t just take our word for it – give it a try! We’re eager to hear about your experiences. Share your results, variations, and any tips you discover in the comments below. Let’s build a community of clean-living enthusiasts who are passionate about making their homes sparkle without breaking the bank or harming the planet. So go ahead, embrace the power of DIY and experience the satisfaction of a truly clean home, made possible by this simple, effective, and eco-friendly cleaning solution. We can’t wait to see what you create!
Frequently Asked Questions (FAQ)
Is this cleaning solution safe for all surfaces?
While this DIY cleaning solution is generally safe for most surfaces, it’s always a good idea to test it in an inconspicuous area first, especially on delicate materials like marble, granite, or wood. The acidity of vinegar can potentially damage certain finishes over time. For these surfaces, consider diluting the solution further with water or using a different cleaning method altogether. Avoid using it on waxed furniture, as it can strip the wax. When in doubt, consult the manufacturer’s recommendations for cleaning specific surfaces.
How long will this cleaning solution last?
This homemade cleaning solution typically lasts for several weeks when stored properly in a cool, dark place. The vinegar acts as a natural preservative, helping to prevent bacterial growth. However, it’s best to use it within a month or two for optimal effectiveness. If you notice any changes in color, odor, or consistency, it’s best to discard the solution and make a fresh batch. Always label your spray bottle with the date you made the solution so you can keep track of its freshness.
Can I use a different type of vinegar?
While white vinegar is the most commonly recommended type of vinegar for cleaning due to its high acidity and lack of color, you can experiment with other types of vinegar, such as apple cider vinegar. Apple cider vinegar has a milder scent and may be preferred by those who find the smell of white vinegar overpowering. However, keep in mind that apple cider vinegar may leave a slight residue on some surfaces, so it’s important to test it first. Avoid using balsamic vinegar or other colored vinegars, as they can stain surfaces.
What essential oils are best to use in this cleaning solution?
The best essential oils to use in this cleaning solution depend on your personal preferences and the desired effect. Some popular choices include:
* **Lemon:** For its fresh, citrusy scent and degreasing properties.
* **Tea Tree:** For its antibacterial and antifungal properties.
* **Lavender:** For its calming scent and antiseptic properties.
* **Eucalyptus:** For its invigorating scent and antibacterial properties.
* **Peppermint:** For its refreshing scent and insect-repelling properties.
When using essential oils, be sure to use pure, therapeutic-grade oils and add only a few drops to the cleaning solution. Too much essential oil can be irritating to the skin and respiratory system. Also, be aware that some essential oils are not safe for use around pets or children, so do your research before adding them to your cleaning solution.
Is this cleaning solution safe for pets and children?
This DIY cleaning solution is generally safer for pets and children than many commercial cleaners, as it doesn’t contain harsh chemicals or synthetic fragrances. However, it’s still important to exercise caution when using it around pets and children. Keep the spray bottle out of their reach and avoid spraying it directly on them. If your pet or child ingests the cleaning solution, contact your veterinarian or poison control center immediately. As mentioned earlier, be mindful of the essential oils you use, as some can be toxic to pets.
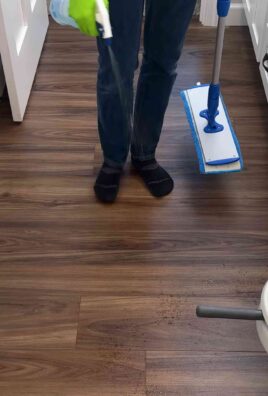
Can I use this cleaning solution on my floors?
Yes, you can use this cleaning solution on most types of floors, but it’s important to dilute it properly and test it in an inconspicuous area first. For hardwood floors, use a very diluted solution and avoid leaving it on the surface for too long, as the vinegar can damage the finish. For tile and laminate floors, you can use a slightly stronger solution. Always mop with a damp mop, not a soaking wet one, to prevent water damage. Avoid using this cleaning solution on marble floors, as the vinegar can etch the surface.
What if I don’t like the smell of vinegar?
If you don’t like the smell of vinegar, there are several things you can do to minimize it. First, use a high-quality vinegar, as some brands have a stronger odor than others. Second, add essential oils to the cleaning solution to mask the vinegar smell. Lemon, lavender, and eucalyptus are all good choices. Third, open windows and ventilate the area while you’re cleaning. Finally, the vinegar smell will dissipate quickly once the surface is dry. You can also try infusing your vinegar with citrus peels for a more pleasant scent.
Can I use this cleaning solution to clean my windows and mirrors?
Yes, this cleaning solution works great for cleaning windows and mirrors. Simply spray the solution onto the surface and wipe it clean with a microfiber cloth. For streak-free results, use a clean, dry microfiber cloth and avoid cleaning windows and mirrors in direct sunlight. You can also add a few drops of dish soap to the cleaning solution for extra cleaning power.
What are the benefits of using a DIY cleaning solution?
There are many benefits to using a DIY cleaning solution, including:
* **Cost-effective:** Homemade cleaning solutions are much cheaper than store-bought cleaners.
* **Eco-friendly:** DIY cleaning solutions are made with natural ingredients and don’t contain harsh chemicals that can harm the environment.
* **Safe for pets and children:** DIY cleaning solutions are generally safer for pets and children than commercial cleaners.
* **Customizable:** You can customize the scent and strength of your DIY cleaning solution to your liking.
* **Reduces waste:** By making your own cleaning solutions, you can reduce your reliance on single-use plastic bottles.
* **Healthier home:** DIY cleaning solutions don’t contain harsh chemicals that can irritate your skin and respiratory system.
By making the switch to DIY cleaning solutions, you can create a cleaner, healthier, and more sustainable home for yourself and your family.

Leave a Comment