

Cleaning Habits Routine: Let’s face it, nobody *loves* cleaning, right? But what if I told you that establishing a simple, effective cleaning habits routine could transform your home from a source of stress into a sanctuary of calm? For centuries, cultures around the globe have understood the profound connection between a clean living space and a clear mind. From the ancient Roman bathhouses to the minimalist aesthetic of Japanese homes, cleanliness has always been valued for its positive impact on well-being.
In today’s fast-paced world, maintaining a spotless home can feel like an impossible task. We’re constantly bombarded with demands on our time and energy, leaving little room for the seemingly endless chores. That’s where this DIY guide comes in! I’m going to share some game-changing cleaning habits routine tips and tricks that will help you streamline your cleaning process, reclaim your weekends, and create a home you truly love to live in.
Think of this as your personal roadmap to a cleaner, happier life. We’ll break down the overwhelming task of cleaning into manageable daily and weekly habits, focusing on efficiency and effectiveness. So, ditch the all-day cleaning marathons and embrace a sustainable cleaning habits routine that fits seamlessly into your busy schedule. Get ready to say goodbye to clutter and hello to a sparkling clean home – without sacrificing your precious free time!

DIY Deep Cleaning Schedule: Conquer Your Home, One Room at a Time!
Okay, friends, let’s be honest. Keeping a house sparkling clean can feel like a never-ending battle. But fear not! I’m here to share my tried-and-true deep cleaning schedule that breaks down the overwhelming task into manageable chunks. This isn’t about perfection; it’s about creating a cleaner, healthier, and happier home for you and your family. I’ve designed this schedule to be flexible, so feel free to adjust it to fit your lifestyle and the specific needs of your space. Let’s get started!
Phase 1: The Monthly Power Hour
These are the tasks that need a little more attention than your weekly routine but don’t require a full-blown deep clean every time. Aim to tackle one or two of these each month.
- Clean Appliances: This includes your dishwasher, washing machine, and dryer.
- Dust Light Fixtures and Ceiling Fans: Get rid of those dust bunnies hanging out up there!
- Wash Curtains and Blinds: Freshen up your window treatments.
- Clean Kitchen Cabinets (Inside and Out): Wipe away spills and grime.
- Declutter and Organize One Area: Choose a drawer, shelf, or closet to tackle.
Phase 2: The Quarterly Refresh
These tasks are a bit more involved and only need to be done every three months or so.
- Deep Clean Bathrooms: Scrub grout, clean showerheads, and disinfect everything.
- Wash Bedding (Including Pillows and Comforters): Give your sleep sanctuary a thorough cleaning.
- Clean Windows and Mirrors: Let the sunshine in!
- Vacuum or Steam Clean Upholstery: Remove dust and allergens from your furniture.
- Clean Out the Refrigerator: Toss expired items and wipe down shelves.
Phase 3: The Semi-Annual Overhaul
These are the big projects that you only need to tackle twice a year.
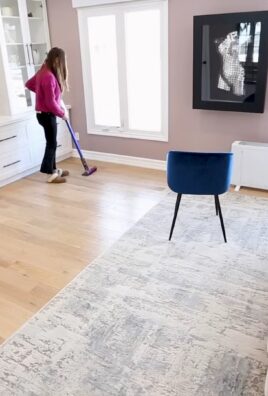
- Deep Clean Carpets or Rugs: Rent a carpet cleaner or hire a professional.
- Clean Out Gutters: Protect your home from water damage.
- Wash Windows Inside and Out: A sparkling view makes a huge difference.
- Organize and Declutter Storage Areas: Garages, attics, and basements often need a good purge.
- Inspect and Clean Smoke Detectors: Ensure your safety devices are working properly.
Phase 4: The Annual Mega-Clean
This is the ultimate deep clean, tackling those tasks that often get overlooked.
- Clean Out Closets and Donate Unwanted Items: A great way to start the new year fresh.
- Power Wash Exterior Surfaces: Clean siding, decks, and patios.
- Inspect and Clean Appliances (Oven, Range Hood): Remove built-up grease and grime.
- Check and Seal Windows and Doors: Improve energy efficiency.
- Clean and Organize the Entire House: A top-to-bottom refresh!
Step-by-Step Instructions: Let’s Get Cleaning!
Now, let’s dive into some specific tasks with detailed instructions. I’ll share my favorite methods and products to make the process as efficient and effective as possible.
1. Deep Cleaning Your Dishwasher
A clean dishwasher means cleaner dishes! Here’s how I tackle this task:
- Empty the Dishwasher: Remove all dishes, utensils, and racks.
- Clean the Filter: Locate the filter (usually at the bottom of the dishwasher) and remove it. Rinse it thoroughly under running water, removing any food particles or debris. You might need a small brush to get into the crevices.
- Clean the Spray Arms: Check the spray arms for any clogs. Use a toothpick or wire to clear any blocked holes.
- Run a Vinegar Cycle: Place a dishwasher-safe cup filled with white vinegar on the top rack. Run the dishwasher on a hot cycle. The vinegar will help to dissolve grease and mineral buildup.
- Sprinkle Baking Soda: After the vinegar cycle, sprinkle a cup of baking soda on the bottom of the dishwasher. Run a short, hot cycle. The baking soda will help to deodorize and freshen the dishwasher.
- Wipe Down the Exterior: Use a damp cloth to wipe down the exterior of the dishwasher, including the door, control panel, and handle.
2. Washing Machine Deep Clean
Your washing machine needs love too! Mold and mildew can build up over time, so regular cleaning is essential.
- Empty the Washing Machine: Make sure there are no clothes inside.
- Clean the Dispenser: Remove the detergent and fabric softener dispensers and clean them thoroughly with warm, soapy water. Rinse well and dry before replacing.
- Run a Cleaning Cycle with Bleach: Add 1 cup of bleach to the bleach dispenser. Run the washing machine on the hottest, longest cycle. If your machine has a “clean washer” cycle, use that.
- Run a Cleaning Cycle with Vinegar: After the bleach cycle, add 1 cup of white vinegar to the detergent dispenser. Run the washing machine on the hottest, longest cycle again. This will help to remove any remaining bleach residue and further disinfect the machine.
- Wipe Down the Exterior: Use a damp cloth to wipe down the exterior of the washing machine, including the door, control panel, and lid.
- Leave the Door Ajar: After cleaning, leave the washing machine door ajar to allow it to air dry completely. This will help to prevent mold and mildew growth.
3. Tackling Those Dusty Ceiling Fans
Dusty ceiling fans can circulate allergens throughout your home. Here’s my easy method for cleaning them:
- Gather Your Supplies: You’ll need a stepladder, a pillowcase, and a microfiber cloth.
- Prepare the Pillowcase: Slide the pillowcase over one of the fan blades, encasing it completely.
- Wipe the Blade: Gently wipe the blade with the pillowcase, pulling the dust and debris inside. Repeat for each blade. The pillowcase will catch the dust and prevent it from falling onto the floor.
- Wipe Down the Fan Motor: Use a microfiber cloth to wipe down the fan motor and any other exposed parts of the fan.
- Clean the Light Fixture (If Applicable): If your ceiling fan has a light fixture, remove the glass cover and clean it with warm, soapy water. Dry thoroughly before replacing.
4. Deep Cleaning Your Shower
Shower grime can be tough, but with the right approach, you can get your shower sparkling clean.
- Ventilate the Bathroom: Open a window or turn on the exhaust fan to ventilate the bathroom.
- Rinse the Shower Walls: Rinse the shower walls with hot water to loosen any soap scum or grime.
- Apply Your Cleaning Solution: I like to use a mixture of equal parts white vinegar and dish soap. You can also use a commercial shower cleaner. Spray the cleaning solution liberally on the shower walls, floor, and door.
- Let the Solution Sit: Allow the cleaning solution to sit for at least 15-20 minutes to allow it to penetrate the grime.
- Scrub the Shower: Use a scrub brush or sponge to scrub the shower walls, floor, and door. Pay special attention to areas with heavy soap scum or mildew. For tough stains, you can use a grout brush.
- Rinse Thoroughly: Rinse the shower thoroughly with hot water to remove all traces of the cleaning solution.
- Dry the Shower: Use a clean towel or squeegee to dry the shower walls, floor, and door. This will help to prevent water spots and mildew growth.
- Clean the Showerhead: To clean the showerhead, fill a plastic bag with white vinegar and secure it around the showerhead with a rubber band. Make sure the showerhead is submerged in the vinegar. Let it soak for at least 30 minutes, or overnight for stubborn buildup. Remove the bag and rinse the showerhead thoroughly with water.
5. Cleaning Kitchen Cabinets (Inside and Out)
Kitchen cabinets can accumulate grease, spills, and dust. Here’s how to give them a thorough cleaning:
- Empty the Cabinets: Remove all items from the cabinets.
- Dust the Interiors: Use a vacuum cleaner with a brush attachment to dust the interiors of the cabinets.
- Wash the Interiors: Mix warm

Conclusion
So, there you have it! Transforming your cleaning habits routine from a dreaded chore into a manageable, even enjoyable, part of your life is entirely within your reach. This DIY approach isn’t just about saving money on expensive cleaning products; it’s about taking control of the ingredients you’re bringing into your home and creating a healthier, more sustainable living space for yourself and your family.
Why is this a must-try? Because it’s effective, customizable, and empowering. You’re not just blindly following a pre-packaged solution; you’re actively participating in creating a cleaner, healthier environment. You’ll be amazed at how simple ingredients like vinegar, baking soda, and essential oils can tackle even the toughest cleaning challenges. Plus, the satisfaction of knowing exactly what’s in your cleaning solutions is unparalleled.
Consider these variations to personalize your cleaning habits routine even further:
* **Scent Customization:** Experiment with different essential oil blends to create your signature cleaning scent. Lavender and lemon are classic choices for their antibacterial and uplifting properties, but don’t be afraid to explore other options like eucalyptus, tea tree, or grapefruit.
* **Surface-Specific Solutions:** While the all-purpose cleaner is a great starting point, you can tailor your solutions for specific surfaces. For example, a paste of baking soda and water is excellent for scrubbing stubborn stains in the bathroom, while a diluted vinegar solution works wonders on glass and mirrors.
* **DIY Cleaning Wipes:** Pre-soak reusable cloths in your all-purpose cleaner and store them in an airtight container for quick and easy cleanups. This is a fantastic way to reduce paper towel waste and keep your home consistently tidy.
* **Deep Cleaning Schedule:** Integrate these DIY solutions into a comprehensive deep cleaning schedule. Break down larger tasks into smaller, manageable chunks and tackle one area of your home each week. This will prevent overwhelm and ensure that your home stays consistently clean and fresh.We truly believe that incorporating these DIY cleaning habits routine into your life will make a significant difference. Not only will you save money and reduce your exposure to harsh chemicals, but you’ll also gain a sense of accomplishment and control over your home environment.
Now, it’s your turn! We encourage you to try these DIY cleaning solutions and see the results for yourself. Don’t be afraid to experiment, adapt, and personalize the recipes to suit your specific needs and preferences.
Most importantly, we want to hear about your experience! Share your successes, challenges, and variations in the comments below. Let’s build a community of DIY cleaning enthusiasts who are passionate about creating healthier, happier homes. Your insights and tips could inspire others to embrace the power of DIY cleaning and transform their own cleaning habits routine. Let us know what works for you, what doesn’t, and any creative solutions you come up with along the way. Together, we can make cleaning less of a chore and more of a rewarding experience.
FAQ
What are the benefits of switching to a DIY cleaning habits routine?
Switching to a DIY cleaning habits routine offers a multitude of benefits. Firstly, it significantly reduces your exposure to harsh chemicals found in many commercial cleaning products. These chemicals can be harmful to your health, causing skin irritation, respiratory problems, and even long-term health issues. By using natural ingredients like vinegar, baking soda, and essential oils, you can create a safer and healthier environment for yourself and your family.
Secondly, DIY cleaning is incredibly cost-effective. The ingredients used in homemade cleaning solutions are typically much cheaper than their commercial counterparts. You can save a significant amount of money over time by making your own cleaning products.
Thirdly, DIY cleaning is environmentally friendly. Commercial cleaning products often come in plastic bottles that contribute to pollution. By making your own cleaning solutions, you can reduce your plastic waste and minimize your environmental impact. You can also reuse spray bottles and containers, further reducing waste.
Finally, DIY cleaning allows you to customize your cleaning solutions to meet your specific needs and preferences. You can adjust the ingredients and scents to create cleaning products that are tailored to your home and lifestyle.
Is DIY cleaning as effective as using commercial cleaning products?
Yes, DIY cleaning can be just as effective as using commercial cleaning products, and in some cases, even more so. The key is to use the right ingredients and techniques for the specific cleaning task. For example, vinegar is a powerful disinfectant and degreaser, while baking soda is an excellent abrasive cleaner and deodorizer. When used correctly, these natural ingredients can effectively clean and sanitize your home.
However, it’s important to note that some DIY cleaning solutions may not be as effective against certain types of bacteria and viruses as commercial disinfectants. If you’re concerned about disinfecting surfaces, you can add a few drops of tea tree oil or other antibacterial essential oils to your cleaning solutions.
What are some essential ingredients for a DIY cleaning habits routine?
Some essential ingredients for a DIY cleaning habits routine include:
* **White Vinegar:** A versatile cleaner, disinfectant, and deodorizer.
* **Baking Soda:** An abrasive cleaner, deodorizer, and pH regulator.
* **Essential Oils:** Add fragrance and antibacterial properties. Popular choices include lavender, lemon, tea tree, and eucalyptus.
* **Castile Soap:** A gentle and effective cleanser.
* **Water:** Used to dilute other ingredients and create spray solutions.
* **Citric Acid:** Effective for removing hard water stains and soap scum.
* **Borax:** A natural mineral that can be used as a laundry booster and cleaner. (Use with caution and research safety guidelines.)How do I store my DIY cleaning solutions?
Store your DIY cleaning solutions in clean, airtight containers. Label each container clearly with the name of the solution and the date it was made. Store your cleaning solutions in a cool, dark place away from direct sunlight and heat.
It’s important to note that some DIY cleaning solutions, such as those containing vinegar and baking soda, may react with certain types of containers. Avoid storing these solutions in metal containers, as they can corrode. Glass or plastic containers are generally the best options.
Are there any safety precautions I should take when making and using DIY cleaning solutions?
Yes, there are several safety precautions you should take when making and using DIY cleaning solutions:
* **Always label your containers clearly.** This will prevent accidental ingestion or misuse of the solutions.
* **Keep cleaning solutions out of reach of children and pets.**
* **Avoid mixing certain ingredients, such as bleach and ammonia.** This can create toxic fumes.
* **Wear gloves when handling cleaning solutions, especially if you have sensitive skin.**
* **Test cleaning solutions on a small, inconspicuous area before using them on larger surfaces.** This will help you ensure that the solution doesn’t damage or discolor the surface.
* **Ensure proper ventilation when using cleaning solutions.** Open windows or turn on a fan to circulate air.
* **Research the safety guidelines for any new ingredients you are using.**Can I use essential oils in my DIY cleaning solutions?
Yes, essential oils can be a great addition to your DIY cleaning solutions. They add fragrance and can also provide antibacterial and antiviral properties. However, it’s important to use essential oils safely and responsibly.
* **Use high-quality, pure essential oils.**
* **Dilute essential oils properly.** A general guideline is to use 10-15 drops of essential oil per cup of water or other liquid.
* **Be aware of potential allergies or sensitivities to essential oils.** Test a small amount of diluted essential oil on your skin before using it in your cleaning solutions.
* **Avoid using essential oils around pregnant women, infants, and pets.** Some essential oils can be harmful to these groups.
* **Store essential oils in dark glass bottles away from direct sunlight and heat.**What if a DIY cleaning solution doesn’t work as expected?
If a DIY cleaning solution doesn’t work as expected, don’t be discouraged! There are several things you can try:
* **Adjust the recipe.** You may need to add more of a particular ingredient or try a different combination of ingredients.
* **Use a different cleaning technique.** For example, you may need to scrub harder or let the solution sit for longer.
* **Try a different DIY cleaning solution.** There are many different recipes available online, so you can experiment until you find one that works for you.
* **Consider the type of surface you’re cleaning.** Some surfaces may require more specialized cleaning solutions.
* **Research the specific stain or cleaning challenge you’re facing.** This will help you identify the most effective ingredients and techniques.Remember, DIY cleaning is all about experimentation and finding what works best for you. Don’t be afraid to try new things and adapt the recipes to suit your specific needs and preferences.


Leave a Comment