

Growing Basil Easy? Absolutely! And I’m here to tell you it’s easier than you might think. Forget those wilting, sad-looking basil plants you see at the grocery store – imagine stepping outside your door and snipping fresh, fragrant basil leaves whenever you need them. Sounds dreamy, right?
Basil, with its rich history stretching back thousands of years, isn’t just a culinary superstar; it’s a symbol of good luck and love in many cultures. From ancient Greece, where it was associated with royalty, to India, where it’s considered a sacred herb, basil has always held a special place in our hearts and kitchens. But you don’t need royal blood or a green thumb to cultivate this amazing herb.
In today’s busy world, who has time for complicated gardening? That’s where these DIY tricks and hacks come in. I’m going to share some simple, effective methods for growing basil easy, even if you’re a complete beginner. We’ll cover everything from choosing the right pot to watering techniques, ensuring you have a thriving basil plant that provides you with delicious leaves all season long. Say goodbye to expensive store-bought basil and hello to fresh, homegrown goodness!

Growing Basil Like a Pro: My Foolproof DIY Guide
Hey there, fellow plant enthusiasts! I’m so excited to share my tried-and-true method for growing lush, fragrant basil right at home. Forget those sad, spindly supermarket basil plants – with a little know-how, you can have a thriving basil bounty all season long. This guide is packed with tips and tricks I’ve learned over the years, so get ready to become a basil-growing guru!
Choosing Your Basil Variety
Before we dive into the nitty-gritty, let’s talk basil varieties. There’s more to basil than just the standard Genovese! Each type offers a unique flavor and aroma, so choosing the right one is key.
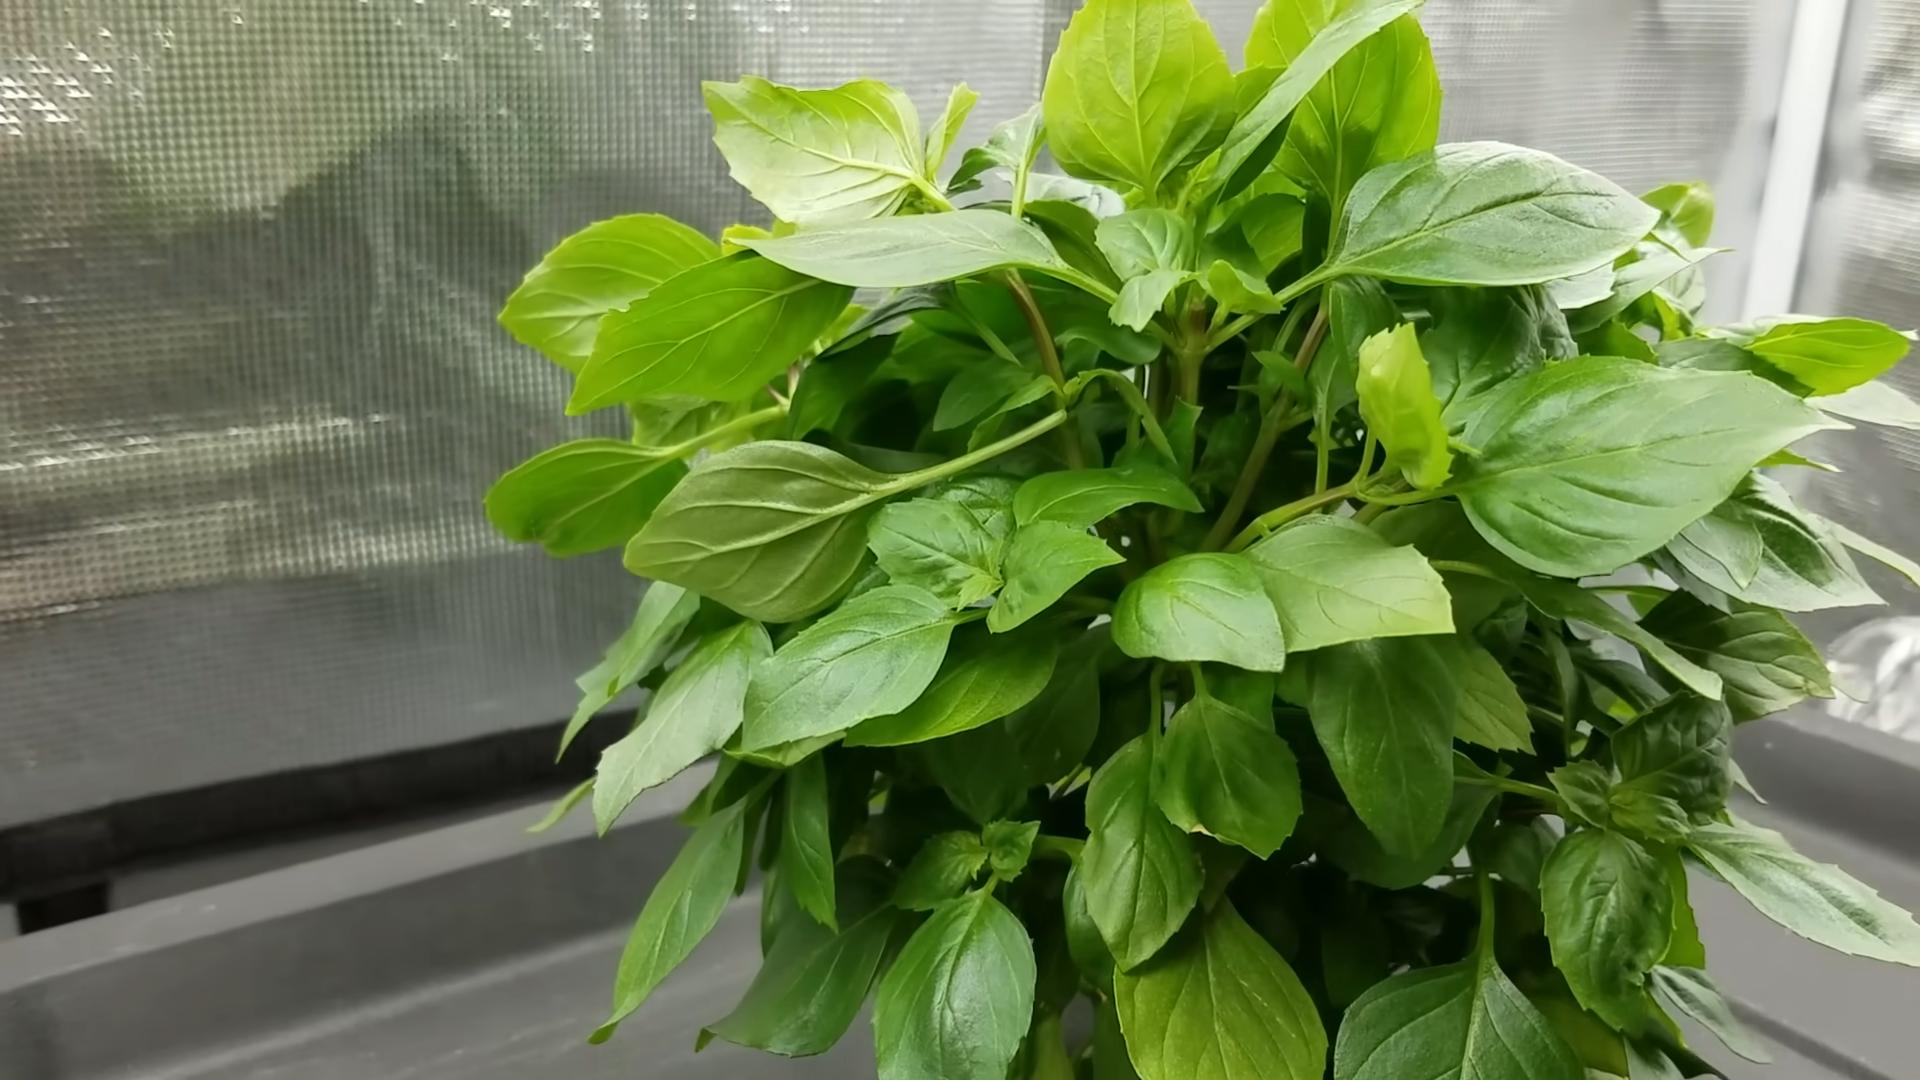
* Genovese Basil: This is your classic Italian basil, perfect for pesto, pasta sauces, and Caprese salads. It has a strong, sweet flavor.
* Thai Basil: With its anise-like flavor, Thai basil is a must-have for Southeast Asian cuisine. It holds up well in stir-fries and soups.
* Lemon Basil: As the name suggests, lemon basil has a bright, citrusy flavor that’s delicious in salads, teas, and desserts.
* Purple Basil: Not only does purple basil add a pop of color to your garden, but it also has a slightly spicier flavor than Genovese.
* Globe Basil: This compact variety is perfect for small spaces and has a milder, sweeter flavor.
I personally love growing a mix of Genovese and Thai basil – the combination is unbeatable!
Starting from Seed vs. Buying Seedlings
You have two main options for getting your basil plants: starting from seed or buying seedlings from a nursery. Both have their pros and cons.
* Starting from Seed: This is the more economical option, and it gives you a wider variety of basil to choose from. However, it requires more time and effort.
* Buying Seedlings: This is the quicker and easier option, especially if you’re short on time. Just make sure to choose healthy-looking plants with vibrant green leaves.
I usually start my basil from seed indoors about 6-8 weeks before the last expected frost. This gives them a head start and ensures a longer growing season.
Section 1: Starting Basil Seeds Indoors (My Preferred Method)
If you’re like me and love the satisfaction of watching your plants grow from tiny seeds, this section is for you!
1. Gather Your Supplies: You’ll need seed starting trays or small pots, seed starting mix (not regular potting soil!), basil seeds, a spray bottle, and a warm, sunny location or a grow light.
2. Prepare the Seed Starting Mix: Moisten the seed starting mix with water until it’s damp but not soggy. Fill your seed starting trays or pots with the moistened mix.
3. Sow the Seeds: Sprinkle a few basil seeds on top of the soil in each cell or pot. Gently press them down with your finger. Basil seeds need light to germinate, so don’t bury them too deep.
4. Water Gently: Use a spray bottle to mist the soil surface. Avoid pouring water directly onto the seeds, as this can dislodge them.
5. Provide Warmth and Light: Basil seeds germinate best in warm temperatures (around 70-75°F). Place your seed starting trays in a warm, sunny location or under a grow light. If using a grow light, keep it a few inches above the soil surface.
6. Keep the Soil Moist: Check the soil moisture daily and mist with water as needed to keep it consistently damp. Don’t let the soil dry out completely.
7. Wait for Germination: Basil seeds typically germinate within 5-10 days. Once the seedlings emerge, provide them with plenty of light to prevent them from becoming leggy.
8. Thin the Seedlings: Once the seedlings have their first set of true leaves (the second set of leaves that appear after the initial seed leaves), thin them out so that only one strong seedling remains in each cell or pot. Use small scissors to snip off the weaker seedlings at the soil line.
9. Harden Off the Seedlings: Before transplanting your basil seedlings outdoors, you’ll need to harden them off. This process gradually acclimates them to outdoor conditions. Start by placing the seedlings outdoors in a sheltered location for a few hours each day, gradually increasing the amount of time they spend outside over the course of a week or two. Protect them from direct sunlight and strong winds.
Section 2: Transplanting Basil Seedlings Outdoors
Once your basil seedlings are hardened off and the danger of frost has passed, it’s time to transplant them into your garden or containers.
1. Choose a Sunny Location: Basil thrives in full sun, so choose a location that receives at least 6-8 hours of sunlight per day.
2. Prepare the Soil: Basil prefers well-drained soil that is rich in organic matter. Amend your garden soil with compost or aged manure to improve its fertility and drainage.
3. Dig the Planting Holes: Dig holes that are slightly larger than the root balls of your basil seedlings. Space the holes about 12-18 inches apart.
4. Gently Remove the Seedlings: Carefully remove the basil seedlings from their seed starting trays or pots. Gently loosen the roots if they are tightly bound.
5. Plant the Seedlings: Place the basil seedlings in the planting holes and backfill with soil. Gently firm the soil around the base of the plants.
6. Water Thoroughly: Water the newly transplanted basil seedlings thoroughly to help them settle in.
7. Mulch Around the Plants: Apply a layer of mulch around the base of the plants to help retain moisture, suppress weeds, and regulate soil temperature. I like to use straw or shredded bark.
Section 3: Caring for Your Basil Plants
Now that your basil plants are in the ground, it’s important to provide them with the care they need to thrive.
1. Water Regularly: Basil needs consistent moisture, especially during hot, dry weather. Water deeply whenever the top inch of soil feels dry to the touch. Avoid overwatering, as this can lead to root rot.
2. Fertilize Sparingly: Basil is a relatively light feeder, so you don’t need to fertilize it heavily. Apply a balanced liquid fertilizer every few weeks during the growing season.
3. Pinch Off Flower Buds: To encourage bushy growth and prevent your basil plants from going to seed, pinch off any flower buds that appear. Once basil flowers, its leaves become less flavorful.
4. Harvest Regularly: The more you harvest your basil, the more it will produce. Start harvesting when the plants are about 6-8 inches tall. Pinch or cut off the top sets of leaves, leaving at least 4-6 leaves on the plant.
5. Watch Out for Pests and Diseases: Basil is generally pest-resistant, but it can be susceptible to aphids, spider mites, and Japanese beetles. Inspect your plants regularly and treat any infestations promptly. Basil can also be affected by fungal diseases such as downy mildew. To prevent fungal diseases, provide good air circulation and avoid overhead watering.
Section 4: Troubleshooting Common Basil Problems
Even with the best care, you may encounter some problems while growing basil. Here are a few common issues and how to address them:
* Yellowing Leaves: This can be caused by overwatering, underwatering, nutrient deficiencies, or pests. Check the soil moisture and adjust your watering accordingly. Fertilize with a balanced fertilizer if necessary. Inspect the plants for pests and treat them if found.
* Leggy Growth: This is usually caused by insufficient light. Make sure your basil plants are getting at least 6-8 hours of sunlight per day. If you’re growing them indoors, use a grow light.
* Downy Mildew: This fungal disease causes yellow spots on the leaves, followed by a grayish-purple fuzz on the undersides. To prevent downy mildew, provide good air circulation and avoid overhead watering. If your plants are affected, remove the infected leaves and spray with a fungicide.
* Basil Going to Seed: Once basil flowers, its leaves become less flavorful. To prevent this, pinch off any flower buds that appear. If your basil plants do go to seed, you can still use the leaves, but they may have a slightly bitter taste.
Section 5: Harvesting and Storing Your Basil
Harvesting your basil regularly is key to keeping your plants productive and flavorful.
1. Harvesting: As mentioned earlier, start harvesting when the plants are about 6-8 inches tall. Pinch or cut off the top sets of leaves, leaving at least 4-6 leaves on the plant. Harvest in the morning, after the dew has dried, for the best flavor.
2. Using Fresh Basil: Fresh basil is best used immediately after harvesting. Add it to salads, pasta sauces, soups, and other dishes.
Conclusion
So, there you have it! Growing basil easily at home is not only achievable, but it’s also incredibly rewarding. Forget those sad, expensive bunches from the grocery store that wilt within days. With a little effort and this simple DIY trick, you can have a constant supply of fresh, fragrant basil right at your fingertips.
Why is this a must-try? Because it empowers you to control the quality of your basil. You know exactly what goes into it – no pesticides, no questionable growing practices. Plus, the flavor of homegrown basil is simply unmatched. It’s more vibrant, more aromatic, and adds a burst of freshness to any dish.
Beyond the basic method, there are so many ways to customize your basil-growing experience. Experiment with different varieties! Genovese basil is a classic for pesto, but lemon basil adds a citrusy twist to salads and teas. Thai basil brings an anise-like flavor to Asian dishes. Consider growing your basil in different containers – terracotta pots, raised beds, or even repurposed containers. Just ensure proper drainage.
For those with limited space, growing basil indoors is a fantastic option. Place your basil plant near a sunny window or use a grow light to provide adequate light. Remember to rotate the plant regularly to ensure even growth.
Don’t be afraid to get creative with your basil harvest. Beyond pesto and pasta sauces, basil is delicious in salads, sandwiches, soups, and even cocktails. Infuse olive oil with basil for a flavorful drizzle, or dry your basil leaves for later use.
We wholeheartedly encourage you to try this DIY trick for growing basil easily. It’s a simple, cost-effective, and incredibly satisfying way to elevate your cooking and connect with nature. Once you taste the difference between store-bought and homegrown basil, you’ll never go back.
And most importantly, we want to hear about your experience! Share your tips, tricks, and successes in the comments below. Let us know what varieties you’re growing, what dishes you’re making, and any challenges you’ve overcome. Together, we can create a community of thriving basil growers! Happy gardening!
Frequently Asked Questions (FAQ)
What is the best time of year to start growing basil?
The best time to start growing basil is in the late spring or early summer, after the last frost. Basil is a warm-weather herb and thrives in temperatures between 70°F and 90°F (21°C and 32°C). If you live in a colder climate, you can start your basil seeds indoors 6-8 weeks before the last expected frost. This will give your plants a head start and ensure a longer growing season.
How much sunlight does basil need?
Basil requires at least 6-8 hours of direct sunlight per day to thrive. If you’re growing basil indoors, place it near a sunny window that receives plenty of light. If you don’t have enough natural light, you can supplement with a grow light. Insufficient sunlight can lead to leggy growth and reduced flavor.
What kind of soil is best for growing basil?
Basil prefers well-draining soil that is rich in organic matter. A good potting mix for basil should be slightly acidic to neutral, with a pH between 6.0 and 7.5. You can amend your soil with compost or other organic matter to improve its fertility and drainage. Avoid heavy clay soils, as they can retain too much moisture and lead to root rot.
How often should I water my basil plant?
Water your basil plant regularly, keeping the soil consistently moist but not waterlogged. Check the soil moisture by sticking your finger about an inch deep. If the soil feels dry, it’s time to water. Avoid overwatering, as this can lead to root rot. During hot weather, you may need to water your basil plant more frequently.
How do I harvest basil leaves?
The best way to harvest basil leaves is to pinch or cut them off just above a leaf node (the point where leaves grow from the stem). This will encourage the plant to branch out and produce more leaves. Avoid removing more than one-third of the plant’s leaves at a time, as this can stress the plant. Regular harvesting will also prevent the plant from flowering, which can reduce the flavor of the leaves.
Why is my basil plant turning yellow?
Yellowing leaves on a basil plant can be caused by several factors, including overwatering, underwatering, nutrient deficiencies, or pests. Check the soil moisture to ensure that you’re not overwatering or underwatering. If the soil is consistently moist, it could be a sign of root rot. If the leaves are yellowing from the bottom up, it could be a sign of nutrient deficiency. Fertilize your basil plant with a balanced fertilizer to provide the necessary nutrients. Inspect your plant for pests, such as aphids or spider mites, and treat accordingly.
How do I prevent my basil plant from flowering?
Flowering can reduce the flavor of basil leaves, so it’s important to prevent your plant from flowering. To do this, regularly pinch off the flower buds as soon as they appear. This will encourage the plant to focus its energy on producing more leaves.
Can I grow basil indoors?
Yes, you can absolutely grow basil indoors. Place your basil plant near a sunny window that receives at least 6-8 hours of direct sunlight per day. If you don’t have enough natural light, you can supplement with a grow light. Water your basil plant regularly, keeping the soil consistently moist but not waterlogged. Fertilize your basil plant with a balanced fertilizer every few weeks.
What are some common pests that affect basil plants?
Some common pests that affect basil plants include aphids, spider mites, and whiteflies. These pests can suck the sap from the leaves, causing them to yellow and wilt. Inspect your basil plant regularly for pests and treat accordingly. You can use insecticidal soap or neem oil to control these pests.
How can I propagate basil from cuttings?
Propagating basil from cuttings is a simple and effective way to create new basil plants. Take a cutting from a healthy basil plant, about 4-6 inches long. Remove the lower leaves from the cutting, leaving only a few leaves at the top. Place the cutting in a glass of water, making sure that the leaves are not submerged. Place the glass in a bright, indirect light location. Change the water every few days. After a few weeks, the cutting will develop roots. Once the roots are about an inch long, you can transplant the cutting into a pot filled with well-draining soil.
Can I dry basil leaves for later use?
Yes, you can dry basil leaves for later use. There are several ways to dry basil leaves, including air drying, oven drying, and using a dehydrator. To air dry basil leaves, tie them in small bunches and hang them upside down in a cool, dry, and well-ventilated place. To oven dry basil leaves, spread them out on a baking sheet and bake them at a low temperature (around 170°F or 77°C) for several hours, until they are completely dry. To use a dehydrator, follow the manufacturer’s instructions. Once the basil leaves are completely dry, store them in an airtight container in a cool, dark place.
What are some creative ways to use my homegrown basil?
Beyond the classic pesto and pasta sauces, there are countless ways to use your homegrown basil. Add fresh basil leaves to salads, sandwiches, and soups. Infuse olive oil with basil for a flavorful drizzle. Make basil-infused vinegar for salad dressings. Use basil to flavor grilled meats and vegetables. Add basil to cocktails for a refreshing twist. Get creative and experiment with different ways to incorporate basil into your cooking!

Leave a Comment