

Aloe vera leaf propagation: Ever looked at your thriving aloe vera plant and wished you could magically multiply it? I know I have! It’s like wanting to share the plant love with everyone you know, or maybe just fill your own home with even more of its soothing goodness. Well, guess what? You practically can!
For centuries, aloe vera has been revered for its medicinal properties, tracing back to ancient Egypt where it was known as the “plant of immortality.” Its succulent leaves hold a gel packed with vitamins, minerals, and antioxidants, making it a go-to remedy for sunburns, minor cuts, and even digestive issues. But beyond its healing powers, aloe vera is also a beautiful and easy-to-care-for houseplant.
But here’s the thing: while aloe vera is relatively low-maintenance, propagating it from a single leaf can be a bit tricky. Many people struggle with this, often ending up with a mushy, unsuccessful attempt. That’s where this DIY guide comes in! I’m going to share my tried-and-true method for successful aloe vera leaf propagation, so you can expand your aloe vera family and enjoy all the benefits this amazing plant has to offer. Forget buying new plants – let’s create them ourselves!
Propagating Aloe Vera from a Leaf: A DIY Guide
Hey plant lovers! Ever wondered if you could grow a whole new aloe vera plant from just a single leaf? Well, I’m here to tell you it’s a bit more complicated than that, but don’t worry! While you can’t *exactly* propagate aloe from a single leaf in the traditional sense like you would with some succulents, there are ways to get new aloe plants from your existing one. We’ll focus on the most reliable method: propagating from offsets, also known as “pups.” These little guys are basically baby aloe plants that grow from the base of the mother plant, and they’re the key to expanding your aloe collection!
Understanding Aloe Vera Propagation
Before we dive in, let’s clear up the leaf propagation myth. Unlike some succulents, aloe vera leaves don’t typically root when separated from the plant. They’ll often rot before they have a chance to grow roots. So, while you might see some articles suggesting it, the success rate is very low. That’s why we’re focusing on offsets – they’re much more likely to thrive!
What You’ll Need
* A mature aloe vera plant with offsets (pups)
* A sharp, clean knife or gardening shears
* Potting mix specifically designed for succulents and cacti (well-draining is crucial!)
* New pots for the pups (small to medium-sized, depending on the size of the offsets)
* Gloves (optional, but recommended to avoid getting aloe vera gel on your hands)
* Watering can or spray bottle
* A well-lit location (indirect sunlight is best)
Identifying and Selecting Offsets
The first step is to identify suitable offsets. Look for small aloe plants growing around the base of your mother plant. Here’s what to look for:
* Size: Choose offsets that are at least 1/5 to 1/3 the size of the mother plant. Smaller pups might not have a strong enough root system to survive on their own.
* Roots: Ideally, the offsets will have their own roots already. You might need to gently dig around the base of the pup to check. If they have roots, that’s a great sign!
* Health: Make sure the offsets are healthy and free from any signs of disease or pests. Avoid pups that are discolored, mushy, or have any visible damage.
Separating the Offsets
This is where things get a little tricky, but don’t worry, I’ll guide you through it!
1. Prepare the Mother Plant: Gently remove the mother plant from its pot. You might need to loosen the soil around the edges first. Be careful not to damage the roots.
2. Locate the Offsets: Once the mother plant is out of the pot, you’ll have a better view of the offsets and how they’re connected to the main plant.
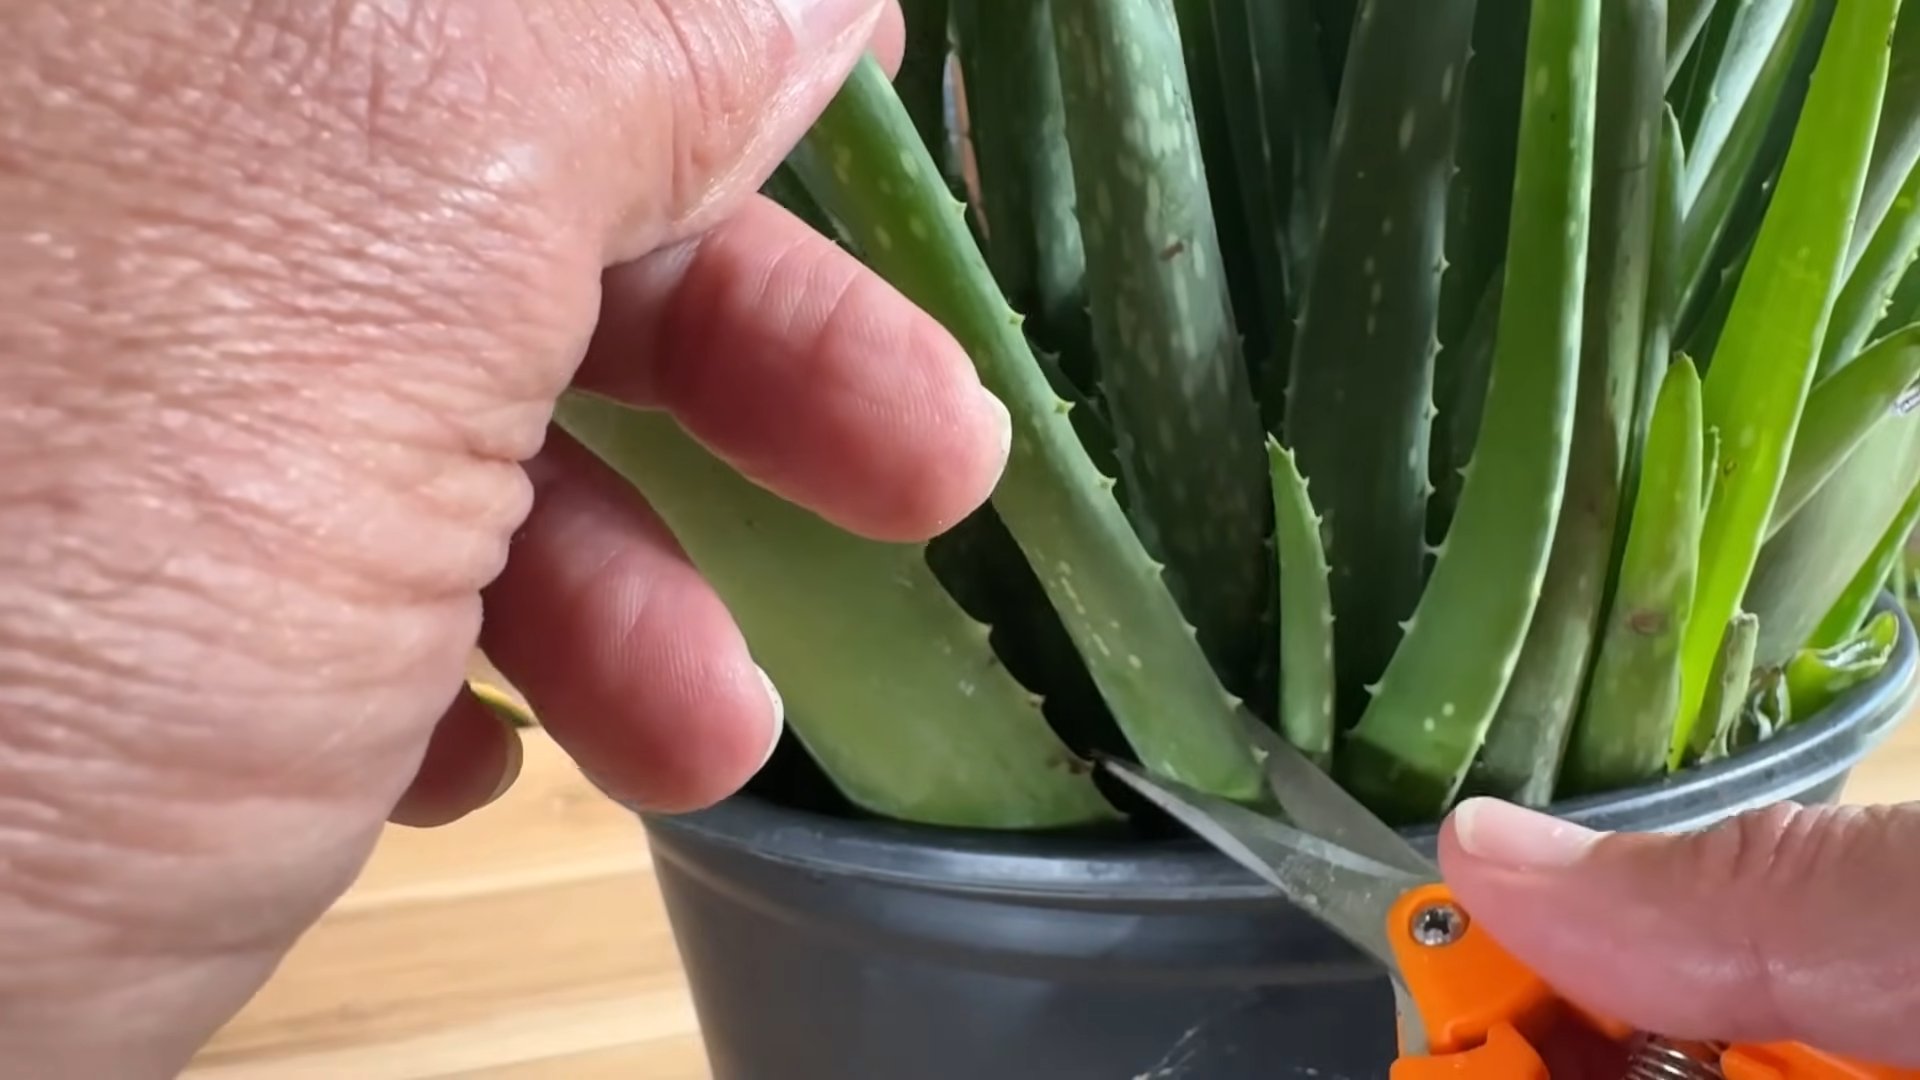
3. Carefully Separate the Offsets: Using your sharp, clean knife or gardening shears, carefully separate the offsets from the mother plant. Try to cut as close to the mother plant as possible, while still ensuring you get a good portion of the offset’s roots (if it has them). If the offset is tightly connected, you might need to gently wiggle it back and forth while cutting to avoid tearing the roots.
* Important Tip: If the offset doesn’t have its own roots, don’t panic! You can still propagate it. Just make sure you let the cut end callous over for a few days before planting it. This will help prevent rot.
4. Inspect the Cuts: After separating the offsets, inspect the cut surfaces on both the mother plant and the offsets. If there are any damaged or ragged edges, trim them cleanly with your knife or shears.
5. Let the Cuts Callous (If Necessary): If the offsets don’t have roots, or if you made a particularly large cut, let the cut ends callous over for a few days. This means leaving them out in a dry, well-ventilated place until the cut surfaces have dried and formed a protective layer. This will help prevent rot when you plant them.
6. Prepare the Pots: While the cuts are callousing (or if the offsets already have roots), prepare the pots for your new aloe plants. Fill each pot with well-draining succulent and cactus potting mix. Leave about an inch of space at the top of the pot.
Planting the Offsets
Now for the fun part – planting your new aloe babies!
1. Make a Hole: Use your finger or a small tool to create a hole in the potting mix that’s large enough to accommodate the offset’s roots (or the calloused end if it doesn’t have roots).
2. Plant the Offset: Gently place the offset into the hole, making sure the base of the plant is level with the soil surface. Don’t bury the leaves!
3. Fill in the Soil: Carefully fill in the hole with potting mix, gently pressing down around the base of the plant to secure it.
4. Water Sparingly: After planting, water the offset sparingly. You don’t want to overwater it, as this can lead to rot. Just moisten the soil slightly.
5. Placement: Place the newly potted offsets in a well-lit location, but avoid direct sunlight. Indirect sunlight is best.
Caring for Your New Aloe Plants
Proper care is essential for ensuring your new aloe plants thrive. Here’s what you need to know:
* Watering: Aloe vera plants are succulents, which means they store water in their leaves. Overwatering is a common mistake that can lead to root rot. Water only when the soil is completely dry. When you do water, water thoroughly until the water drains out of the bottom of the pot. Then, let the soil dry out completely before watering again. During the winter months, you’ll need to water even less frequently.
* Light: Aloe vera plants need plenty of light, but they don’t like direct sunlight. Bright, indirect light is ideal. If your aloe plant isn’t getting enough light, it might become leggy and pale.
* Soil: As mentioned earlier, well-draining soil is crucial for aloe vera plants. Use a potting mix specifically designed for succulents and cacti. This type of soil will allow excess water to drain away quickly, preventing root rot.
* Temperature: Aloe vera plants prefer warm temperatures. They can tolerate temperatures as low as 50°F (10°C), but they thrive in temperatures between 65°F and 80°F (18°C and 27°C).
* Fertilizing: Aloe vera plants don’t need a lot of fertilizer. You can fertilize them once or twice a year during the growing season (spring and summer) with a balanced liquid fertilizer diluted to half strength.
* Repotting: Aloe vera plants don’t need to be repotted very often. Repot them only when they’ve outgrown their pot or when the soil has become compacted. When repotting, choose a pot that’s only slightly larger than the previous one.
Troubleshooting
Even with the best care, you might encounter some problems with your new aloe plants. Here are some common issues and how to address them:
* Root Rot: This is the most common problem with aloe vera plants. It’s caused by overwatering. If you suspect root rot, stop watering immediately and allow the soil to dry out completely. If the rot is severe, you might need to repot the plant in fresh soil.
* Leaf Spot: Leaf spot is a fungal disease that can cause brown or black spots on the leaves. To prevent leaf spot, avoid overwatering and ensure good air circulation around the plant. If you see leaf spot, remove the affected leaves and treat the plant with a fungicide.
* Pests: Aloe vera plants can be susceptible to pests such as mealybugs and scale. Inspect your plants regularly for signs of pests. If you find any pests, treat the plant with insecticidal soap or neem oil.
Patience is Key!
Remember, propagating aloe vera from offsets takes time and patience. Don’t be discouraged if your new plants don’t grow quickly. With proper care, they’ll eventually thrive and become beautiful additions to your plant collection. It usually takes a few weeks to a couple of months for the offsets to establish a strong root system and start showing significant growth. Just keep an eye on them, water them sparingly, and provide them with plenty of indirect light.
And that’s it! You’ve successfully propagated aloe vera from offsets. Enjoy your new plants! I hope this guide has been helpful. Happy gardening!

Conclusion
So, there you have it! Transforming a single aloe vera leaf into multiple thriving plants might seem like magic, but it’s a surprisingly straightforward process that anyone can master. This DIY aloe vera leaf propagation method is more than just a fun gardening experiment; it’s a sustainable way to expand your collection of this incredibly useful plant, save money, and connect with the natural world.
Why is this a must-try? Firstly, aloe vera is a powerhouse of benefits. From soothing sunburns and moisturizing skin to potentially aiding digestion and boosting immunity, having a readily available supply of fresh aloe is a boon for your health and well-being. Secondly, propagating from a leaf is an excellent way to clone your favorite aloe vera plant, ensuring you maintain its specific characteristics and benefits. Store-bought aloe vera can be expensive, and you never truly know the quality of the plant. With this method, you control the entire process, guaranteeing healthy, potent aloe.
But the best part? It’s incredibly rewarding. Watching those tiny roots emerge and new plantlets sprout is a testament to the power of nature and your own green thumb. It’s a project that brings a sense of accomplishment and provides a continuous supply of aloe vera for years to come.
Don’t be afraid to experiment! While we’ve outlined a specific method, there’s room for variation. Try different rooting mediums, such as perlite or vermiculite, to see which works best for you. You can also experiment with different sizes of leaf cuttings, although smaller cuttings may take longer to root. Consider using a rooting hormone to speed up the process, especially if you live in a colder climate or are propagating during the off-season.
Another fun variation is to create a miniature aloe vera garden. Once your propagated plants are established, transplant them into a shallow dish or container filled with well-draining soil. Arrange them creatively, adding decorative rocks or pebbles for a visually appealing display. This makes a wonderful gift or a charming addition to your home decor.
We encourage you to give this DIY aloe vera leaf propagation method a try. It’s a simple, cost-effective, and incredibly satisfying way to grow your own aloe vera plants. And most importantly, don’t forget to share your experiences! We’d love to hear about your successes, challenges, and any variations you’ve tried. Post your photos and stories in the comments below, and let’s build a community of aloe vera enthusiasts. Happy propagating!
Frequently Asked Questions (FAQ)
1. Can I propagate aloe vera from any leaf?
Not all aloe vera leaves are created equal when it comes to propagation. The best leaves to use are those that are mature, healthy, and taken from the lower part of the plant. Avoid using leaves that are damaged, discolored, or too young, as they are less likely to root successfully. A good rule of thumb is to choose leaves that are at least 4-6 inches long and have a firm, plump texture. The health of the mother plant also plays a crucial role. Ensure your aloe vera plant is well-nourished and free from pests or diseases before attempting propagation.
2. How long does it take for aloe vera leaves to root?
Patience is key when propagating aloe vera from leaves. The rooting process can take anywhere from 4 to 8 weeks, depending on various factors such as temperature, humidity, and the health of the leaf. Warmer temperatures and higher humidity levels generally promote faster rooting. It’s important to avoid overwatering during this period, as this can lead to rot. Check the soil moisture regularly and only water when the top inch feels dry to the touch. You’ll know the roots have formed when you gently tug on the leaf and feel resistance.
3. What type of soil is best for propagating aloe vera?
Aloe vera thrives in well-draining soil, as it is susceptible to root rot if the soil remains too wet. A cactus or succulent potting mix is ideal, as it typically contains a blend of ingredients like perlite, sand, and peat moss that promote drainage. You can also create your own potting mix by combining equal parts of potting soil, coarse sand, and perlite. Avoid using heavy, clay-based soils, as they retain too much moisture. When transplanting the rooted leaf into a pot, ensure the pot has drainage holes to prevent water from accumulating at the bottom.
4. How often should I water the aloe vera leaf during propagation?
Overwatering is a common mistake when propagating aloe vera. The leaf cuttings do not have roots yet, so they cannot absorb excess water. Too much moisture can lead to rot and prevent rooting. Water sparingly, only when the top inch of the soil feels dry to the touch. A good approach is to mist the soil lightly every few days to maintain a slightly moist environment without saturating the soil. Once the roots have formed and the plantlets have started to grow, you can gradually increase the watering frequency.
5. What is the best location for propagating aloe vera leaves?
Aloe vera leaves need bright, indirect sunlight to root successfully. Avoid placing them in direct sunlight, as this can scorch the leaves and hinder the rooting process. A location near a window that receives filtered sunlight is ideal. You can also use a grow light to provide supplemental light, especially during the winter months. Maintain a consistent temperature between 65-80°F (18-27°C) for optimal rooting. Avoid placing the cuttings in drafty areas or near sources of heat or cold.
6. Can I use rooting hormone to propagate aloe vera leaves?
While not essential, using a rooting hormone can significantly increase the success rate and speed up the rooting process, especially for aloe vera. Rooting hormones contain auxins, which are plant hormones that stimulate root growth. Dip the cut end of the aloe vera leaf in rooting hormone powder or liquid before planting it in the soil. Be sure to follow the instructions on the rooting hormone packaging. Rooting hormone is particularly beneficial if you are propagating during the off-season or if you are having difficulty getting the leaves to root.
7. What do I do if my aloe vera leaf starts to rot during propagation?
Rot is a common problem when propagating aloe vera, especially if the soil is too wet. If you notice that your aloe vera leaf is starting to rot, remove it from the soil immediately. Cut off the rotted portion of the leaf with a clean, sharp knife. Allow the cut end to callous over for a few days before replanting it in fresh, well-draining soil. Be sure to water sparingly and provide adequate ventilation to prevent further rot. If the rot is extensive, it may be best to discard the leaf and start with a fresh cutting.
8. How do I know when the aloe vera plantlets are ready to be transplanted?
The aloe vera plantlets are ready to be transplanted when they have developed a healthy root system and have grown to a size of at least 2-3 inches. Gently remove the plantlets from the soil, being careful not to damage the roots. Plant them in individual pots filled with well-draining cactus or succulent potting mix. Water thoroughly after transplanting and place the pots in a location with bright, indirect sunlight.
9. Can I propagate aloe vera in water?
While aloe vera is typically propagated in soil, it is possible to propagate it in water, although it’s generally less successful than soil propagation. Place the cut end of the aloe vera leaf in a glass or jar filled with water, ensuring that only the bottom inch of the leaf is submerged. Change the water every few days to prevent bacterial growth. Once the roots have formed, transplant the leaf into a pot filled with well-draining soil. Be aware that water-propagated aloe vera may be more susceptible to root rot when transplanted into soil, so it’s important to use a well-draining potting mix and avoid overwatering.
10. How do I care for my newly propagated aloe vera plants?
Newly propagated aloe vera plants require careful attention to ensure they thrive. Water sparingly, only when the top inch of the soil feels dry to the touch. Provide bright, indirect sunlight and maintain a consistent temperature between 65-80°F (18-27°C). Avoid fertilizing the plants for the first few months, as they are still developing their root systems. Once they are established, you can fertilize them sparingly with a balanced liquid fertilizer diluted to half strength. Monitor the plants regularly for signs of pests or diseases and take appropriate action if necessary. With proper care, your newly propagated aloe vera plants will grow into healthy, thriving specimens.


Leave a Comment