

Basic Home Cleaning Routine: Let’s face it, nobody *loves* cleaning, but a sparkling home? That’s something we can all get behind! Have you ever wondered how some people manage to keep their homes looking effortlessly tidy, even with busy lives? The secret isn’t magic; it’s a well-established, easy-to-follow basic home cleaning routine.
For centuries, cultures around the world have emphasized the importance of a clean living space, not just for aesthetics, but for health and well-being. From ancient rituals involving sweeping away bad spirits to the Victorian era’s obsession with dusting and polishing, the desire for a clean home is deeply ingrained in us. But let’s be honest, those elaborate routines are a bit much for modern life!
That’s where this article comes in. I’m going to share some simple, effective DIY tricks and hacks that will transform your cleaning from a dreaded chore into a manageable part of your week. We’ll break down the essential tasks, offer time-saving tips, and even show you how to make your own eco-friendly cleaning solutions. Because who wants to spend all their free time scrubbing? I know I don’t! With the right basic home cleaning routine, you can reclaim your weekends and enjoy a cleaner, healthier, and happier home. So, grab your gloves, and let’s get started!
DIY Deep Cleaning Your Home: A Room-by-Room Guide
Okay, let’s be honest, cleaning isn’t exactly anyone’s favorite pastime. But a clean home is a happy home, right? And it doesn’t have to be a monumental task you dread. I’m going to walk you through a deep cleaning routine, room by room, that’s manageable and will leave your space sparkling. We’ll break it down so it’s not overwhelming, and I’ll share some of my favorite tips and tricks along the way.
General Supplies You’ll Need
Before we dive into specific rooms, let’s gather our cleaning arsenal. Having everything ready will save you time and prevent those annoying mid-cleaning supply runs.
* Microfiber cloths: These are my absolute go-to. They’re super absorbent, reusable, and won’t scratch surfaces. Get a bunch!
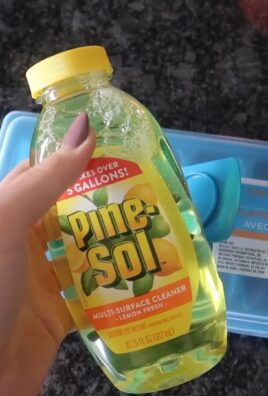
* All-purpose cleaner: Choose one you love the scent of! It makes the whole process more enjoyable.
* Glass cleaner: For windows, mirrors, and glass surfaces.
* Bathroom cleaner: Specifically designed for tackling soap scum and grime.
* Toilet bowl cleaner: A must-have for obvious reasons.
* Disinfectant wipes or spray: For quick sanitizing of high-touch surfaces.
* Vacuum cleaner: With attachments for different surfaces.
* Mop and bucket: Or a spray mop, if you prefer.
* Baking soda: A natural cleaning powerhouse!
* White vinegar: Another natural cleaning superstar.
* Rubber gloves: Protect your hands!
* Sponges: For scrubbing tougher spots.
* Old toothbrush: Perfect for getting into those hard-to-reach crevices.
* Trash bags: For all the clutter you’re about to banish.
* Cleaning caddy or bucket: To carry your supplies from room to room.
The Kitchen: Conquering the Heart of the Home
The kitchen is often the busiest room, and therefore, the dirtiest. Let’s tackle it step-by-step.
1. Clear the Clutter: Start by removing everything from the countertops. Dishes, appliances, mail – everything. This gives you a blank canvas to work with. Put away anything that belongs elsewhere.
2. Wash the Dishes (or Load the Dishwasher): A clean sink is a happy sink. If you have a mountain of dishes, tackle them first. Load the dishwasher efficiently, or if you’re washing by hand, use hot, soapy water.
3. Clean the Countertops: Spray your all-purpose cleaner on the countertops and let it sit for a minute or two. Then, wipe clean with a microfiber cloth. Pay special attention to areas where food is prepared.
4. Wipe Down the Appliances: Use your all-purpose cleaner to wipe down the exterior of your refrigerator, oven, microwave, and dishwasher. For stainless steel appliances, use a stainless steel cleaner to prevent streaks. Don’t forget the stovetop! If you have baked-on food, let the cleaner sit for a bit longer before scrubbing.
5. Clean the Microwave: This is a quick and easy one. Place a microwave-safe bowl filled with water and a few tablespoons of vinegar inside. Microwave for 5 minutes. The steam will loosen any grime, making it easy to wipe clean.
6. Clean the Oven: This is often the most dreaded task, but it doesn’t have to be! You can use a commercial oven cleaner, following the instructions carefully. Or, for a more natural approach, make a paste of baking soda and water. Spread it all over the inside of the oven, avoiding the heating elements. Let it sit overnight, then scrub clean with a sponge and water.
7. Clean the Sink: Scrub the sink with a sponge and your all-purpose cleaner. For stubborn stains, use a paste of baking soda and water. Rinse thoroughly.
8. Sweep and Mop the Floor: Sweep the floor to remove any loose dirt and debris. Then, mop with your chosen floor cleaner. Pay attention to corners and edges.
9. Clean the Refrigerator (Optional, but Recommended): If you have time, give your refrigerator a good cleaning. Remove all the food, toss anything that’s expired, and wipe down the shelves and drawers with a mixture of warm water and baking soda.
10. Clean the Garbage Disposal: To freshen up your garbage disposal, toss in some lemon or lime wedges and run it with cold water.
The Bathroom: Banishing Grime and Germs
The bathroom is another area that requires regular deep cleaning.
1. Clear the Clutter: Remove everything from the countertops and shelves. This includes toiletries, makeup, and anything else that doesn’t belong.
2. Clean the Toilet: Apply toilet bowl cleaner to the inside of the bowl and let it sit for a few minutes. Then, scrub with a toilet brush and flush. Wipe down the exterior of the toilet with disinfectant wipes or spray.
3. Clean the Shower/Tub: Spray your bathroom cleaner on the shower walls and tub. Let it sit for a few minutes to loosen soap scum and grime. Then, scrub with a sponge or brush. Rinse thoroughly. For stubborn stains, try a paste of baking soda and water.
4. Clean the Sink and Countertop: Spray your all-purpose cleaner on the sink and countertop. Wipe clean with a microfiber cloth. Pay special attention to areas around the faucet and drain.
5. Clean the Mirror: Spray glass cleaner on the mirror and wipe clean with a microfiber cloth.
6. Sweep and Mop the Floor: Sweep the floor to remove any loose dirt and debris. Then, mop with your chosen floor cleaner.
7. Clean the Showerhead: Mineral buildup can clog your showerhead. To clean it, fill a plastic bag with white vinegar and secure it around the showerhead with a rubber band. Let it soak for a few hours or overnight. Then, remove the bag and run the shower to flush out any remaining vinegar.
8. Wash Shower Curtain or Liner: If you have a fabric shower curtain, toss it in the washing machine with a mild detergent. If you have a plastic shower liner, you can wipe it down with a sponge and your all-purpose cleaner.
The Living Room: Creating a Relaxing Oasis
The living room is where we relax and unwind, so let’s make sure it’s clean and inviting.
1. Clear the Clutter: Remove any clutter from the coffee table, shelves, and other surfaces. Put away books, magazines, toys, and anything else that doesn’t belong.
2. Dust Everything: Dust all surfaces, including furniture, shelves, picture frames, and lamps. Use a microfiber cloth or a duster. Don’t forget to dust the ceiling fans!
3. Vacuum the Furniture: Use the upholstery attachment on your vacuum cleaner to vacuum the furniture. Pay special attention to crevices and seams.
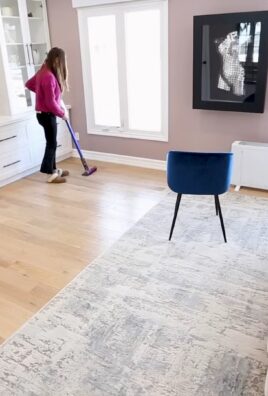
4. Vacuum or Mop the Floor: Vacuum carpets and rugs thoroughly. Mop hard floors with your chosen floor cleaner.
5. Clean the Windows and Mirrors: Spray glass cleaner on the windows and mirrors and wipe clean with a microfiber cloth.
6. Clean Electronics: Use a dry microfiber cloth to wipe down your TV screen, computer monitor, and other electronics. Avoid using harsh chemicals.
7. Fluff Pillows and Blankets: Fluff your pillows and blankets to make them look fresh and inviting.
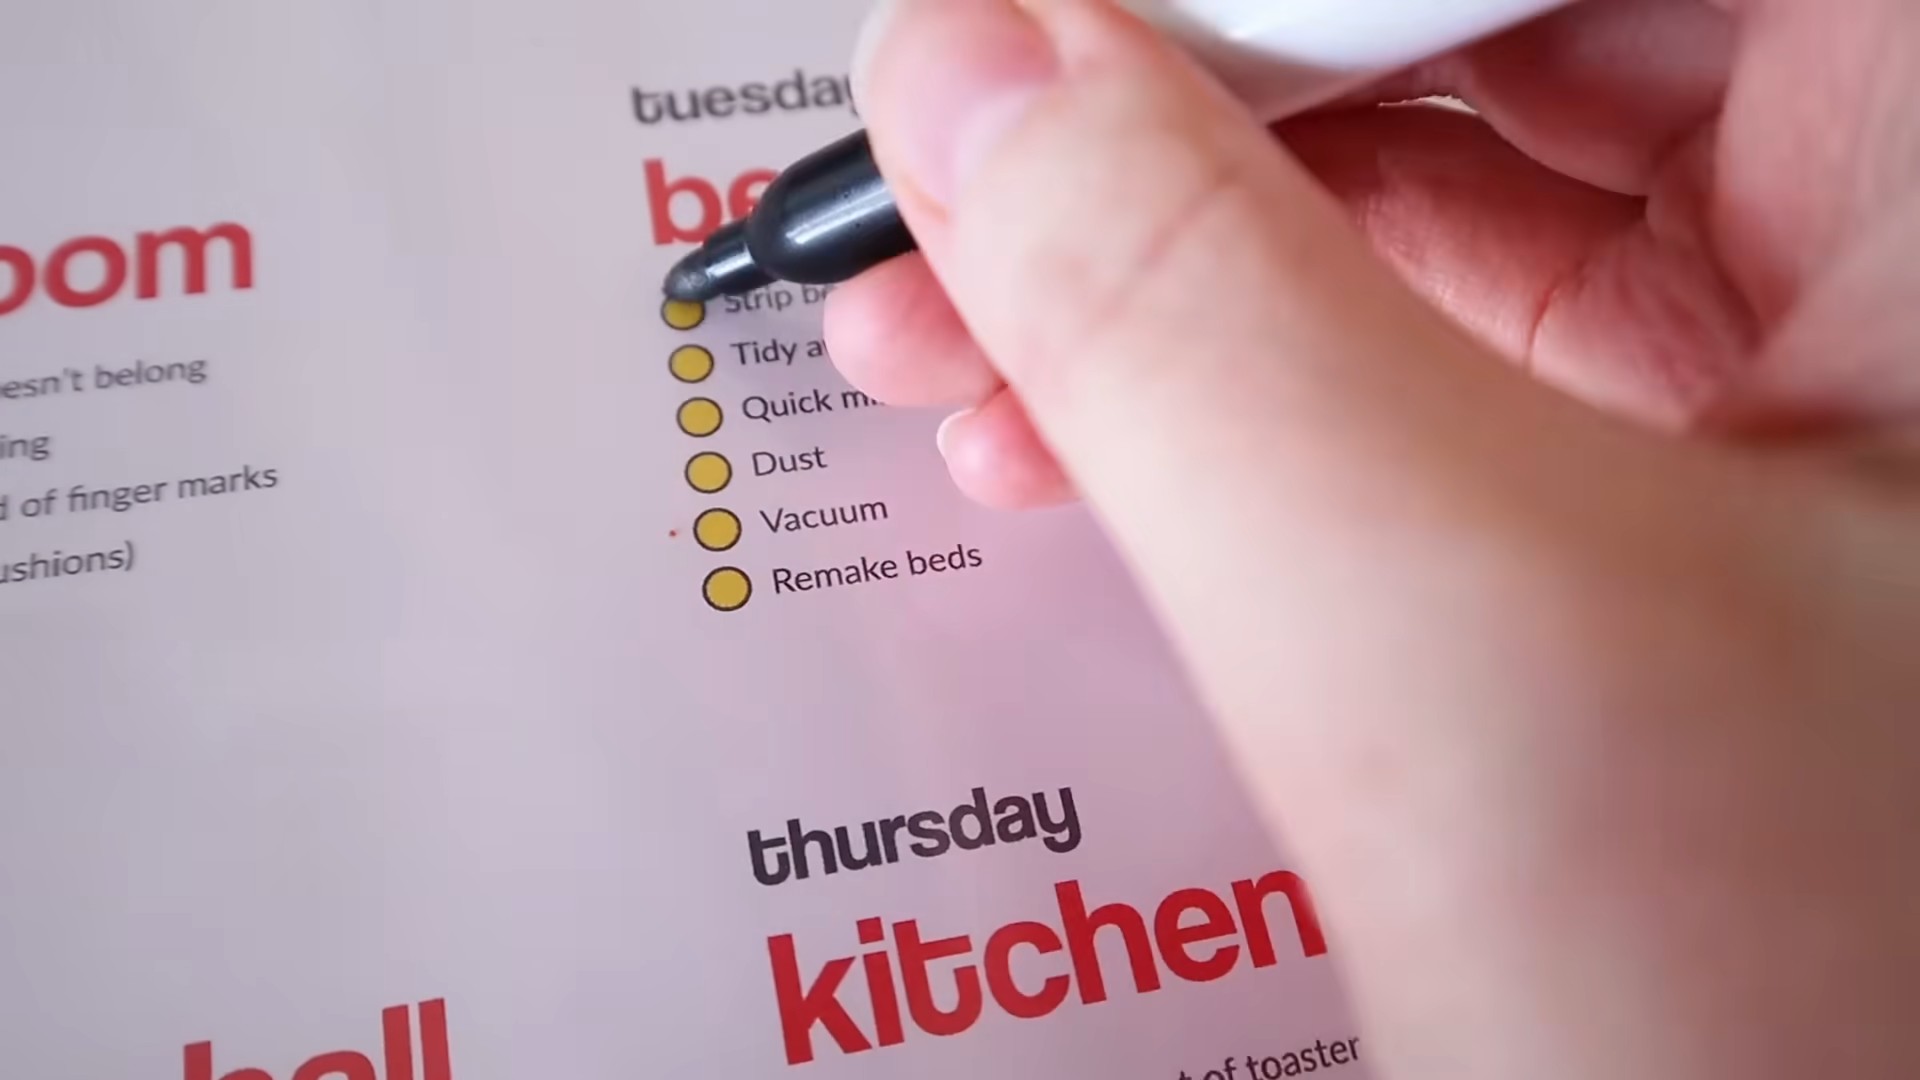
The Bedrooms: Promoting Restful Sleep
A clean bedroom is essential for a good night’s sleep.
1. Clear the Clutter: Remove any clutter from the nightstands, dressers, and other surfaces. Put away clothes, books, and anything else that doesn’t belong.
2. Dust Everything: Dust all surfaces, including furniture, shelves, picture frames, and lamps.
3. Wash the Bedding: Strip the bed and wash the sheets, pillowcases, and duvet cover.
4. Vacuum the Mattress: Vacuum the mattress to remove dust mites and allergens.
5. Vacuum or Mop the Floor: Vacuum carpets and rugs thoroughly. Mop hard floors with your chosen floor cleaner.
6. Clean the Windows and Mirrors: Spray glass cleaner on the windows and mirrors and wipe clean with a microfiber cloth.
7. Organize Closets and Drawers (Optional, but Recommended): If you have time, take some time to organize your closets and drawers. This will make it easier to find what you need and keep your bedroom tidy.
Extra Tips and Tricks
* Don’t try to do everything at once. Break the cleaning into smaller tasks and tackle one room or area at a time.
* Open the windows for ventilation. Fresh air will help to remove odors and improve air quality.
* Put on some music or a podcast to make the cleaning more enjoyable
Conclusion
So, there you have it! Transforming your basic home cleaning routine with these simple yet effective DIY tricks isn’t just about saving money; it’s about creating a healthier, happier, and more personalized living space. We’ve explored how to ditch harsh chemicals for natural alternatives, repurpose everyday items for cleaning power, and streamline your cleaning process for maximum efficiency.
Why is this a must-try? Because it empowers you to take control of your cleaning supplies and environment. You’ll know exactly what’s going into your cleaning solutions, avoiding potentially harmful ingredients found in many commercial products. Plus, the satisfaction of creating something yourself, knowing you’re contributing to a more sustainable lifestyle, is incredibly rewarding.
But the beauty of these DIY tricks lies in their adaptability. Feel free to experiment with different essential oil combinations to find your signature scent. For instance, if you’re not a fan of lemon, try orange or grapefruit for a similarly citrusy and degreasing effect. If you have particularly stubborn stains, consider adding a bit of borax to your DIY cleaner for extra cleaning power (always use with caution and proper ventilation). You can also infuse your vinegar with herbs like lavender or rosemary for a more fragrant and therapeutic cleaning experience.
Consider these variations:
* **DIY All-Purpose Cleaner Boost:** Add a tablespoon of washing soda to your all-purpose cleaner recipe for extra cleaning power on tough grime.
* **DIY Furniture Polish Alternative:** Mix equal parts olive oil and lemon juice for a natural furniture polish. Test on an inconspicuous area first.
* **DIY Drain Cleaner Enhancement:** After pouring baking soda and vinegar down the drain, let it fizz for at least 30 minutes, or even overnight, before flushing with hot water. For really stubborn clogs, use a drain snake.
Ultimately, the goal is to find what works best for you and your home. Don’t be afraid to tweak the recipes and techniques to suit your specific needs and preferences.
We wholeheartedly encourage you to give these DIY cleaning tricks a try. You might be surprised at how effective and enjoyable they can be. And most importantly, we want to hear about your experiences! Share your successes, your challenges, and your own unique variations in the comments below. Let’s build a community of DIY cleaning enthusiasts and learn from each other. Your insights could inspire others to embrace a more natural and sustainable approach to home cleaning. Let us know which **basic home cleaning routine** hacks worked best for you!
FAQ
What are the benefits of using DIY cleaning products compared to store-bought ones?
DIY cleaning products offer a multitude of benefits. Firstly, they are often significantly cheaper than their store-bought counterparts. The ingredients used, such as vinegar, baking soda, and essential oils, are typically readily available and cost-effective. Secondly, DIY cleaners allow you to control the ingredients, avoiding harsh chemicals, artificial fragrances, and potential allergens that can be found in commercial products. This is particularly beneficial for individuals with sensitivities, allergies, or young children and pets. Thirdly, making your own cleaning products is a more sustainable choice, reducing plastic waste from packaging and minimizing the environmental impact of chemical production and disposal. Finally, many people find the process of creating their own cleaning solutions to be empowering and satisfying, knowing exactly what they are using to clean their homes.
Are DIY cleaning products as effective as store-bought cleaners?
In many cases, yes! While some heavy-duty cleaning tasks might require specialized commercial products, DIY cleaners are surprisingly effective for everyday cleaning needs. Vinegar, for example, is a powerful disinfectant and degreaser. Baking soda is a gentle abrasive and deodorizer. Essential oils can add antibacterial and antifungal properties, as well as pleasant scents. The key is to use the right ingredients for the specific cleaning task and to understand their properties. For instance, vinegar is excellent for cleaning glass and removing hard water stains, while baking soda is ideal for scrubbing sinks and ovens. With a little experimentation and knowledge, you can create DIY cleaning solutions that are just as effective, if not more so, than many store-bought options.
What safety precautions should I take when making and using DIY cleaning products?
Safety is paramount when making and using DIY cleaning products. Always label your homemade cleaners clearly to avoid confusion and accidental ingestion. Store them out of reach of children and pets. When mixing ingredients, do so in a well-ventilated area to avoid inhaling fumes. Never mix bleach with vinegar or ammonia, as this can create toxic gases. Wear gloves to protect your skin, especially when working with concentrated solutions or essential oils. Test your DIY cleaner on an inconspicuous area first to ensure it doesn’t damage the surface. Be mindful of the surfaces you are cleaning; for example, vinegar can damage marble and granite. Finally, research the properties of each ingredient you are using to understand any potential risks or contraindications.
Can I use essential oils in all my DIY cleaning products? Which ones are best?
Essential oils can be a wonderful addition to DIY cleaning products, adding fragrance and potential antibacterial, antiviral, and antifungal properties. However, it’s important to use them safely and appropriately. Not all essential oils are created equal, and some may be more effective for cleaning than others. Popular choices for cleaning include lemon, tea tree, lavender, eucalyptus, and peppermint. Lemon oil is a great degreaser, tea tree oil is a powerful antiseptic, lavender oil has calming properties, eucalyptus oil is effective against mold and mildew, and peppermint oil can repel insects. When using essential oils, start with a small amount (a few drops per batch) and adjust to your preference. Be aware that some essential oils can be toxic to pets, so do your research before using them around animals. Also, avoid using essential oils on surfaces that may be damaged by oils, such as unfinished wood.
How long can I store DIY cleaning products?
The shelf life of DIY cleaning products varies depending on the ingredients used. Cleaners made with water and without preservatives are best used within a few weeks to prevent bacterial growth. Vinegar-based cleaners can last for several months. Essential oils can help to extend the shelf life of your DIY cleaners due to their antibacterial properties. Store your DIY cleaners in airtight containers in a cool, dark place to maximize their shelf life. Always check for any signs of spoilage, such as discoloration, separation, or a foul odor, before using. If in doubt, it’s best to discard the cleaner and make a fresh batch.
What are some common mistakes to avoid when making DIY cleaning products?
One of the most common mistakes is not labeling your DIY cleaning products clearly. This can lead to confusion and accidental misuse. Another mistake is mixing incompatible ingredients, such as bleach and vinegar, which can create dangerous gases. Using too much of a particular ingredient, such as essential oils, can also be problematic, potentially causing skin irritation or damaging surfaces. Failing to test your cleaner on an inconspicuous area first can result in damage to delicate surfaces. Finally, not storing your DIY cleaners properly can shorten their shelf life and compromise their effectiveness. Always follow recipes carefully, use high-quality ingredients, and store your cleaners in appropriate containers in a cool, dark place.
Leave a Comment