

Bathroom cleaning hacks – who doesn’t need a few of those up their sleeve? Let’s be honest, cleaning the bathroom is nobody’s favorite chore. It’s right up there with doing taxes and going to the dentist! But what if I told you there were simple, effective, and even *fun* ways to tackle that grime and get your bathroom sparkling?
For centuries, people have been searching for the ultimate cleaning solutions. From ancient Romans using olive oil and ash to modern-day innovations, the quest for a spotless home is a timeless pursuit. But let’s face it, many commercial cleaners are packed with harsh chemicals that can be harmful to both our health and the environment. That’s where these DIY bathroom cleaning hacks come in!
I’m going to share some of my favorite, tried-and-true methods for banishing bathroom buildup without breaking the bank or resorting to toxic ingredients. Think vinegar, baking soda, and a little elbow grease – that’s all you need! These bathroom cleaning hacks will save you time, money, and a whole lot of scrubbing. So, grab your gloves, and let’s get started on transforming your bathroom into a sparkling sanctuary!
DIY Bathroom Cleaning Power: The Baking Soda & Vinegar Volcano!
Okay, friends, let’s be honest: cleaning the bathroom is nobody’s favorite chore. But what if I told you there’s a super simple, surprisingly fun, and incredibly effective way to tackle those grimy surfaces using just two ingredients you probably already have in your pantry? Yep, I’m talking about baking soda and vinegar! This dynamic duo creates a fizzing, bubbling action that loosens dirt, grime, and even stubborn soap scum, leaving your bathroom sparkling. Let’s get started!
What You’ll Need:
Before we dive in, gather your supplies. Trust me, having everything ready makes the whole process smoother.
* Baking Soda
* White Vinegar
* Spray Bottle (empty)
* Cleaning Cloths or Sponges (microfiber works best!)
* Old Toothbrush (for those hard-to-reach spots)
* Rubber Gloves (optional, but recommended)
* Small Bowl or Container
* Measuring Cups or Spoons (optional, for precise measurements)
Tackling the Toilet Bowl: The Volcano Eruption
The toilet bowl is often the dirtiest part of the bathroom, so let’s start there. This method is fantastic for removing stains and odors.
1. Prep the Bowl: Flush the toilet to wet the bowl. This helps the baking soda stick.
2. Baking Soda Blast: Pour about one cup of baking soda directly into the toilet bowl. Try to distribute it evenly around the sides.
3. Vinegar Volcano: Slowly pour about two cups of white vinegar into the bowl. Get ready for the fizz! You’ll see a bubbling reaction as the baking soda and vinegar combine. This is the magic happening!
4. Let it Fizz: Let the mixture sit and fizz for at least 30 minutes. For really tough stains, you can let it sit overnight. The longer it sits, the more time it has to break down the grime.
5. Scrub-a-dub-dub: After the fizzing action has subsided, use your toilet brush to scrub the bowl thoroughly, paying attention to any stains or buildup.
6. Flush it Away: Flush the toilet to rinse away the baking soda and vinegar. You should be left with a cleaner, fresher-smelling toilet bowl! If you still see some stains, repeat the process or use a pumice stone (gently!) for extra scrubbing power.
Shining the Shower & Tub: Soap Scum’s Worst Nightmare
Soap scum can be a real pain, but this baking soda and vinegar method makes it much easier to remove.
1. Baking Soda Paste: In a small bowl, mix baking soda with a little water to create a thick paste. The consistency should be similar to toothpaste.
2. Apply the Paste: Using a sponge or cleaning cloth, apply the baking soda paste to the walls, floor, and fixtures of your shower or tub. Focus on areas with heavy soap scum buildup.
3. Vinegar Power: Fill your spray bottle with white vinegar.
4. Spray and Fizz: Spray the vinegar directly onto the baking soda paste. Again, you’ll see that satisfying fizzing reaction!
5. Wait and Relax: Let the mixture sit for 15-20 minutes. This gives the vinegar time to break down the soap scum.
6. Scrub-a-thon: After the soaking time, use a sponge or cleaning cloth to scrub the surfaces. You should find that the soap scum comes off much easier than usual. For stubborn areas, use an old toothbrush to get into corners and crevices.
7. Rinse Thoroughly: Rinse the shower or tub with warm water to remove all traces of baking soda and vinegar.
8. Dry and Admire: Use a clean towel to dry the surfaces. This will help prevent water spots and leave your shower or tub sparkling clean.
Cleaning the Sink & Countertop: A Quick Refresh
The sink and countertop are often used multiple times a day, so they can get dirty quickly. This method is perfect for a quick refresh.
1. Baking Soda Sprinkle: Sprinkle a thin layer of baking soda onto the surface of your sink and countertop.
2. Vinegar Spray: Lightly spray the baking soda with white vinegar. You don’t need a lot, just enough to dampen the baking soda.
3. Gentle Scrub: Use a damp sponge or cleaning cloth to gently scrub the surface. The baking soda acts as a mild abrasive, helping to remove dirt and grime.
4. Rinse and Dry: Rinse the sink and countertop with water and dry with a clean towel.
Degunking Showerheads: Restoring Water Pressure
Over time, showerheads can become clogged with mineral deposits, reducing water pressure. Here’s how to clean them with vinegar.
1. Vinegar Bath: There are two ways to do this. The first is to remove the showerhead and submerge it in a bowl of white vinegar for several hours or overnight. The second (and often easier) method is to fill a plastic bag with white vinegar and secure it around the showerhead with a rubber band or twist tie, ensuring the showerhead is fully submerged in the vinegar.
2. Soak it Up: Let the showerhead soak in the vinegar for at least a few hours, or preferably overnight. This will give the vinegar time to dissolve the mineral deposits.
3. Scrub and Rinse: After soaking, remove the showerhead (or the bag) and scrub it with an old toothbrush to remove any remaining mineral deposits.
4. Flush it Out: Rinse the showerhead thoroughly with water to remove all traces of vinegar and loosened debris.
5. Reattach and Test: Reattach the showerhead (if you removed it) and run the water for a few minutes to flush out any remaining debris. You should notice a significant improvement in water pressure!
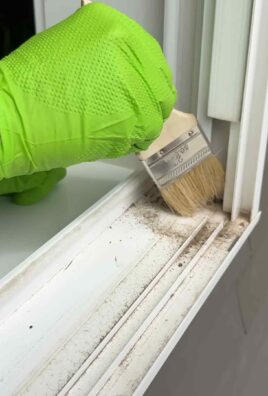
Cleaning Grout: Banishing Mold and Mildew
Grout can be a breeding ground for mold and mildew. This baking soda and vinegar method can help to clean and brighten it.
1. Baking Soda Paste: Mix baking soda with a little water to create a thick paste.
2. Apply to Grout: Apply the baking soda paste to the grout lines using an old toothbrush or grout brush.
3. Vinegar Power: Spray the baking soda paste with white vinegar.
4. Fizz and Soak: Let the mixture sit for 10-15 minutes.
5. Scrub-a-dub: Scrub the grout lines with the toothbrush or grout brush.
6. Rinse and Repeat: Rinse the area with water. If the grout is still dirty, repeat the process. For stubborn stains, you can try using a stronger solution of vinegar or a commercial grout cleaner.
Polishing Chrome Fixtures: Bringing Back the Shine
Vinegar is a natural cleaner and polisher, making it perfect for cleaning chrome fixtures.
1. Vinegar Spray: Fill a spray bottle with white vinegar.
2. Spray and Wipe: Spray the vinegar onto the chrome fixtures and wipe with a clean, soft cloth.
3. Buff to Shine: Buff the fixtures with a dry cloth to bring back the shine.
Important Considerations:
* Test First: Before cleaning an entire surface, test the baking soda and vinegar mixture on a small, inconspicuous area to make sure it doesn’t damage the material. This is especially important for delicate surfaces like marble or granite.
* Ventilation: Make sure the bathroom is well-ventilated when using vinegar, as the fumes can be strong. Open a window or turn on the exhaust fan.
* Don’t Mix with Bleach: Never mix vinegar with bleach, as this can create toxic fumes.
* Protective Gear: Wear rubber gloves to protect your hands from the cleaning solutions.
* Adjust Ratios: Feel free to adjust the ratios of baking soda and vinegar to suit your needs. For example, if you’re dealing with a particularly stubborn stain, you might want to use more vinegar.
And there you have it! A sparkling clean bathroom using the power of baking soda and vinegar. It’s a simple, affordable, and eco-friendly way to keep your bathroom looking its best. Happy cleaning!

Conclusion
So, there you have it! This simple, yet incredibly effective bathroom cleaning hack is a game-changer for anyone looking to streamline their cleaning routine and achieve a sparkling clean bathroom without harsh chemicals or back-breaking scrubbing. We’ve shown you how to harness the power of readily available ingredients to create a potent cleaning solution that tackles soap scum, mildew, and grime with ease.
Why is this a must-try? Because it’s not just about cleaning; it’s about reclaiming your time and energy. Imagine spending less time wrestling with stubborn stains and more time enjoying your beautifully clean and refreshed bathroom. This DIY approach is also kinder to the environment and your wallet, reducing your reliance on expensive, commercially produced cleaners that often contain harmful chemicals. Plus, the satisfaction of creating your own effective cleaning solution is an added bonus!
But the beauty of this bathroom cleaning hack lies in its adaptability. Feel free to experiment with variations to suit your specific needs and preferences. For instance, if you’re dealing with particularly stubborn mildew, consider adding a few drops of tea tree oil to your solution for its natural antifungal properties. Or, if you prefer a more citrusy scent, a few drops of lemon essential oil can do wonders. You can also adjust the ratio of ingredients to find the perfect balance for your bathroom surfaces. Remember to always test any new solution on a small, inconspicuous area first to ensure it doesn’t damage the surface.
This bathroom cleaning hack is a true testament to the power of simple, natural ingredients. It’s a cost-effective, eco-friendly, and incredibly effective way to keep your bathroom sparkling clean.
We are confident that once you try this DIY bathroom cleaning hack, you’ll be amazed by the results. It’s a simple change that can make a big difference in your cleaning routine and the overall cleanliness of your home.
Don’t just take our word for it, though! We encourage you to give this bathroom cleaning hack a try and see the difference for yourself. We’re eager to hear about your experiences and any variations you discover. Share your tips, tricks, and before-and-after photos in the comments below. Let’s create a community of clean bathroom enthusiasts and share our knowledge to make cleaning less of a chore and more of a rewarding experience! We believe that a clean bathroom contributes to a more peaceful and enjoyable home environment, and this hack is your first step towards achieving that. So, grab your ingredients, get cleaning, and let us know what you think!
Frequently Asked Questions
What kind of vinegar should I use for this bathroom cleaning hack?
White distilled vinegar is the best choice for this bathroom cleaning hack. It’s readily available, inexpensive, and has a high acidity level, making it effective at cutting through soap scum, hard water stains, and mildew. Avoid using other types of vinegar, such as apple cider vinegar or balsamic vinegar, as they may contain sugars or coloring that could stain or leave a residue on your bathroom surfaces. The clear, acidic nature of white distilled vinegar is what makes it the ideal cleaning agent for this purpose.
Is this bathroom cleaning hack safe for all bathroom surfaces?
While this bathroom cleaning hack is generally safe for most bathroom surfaces, it’s always a good idea to test it on a small, inconspicuous area first. Avoid using it on natural stone surfaces like marble or granite, as the acidity of the vinegar can etch or damage these materials. It’s also best to avoid using it on unsealed grout, as it can potentially discolor it. For delicate surfaces, consider diluting the solution further or using a gentler cleaning method. Always rinse the cleaned surface thoroughly with water after applying the solution.
How often should I use this bathroom cleaning hack?
The frequency of using this bathroom cleaning hack depends on how often you clean your bathroom and how quickly grime and buildup accumulate. For regular maintenance, using it once a week is usually sufficient. If your bathroom is prone to soap scum or mildew, you may need to use it more frequently, such as every few days. Pay attention to your bathroom surfaces and adjust the frequency accordingly. Remember, regular cleaning is key to preventing stubborn stains and buildup.
Can I add essential oils to this bathroom cleaning hack?
Yes, you can definitely add essential oils to this bathroom cleaning hack! Essential oils not only add a pleasant scent but also offer additional cleaning and disinfecting properties. Tea tree oil is a great choice for its antifungal and antibacterial properties, making it effective against mildew. Lemon essential oil adds a fresh, citrusy scent and helps to cut through grease and grime. Lavender essential oil provides a calming aroma and has antiseptic properties. Simply add a few drops of your favorite essential oil to the cleaning solution and shake well before using.
How should I store the leftover cleaning solution?
Store any leftover cleaning solution in a labeled spray bottle in a cool, dark place. It’s important to label the bottle clearly to avoid any confusion or accidental misuse. Keep it out of reach of children and pets. The solution should remain effective for several weeks, but it’s best to use it within a month for optimal results. If you notice any changes in color or odor, discard the solution and make a fresh batch.
What if the bathroom cleaning hack doesn’t remove all the stains?
If the bathroom cleaning hack doesn’t remove all the stains, there are a few things you can try. First, make sure you’re allowing the solution to sit on the stain for a sufficient amount of time before scrubbing. For stubborn stains, you may need to let it sit for up to 15-20 minutes. You can also try using a scrub brush or sponge with a slightly abrasive surface to help loosen the stain. For particularly tough stains, consider making a paste of baking soda and water and applying it to the stain before spraying with the cleaning solution.
Can I use this bathroom cleaning hack on shower doors?
Yes, this bathroom cleaning hack is excellent for cleaning shower doors! It effectively removes soap scum and water spots, leaving your shower doors sparkling clean. Simply spray the solution onto the shower doors, let it sit for a few minutes, and then scrub with a sponge or microfiber cloth. Rinse thoroughly with water and dry with a clean towel or squeegee to prevent water spots from reappearing. For best results, clean your shower doors regularly to prevent buildup.
Is this bathroom cleaning hack safe for septic systems?
Yes, this bathroom cleaning hack is generally safe for septic systems. The ingredients used, vinegar and dish soap, are biodegradable and don’t contain harsh chemicals that can harm the beneficial bacteria in your septic tank. However, it’s always a good idea to use cleaning products sparingly when you have a septic system. Avoid pouring large amounts of any cleaning solution down the drain at once.
Can I use this bathroom cleaning hack on colored grout?
While this bathroom cleaning hack is generally safe for grout, it’s best to test it on a small, inconspicuous area of colored grout first. The acidity of the vinegar can potentially lighten or discolor colored grout over time. If you’re concerned about discoloration, consider diluting the solution further or using a gentler cleaning method specifically designed for colored grout. Always rinse the grout thoroughly with water after applying the solution.
What are some other uses for this bathroom cleaning hack?
Besides cleaning bathroom surfaces, this bathroom cleaning hack can also be used to clean other areas of your home. It’s effective for cleaning kitchen sinks, countertops, and appliances. You can also use it to clean tile floors and remove hard water stains from faucets and showerheads. Just remember to test it on a small, inconspicuous area first to ensure it doesn’t damage the surface. The versatility of this cleaning solution makes it a valuable addition to your cleaning arsenal.

Leave a Comment