

Clean Kitchen Sink Naturally: Is your kitchen sink looking less than sparkling? Are you tired of harsh chemicals and expensive cleaners that promise the world but deliver little? I get it! We all want a clean and inviting kitchen, and the sink is often the heart of it all. But let’s face it, food scraps, grease, and everyday use can leave our sinks looking grimy and smelling less than fresh.
For generations, resourceful homemakers have relied on natural ingredients to keep their homes clean and fresh. Think about it – before the advent of commercial cleaners, people used simple, readily available items like vinegar, baking soda, and lemon juice to tackle even the toughest cleaning tasks. This tradition of natural cleaning is not only effective but also environmentally friendly and budget-conscious.
That’s why I’m so excited to share these simple yet incredibly effective DIY tricks to clean kitchen sink naturally. You’ll learn how to banish stubborn stains, eliminate unpleasant odors, and keep your sink sparkling without resorting to harsh chemicals. These hacks are not only good for your health and the environment, but they’ll also save you money in the long run. So, let’s dive in and discover how to transform your kitchen sink into a shining example of cleanliness, naturally!
DIY Natural Kitchen Sink Cleaning Powerhouse
Hey there! Are you tired of harsh chemicals and lingering smells after cleaning your kitchen sink? I know I was! That’s why I’ve perfected this all-natural cleaning method that leaves my sink sparkling and smelling fresh. Plus, it’s super easy and uses ingredients you probably already have in your pantry. Let’s get started!
What You’ll Need:
* Baking Soda
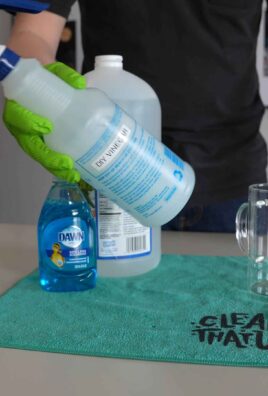
* White Vinegar
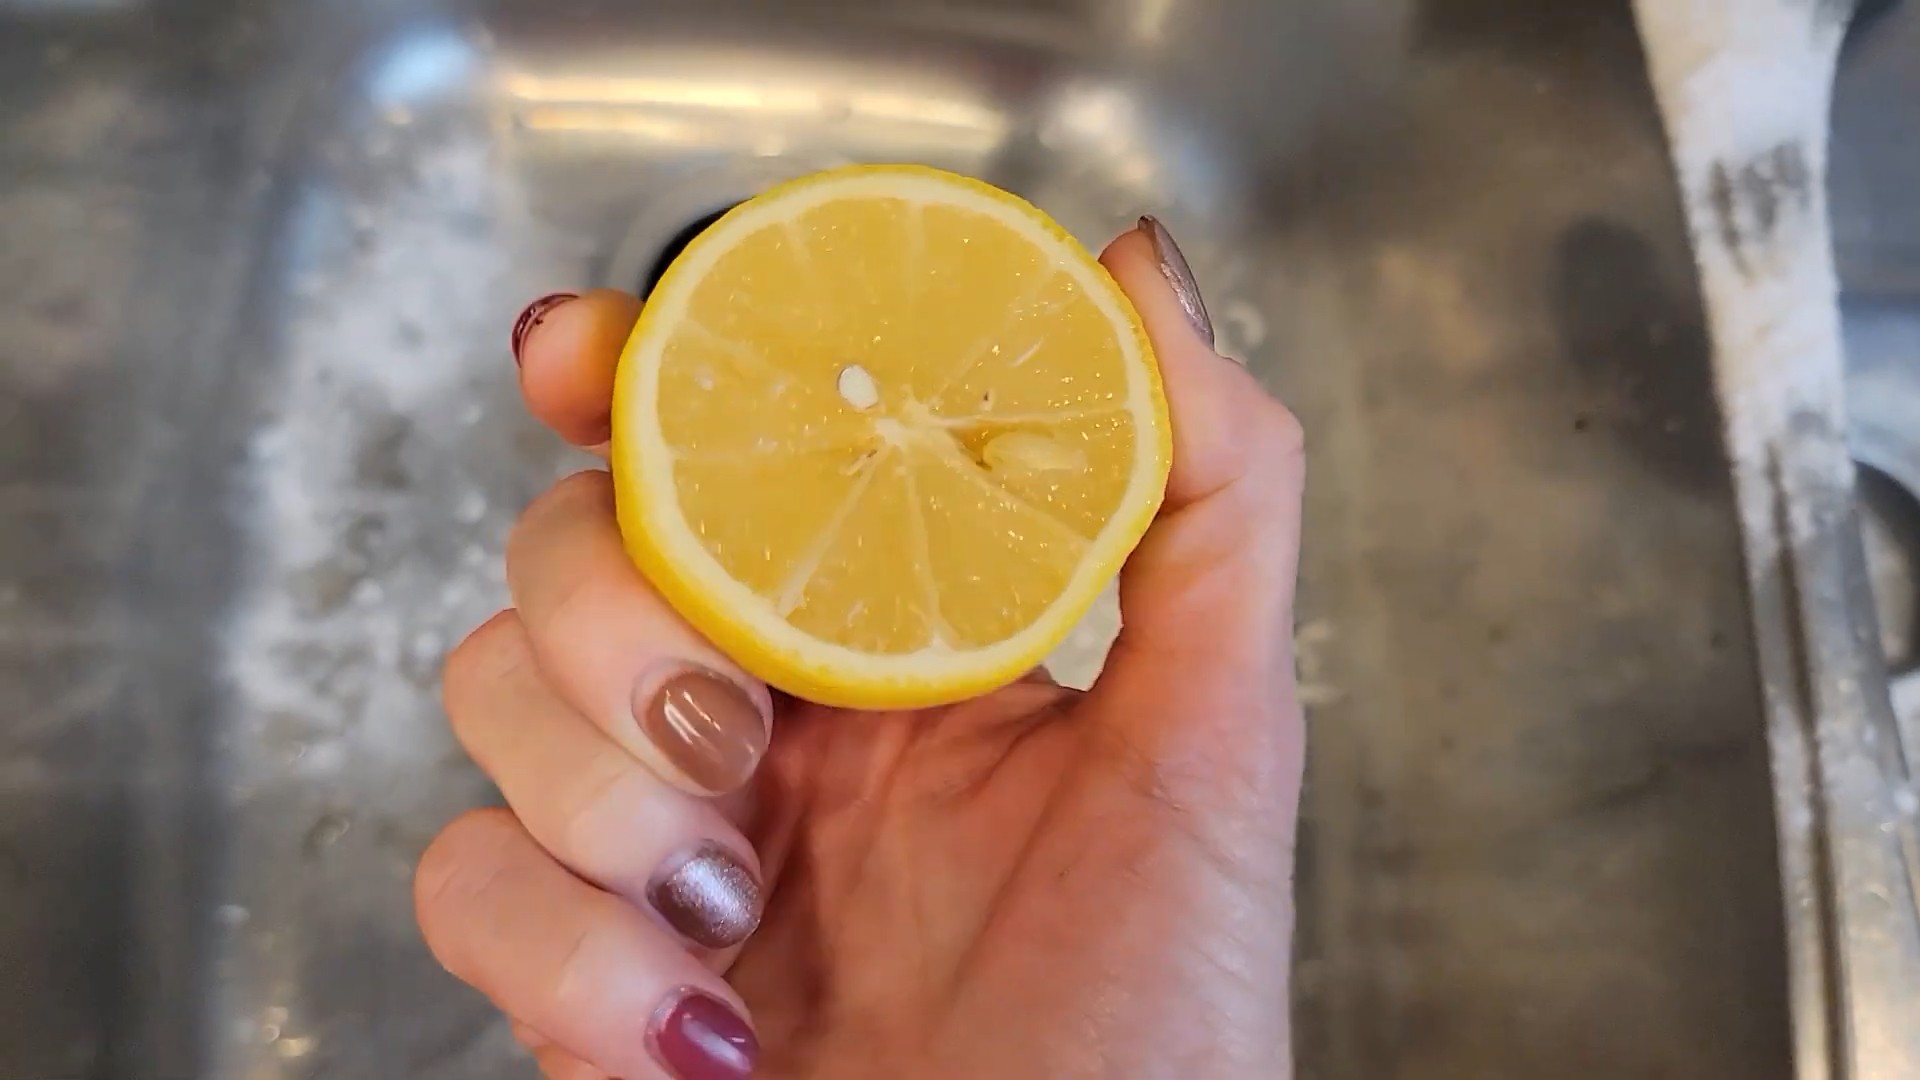
* Lemon (or Lemon Essential Oil)
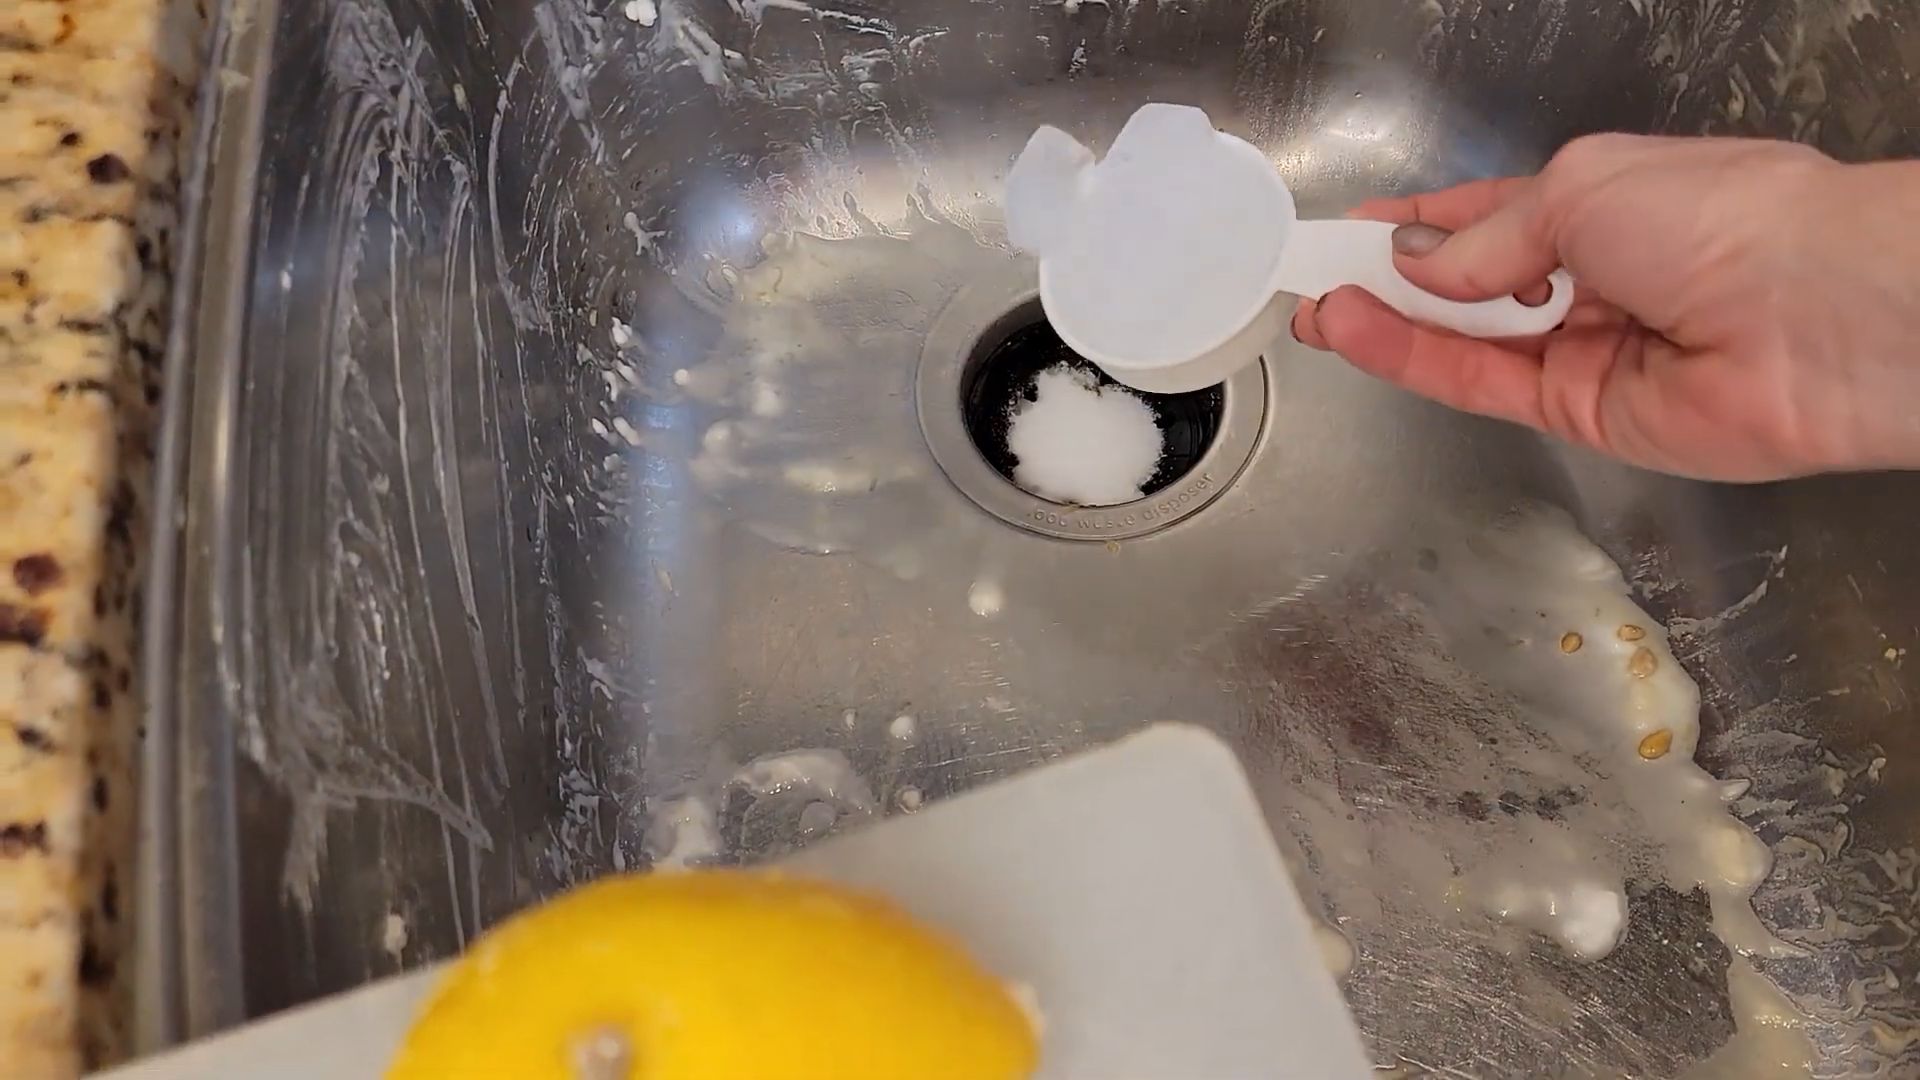
* Salt (Coarse Salt is best)
* Dish Soap (Natural is preferable)
* Boiling Water
* Old Toothbrush or Scrub Brush
* Microfiber Cloth or Sponge
* Rubber Gloves (optional, but recommended)
The Cleaning Process: A Step-by-Step Guide
1. Clear the Sink: First things first, remove any dishes, sponges, or other items from your sink. We need a clean slate to work with!
2. Rinse the Sink: Give the sink a quick rinse with warm water to loosen any loose debris. This will help the cleaning agents work more effectively.
3. Baking Soda Power: Generously sprinkle baking soda all over the sink surface, including the sides and around the drain. Don’t be shy! Baking soda is a fantastic mild abrasive and deodorizer. I usually use about half a cup, but adjust based on the size of your sink.
4. Vinegar Volcano (Gentle Version): Now for the fun part! Slowly pour white vinegar over the baking soda. You’ll see it fizz and bubble – that’s the magic happening! The chemical reaction between the baking soda and vinegar helps to loosen grime and break down grease. Let this mixture sit for about 5-10 minutes. This gives it time to really work its magic.
5. Scrub-a-dub-dub: Using your old toothbrush or scrub brush, scrub the entire sink surface, paying special attention to areas with stubborn stains or buildup. Really get into those corners and around the drain. I find that a circular motion works best.
6. Salt Scrub for Extra Oomph: If you have some particularly tough stains or hard water deposits, sprinkle some coarse salt onto your scrub brush and use it to scrub those areas. The salt acts as a gentle abrasive to help remove the stubborn grime. Be careful not to scrub too hard, though, as you don’t want to scratch your sink.
7. Rinse Thoroughly: Rinse the sink thoroughly with warm water to remove all traces of baking soda, vinegar, and salt. Make sure you get everything!
8. Dish Soap Wash: Squirt a small amount of natural dish soap onto your sponge or microfiber cloth and wash the entire sink surface again. This will help to remove any remaining grease or residue.
9. Boiling Water Flush: Carefully pour a kettle of boiling water down the drain. This will help to flush out any remaining debris and kill any bacteria that may be lurking in the pipes. Be extremely careful when handling boiling water to avoid burns.
10. Lemon Freshness: Cut a lemon in half and rub it all over the sink surface. The lemon juice will help to disinfect the sink and leave it smelling fresh and clean. If you don’t have a lemon, you can add a few drops of lemon essential oil to a damp cloth and wipe down the sink.
11. Final Rinse and Dry: Give the sink one last rinse with warm water and then dry it thoroughly with a clean microfiber cloth. This will prevent water spots and leave your sink sparkling.
Dealing with Stubborn Stains and Odors
Sometimes, even with all that scrubbing, you might still have some stubborn stains or lingering odors. Don’t worry, I’ve got a few extra tricks up my sleeve!
* For Hard Water Stains: If you have hard water, you might notice white, chalky deposits on your sink. To remove these, soak a paper towel in white vinegar and place it over the affected area for about an hour. Then, scrub with a brush and rinse thoroughly.
* For Rust Stains: Rust stains can be tricky to remove. Try making a paste of baking soda and lemon juice and applying it to the stain. Let it sit for about 30 minutes, then scrub and rinse.
* For Drain Odors: If your sink drain is smelling a bit funky, try pouring a cup of baking soda down the drain, followed by a cup of white vinegar. Let it fizz for about 30 minutes, then flush with boiling water. You can also try dropping a few lemon or orange peels down the drain and running the garbage disposal (if you have one).
Maintaining a Clean Sink: Prevention is Key!
The best way to keep your sink clean is to prevent it from getting too dirty in the first place. Here are a few tips:
* Rinse After Each Use: Make it a habit to rinse your sink after each use to prevent food particles and grease from building up.
* Wipe Down Regularly: Wipe down your sink with a damp cloth or sponge every day to remove any spills or splatters.
* Avoid Harsh Chemicals: Harsh chemicals can damage your sink and are not necessary for effective cleaning. Stick to natural cleaning solutions whenever possible.
* Don’t Pour Grease Down the Drain: Pouring grease down the drain can clog your pipes and cause unpleasant odors. Instead, pour grease into a container and dispose of it properly.
* Use a Drain Strainer: A drain strainer will catch food particles and other debris, preventing them from going down the drain and causing clogs.
Choosing the Right Materials for Your Sink
The type of sink you have will affect how you clean it. Here’s a quick guide:
* Stainless Steel Sinks: Stainless steel sinks are durable and easy to clean, but they can be prone to water spots and scratches. Use a non-abrasive cleaner and a soft cloth to avoid damaging the surface.
* Porcelain Sinks: Porcelain sinks are beautiful but can be easily stained and chipped. Use a gentle cleaner and avoid harsh abrasives.
* Composite Sinks: Composite sinks are made from a mixture of materials, such as granite or quartz, and are very durable. Use a mild cleaner and avoid harsh chemicals.
* Copper Sinks: Copper sinks have a unique look and are naturally antimicrobial. Use a cleaner specifically designed for copper to avoid damaging the finish.
Why I Love This Natural Cleaning Method
I’ve been using this natural cleaning method for years, and I absolutely love it! Not only does it leave my sink sparkling clean and smelling fresh, but it’s also safe for my family and the environment. I feel good knowing that I’m not using harsh chemicals that could be harmful. Plus, it’s so much cheaper than buying expensive cleaning products!
A Few Extra Tips and Tricks
* For a Sparkling Shine: After drying your sink, you can buff it with a dry microfiber cloth to give it an extra shine.
* Essential Oil Power: Experiment with different essential oils to find your favorite scent. Lavender, tea tree, and eucalyptus are all great options.
* Make it a Routine: Incorporate this cleaning method into your regular cleaning routine to keep your sink looking its best. I usually do a quick clean every few days and a more thorough clean once a week.
* Don’t Forget the Faucet: While you’re cleaning your sink, don’t forget to clean the faucet! Use a damp cloth and a mild cleaner to wipe down the faucet and remove any water spots or buildup.
I hope you found this guide helpful! Give it a try and let me know what you think. I’m confident that you’ll love the results. Happy cleaning!
Conclusion
So, there you have it! A simple, effective, and entirely natural way to keep your kitchen sink sparkling clean. Forget harsh chemicals and expensive cleaners; this DIY trick using readily available ingredients is a game-changer. We’ve shown you how easy it is to banish grime, eliminate odors, and maintain a hygienic kitchen sink environment without resorting to potentially harmful substances.
Why is this a must-try? Because it’s not just about cleaning; it’s about creating a healthier home. Traditional cleaning products often contain volatile organic compounds (VOCs) that can irritate your lungs and contribute to indoor air pollution. This natural method avoids those risks, making it safer for you, your family, and even your pets. Plus, it’s incredibly cost-effective. You likely already have the ingredients in your pantry!
Beyond the basic recipe, there are several variations you can explore to tailor the cleaning power to your specific needs. For instance, if you’re dealing with stubborn stains, try adding a tablespoon of borax to the baking soda paste for extra scrubbing power. For a refreshing scent boost, infuse your vinegar with citrus peels (lemon, orange, or grapefruit) for a few weeks before using it. This will not only add a pleasant aroma but also enhance the cleaning properties of the vinegar. Another option is to add a few drops of your favorite essential oil, such as tea tree oil for its antibacterial properties or lavender oil for its calming scent.
If you have a stainless steel sink, be sure to wipe it down with a microfiber cloth after cleaning to prevent water spots and maintain its shine. For porcelain sinks, avoid using abrasive scrub brushes that could scratch the surface. A soft sponge or cloth will work just fine. Remember to always test any cleaning solution in an inconspicuous area first to ensure it doesn’t damage the finish of your sink.
We are confident that this clean kitchen sink naturally method will become a staple in your cleaning routine. It’s quick, easy, eco-friendly, and incredibly effective. But don’t just take our word for it – try it yourself!
We encourage you to give this DIY trick a try and see the amazing results firsthand. We’re eager to hear about your experiences! Share your before-and-after photos, your favorite variations, and any tips or tricks you discover along the way in the comments section below. Let’s build a community of natural cleaning enthusiasts and help each other create healthier, happier homes, one sparkling sink at a time. Your feedback is invaluable and will help us refine and improve this method for everyone. So, go ahead, give it a shot, and let us know what you think!
Frequently Asked Questions (FAQs)
What exactly makes this method “natural”?
This method relies on the cleaning power of baking soda and vinegar, both of which are naturally occurring substances. Baking soda is a mild alkali that helps to dissolve dirt and grease, while vinegar is a mild acid that helps to disinfect and remove mineral deposits. Unlike many commercial cleaners, these ingredients are biodegradable and don’t contain harsh chemicals, synthetic fragrances, or artificial dyes. This makes them a safer and more environmentally friendly option for cleaning your kitchen sink.
Can I use this method on all types of kitchen sinks?
This method is generally safe for most types of kitchen sinks, including stainless steel, porcelain, and composite sinks. However, it’s always a good idea to test the solution in an inconspicuous area first, especially if you have a sink made of a more delicate material like copper or natural stone. Avoid using abrasive scrub brushes on porcelain sinks, as they can scratch the surface. For stainless steel sinks, be sure to wipe them down with a microfiber cloth after cleaning to prevent water spots.
How often should I clean my kitchen sink using this method?
The frequency of cleaning depends on how often you use your sink and how dirty it gets. As a general rule, it’s a good idea to clean your sink at least once a week to prevent the buildup of grime and bacteria. If you use your sink frequently or if it tends to get particularly dirty, you may need to clean it more often. You can also use this method for spot cleaning as needed.
What if I don’t have vinegar? Can I use something else?
Vinegar is a key ingredient in this method due to its acidic properties, which help to disinfect and remove mineral deposits. However, if you don’t have vinegar on hand, you can try using lemon juice as a substitute. Lemon juice is also acidic and has natural antibacterial properties. Simply use the same amount of lemon juice as you would vinegar in the recipe.
My sink has a really bad odor. Will this method get rid of it?
Yes, this method is effective at eliminating odors from your kitchen sink. The baking soda helps to absorb odors, while the vinegar helps to disinfect and kill odor-causing bacteria. For particularly stubborn odors, you can try pouring a cup of baking soda down the drain, followed by a cup of vinegar. Let it fizz for 30 minutes, then flush with hot water. You can also add a few drops of essential oils, such as tea tree oil or lemon oil, to the baking soda paste for an extra boost of odor-fighting power.
Can I use this method to clean my garbage disposal?
Yes, this method can also be used to clean your garbage disposal. Simply pour the baking soda and vinegar mixture down the drain and let it fizz for 30 minutes. Then, flush with hot water while running the garbage disposal. This will help to remove food particles and eliminate odors from your garbage disposal. You can also add a few ice cubes to the garbage disposal while running it to help sharpen the blades.
Is it safe to mix baking soda and vinegar? I’ve heard it can be dangerous.
While mixing baking soda and vinegar creates a chemical reaction that produces carbon dioxide gas, it is generally safe to use for cleaning purposes. The amount of gas produced is relatively small and dissipates quickly. However, it’s important to avoid mixing large quantities of baking soda and vinegar in a closed container, as this could create pressure and potentially cause the container to explode. When using this method to clean kitchen sink naturally, ensure adequate ventilation and avoid inhaling the fumes directly.
What if I have hard water stains in my sink?
Hard water stains can be difficult to remove, but this method can still be effective. For stubborn hard water stains, try making a paste of baking soda and water and applying it directly to the stains. Let it sit for 15-20 minutes, then scrub with a non-abrasive sponge or cloth. You can also try soaking a paper towel in vinegar and placing it over the stains for a few hours. The vinegar will help to dissolve the mineral deposits.
Can I use this method on colored sinks? Will it fade the color?
While this method is generally safe for most colored sinks, it’s always a good idea to test it in an inconspicuous area first to ensure it doesn’t fade the color. Vinegar is a mild acid and could potentially affect the color of some materials. If you’re concerned about fading, you can dilute the vinegar with water or use lemon juice as a substitute.
What are some other natural cleaning tips for the kitchen?
Besides cleaning your sink with baking soda and vinegar, there are many other natural ways to keep your kitchen clean. You can use lemon juice to disinfect cutting boards, baking soda to deodorize your refrigerator, and olive oil to polish wooden surfaces. For a natural all-purpose cleaner, mix equal parts water and vinegar in a spray bottle. You can also use essential oils to add a pleasant scent and boost the cleaning power of your natural cleaners.


Leave a Comment