

Clean refrigerator coils vacuum – sounds like a chore, right? But trust me, it’s one of the easiest and most impactful DIY tasks you can do to keep your fridge running smoothly and save money on your energy bill! For generations, keeping food cold has been a cornerstone of home economics. From ice houses of the past to the modern marvels we have today, refrigeration has always been about preservation and efficiency. But did you know that the coils on the back (or bottom) of your refrigerator are crucial to this process?
Think of it this way: your refrigerator works hard to keep your food at the perfect temperature. Over time, dust, pet hair, and other debris accumulate on these coils, acting like a blanket and preventing the fridge from efficiently releasing heat. This forces your refrigerator to work harder, consuming more energy and potentially shortening its lifespan. That’s where this simple DIY trick comes in! By learning how to clean refrigerator coils vacuum, you’re not just cleaning; you’re investing in the longevity of your appliance and reducing your carbon footprint. Plus, who doesn’t love saving a few bucks on their electricity bill? Let’s get started and show you how easy it is!
DIY Refrigerator Coil Cleaning: A Step-by-Step Guide
Okay, so your fridge isn’t as cold as it used to be, or maybe your energy bill is creeping up? One of the most common culprits is dirty refrigerator coils. Don’t worry, you don’t need to call a repairman just yet! Cleaning them yourself is a surprisingly easy DIY project that can save you money and extend the life of your fridge. I’m going to walk you through the whole process.
What You’ll Need
Before we get started, let’s gather our supplies. You probably have most of these lying around the house already:
* Vacuum Cleaner: A vacuum with a hose attachment is essential. A brush attachment is even better!
* Soft Brush: A long-handled brush, like a radiator brush or even a clean paintbrush, will help loosen stubborn dust.
* Screwdriver or Nut Driver: You might need this to remove the access panel covering the coils. The type will depend on your fridge model.
* Work Gloves: Protect your hands from dust and sharp edges.
* Flashlight or Headlamp: To see those hard-to-reach areas.
* Cleaning Cloth or Paper Towels: For wiping down surfaces.
* Appliance Dolly (Optional): If your fridge is difficult to move.
* Owner’s Manual: Always a good idea to consult your fridge’s manual for specific instructions or warnings.
Safety First!
Before you even think about touching anything, let’s prioritize safety:
1. Unplug the Refrigerator: This is absolutely crucial! We’re dealing with electrical components, and you don’t want to risk getting shocked. Find the outlet and unplug the fridge completely.
2. Turn Off the Refrigerator’s Power Switch (If Applicable): Some refrigerators have a dedicated power switch. If yours does, turn it off as an extra precaution.
3. Read the Owner’s Manual: I know, I know, nobody reads manuals. But seriously, take a quick look. It might have specific instructions or warnings related to cleaning the coils on your particular model.
Locating the Refrigerator Coils
This is the first real step, and it’s important to know where to look. Refrigerator coils are usually located in one of two places:
* On the Back of the Refrigerator: This is the most common location. You’ll usually see a black panel covering the coils.
* At the Bottom of the Refrigerator: Some models have the coils behind a grill at the bottom, either in the front or the back.
If you’re not sure, consult your owner’s manual.
Cleaning the Coils: Step-by-Step
Alright, let’s get down to business!
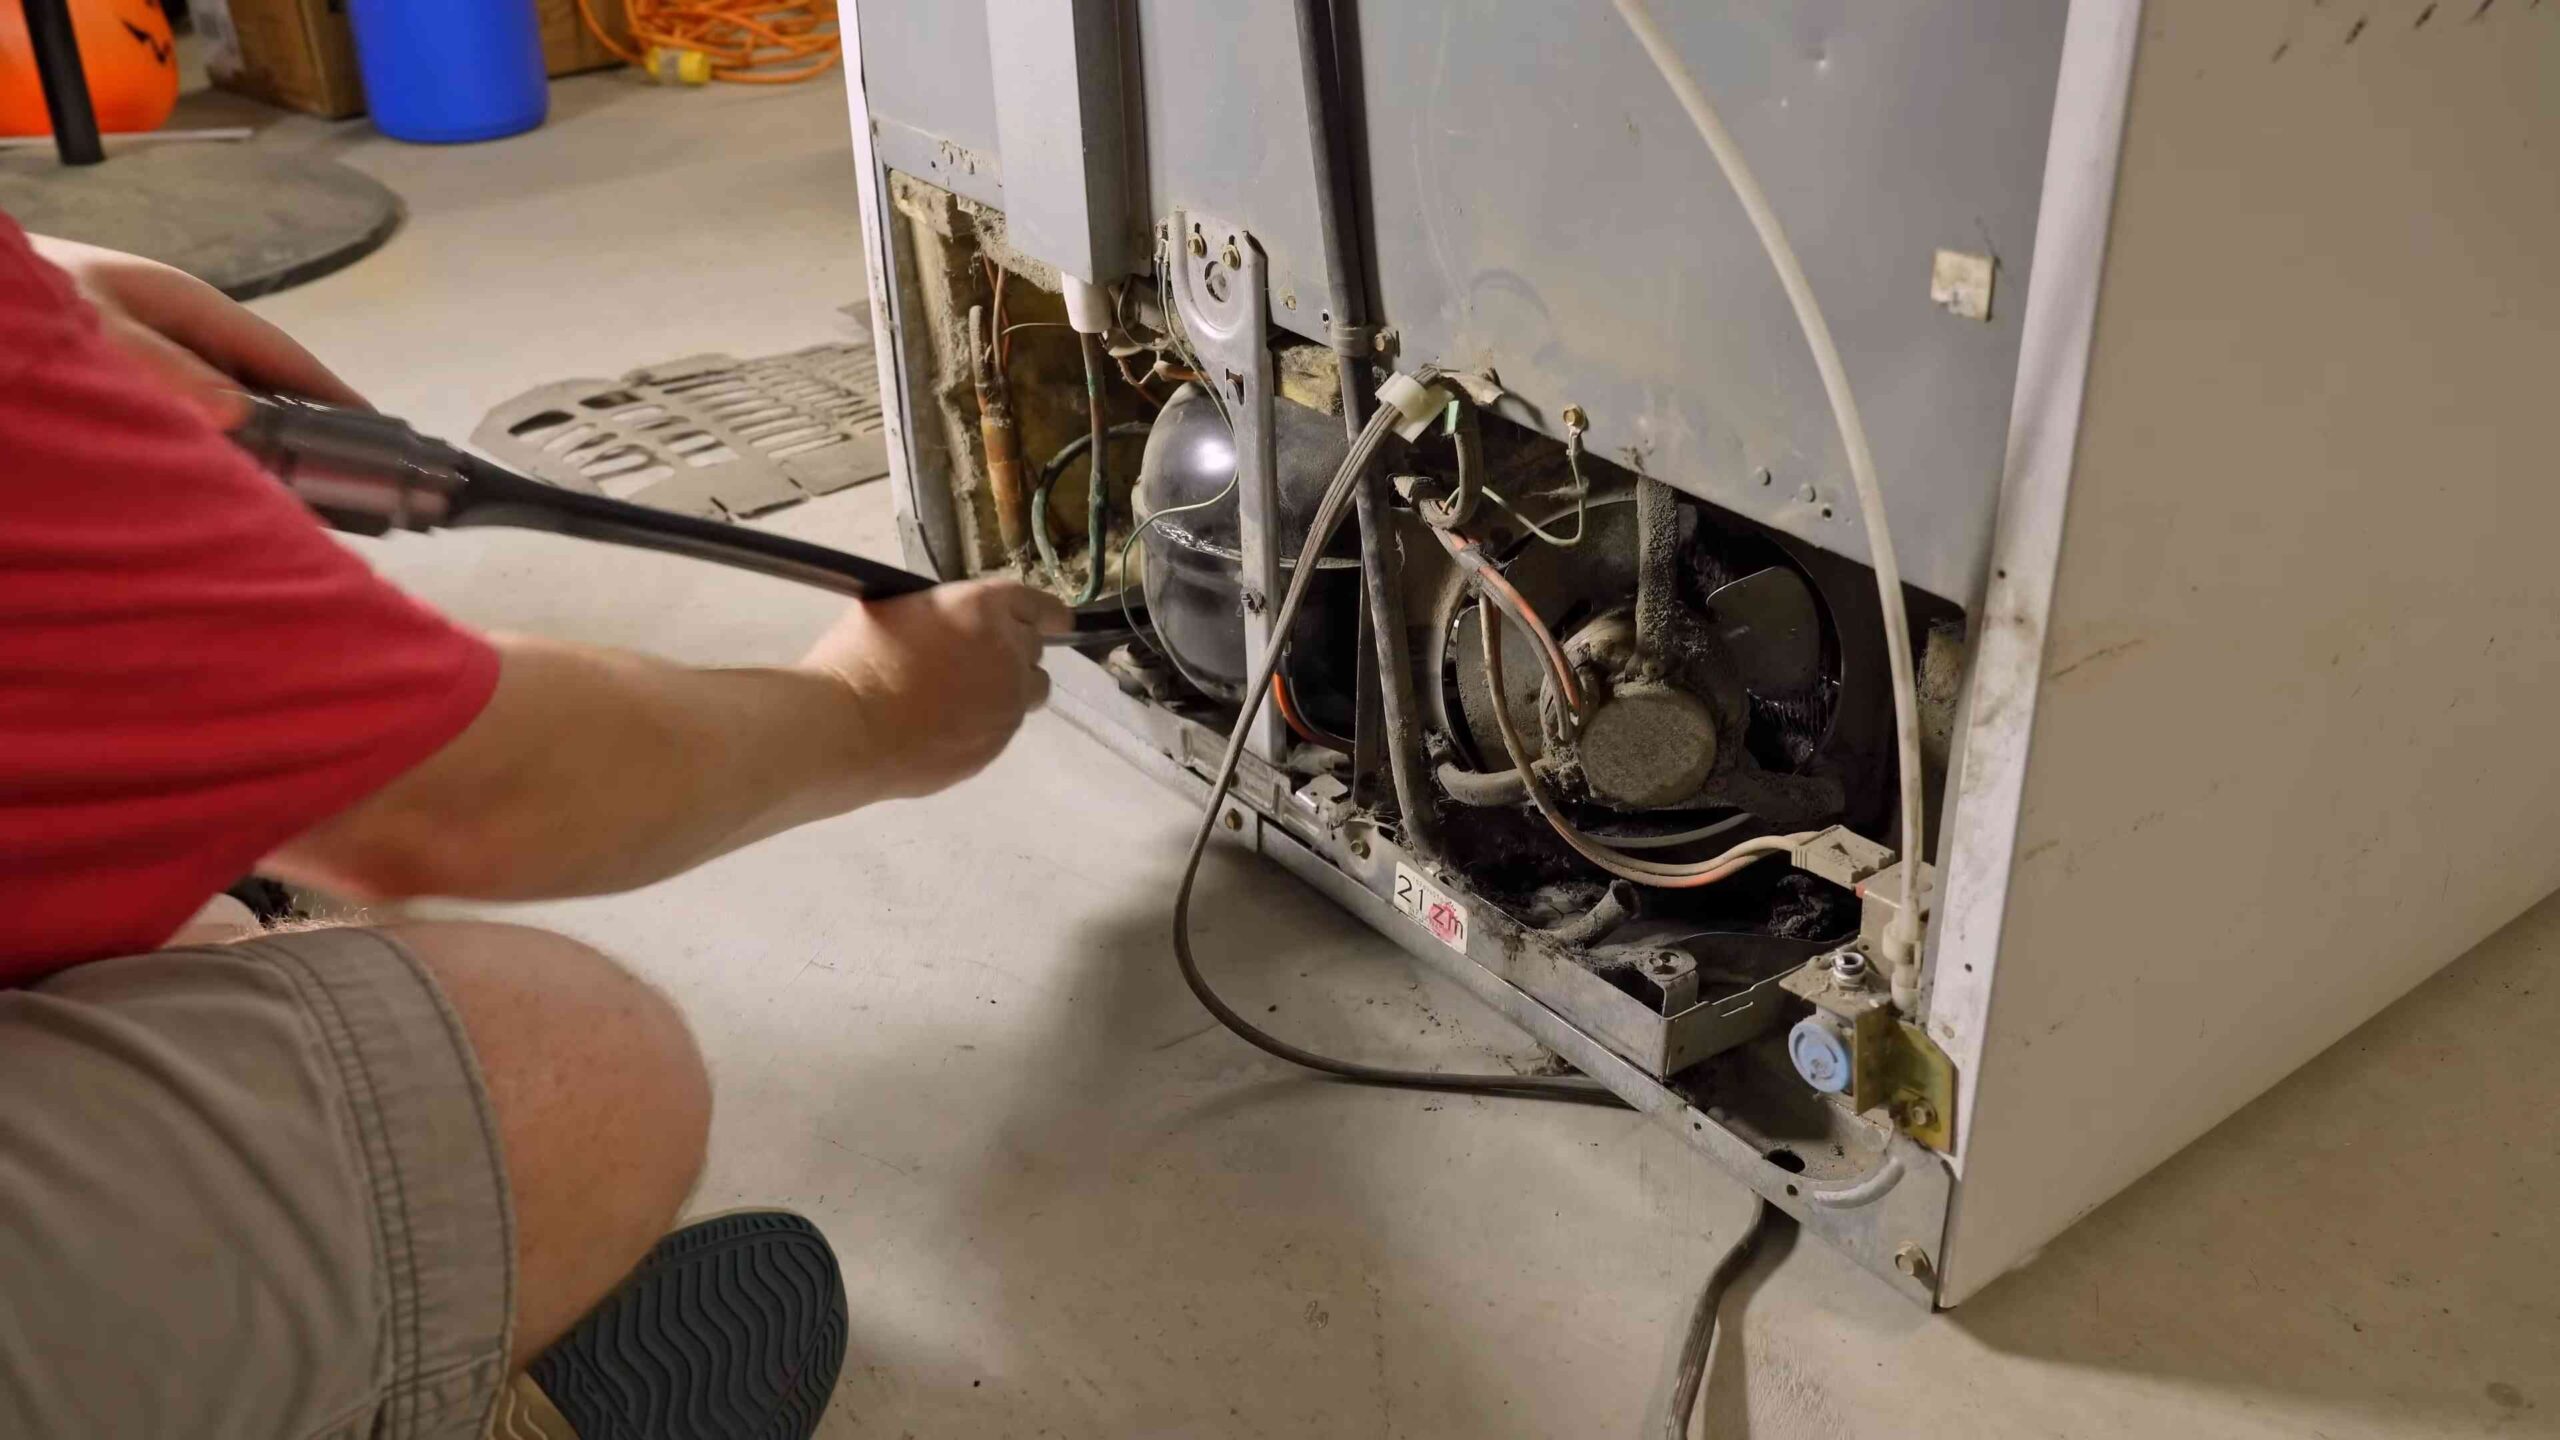
1. Move the Refrigerator (If Necessary): If the coils are on the back, you’ll need to pull the fridge away from the wall. Be careful not to damage the floor. An appliance dolly can be helpful if your fridge is heavy.
2. Remove the Access Panel: Use your screwdriver or nut driver to remove the screws holding the access panel in place. Carefully remove the panel and set it aside.
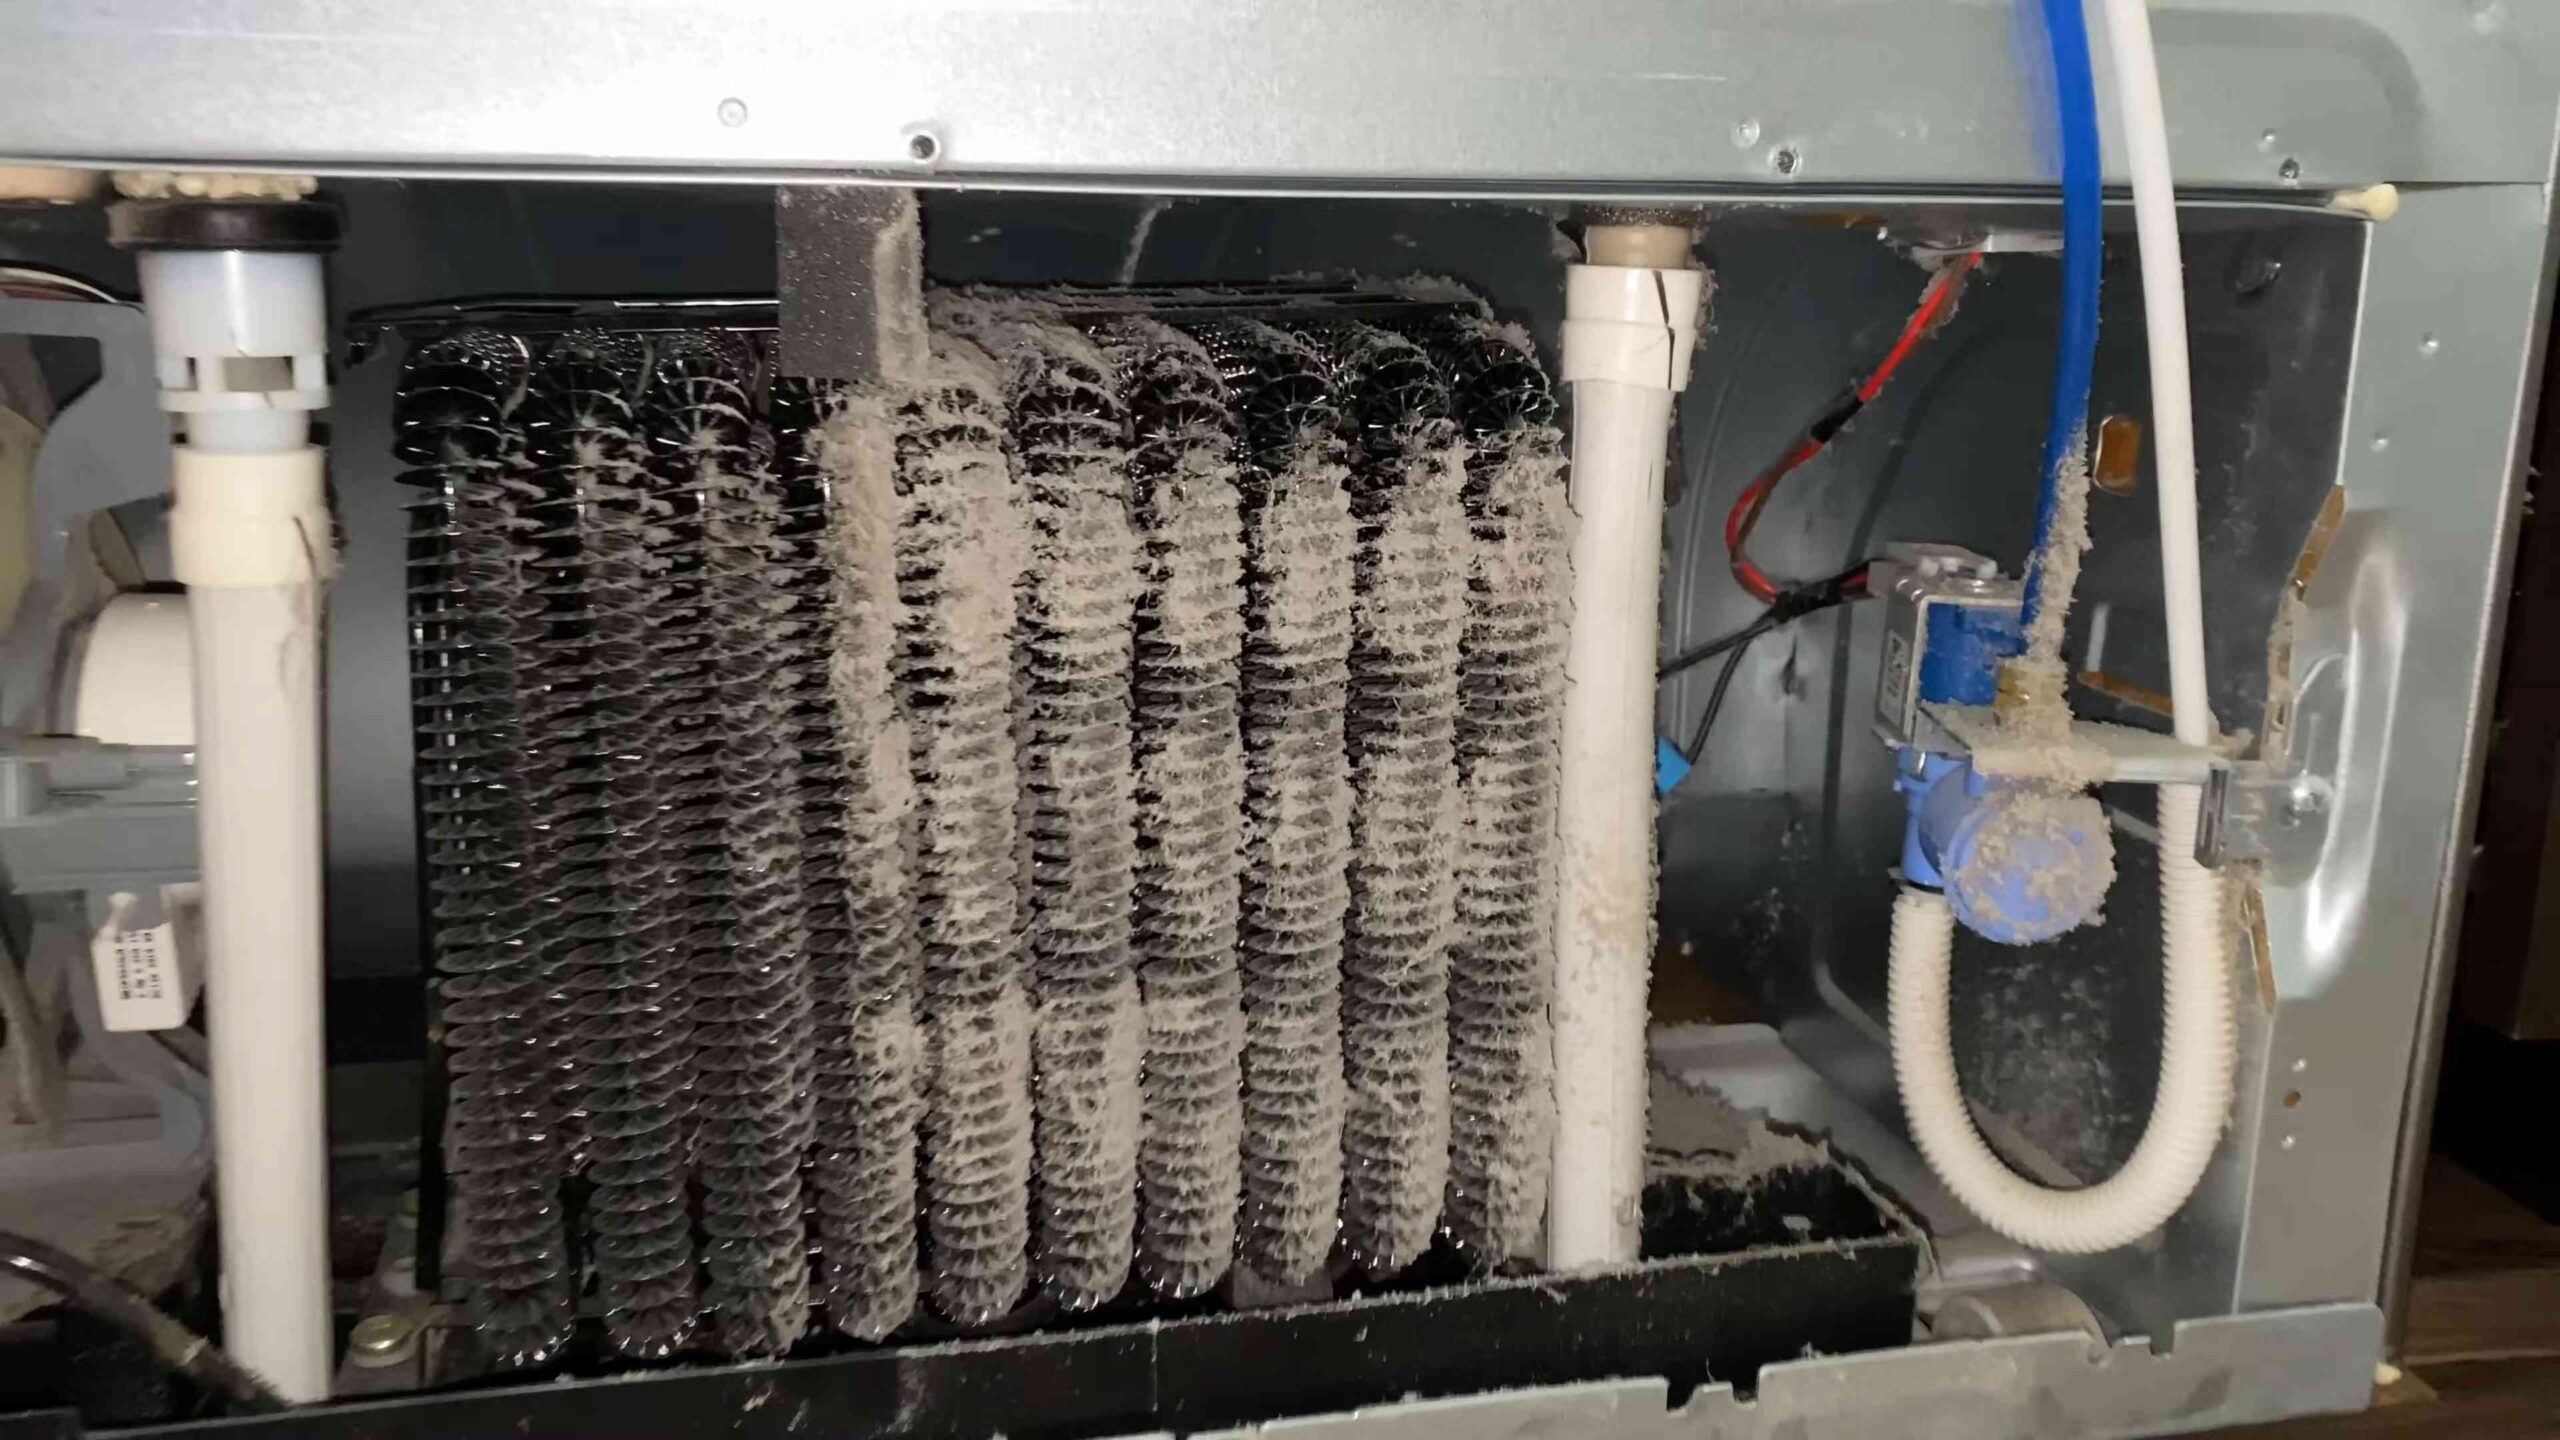
3. Inspect the Coils: Take a good look at the coils. You’ll probably see a thick layer of dust, lint, and pet hair. This is what’s reducing your fridge’s efficiency.
4. Vacuum the Coils: Using your vacuum cleaner with the hose attachment, carefully vacuum the coils. Use the brush attachment if you have one. Work from top to bottom, making sure to get into all the nooks and crannies.
5. Use the Soft Brush: For stubborn dust, use your soft brush to loosen it up before vacuuming. Gently brush the coils, being careful not to damage them.
6. Vacuum Again: After brushing, vacuum the coils again to remove any remaining dust.
7. Wipe Down the Area: Use a damp cloth or paper towels to wipe down the area around the coils. This will help prevent dust from accumulating again quickly.
8. Replace the Access Panel: Once the coils are clean and the area is wiped down, replace the access panel and secure it with the screws.
9. Move the Refrigerator Back into Place: Carefully push the refrigerator back into its original position.
10. Plug the Refrigerator Back In: Plug the refrigerator back into the outlet.
11. Turn On the Power Switch (If Applicable): If your refrigerator has a power switch, turn it back on.
Dealing with Bottom-Mounted Coils
If your refrigerator has bottom-mounted coils, the process is slightly different:
1. Locate the Grill: Find the grill at the bottom of the refrigerator, either in the front or the back.
2. Remove the Grill: Most grills are held in place by clips or screws. Carefully remove the grill to expose the coils.
3. Vacuum the Coils: Use your vacuum cleaner with the hose attachment to vacuum the coils. You may need to use a crevice tool to reach into tight spaces.
4. Use the Soft Brush: As with back-mounted coils, use a soft brush to loosen stubborn dust.
5. Vacuum Again: Vacuum the coils again to remove any remaining dust.
6. Wipe Down the Area: Wipe down the area around the coils with a damp cloth or paper towels.
7. Replace the Grill: Replace the grill and secure it in place.
Tips and Tricks for a Sparkling Clean
* Frequency: Aim to clean your refrigerator coils every 6-12 months. If you have pets, you might need to do it more often.
* Pet Hair: Pet hair is a major culprit when it comes to dirty coils. If you have pets, consider using a vacuum with a HEPA filter to capture more of the hair.
* Compressed Air: For really stubborn dust, you can try using compressed air to blow it out. Be careful not to damage the coils.
* Coil Cleaning Brush: You can buy specialized coil cleaning brushes that are designed to reach into tight spaces.
* Listen to Your Fridge: Pay attention to how your fridge is running. If it’s running constantly or making unusual noises, it might be a sign that the coils need cleaning.
* Check the Condenser Fan: While you’re cleaning the coils, take a look at the condenser fan (if your fridge has one). Make sure it’s clean and spinning freely.
Troubleshooting
* Can’t Remove the Access Panel? Double-check that you’ve removed all the screws. If it’s still stuck, consult your owner’s manual.
* Coils Are Frozen? If your coils are frozen, it could be a sign of a more serious problem. Contact a qualified appliance repair technician.
* Fridge Still Not Cold Enough? If cleaning the coils doesn’t solve the problem, there could be other issues, such as a faulty door seal or a problem with the compressor.
Why is This Important?
You might be thinking, “Is cleaning the coils really that important?” The answer is a resounding YES! Here’s why:
* Improved Efficiency: Dirty coils make your refrigerator work harder to stay cold. Cleaning them can improve its efficiency and lower your energy bill.
* Longer Lifespan: When your refrigerator doesn’t have to work as hard, it will last longer.
* Better Food Preservation: A properly functioning refrigerator will keep your food fresher for longer.
* Prevent Costly Repairs: Neglecting your refrigerator can lead to more serious problems down the road, which can be expensive to repair.
So, there you have it! Cleaning your refrigerator coils is a simple DIY project that can save you money and extend the life of your fridge. It might seem like a small thing, but it can make a big difference. Grab your vacuum, and let’s get those coils sparkling clean! You’ll be surprised at how much better your fridge performs.
Conclusion
So, there you have it! Cleaning your refrigerator coils with a vacuum isn’t just a chore; it’s a game-changer for your appliance’s efficiency and longevity. We’ve walked you through the simple steps, highlighting the benefits of improved cooling, reduced energy consumption, and a longer lifespan for your refrigerator. Think of it as a small investment of your time that yields significant returns in the long run.
Why is this DIY trick a must-try? Because it’s incredibly effective, surprisingly easy, and saves you money. A refrigerator working harder than it needs to consumes more energy, leading to higher electricity bills. Dirty coils force the compressor to work overtime, potentially leading to premature failure. By regularly vacuuming those coils, you’re essentially giving your refrigerator a breath of fresh air, allowing it to operate at peak performance.
But don’t just take our word for it! We encourage you to try this simple yet powerful DIY trick yourself. And while you’re at it, consider a few variations to personalize the process. For instance, if you have a pet with long hair, you might want to use a brush attachment on your vacuum to more effectively remove stubborn debris. Alternatively, for hard-to-reach coils, a crevice tool can be your best friend. You can also use a soft brush to loosen any caked-on dust before vacuuming. Some people even like to use a can of compressed air to blow out any remaining particles after vacuuming. Just be sure to do this in a well-ventilated area.
The key takeaway here is that maintaining clean refrigerator coils is a crucial aspect of home maintenance that often gets overlooked. It’s a simple task that can prevent costly repairs and keep your food fresher for longer. It’s a win-win situation!
We’re confident that once you experience the difference a clean set of coils makes, you’ll make this a regular part of your home maintenance routine. Don’t be surprised if you notice your refrigerator running quieter and your food staying colder. You might even see a noticeable dip in your energy bill!
So, grab your vacuum, unplug your refrigerator, and get ready to give those coils some much-needed attention. We’re eager to hear about your experience! Share your tips, tricks, and results in the comments below. Let’s create a community of refrigerator coil cleaning enthusiasts! Let us know if you noticed a difference in your refrigerator’s performance or energy consumption. Your feedback will help others discover the benefits of this simple yet effective DIY trick. Remember, a little effort goes a long way in keeping your refrigerator running smoothly and efficiently for years to come. Let’s all commit to keeping our refrigerators happy and healthy, one vacuumed coil at a time!
Frequently Asked Questions (FAQ)
How often should I clean my refrigerator coils?
The frequency of cleaning your refrigerator coils depends on several factors, including the environment in your home and whether you have pets. As a general rule of thumb, it’s recommended to clean them at least twice a year. However, if you have pets that shed a lot, or if your refrigerator is located in a dusty area, you might need to clean them more frequently, perhaps every three months. A good way to determine if it’s time for a cleaning is to visually inspect the coils. If they appear dusty or covered in debris, it’s time to break out the vacuum. Regular cleaning will prevent buildup and ensure optimal performance.
What type of vacuum cleaner is best for cleaning refrigerator coils?
Ideally, a vacuum cleaner with a hose attachment and a brush attachment is the best choice for cleaning refrigerator coils. The hose allows you to reach those hard-to-access areas, while the brush attachment helps to loosen and remove stubborn dust and debris. A vacuum with adjustable suction is also beneficial, as you can lower the suction to prevent damaging delicate components. If you don’t have a vacuum with these attachments, a crevice tool can also be helpful for getting into tight spaces. Avoid using a vacuum with excessively strong suction, as this could potentially damage the coils.
Is it safe to clean refrigerator coils myself?
Yes, cleaning refrigerator coils yourself is generally safe, as long as you take a few precautions. The most important step is to unplug the refrigerator from the power outlet before you begin. This will prevent any risk of electric shock. Also, be careful not to damage the coils while cleaning them. Use gentle movements and avoid applying excessive pressure. If you’re unsure about any part of the process, consult your refrigerator’s owner’s manual or contact a qualified appliance repair technician.
What happens if I don’t clean my refrigerator coils?
Neglecting to clean your refrigerator coils can lead to a variety of problems. The most immediate consequence is reduced cooling efficiency. Dirty coils prevent the refrigerator from dissipating heat effectively, causing the compressor to work harder and longer to maintain the desired temperature. This increased workload leads to higher energy consumption and increased electricity bills. Over time, the overworked compressor can overheat and fail prematurely, resulting in costly repairs or even the need to replace the entire refrigerator. Furthermore, a poorly functioning refrigerator can lead to food spoilage, resulting in wasted food and potential health risks.
Can I use a brush or cloth to clean the coils instead of a vacuum?
While a brush or cloth can be used to clean refrigerator coils, a vacuum cleaner is generally the more effective and efficient option. A brush or cloth can help to loosen dust and debris, but it doesn’t remove it from the area. This can lead to the dust simply being redistributed around the coils. A vacuum cleaner, on the other hand, sucks up the dust and debris, leaving the coils cleaner and more efficient. If you do choose to use a brush or cloth, be sure to use a soft brush and a clean, damp cloth. Avoid using abrasive materials, as these could damage the coils. Always unplug the refrigerator before cleaning, regardless of the method you choose.
My refrigerator coils are located at the top of the unit. How can I reach them?
If your refrigerator coils are located at the top of the unit, you may need a step stool or ladder to reach them safely. Be sure to use a sturdy step stool or ladder and have someone spot you to prevent falls. A vacuum cleaner with a long hose attachment will also be helpful in reaching the coils. If you have difficulty reaching the coils yourself, consider asking a friend or family member for assistance. Alternatively, you can hire a professional appliance repair technician to clean the coils for you.
Will cleaning the coils really make a difference in my energy bill?
Yes, cleaning your refrigerator coils can indeed make a noticeable difference in your energy bill. When the coils are dirty, the refrigerator has to work harder to maintain the desired temperature, which consumes more energy. By cleaning the coils, you allow the refrigerator to operate more efficiently, reducing its energy consumption. The amount of savings you’ll see will depend on the severity of the coil buildup and the efficiency of your refrigerator, but many homeowners report a noticeable decrease in their energy bills after cleaning their refrigerator coils. It’s a simple and cost-effective way to save money and reduce your environmental impact.
What if I accidentally damage the coils while cleaning them?
If you accidentally damage the coils while cleaning them, it’s important to assess the extent of the damage. Minor dents or bends may not significantly affect the refrigerator’s performance, but more severe damage, such as punctures or leaks, can compromise the cooling system. If you suspect that you’ve caused significant damage, it’s best to contact a qualified appliance repair technician for assistance. They can assess the damage and determine the best course of action, which may involve repairing or replacing the damaged coils. Attempting to repair the coils yourself without the proper knowledge and tools could potentially worsen the problem.


Leave a Comment