

Coffee grinder cleaning tips – are you tired of your morning brew tasting a little…off? Or maybe you’ve noticed a lingering stale coffee smell even after you’ve emptied the grounds? I totally get it! We all love that fresh, aromatic cup of coffee, but a neglected coffee grinder can quickly turn your daily ritual into a less-than-perfect experience.
For centuries, coffee grinders have been essential tools, evolving from simple mortars and pestles to the sophisticated electric models we use today. Each grind contributes to the unique flavor profile of our favorite beans. But with every use, oils and residue build up, impacting the taste and potentially harboring unwanted bacteria. Yuck!
That’s where these DIY coffee grinder cleaning tips come in! I’m going to share some super easy and effective methods to keep your grinder sparkling clean and your coffee tasting its absolute best. You don’t need fancy equipment or harsh chemicals – just a few household items and a little bit of elbow grease. Trust me, the difference in your coffee will be noticeable, and you’ll be so glad you took the time to give your grinder some TLC. Let’s get started and bring back that fresh, delicious coffee flavor!
DIY Deep Clean: Revive Your Coffee Grinder Like New!
Okay, coffee lovers, let’s talk about something we often neglect: our trusty coffee grinders! We rely on them daily to deliver that perfect cup, but all that grinding leaves behind residue that can affect the taste of your precious beans. Don’t worry, though! I’m going to walk you through a super easy and effective DIY cleaning method that will have your grinder sparkling and your coffee tasting better than ever.
Why Clean Your Coffee Grinder?
Before we dive in, let’s quickly cover why this is so important.
* Fresher Taste: Old coffee grounds and oils build up, turning rancid and imparting a stale, bitter flavor to your freshly ground coffee. Yuck!
* Improved Grinder Performance: Buildup can clog the burrs or blades, making your grinder work harder and less efficiently. This can even shorten its lifespan.
* Hygiene: Nobody wants mold or bacteria lurking in their coffee! Regular cleaning helps prevent this.
What You’ll Need
This cleaning method is simple and uses ingredients you probably already have:
* Uncooked Rice: Plain white rice is the star of the show! It acts as a natural abrasive to dislodge coffee residue.
* Small Brush: A toothbrush, pastry brush, or even a small paintbrush will work wonders for getting into those hard-to-reach areas.
* Microfiber Cloth: For wiping down the exterior and interior parts.
* Vacuum Cleaner (with a hose attachment): Optional, but highly recommended for sucking up loose grounds and dust.
* Dish Soap (mild): For cleaning the removable parts.
* Damp Cloth: For wiping down any soapy residue.
* Screwdriver (if needed): Some grinders require a screwdriver to disassemble certain parts. Check your grinder’s manual.
Step-by-Step Cleaning Guide
Alright, let’s get down to business! Here’s how to clean your coffee grinder like a pro:
Section 1: Disassembly (If Applicable)
1. Unplug the Grinder: This is crucial for safety! Never work on an electrical appliance while it’s plugged in.
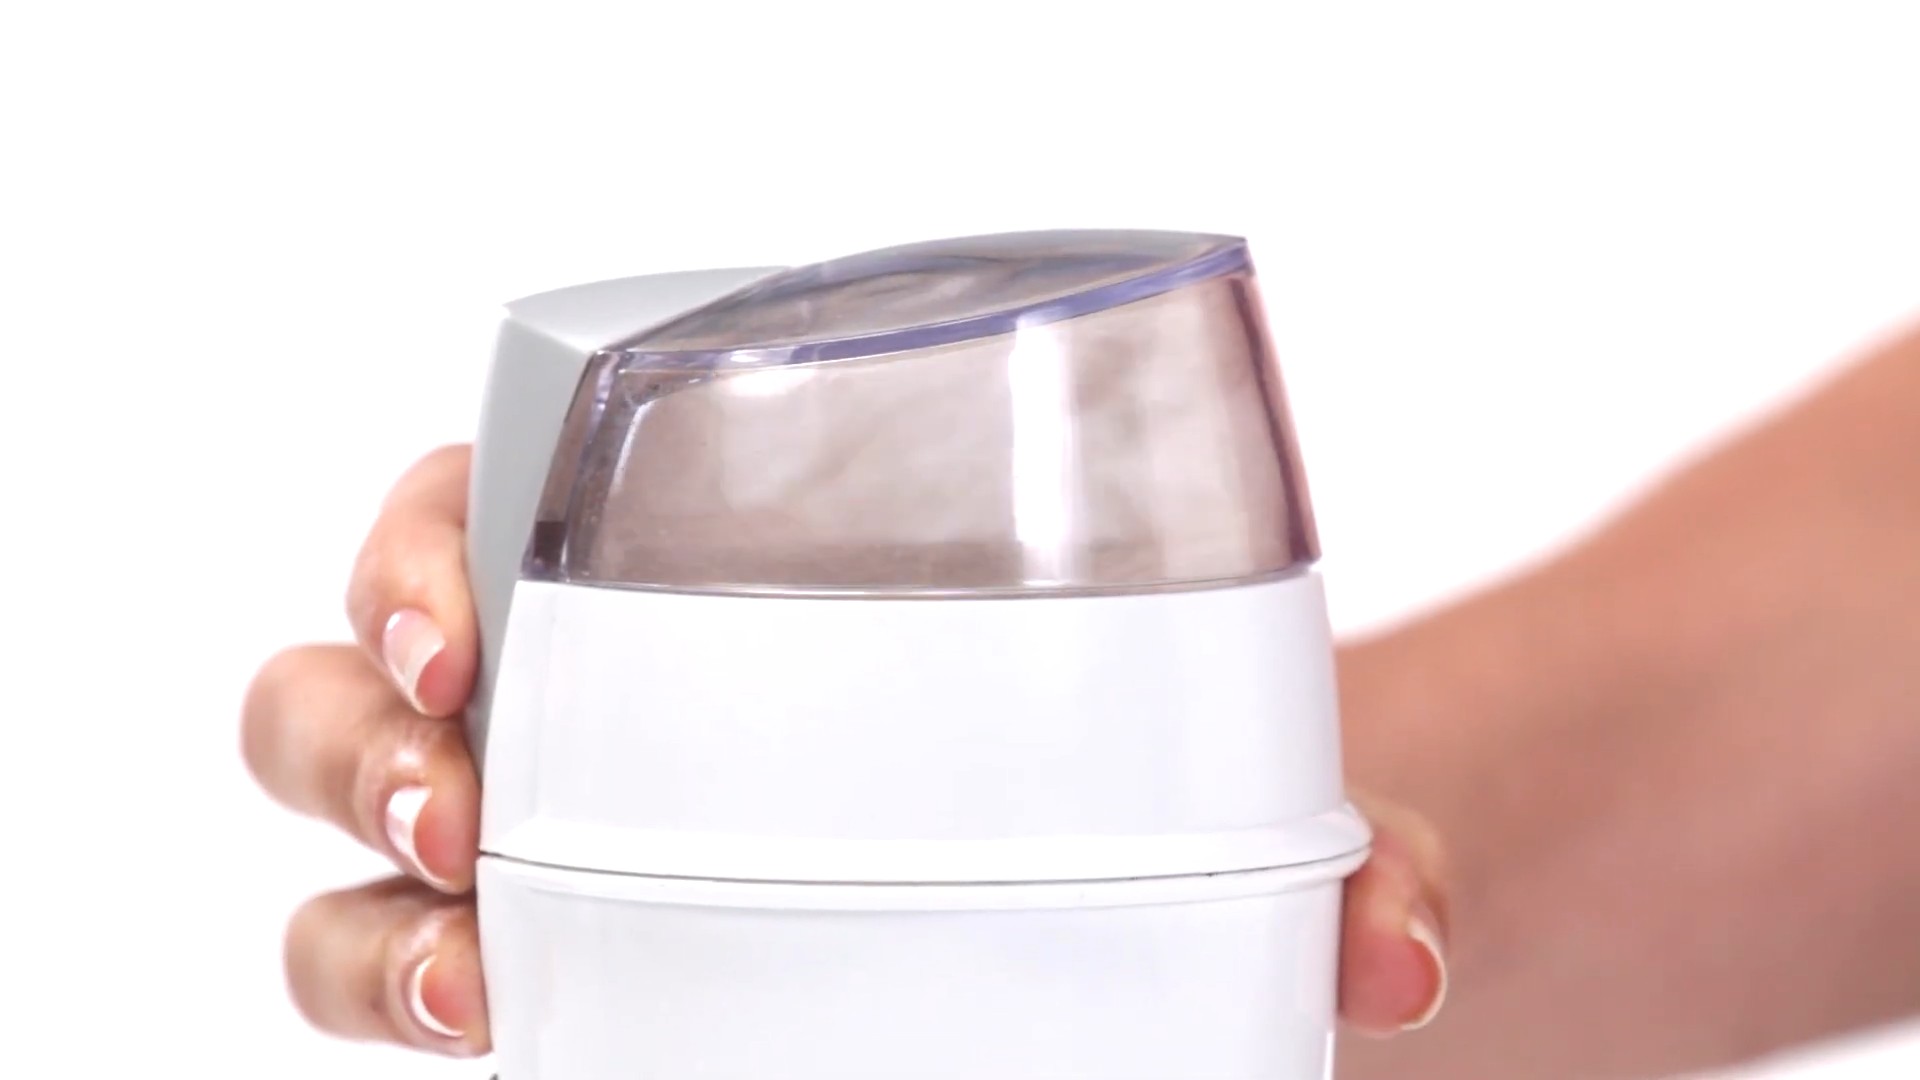
2. Remove the Hopper: The hopper is the container that holds your coffee beans. Most hoppers simply twist off or lift out. Empty any remaining beans before removing it.
3. Disassemble Removable Parts: Depending on your grinder model, you might be able to remove the burrs (the grinding wheels) or blades. Consult your grinder’s manual for specific instructions. If you’re unsure, it’s best to leave them in place. Don’t force anything!
4. Take Pictures: Before you disassemble anything complex, take pictures with your phone. This will be a lifesaver when you’re putting everything back together! Trust me, you’ll thank me later.
Section 2: The Rice Cleaning Method
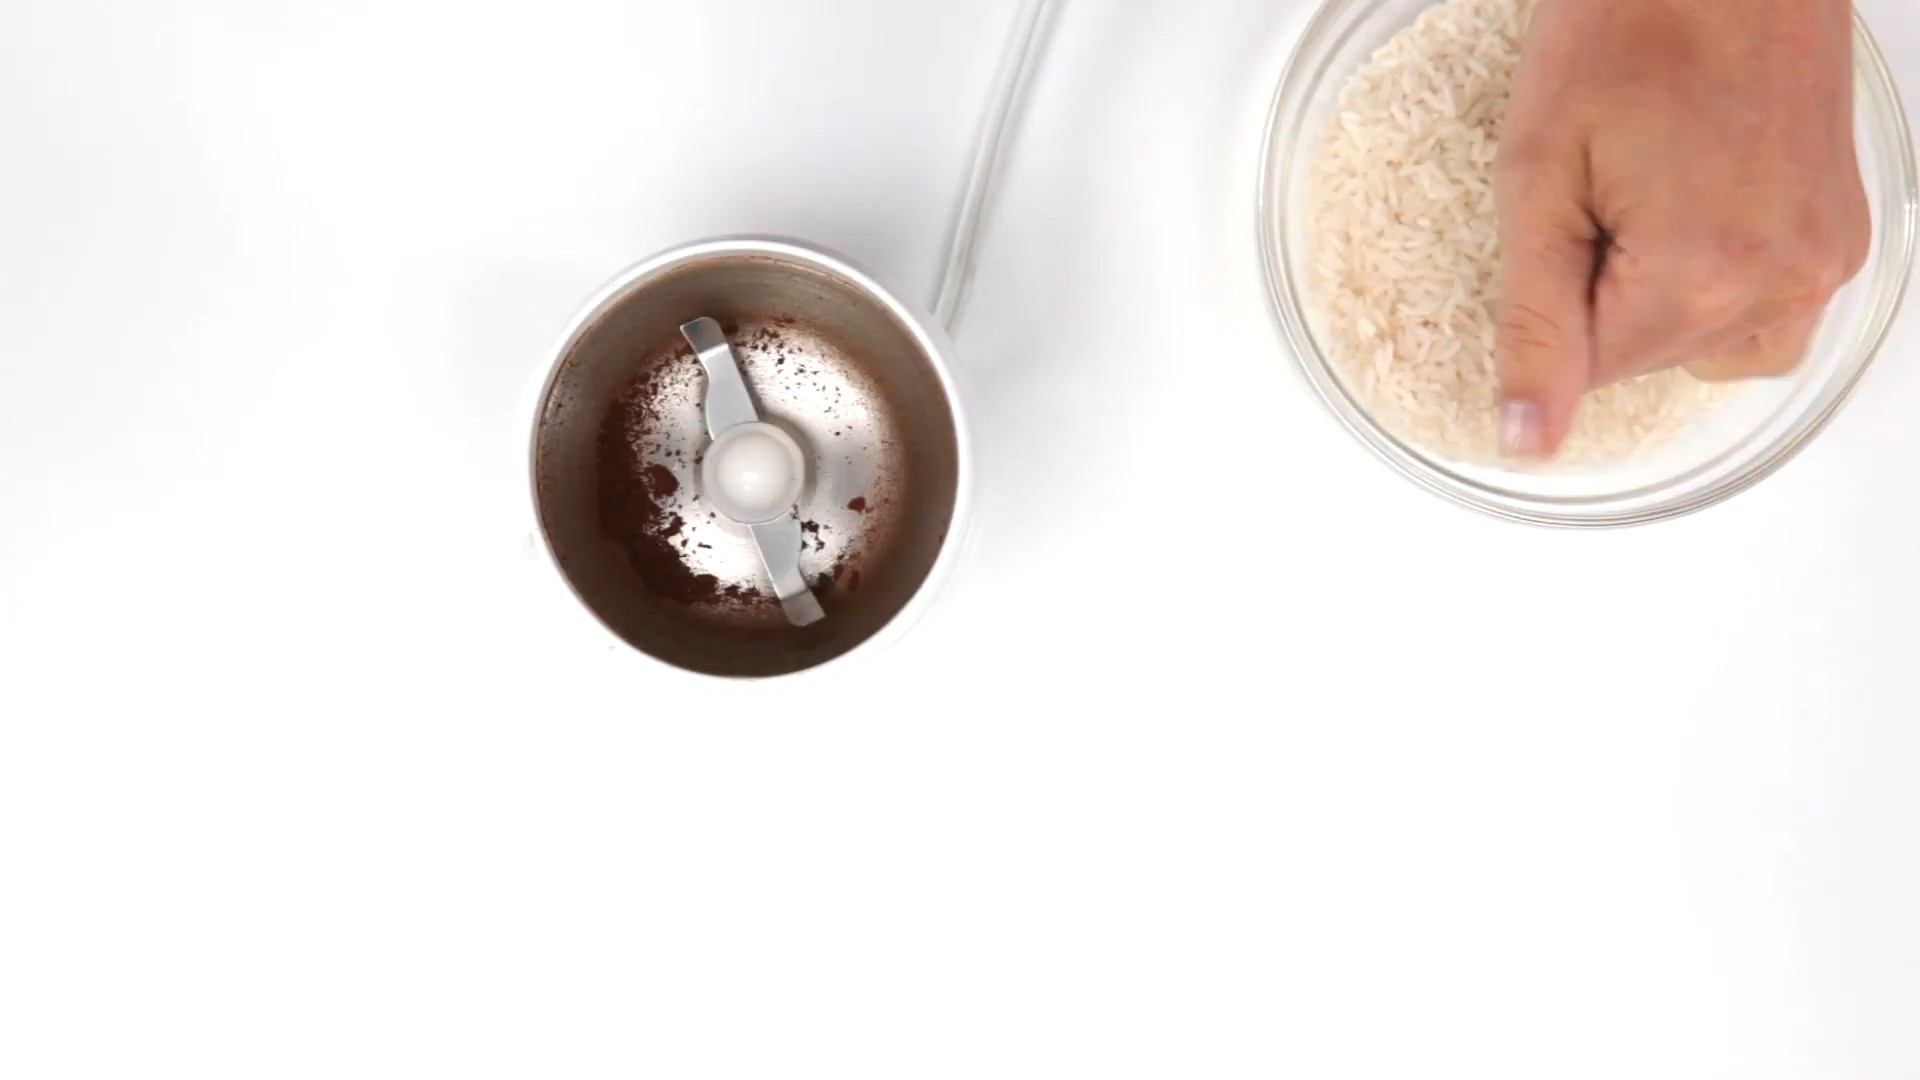
1. Measure the Rice: Pour about 1/4 cup to 1/2 cup of uncooked white rice into the grinder. The amount will depend on the size of your grinder. You want enough rice to fill the grinding chamber partially.
2. Grind the Rice: Turn on your grinder and let it run until the rice is ground into a fine powder. This usually takes about 30-60 seconds. The rice will absorb the oils and dislodge the coffee residue.
3. Inspect the Rice Powder: Take a look at the ground rice. You’ll likely see that it’s discolored and coated with coffee residue. That’s a good sign! It means the rice is doing its job.
4. Discard the Rice Powder: Don’t use this rice powder for anything! Throw it away.
5. Repeat (If Necessary): If your grinder was particularly dirty, you might want to repeat the rice grinding process with a fresh batch of rice.
Section 3: Cleaning the Individual Parts
1. Clean the Hopper: Wash the hopper with warm, soapy water. Rinse thoroughly and dry completely with a microfiber cloth. Make sure it’s completely dry before reassembling.
2. Brush the Burrs/Blades: Use your small brush to gently scrub the burrs or blades. Pay close attention to the crevices where coffee grounds tend to accumulate. If you can’t remove the burrs/blades, carefully brush around them.
3. Vacuum (Optional): Use the hose attachment of your vacuum cleaner to suck up any loose coffee grounds or rice powder from the grinding chamber and around the burrs/blades. This is a super effective way to remove stubborn residue.
4. Wipe Down Interior: Use a damp microfiber cloth to wipe down the interior of the grinder. This will remove any remaining dust or residue. Make sure the interior is completely dry before reassembling.
5. Clean the Exterior: Wipe down the exterior of the grinder with a damp microfiber cloth. You can use a mild dish soap if needed, but be sure to rinse thoroughly and dry completely.
Section 4: Reassembly
1. Reassemble the Grinder: Carefully reassemble the grinder, referring to the pictures you took earlier (if applicable). Make sure all parts are securely in place.
2. Test the Grinder: Plug in the grinder and run it briefly to make sure everything is working properly.
3. Grind a Small Amount of Coffee: Grind a small amount of inexpensive coffee beans and discard them. This will help remove any remaining rice dust or residue.
Tips and Tricks for a Sparkling Clean Grinder
* Frequency: How often should you clean your grinder? I recommend cleaning it every 1-2 weeks if you use it daily. If you only use it occasionally, you can clean it less frequently.
* Rice Alternatives: While rice is the most common and effective method, some people use grinder cleaning tablets specifically designed for this purpose. These tablets are made from food-safe ingredients and can be a good option if you prefer not to use rice.
* Don’t Use Water on Electrical Parts: Never submerge the grinder’s base or any electrical components in water. This can damage the grinder and create a safety hazard.
* Stubborn Residue: If you have stubborn residue that won’t come off with brushing, you can try using a cotton swab dipped in isopropyl alcohol. Be sure to use it sparingly and allow the alcohol to evaporate completely before reassembling the grinder.
* Oily Beans: If you use oily coffee beans, you may need to clean your grinder more frequently. Oily beans tend to leave behind more residue.
* Manual Grinders: The same principles apply to manual grinders! Disassemble the grinder, clean the parts with a brush and warm, soapy water, and dry thoroughly before reassembling.
* Read the Manual: Always consult your grinder’s manual for specific cleaning instructions and recommendations.
Troubleshooting
* Grinder Not Working After Cleaning: Double-check that all parts are properly assembled and securely in place. Make sure the hopper is correctly attached. If the grinder still doesn’t work, consult the manufacturer’s website or contact customer support.
* Strange Smell After Cleaning: This could be due to residual rice dust or soap. Run the grinder with a small amount of inexpensive coffee beans and discard them. This should eliminate the smell.
* Grinder Still Grinding Unevenly: This could be due to worn burrs or blades. If your grinder is old, it might be time to replace the burrs or blades, or even the entire grinder.
Enjoy Your Freshly Ground Coffee!
There you have it! A simple and effective way to deep clean your coffee grinder and enjoy fresher, better-tasting coffee. By following these steps regularly, you’ll keep your grinder in top condition and ensure that your coffee always tastes its best. Happy brewing!
Conclusion
So, there you have it! Mastering the art of cleaning your coffee grinder doesn’t require expensive products or complicated procedures. This simple, yet effective DIY trick using rice is a game-changer for any coffee enthusiast. We’ve shown you how to banish those lingering coffee oils and grounds that can compromise the flavor of your freshly brewed cup. Think of it: no more stale, bitter notes tainting your meticulously sourced beans. Just pure, unadulterated coffee bliss, every single time.
Why is this DIY trick a must-try? Because it’s cost-effective, readily accessible, and incredibly efficient. You likely already have rice in your pantry, making this a zero-dollar solution to a common problem. Beyond the financial benefits, it’s also a time-saver. The entire process takes just a few minutes, fitting seamlessly into even the busiest schedules. And most importantly, it works! Rice effectively absorbs those stubborn oils and grounds, leaving your grinder clean and ready to deliver optimal performance.
But don’t just take our word for it. We encourage you to try this DIY coffee grinder cleaning method and experience the difference for yourself. You’ll be amazed at how much cleaner your grinder is and how much better your coffee tastes.
Looking for variations? Consider using different types of rice. While white rice is the most common and readily available, brown rice can also be used. Some people even suggest using instant rice for its finer texture, which may help reach those hard-to-get areas. Experiment and see what works best for your specific grinder model. Another variation involves adding a small amount of baking soda to the rice for extra cleaning power. The baking soda acts as a mild abrasive and can help neutralize any lingering odors. Just be sure to thoroughly clean the grinder afterward to remove any traces of baking soda.
This DIY coffee grinder cleaning trick is a simple, effective, and affordable way to maintain your grinder and ensure the best possible coffee flavor. It’s a small investment of time that yields significant returns in terms of coffee quality and grinder longevity.
We’re confident that once you try this method, you’ll never go back to using harsh chemicals or complicated cleaning procedures. It’s a sustainable, eco-friendly, and ultimately more enjoyable way to care for your coffee equipment.
Now, it’s your turn! Give this DIY trick a try and share your experience with us. Did you notice a difference in the taste of your coffee? Did you find any particular type of rice to be more effective? We’d love to hear your feedback and learn from your experiences. Share your tips, tricks, and photos in the comments below. Let’s build a community of coffee lovers who are passionate about maintaining their equipment and enjoying the perfect cup of coffee, every single time.
Frequently Asked Questions (FAQ)
Q: How often should I clean my coffee grinder using this rice method?
A: The frequency of cleaning depends on how often you use your coffee grinder. For daily users, we recommend cleaning it at least once a month. If you only use your grinder a few times a week, cleaning it every two to three months should suffice. However, if you notice a change in the taste of your coffee or if your grinder seems to be struggling, it’s a good idea to clean it more frequently. Regular cleaning prevents the buildup of coffee oils and grounds, which can affect the flavor and performance of your grinder.
Q: Can I use this method on all types of coffee grinders?
A: This DIY rice cleaning method is generally safe for most blade grinders and burr grinders. However, it’s always a good idea to consult your grinder’s manual for specific cleaning instructions. If you have a particularly delicate or expensive grinder, you may want to test the method on a small area first to ensure it doesn’t cause any damage. For example, some high-end burr grinders have very precise tolerances, and using rice that is too hard could potentially damage the burrs.
Q: What kind of rice is best for cleaning a coffee grinder?
A: White rice is the most commonly used and readily available option. It’s effective at absorbing coffee oils and grounds without being too abrasive. Brown rice can also be used, but it may be slightly more abrasive. Some people suggest using instant rice because its finer texture may help reach those hard-to-get areas. Ultimately, the best type of rice is the one that works best for your specific grinder and your personal preference. Experiment and see what you find most effective.
Q: Is it safe to grind rice in my coffee grinder? Won’t it damage the blades or burrs?
A: While grinding rice may seem counterintuitive, it’s generally safe for most coffee grinders when done in moderation. The rice acts as a mild abrasive, helping to dislodge coffee oils and grounds. However, it’s important not to overdo it. Grinding too much rice or grinding it for too long could potentially damage the blades or burrs. Follow the instructions carefully and only grind the rice for a short period of time. Also, ensure that all rice particles are removed after cleaning.
Q: My coffee grinder still smells like coffee after cleaning it with rice. What can I do?
A: If your coffee grinder still smells like coffee after cleaning it with rice, you can try a few things. First, make sure you’ve thoroughly removed all the rice particles. Second, you can try adding a small amount of baking soda to the rice for extra cleaning power. The baking soda will help neutralize any lingering odors. Just be sure to thoroughly clean the grinder afterward to remove any traces of baking soda. Another option is to wipe down the inside of the grinder with a damp cloth and a mild detergent. Be sure to dry it completely before using it again.
Q: Can I reuse the rice after cleaning my coffee grinder?
A: No, you should not reuse the rice after cleaning your coffee grinder. The rice will have absorbed coffee oils and grounds, making it unsuitable for consumption. Discard the rice after each cleaning session.
Q: What are the signs that my coffee grinder needs cleaning?
A: There are several signs that indicate your coffee grinder needs cleaning. These include a change in the taste of your coffee (often becoming more bitter or stale), a decrease in the grinder’s performance (such as taking longer to grind or producing uneven grounds), and a visible buildup of coffee oils and grounds inside the grinder. If you notice any of these signs, it’s time to clean your grinder.
Q: Are there any other DIY cleaning methods for coffee grinders?
A: Yes, there are several other DIY cleaning methods for coffee grinders. One popular method involves using denture cleaning tablets. Simply place a tablet in the grinder and run it for a few seconds. Then, rinse the grinder thoroughly with water and dry it completely. Another method involves using a vacuum cleaner to remove loose coffee grounds. You can also use a small brush to clean hard-to-reach areas. However, the rice method is generally considered to be the most effective and convenient DIY cleaning method.
Q: What if I don’t have rice? Are there any alternatives?
A: While rice is the most commonly recommended DIY cleaning agent, some people have reported success with other dry grains like quinoa or even dry bread. However, these alternatives may not be as effective at absorbing oils as rice. If you’re considering using an alternative, be sure to research its potential impact on your grinder and proceed with caution. Always prioritize the safety and longevity of your equipment.


Leave a Comment