

DIY Shower Cleaner: Tired of battling stubborn soap scum and mildew in your shower? I know I am! It feels like a never-ending chore, doesn’t it? But what if I told you there’s a simple, effective, and budget-friendly solution hiding in your pantry?
For generations, resourceful homemakers have relied on homemade cleaning remedies, often passed down through families. Before the age of commercial cleaners, ingredients like vinegar and baking soda were the go-to for tackling household grime. This tradition of resourcefulness is not only economical but also allows us to control the ingredients we bring into our homes, minimizing exposure to harsh chemicals.
Let’s face it, commercial shower cleaners can be expensive and often contain harsh chemicals that can irritate your skin and lungs. Plus, who really wants to spend their precious weekend scrubbing away at stubborn stains? That’s where this DIY Shower Cleaner comes in! I’m going to share a super easy recipe that uses common household ingredients to create a powerful cleaner that will leave your shower sparkling clean without the harsh fumes or hefty price tag. Get ready to say goodbye to shower grime and hello to a fresh, clean bathroom with this simple DIY trick!
DIY Shower Cleaner: Sparkling Clean Without the Harsh Chemicals!
Okay, let’s face it, cleaning the shower is nobody’s favorite chore. But it’s a necessary evil, right? And those store-bought cleaners? Whew, the fumes! I always feel like I’m going to pass out from the chemicals. So, I decided to ditch the harsh stuff and create my own DIY shower cleaner. It’s super effective, smells amazing (you control the scent!), and is way easier on your lungs and the environment. Plus, it saves you money!
Here’s my go-to recipe and method for a sparkling clean shower, without all the nasty chemicals.
What You’ll Need
Before we dive in, let’s gather our supplies. This is a pretty simple recipe, so you probably already have most of these things on hand.
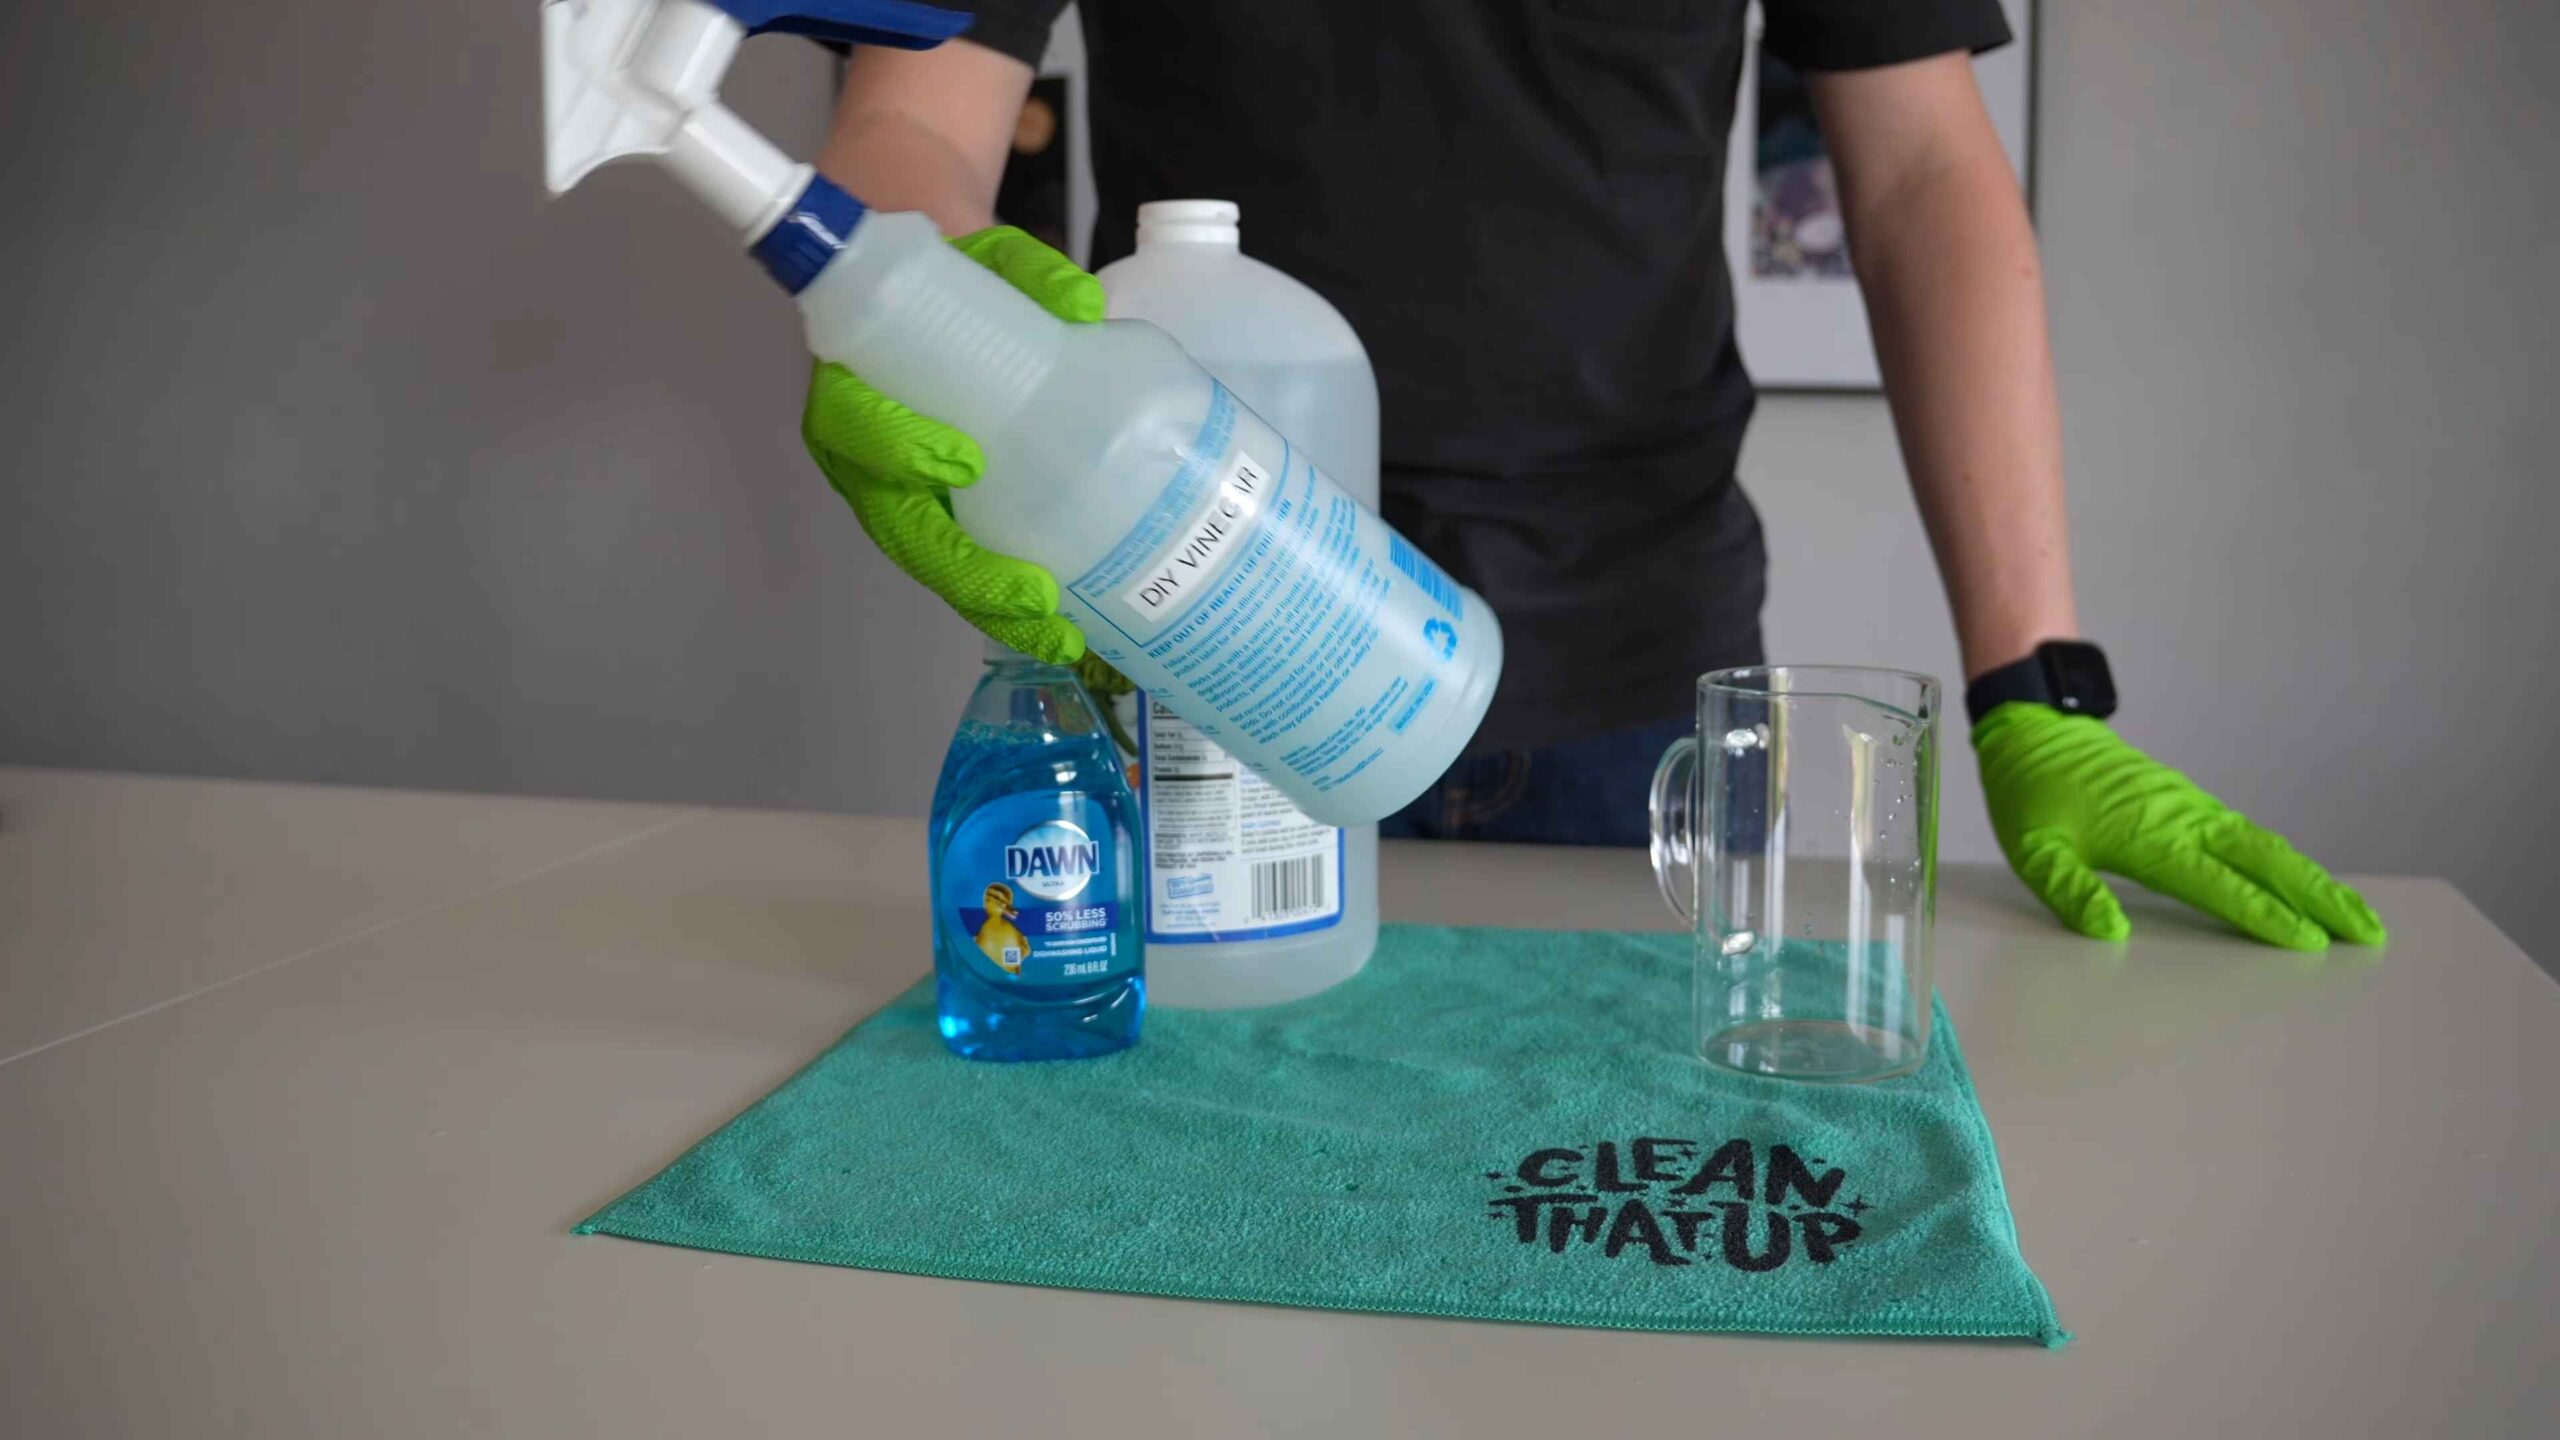
* White Vinegar: This is the star of the show! Vinegar’s acidity helps break down soap scum, hard water stains, and mildew.
* Dish Soap: I prefer using Dawn dish soap because it’s great at cutting through grease and grime. But any dish soap will work.
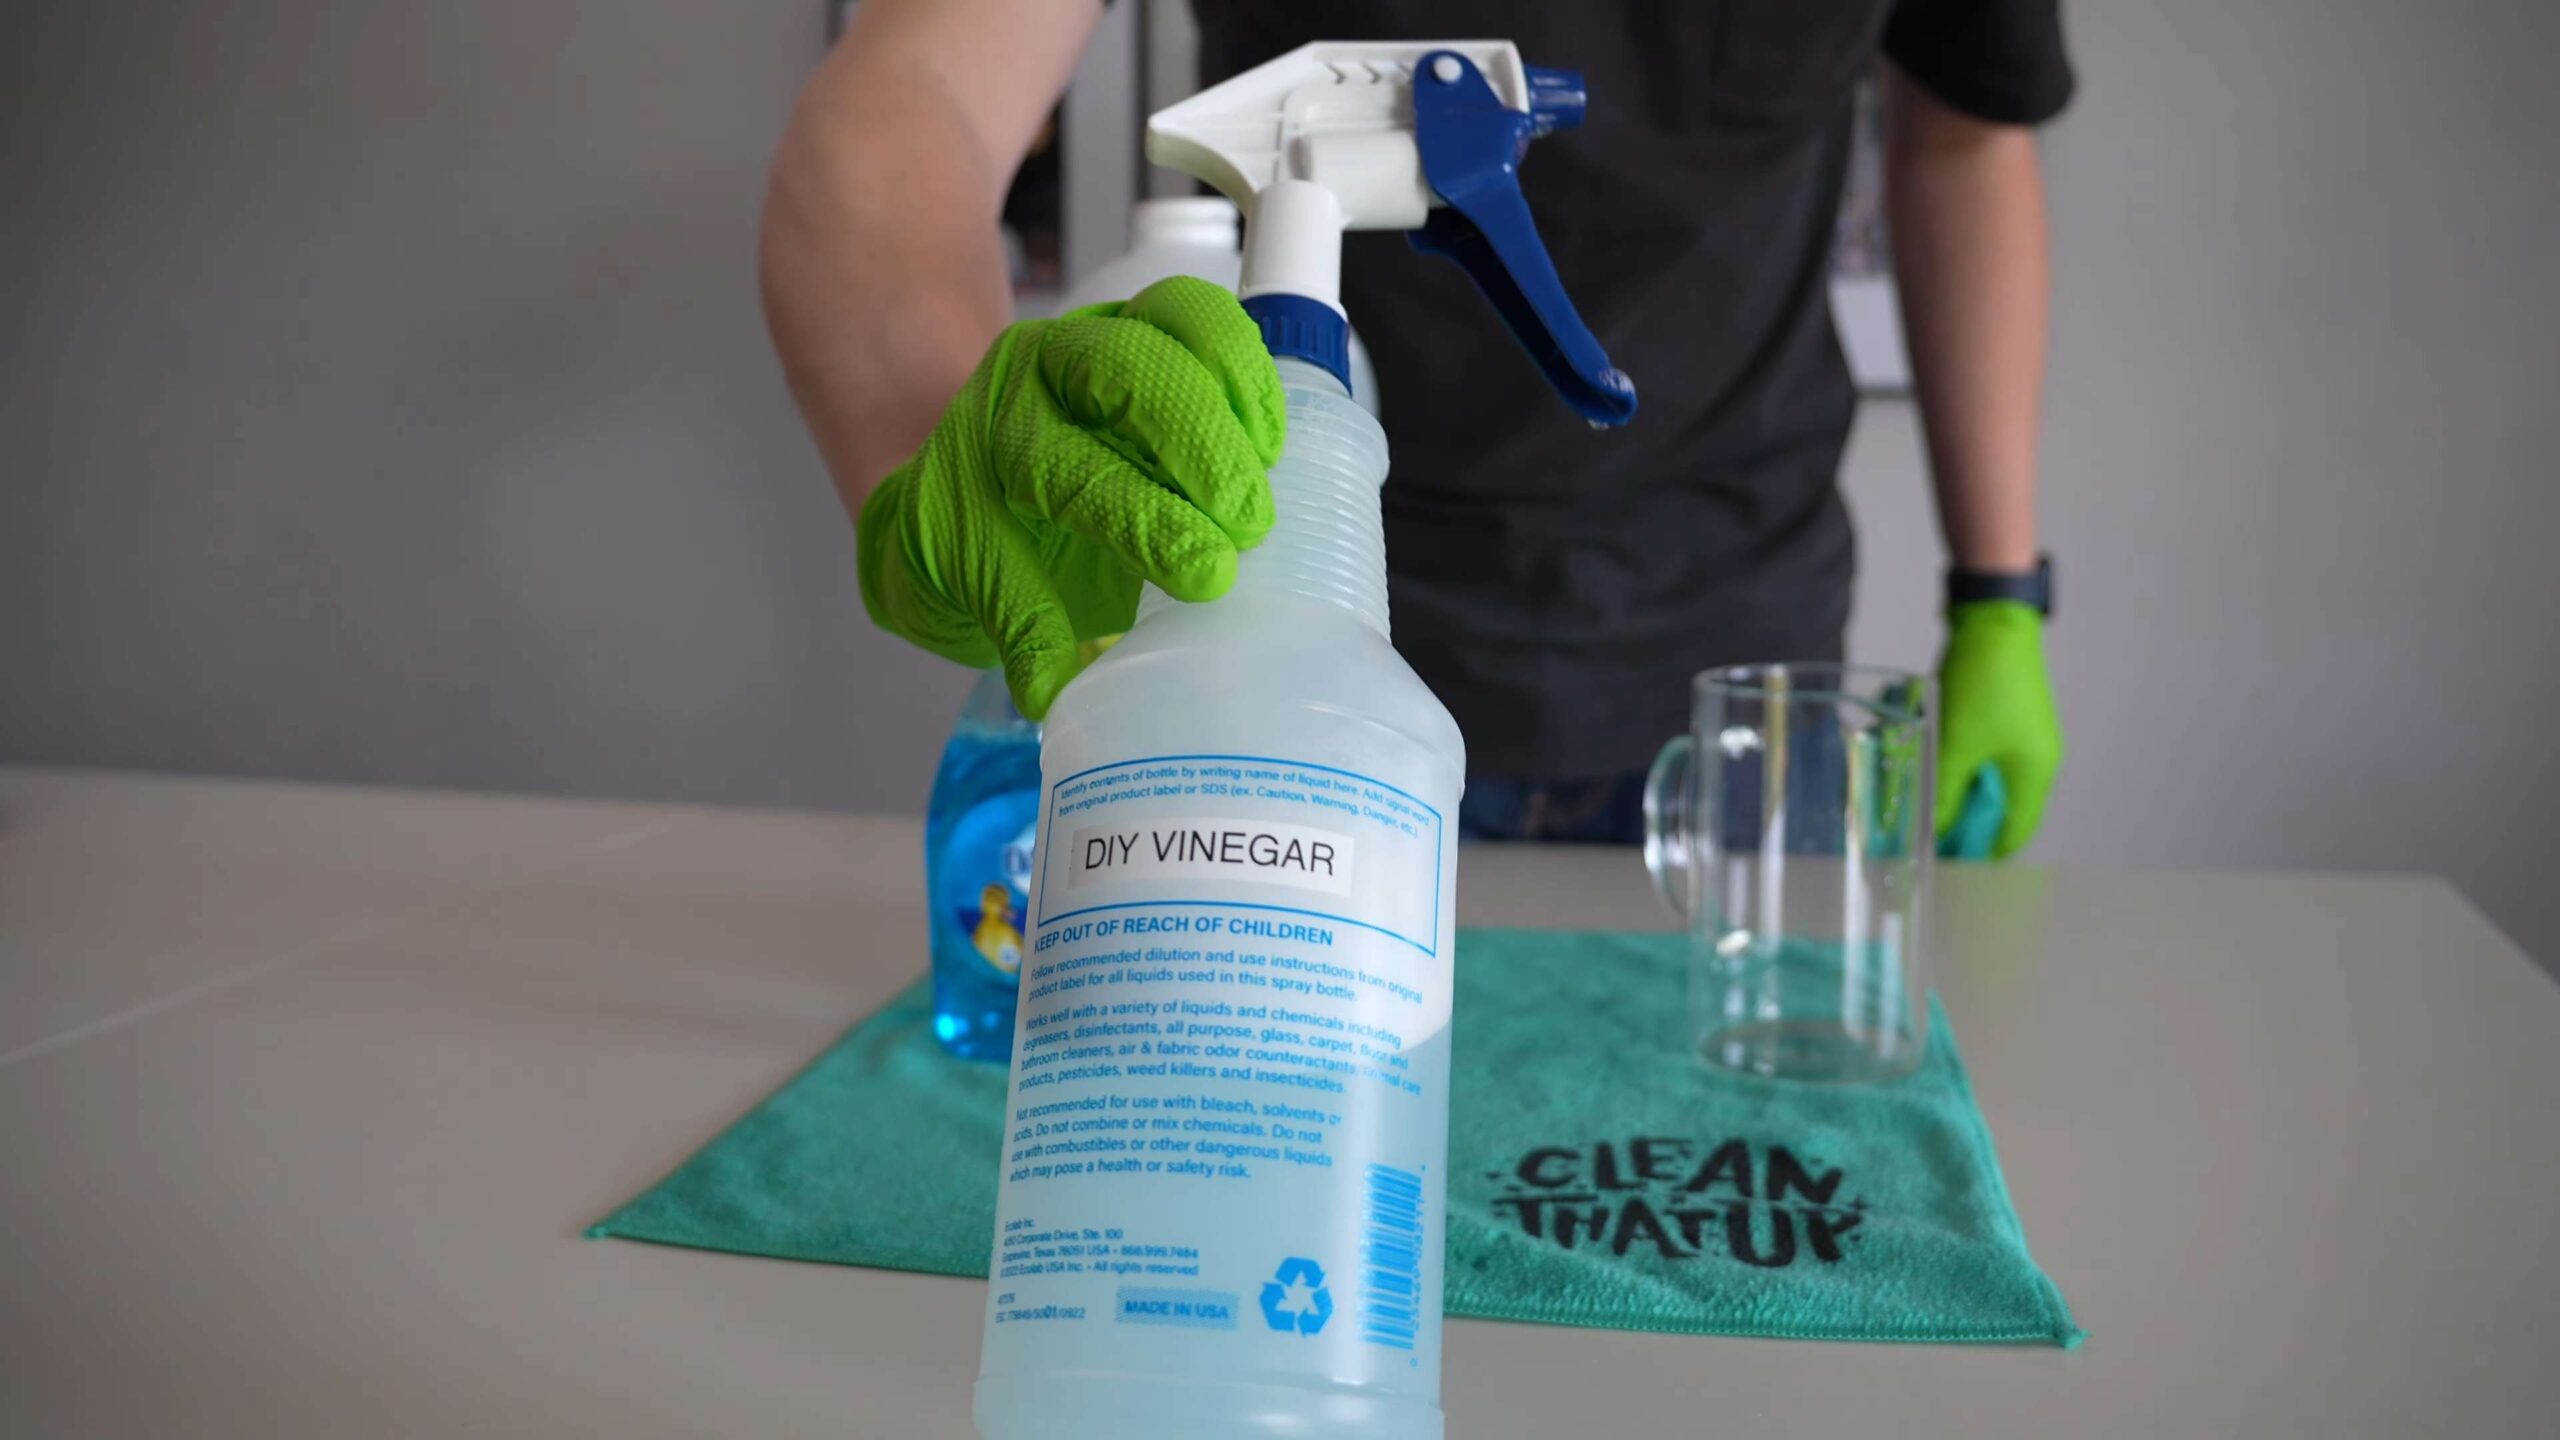
* Spray Bottle: You’ll need a clean spray bottle to mix and apply the cleaner.
* Essential Oils (Optional): These are totally optional, but they add a lovely scent and can even boost the cleaning power. I like using tea tree oil (antifungal), eucalyptus oil (antimicrobial and refreshing), or lavender oil (relaxing).
* Microfiber Cloths or Sponges: Microfiber cloths are great for scrubbing and wiping down surfaces without scratching. Sponges work too, but I find microfiber cloths are more effective.
* Scrub Brush (Optional): For stubborn stains or grout, a scrub brush can be a lifesaver. An old toothbrush works great for grout too!
* Squeegee (Optional): Using a squeegee after each shower can help prevent soap scum buildup, making future cleaning easier.
The Magic Formula: Mixing the Cleaner
This is the easiest part! Just follow these simple steps to create your DIY shower cleaner.
1. Heat the Vinegar: Pour 1 cup of white vinegar into a microwave-safe container. Heat it in the microwave for about 2 minutes, or until it’s hot but not boiling. Heating the vinegar helps it work even better at dissolving soap scum.
Important: Be careful when handling hot vinegar!
2. Combine Ingredients: In your spray bottle, add 1 cup of Dawn dish soap. Then, carefully pour in the hot vinegar.
Warning: The mixture will fizz up a bit when you combine the vinegar and dish soap. This is normal, so don’t worry! Just make sure you’re doing it in a well-ventilated area.
3. Add Essential Oils (Optional): If you’re using essential oils, add about 10-20 drops of your favorite scent to the spray bottle.
4. Shake Gently: Close the spray bottle tightly and gently shake it to combine all the ingredients. Avoid shaking it too vigorously, as this can create excessive suds.
Shower Cleaning Time: Step-by-Step Guide
Now that you have your amazing DIY shower cleaner, it’s time to get to work! Here’s how I use it to clean my shower:
1. Prepare the Shower: Before you start spraying, give your shower a quick rinse with warm water. This will help loosen any loose dirt or soap scum.
2. Spray the Cleaner: Generously spray the entire shower area with your DIY cleaner. Make sure to cover all surfaces, including the walls, floor, shower door or curtain, and fixtures.
3. Let it Sit: This is the key to success! Let the cleaner sit on the surfaces for at least 15-30 minutes. This gives the vinegar and dish soap time to break down the soap scum and grime. For really tough stains, you can let it sit for even longer, up to an hour.
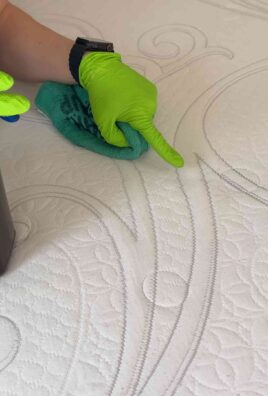
4. Scrub (If Necessary): After the cleaner has had time to work its magic, use a microfiber cloth, sponge, or scrub brush to scrub any remaining soap scum or stains. Pay special attention to areas that tend to accumulate more buildup, such as the corners, grout lines, and around the showerhead.
5. Rinse Thoroughly: Rinse the entire shower area thoroughly with warm water to remove all traces of the cleaner. Make sure to get into all the nooks and crannies.
6. Dry and Shine: Use a clean microfiber cloth to dry all the surfaces in the shower. This will help prevent water spots and leave your shower sparkling clean.
7. Squeegee (Optional): After each shower, use a squeegee to remove excess water from the walls and shower door. This will help prevent soap scum buildup and keep your shower cleaner for longer.
Tackling Tough Stains and Problem Areas
Sometimes, you’ll encounter stubborn stains or problem areas that require a little extra attention. Here are some tips for dealing with those challenges:
* Hard Water Stains: Hard water stains can be particularly difficult to remove. For these, I recommend making a paste of baking soda and water. Apply the paste to the stains, let it sit for a few minutes, and then scrub with a scrub brush or sponge. Rinse thoroughly. You can also try using a commercial hard water stain remover, but be sure to follow the instructions carefully.
* Grout Cleaning: Grout lines can be a breeding ground for mold and mildew. To clean grout, mix equal parts baking soda and hydrogen peroxide to form a paste. Apply the paste to the grout lines, let it sit for 5-10 minutes, and then scrub with an old toothbrush or grout brush. Rinse thoroughly.
* Mold and Mildew: For mold and mildew, you can use a solution of bleach and water. Mix 1 part bleach with 10 parts water. Spray the solution onto the affected areas, let it sit for a few minutes, and then scrub with a scrub brush or sponge. Rinse thoroughly.
Caution: Bleach can be harmful, so be sure to wear gloves and eye protection when using it. Also, make sure to ventilate the area well.
* Showerhead Cleaning: Mineral deposits can build up on your showerhead, reducing water pressure. To clean your showerhead, fill a plastic bag with white vinegar and secure it around the showerhead with a rubber band. Make sure the showerhead is completely submerged in the vinegar. Let it soak for several hours or overnight. Remove the bag and rinse the showerhead thoroughly with water.
Maintaining a Clean Shower: Prevention is Key!
The best way to keep your shower clean is to prevent soap scum and grime from building up in the first place. Here are some tips for maintaining a clean shower:
* Squeegee After Each Shower: As I mentioned earlier, using a squeegee after each shower is one of the most effective ways to prevent soap scum buildup.
* Ventilate the Shower: Make sure to ventilate your shower after each use by opening a window or turning on the exhaust fan. This will help prevent mold and mildew growth.
* Use Liquid Soap Instead of Bar Soap: Bar soap tends to leave more residue than liquid soap, which can contribute to soap scum buildup.
* Regular Cleaning: Clean your shower regularly, at least once a week, to prevent soap scum and grime from accumulating.
Why This DIY Cleaner Works
So, what makes this DIY shower cleaner so effective? It’s all about the ingredients and how they work together:
* Vinegar: The acetic acid in vinegar is a natural disinfectant and cleaner. It helps break down soap scum, hard water stains, and mildew.
* Dish Soap: Dish soap is a powerful degreaser that helps cut through grease and grime. It also helps the vinegar cling to surfaces, giving it more time to work.
* Essential Oils: Essential oils not only add a pleasant scent, but they can also boost the cleaning power of the cleaner. Tea tree oil, for example, has antifungal properties, while eucalyptus oil is antimicrobial and refreshing.
Customizing Your Cleaner: Scent and Strength
One of the best things about making your own shower cleaner is that you can customize it to your liking. Here are some ways to personalize your cleaner:
* Scent: Experiment with different essential oil combinations to find your favorite scent. Some other popular options include lemon, orange, peppermint, and rosemary.
* Strength: If you have particularly stubborn stains, you can increase the amount of vinegar in the cleaner. Just be careful not to use too much, as vinegar can be harsh on some surfaces. You can also try adding a tablespoon of baking soda to the cleaner for extra cleaning power.
Safety First!
While this DIY shower cleaner is much safer than commercial cleaners, it’s still important to take some precautions:
* Ventilation: Always use the cleaner in a well-ventilated area.
* Eye Protection: Wear eye protection to prevent
Conclusion
So, there you have it! Ditching those harsh chemicals and embracing this DIY shower cleaner is more than just a trend; it’s a game-changer for your bathroom, your health, and even your wallet. We’ve walked you through a simple, effective recipe that harnesses the power of natural ingredients to tackle soap scum, mildew, and grime, leaving your shower sparkling clean and smelling fresh.
But why is this DIY approach a must-try? Beyond the obvious cost savings, you’re gaining complete control over what you’re spraying into your shower and, ultimately, breathing in. Commercial cleaners are often packed with volatile organic compounds (VOCs) that can irritate your lungs, trigger allergies, and even contribute to long-term health problems. This homemade solution offers a safer, gentler alternative without sacrificing cleaning power.
Think of it this way: you’re not just cleaning your shower; you’re creating a healthier environment for yourself and your family. And let’s be honest, who doesn’t love the satisfaction of knowing exactly what’s in their cleaning products?
Now, let’s talk variations. Feel free to experiment with different essential oils to customize the scent. Lavender, tea tree, eucalyptus, and lemon are all excellent choices for their antibacterial and antifungal properties, as well as their invigorating aromas. For particularly stubborn stains, consider adding a tablespoon of washing soda to the mix. Washing soda is a powerful cleaning agent that can help break down tough grime.
Another variation involves the application method. While a spray bottle is convenient, you can also use a sponge or microfiber cloth to apply the cleaner directly to problem areas. This can be especially effective for tackling grout stains. Just be sure to rinse thoroughly after cleaning.
For those with hard water, adding a bit more vinegar to the solution can help combat mineral buildup. Remember to always test a small, inconspicuous area first to ensure the cleaner doesn’t damage the surface.
We understand that switching to a DIY cleaning routine can feel daunting at first, but trust us, the results are worth it. Not only will you have a cleaner, healthier shower, but you’ll also be contributing to a more sustainable lifestyle by reducing your reliance on plastic bottles and harsh chemicals.
Ready to take the plunge? We encourage you to give this DIY shower cleaner a try. We’re confident that you’ll be amazed by its effectiveness and simplicity. And most importantly, we want to hear about your experience! Share your tips, variations, and before-and-after photos in the comments below. Let’s build a community of DIY cleaning enthusiasts and help each other create healthier, happier homes. What essential oil blends did you find most effective? Did you discover any unique application techniques? We’re all ears! Your feedback will not only help other readers but also inspire us to continue developing and refining our DIY cleaning recipes.
So, grab your ingredients, mix up a batch of this amazing DIY shower cleaner, and get ready to transform your shower into a sparkling oasis. We can’t wait to hear about your success!
Frequently Asked Questions (FAQ)
1. Is this DIY shower cleaner safe for all shower surfaces?
While this DIY shower cleaner is generally safe for most shower surfaces, it’s always a good idea to test it on a small, inconspicuous area first. This is especially important for natural stone surfaces like marble or granite, as vinegar can etch these materials over time. If you’re unsure about the compatibility of the cleaner with your shower surface, consult with a professional cleaner or the manufacturer of your shower materials. For acrylic or fiberglass showers, this cleaner is generally safe, but always dilute the vinegar with water as directed in the recipe. Avoid using abrasive scrub brushes or pads, as these can scratch the surface.
2. How often should I use this DIY shower cleaner?
The frequency of cleaning depends on how often you use your shower and how quickly grime and mildew build up. For most households, cleaning the shower once a week is sufficient to maintain a clean and fresh environment. However, if you have hard water or notice soap scum accumulating quickly, you may need to clean it more frequently, perhaps every few days. Regular cleaning will prevent buildup and make the cleaning process easier in the long run. Consider using a squeegee after each shower to remove excess water and prevent water spots and mildew growth.
3. Can I use a different type of vinegar?
White vinegar is the most commonly recommended type of vinegar for cleaning due to its acidity and lack of color, which minimizes the risk of staining. However, you can use apple cider vinegar as a substitute, although it may have a slightly different scent. Avoid using balsamic vinegar or other colored vinegars, as they can stain your shower surfaces. The acidity of the vinegar is what makes it effective at breaking down soap scum and mildew, so ensure that the vinegar you choose has a sufficient acidity level (typically around 5%).
4. What essential oils are best to use in this DIY shower cleaner?
The best essential oils for this DIY shower cleaner are those with antibacterial, antifungal, and deodorizing properties. Some popular choices include:
* Tea Tree Oil: Known for its powerful antibacterial and antifungal properties, tea tree oil is excellent for fighting mildew and mold.
* Eucalyptus Oil: Eucalyptus oil has a refreshing scent and is also effective at killing bacteria and fungi.
* Lavender Oil: Lavender oil has a calming scent and possesses antibacterial and antiseptic properties.
* Lemon Oil: Lemon oil has a bright, citrusy scent and is a natural degreaser and disinfectant.
* Peppermint Oil: Peppermint oil has a refreshing scent and can help deter pests.
You can use a single essential oil or create a blend of several oils to customize the scent and enhance the cleaning power of the cleaner. Start with a few drops of each oil and adjust the amount to your preference.
5. How do I store this DIY shower cleaner?
Store the DIY shower cleaner in a clean, labeled spray bottle. It’s best to use a dark-colored bottle to protect the essential oils from light, which can degrade their quality over time. Keep the bottle in a cool, dry place away from direct sunlight. The cleaner should last for several months if stored properly. Before each use, give the bottle a gentle shake to ensure the ingredients are well mixed. Always label the bottle clearly to avoid confusion with other cleaning products.
6. Can I use this DIY shower cleaner on glass shower doors?
Yes, this DIY shower cleaner is safe and effective for cleaning glass shower doors. The vinegar helps to remove water spots and soap scum, leaving the glass sparkling clean. After spraying the cleaner on the glass, allow it to sit for a few minutes before wiping it off with a clean microfiber cloth or squeegee. For stubborn water spots, you may need to repeat the process or use a slightly more concentrated solution of vinegar and water. Regular use of this cleaner can help prevent buildup and keep your glass shower doors looking their best.
7. What if I don’t have essential oils? Can I still make this cleaner?
Yes, you can still make this cleaner without essential oils. The vinegar and water mixture is effective on its own for cleaning and disinfecting. The essential oils primarily add fragrance and enhance the antibacterial and antifungal properties of the cleaner. If you don’t have essential oils, you can simply omit them from the recipe. You can also add a few drops of lemon juice for a fresh scent and extra cleaning power. The effectiveness of the cleaner will still be significant without the essential oils.
8. How can I make this DIY shower cleaner even more powerful?
To make this DIY shower cleaner even more powerful, consider adding a tablespoon of baking soda or washing soda to the mixture. Baking soda is a mild abrasive that can help scrub away stubborn grime, while washing soda is a stronger cleaning agent that can break down tough stains. Be careful when using washing soda, as it can be irritating to the skin. Always wear gloves when handling washing soda. You can also pre-treat heavily soiled areas with a paste of baking soda and water before spraying with the DIY shower cleaner.
9. Is this DIY shower cleaner safe for septic systems?
Yes, this DIY shower cleaner is generally safe for septic systems. The ingredients used, such as vinegar, water, and essential oils, are biodegradable and do not contain harsh chemicals that can harm the bacteria in your septic tank. However, it’s always a good idea to use cleaning products sparingly, even those that are considered septic-safe. Avoid pouring large amounts of any cleaning product down the drain, as this can disrupt the balance of your septic system.
10. What should I do if the vinegar smell is too strong?
If the vinegar smell is too strong, you can try a few things to mitigate it. First, ensure that you are diluting the vinegar with water as directed in the recipe. You can also add more essential oils to help mask the vinegar scent. Another option is to open a window or turn on the bathroom fan to improve ventilation while cleaning. The vinegar smell will typically dissipate quickly after the shower is dry. You can also try using a different type of vinegar, such as apple cider vinegar, which has a milder scent than white vinegar.

Leave a Comment