

DIY Sink Cleaner Recipe: Are you tired of stubborn clogs and unpleasant odors emanating from your kitchen or bathroom sink? I know I am! Forget those expensive, chemical-laden drain cleaners that promise the world but often deliver disappointment (and a hefty bill!). This article unveils a simple, effective, and eco-friendly DIY sink cleaner recipe that will have your drains flowing freely and smelling fresh in no time.
For generations, resourceful homeowners have relied on homemade remedies to tackle household chores. Before the advent of commercially produced cleaners, natural ingredients like baking soda and vinegar were the go-to solutions for unclogging drains and sanitizing surfaces. This tradition of resourcefulness not only saved money but also minimized exposure to harsh chemicals, a practice that’s becoming increasingly relevant today.
Let’s face it, a clogged sink is more than just an inconvenience; it can be a breeding ground for bacteria and a source of unpleasant smells that permeate your entire home. Nobody wants that! This DIY sink cleaner recipe is a game-changer because it’s incredibly easy to make with ingredients you likely already have in your pantry. Plus, it’s a safer and more sustainable alternative to harsh chemical cleaners, protecting your pipes, your family, and the environment. So, ditch the store-bought stuff and let’s get started on creating a sparkling clean and fresh-smelling sink!

DIY Sink Cleaner: Banish Clogs and Odors Naturally!
Hey there, fellow DIY enthusiasts! Are you tired of battling stubborn sink clogs and lingering odors with harsh chemicals? I know I was! That’s why I’m so excited to share my go-to, all-natural DIY sink cleaner recipe that’s not only effective but also gentle on your pipes and the environment. This method uses ingredients you probably already have in your pantry, making it super convenient and budget-friendly. Let’s get started!
What You’ll Need: The Essential Ingredients
Before we dive into the cleaning process, let’s gather our supplies. Here’s what you’ll need to create this powerful sink cleaner:
* 1 cup Baking Soda: This is our workhorse! Baking soda is a mild alkali that helps to dissolve grease and grime. It’s also a fantastic deodorizer.
* 2 cups White Vinegar: The acidic power of vinegar reacts with the baking soda to create a fizzing action that helps to loosen clogs and break down buildup.
* Boiling Water: Hot water helps to flush away loosened debris and further dissolve grease. Make sure it’s *boiling* for optimal results!
* Optional: 5-10 drops of Essential Oil (Lemon, Tea Tree, or Lavender): These add a pleasant scent and can provide additional antibacterial properties. I personally love lemon for its fresh, clean smell!
* A Kettle or Pot for Boiling Water
* A Measuring Cup
* A Teaspoon (for essential oils, if using)
* A Rubber Spatula or Spoon (to help push baking soda down the drain)
* A Sink Stopper or Plug (optional, for soaking)
Step-by-Step Instructions: Unclogging and Freshening Your Sink
Okay, now that we have everything ready, let’s get down to the nitty-gritty of cleaning your sink! I’ve broken it down into easy-to-follow steps:
1. Clear the Area: Remove any dishes, sponges, or other items from your sink. You want a clear workspace to avoid any accidental spills or messes.
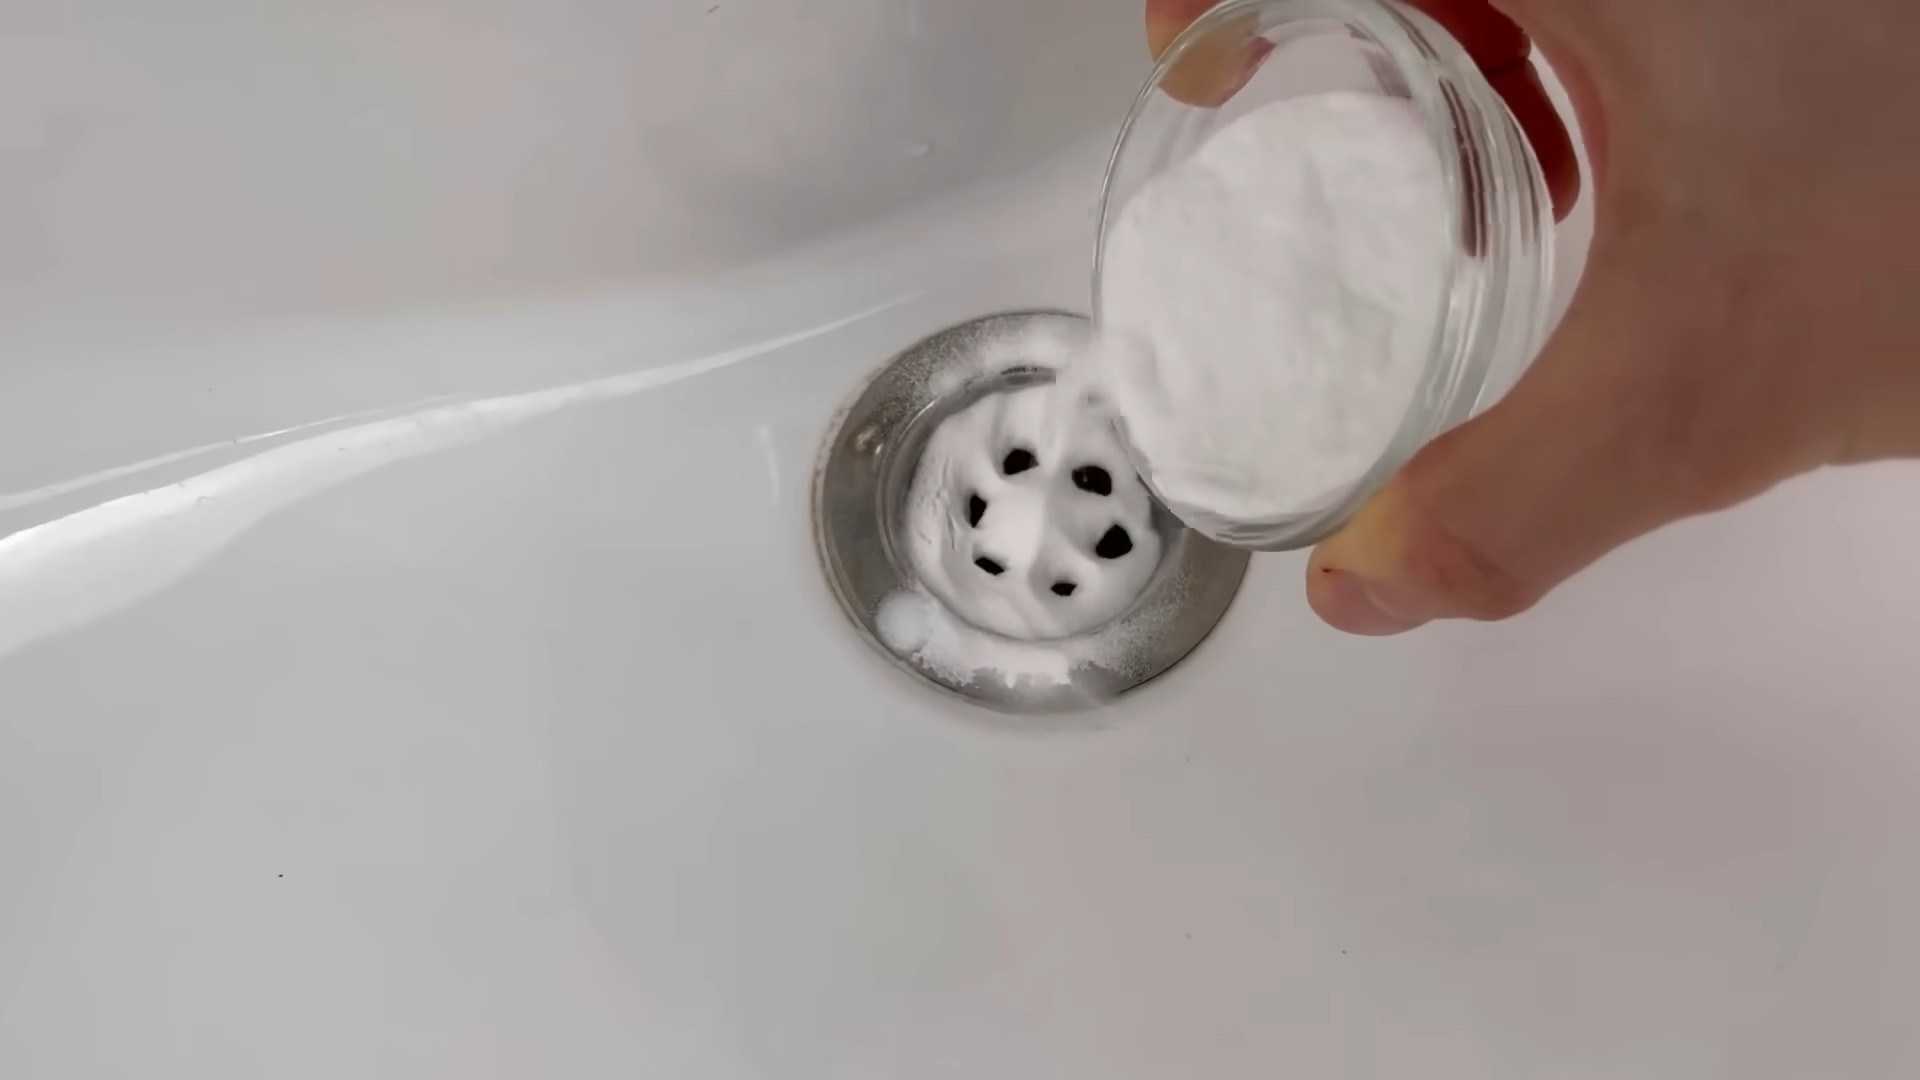
2. Pour in the Baking Soda: Carefully pour one cup of baking soda down the drain. Try to get as much of it directly into the drain opening as possible. If some spills around the edges, don’t worry, just use your rubber spatula or spoon to gently push it down.
3. Add the Vinegar: Now for the fun part! Slowly pour two cups of white vinegar down the drain on top of the baking soda. You’ll immediately notice a fizzing and bubbling reaction. This is exactly what we want! The combination of baking soda and vinegar creates carbon dioxide gas, which helps to dislodge debris and break down grease.
4. Let it Fizz and Bubble: Allow the baking soda and vinegar mixture to fizz and bubble for at least 30 minutes. For really stubborn clogs, I recommend letting it sit for an hour or even overnight. The longer it sits, the more time it has to work its magic. During this time, avoid running any water down the drain.
5. Flush with Boiling Water: After the fizzing has subsided, carefully pour a kettle or pot of boiling water down the drain. The hot water will help to flush away any loosened debris and further dissolve grease. Be careful when handling boiling water to avoid burns!
6. Repeat if Necessary: If your sink is still draining slowly or has a lingering odor, repeat steps 2-5. Sometimes, a second treatment is needed to completely clear the clog.
7. Add Essential Oils (Optional): If you’re using essential oils, now’s the time to add them! After flushing with boiling water, pour a small amount of warm (not boiling) water down the drain, followed by 5-10 drops of your favorite essential oil. This will leave your sink smelling fresh and clean.
Dealing with Stubborn Clogs: When the Fizz Isn’t Enough
Sometimes, despite our best efforts, a clog just won’t budge. If you’ve tried the baking soda and vinegar method a couple of times and your sink is still draining slowly, don’t despair! Here are a few additional tips and tricks to try:
* Plunger Power: A good old-fashioned plunger can often dislodge stubborn clogs. Make sure there’s enough water in the sink to cover the cup of the plunger, and then plunge vigorously for several minutes.
* The Bent Wire Hanger Trick: Straighten out a wire coat hanger and bend one end into a small hook. Carefully insert the hooked end into the drain and try to fish out any hair, food particles, or other debris that may be causing the clog. Be careful not to push the clog further down the drain!
* Check the P-Trap: The P-trap is the curved pipe located under your sink. It’s designed to trap debris and prevent sewer gases from entering your home. Sometimes, clogs can accumulate in the P-trap. To clean it, place a bucket under the P-trap to catch any water, and then carefully loosen the slip nuts that connect the P-trap to the drain pipes. Remove the P-trap and clean out any debris. Reassemble the P-trap, making sure the slip nuts are tightened securely.
* Enzyme Drain Cleaners: If all else fails, you can try using an enzyme drain cleaner. These cleaners contain enzymes that break down organic matter, such as hair and food particles. They’re generally safer for your pipes than chemical drain cleaners, but it’s still important to follow the instructions carefully.
Preventing Future Clogs: A Proactive Approach
Prevention is always better than cure! Here are a few tips to help prevent future sink clogs:
* Avoid Pouring Grease Down the Drain: Grease is a major culprit when it comes to sink clogs. Always dispose of grease in a separate container, such as an old jar or can.
* Use a Sink Strainer: A sink strainer will catch food particles and other debris before they can enter the drain.
* Flush with Hot Water Regularly: Run hot water down the drain for a few minutes after each use to help flush away any grease or debris that may be accumulating.
* Regular Baking Soda and Vinegar Treatments: Perform the baking soda and vinegar cleaning method once a month to help prevent clogs from forming in the first place.
Essential Oil Blends for a Fresh-Smelling Sink
As I mentioned earlier, adding essential oils to your sink cleaner can leave your sink smelling amazing! Here are a few of my favorite essential oil blends for a fresh and clean scent:
* Lemon and Tea Tree: This combination is both refreshing and antibacterial. Lemon provides a bright, citrusy scent, while tea tree oil has powerful antiseptic properties.
* Lavender and Eucalyptus: This blend is calming and invigorating. Lavender has a soothing scent, while eucalyptus helps to clear the sinuses and provides a refreshing aroma.
* Orange and Peppermint: This combination is uplifting and energizing. Orange provides a sweet, citrusy scent, while peppermint helps to freshen the air and provides a cooling sensation.
When using essential oils, be sure to use pure, therapeutic-grade oils for the best results. And remember, a little goes a long way! Start with just a few drops and add more if needed.
Safety First: Important Precautions
While this DIY sink cleaner is generally safe, it’s important to take a few precautions:
* Avoid Mixing with Other Cleaners: Never mix baking soda and vinegar with other cleaning products, especially bleach. This can create dangerous fumes.
* Wear Gloves: If you have sensitive skin, it’s a good idea to wear gloves when handling baking soda and vinegar.
* Be Careful with Boiling Water: Always use caution when handling boiling water to avoid burns.
* Keep Out of Reach of Children and Pets: Store baking soda, vinegar, and essential oils out of reach of children and pets.
Why This DIY Cleaner is Better Than Store-Bought
I truly believe this DIY sink cleaner is superior to many store-bought options for several reasons:
* It’s Natural and Non-Toxic: You know exactly what’s going into your drain, and you can avoid harsh chemicals that can be harmful to your health and the environment.
* It’s Budget-Friendly: Baking soda and vinegar are inexpensive and readily available, making this a very affordable cleaning solution.
* It’s Effective: This method is surprisingly effective at unclogging drains and eliminating odors.
* It’s Gentle on Your Pipes: Unlike some chemical drain cleaners, baking soda and vinegar are gentle on your pipes and won’t cause corrosion.
So there you have it! My go-to DIY sink cleaner recipe that’s sure to banish clogs and odors naturally. Give it a try, and let me know what you think! Happy cleaning!
Conclusion
So, there you have it! This simple, yet incredibly effective, DIY sink cleaner recipe is a game-changer for anyone tired of battling stubborn grime and unpleasant odors in their kitchen or bathroom. Forget those harsh, chemical-laden commercial cleaners that can irritate your skin and pollute your home. This homemade solution harnesses the power of readily available, eco-friendly ingredients to deliver sparkling clean results without the worry.
Why is this DIY trick a must-try? Because it’s not just about cleaning; it’s about creating a healthier, more sustainable home environment. You’re eliminating the need for plastic bottles that contribute to landfill waste, and you’re controlling exactly what goes down your drain, minimizing the impact on our waterways. Plus, let’s be honest, the satisfaction of creating something effective yourself is incredibly rewarding!
But the benefits don’t stop there. This recipe is incredibly versatile. Want to boost its cleaning power even further? Add a few drops of your favorite essential oil, like tea tree or eucalyptus, for their antibacterial and antifungal properties. For extra stubborn clogs, you can increase the amount of baking soda and vinegar used, or let the mixture sit overnight before flushing with hot water. Experiment with different ratios to find what works best for your specific sink and the types of messes it encounters.
Consider adding a squirt of dish soap to the baking soda paste for extra grease-cutting power. This is especially helpful in kitchen sinks that deal with oily residues from cooking. Another variation involves using washing soda (sodium carbonate) instead of baking soda for an even stronger cleaning action. However, be cautious when using washing soda, as it can be more abrasive and should be tested on a small, inconspicuous area first.
We’ve found that using a stiff-bristled brush, like an old toothbrush or a dedicated cleaning brush, is particularly effective for scrubbing around the drain and faucet. This helps to dislodge any stubborn buildup and ensures a thorough clean. Don’t forget to rinse the sink thoroughly with hot water after scrubbing to remove any remaining residue.
Ultimately, this DIY sink cleaner recipe is about empowering you to take control of your cleaning routine and create a healthier home. It’s cost-effective, environmentally friendly, and surprisingly simple to make.
We wholeheartedly encourage you to give this DIY sink cleaner a try. We’re confident that you’ll be amazed by the results. And once you’ve experienced the satisfaction of a sparkling clean sink, we’d love to hear about it! Share your experiences, variations, and any tips you discover in the comments below. Let’s build a community of DIY cleaning enthusiasts and help each other create healthier, happier homes! We are eager to see your before and after photos, and any modifications you made to the recipe to suit your needs. Your insights could be invaluable to other readers!
Frequently Asked Questions (FAQ)
What exactly are the ingredients in this DIY sink cleaner recipe?
The basic recipe typically includes baking soda, vinegar, and hot water. Some variations may include dish soap, essential oils (like tea tree or lemon), or washing soda. The exact proportions can vary depending on the specific recipe you’re following and the severity of the sink’s condition.
Why does the recipe use baking soda and vinegar? What do they do?
Baking soda is a mild abrasive and deodorizer. It helps to scrub away grime and absorb unpleasant odors. Vinegar is a mild acid that reacts with baking soda to create a fizzing action. This fizzing helps to loosen debris and break down grease and grime. The combination of these two ingredients provides a powerful, yet gentle, cleaning action.
Is this DIY sink cleaner safe for all types of sinks?
Generally, this DIY sink cleaner is safe for most types of sinks, including stainless steel, porcelain, and ceramic. However, it’s always a good idea to test it on a small, inconspicuous area first, especially if you have a more delicate or unusual sink material. Avoid using abrasive scrub brushes on easily scratched surfaces. For sensitive materials like natural stone, consider diluting the vinegar with more water or using a gentler alternative like castile soap.
How often should I use this DIY sink cleaner?
The frequency of use depends on how often you use your sink and how quickly it gets dirty. For general maintenance, cleaning your sink with this DIY solution once or twice a week is usually sufficient. If your sink is prone to clogs or odors, you may need to clean it more frequently.
Can this DIY sink cleaner unclog a completely blocked drain?
While this DIY sink cleaner can help to clear minor clogs, it may not be effective for completely blocked drains. For severe clogs, you may need to use a drain snake or call a professional plumber. However, using this DIY cleaner regularly can help to prevent clogs from forming in the first place.
What if I don’t have vinegar? Can I use something else?
Vinegar is a key ingredient in this recipe due to its acidic properties. While it’s difficult to find a direct substitute, you could try using lemon juice as a milder alternative. However, lemon juice may not be as effective as vinegar for breaking down grease and grime.
The baking soda and vinegar mixture fizzes a lot. Is that normal?
Yes, the fizzing is a normal and desirable reaction between baking soda and vinegar. It’s this fizzing action that helps to loosen debris and clean the sink. Be careful not to add too much vinegar at once, as it can cause the mixture to overflow.
Can I add bleach to this DIY sink cleaner for extra cleaning power?
No, you should never mix bleach with vinegar or baking soda. Mixing bleach with vinegar can create toxic chlorine gas, which is extremely dangerous. Mixing bleach with baking soda can also create harmful fumes. It’s important to use these ingredients separately and never combine them.
How do I store leftover DIY sink cleaner?
It’s best to make this DIY sink cleaner fresh each time you need it. The mixture loses its effectiveness over time as the baking soda and vinegar react. If you do have leftover mixture, store it in a sealed container and use it within a day or two.
What essential oils are best to add to this DIY sink cleaner?
Several essential oils can be added to this DIY sink cleaner for their antibacterial, antifungal, and deodorizing properties. Some popular choices include tea tree oil, lemon oil, eucalyptus oil, lavender oil, and peppermint oil. Choose an essential oil that you enjoy the scent of and that has the properties you’re looking for. Add just a few drops of essential oil to the mixture, as a little goes a long way.

Leave a Comment