

Grow Cauliflower at Home? Absolutely! Imagine harvesting your own creamy, delicious cauliflower, knowing exactly where it came from and how it was grown. Forget those bland, overpriced heads at the grocery store – with a few simple tricks, you can cultivate vibrant, flavorful cauliflower right in your backyard or even on your balcony!
For centuries, cauliflower has been a staple in gardens and kitchens worldwide. Originating in the Mediterranean, this versatile vegetable has been enjoyed for its nutritional benefits and unique taste. From Roman emperors to modern-day foodies, people have appreciated the satisfying crunch and subtle sweetness of homegrown cauliflower.
But let’s be honest, growing cauliflower can seem intimidating. It’s often perceived as a finicky plant, prone to pests and diseases. That’s where these DIY tricks and hacks come in! I’m here to share my tried-and-true methods for successfully grow cauliflower at home, even if you’re a beginner gardener. We’ll cover everything from seed starting to pest control, ensuring you have a bountiful harvest. So, ditch the grocery store cauliflower and get ready to enjoy the satisfaction of growing your own!
Growing Cauliflower at Home: A Beginner’s Guide
Hey there, fellow gardening enthusiasts! I’m so excited to share my experiences with growing cauliflower at home. It might seem intimidating at first, but trust me, with a little patience and the right guidance, you can harvest your own delicious, homegrown cauliflower. Let’s dive in!
Choosing the Right Cauliflower Variety
Before we even think about planting, we need to pick the right cauliflower variety. This is crucial because different varieties thrive in different climates and have varying maturity times.
* Consider your climate: Are you in a warm or cool climate? Some varieties are heat-tolerant, while others prefer cooler temperatures.
* Think about maturity time: How long are you willing to wait for your cauliflower to mature? Some varieties mature in as little as 50 days, while others can take up to 80 days or more.
* Popular varieties: Some popular and reliable varieties include ‘Snowball Y Improved’ (early maturing), ‘Cheddar’ (orange cauliflower), ‘Graffiti’ (purple cauliflower), and ‘Romanesco’ (unique spiral shape). I personally love ‘Snowball Y Improved’ for its reliability and classic white head.
Starting Cauliflower Seeds (or Buying Transplants)
You have two options here: start your own seeds indoors or buy transplants from a local nursery. Starting seeds gives you more control over the process, but buying transplants is a quicker and easier option.
Starting Seeds Indoors
I usually prefer starting my own seeds because it’s more economical and I get to choose the exact variety I want.
1. Timing is key: Start your seeds about 4-6 weeks before the last expected frost in your area. This will give them a head start before transplanting them outdoors.
2. Prepare your seed starting mix: Use a well-draining seed starting mix. I like to use a mix of peat moss, vermiculite, and perlite.
3. Sow the seeds: Sow the seeds about ¼ inch deep in small pots or seed trays.
4. Water gently: Water the seeds gently to avoid disturbing them.
5. Provide warmth and light: Keep the soil consistently moist and provide warmth (around 70-75°F). You can use a heat mat to help with germination. Place the seedlings under grow lights or in a sunny window.
6. Harden off the seedlings: About a week before transplanting, gradually expose the seedlings to outdoor conditions. This process, called “hardening off,” helps them adjust to the sun, wind, and temperature changes. Start by placing them outside for an hour or two each day, gradually increasing the time over the course of the week.
Buying Transplants
If you’re short on time or don’t want to deal with starting seeds, buying transplants is a great option.
1. Choose healthy transplants: Look for transplants that are healthy and vigorous, with green leaves and a strong stem. Avoid plants that are yellowed, wilted, or have signs of pests or diseases.
2. Check the roots: Gently remove a transplant from its container and check the roots. They should be white and healthy, not brown or root-bound.
Preparing the Planting Site
Cauliflower needs a sunny spot with well-drained soil. It also prefers slightly acidic soil with a pH of 6.0 to 7.0.
1. Choose a sunny location: Cauliflower needs at least 6 hours of sunlight per day.
2. Prepare the soil: Amend the soil with compost or other organic matter to improve drainage and fertility. I like to add a generous amount of compost to my planting beds.
3. Test the soil pH: Use a soil testing kit to check the pH. If the soil is too acidic, add lime to raise the pH. If it’s too alkaline, add sulfur to lower the pH.
4. Ensure good drainage: Cauliflower doesn’t like to sit in soggy soil, so make sure the planting site has good drainage. If your soil is heavy clay, consider planting in raised beds.
Transplanting Cauliflower Seedlings
Now comes the exciting part – getting those little plants into the ground!
1. Timing is important: Transplant your cauliflower seedlings outdoors after the last expected frost.
2. Space the plants properly: Space the plants about 18-24 inches apart in rows that are 24-36 inches apart. This will give them enough room to grow and mature.
3. Dig the holes: Dig holes that are slightly larger than the root ball of the transplants.
4. Gently remove the transplants: Gently remove the transplants from their containers, being careful not to damage the roots.
5. Place the transplants in the holes: Place the transplants in the holes and backfill with soil.
6. Water thoroughly: Water the transplants thoroughly after planting.
7. Mulch around the plants: Mulch around the plants with straw, wood chips, or other organic mulch to help retain moisture, suppress weeds, and regulate soil temperature.
Caring for Your Cauliflower Plants
Once your cauliflower plants are in the ground, it’s important to provide them with the care they need to thrive.
* Watering: Cauliflower needs consistent moisture, especially during head formation. Water deeply and regularly, especially during dry periods. Aim for about 1-1.5 inches of water per week.
* Fertilizing: Fertilize your cauliflower plants every 2-3 weeks with a balanced fertilizer. I like to use a fertilizer that is high in nitrogen, phosphorus, and potassium.
* Weeding: Keep the planting area free of weeds, which can compete with the cauliflower plants for nutrients and water.
* Pest and disease control: Keep an eye out for pests and diseases, such as cabbage worms, aphids, and clubroot. Take action promptly to prevent problems from spreading. I prefer using organic pest control methods whenever possible.
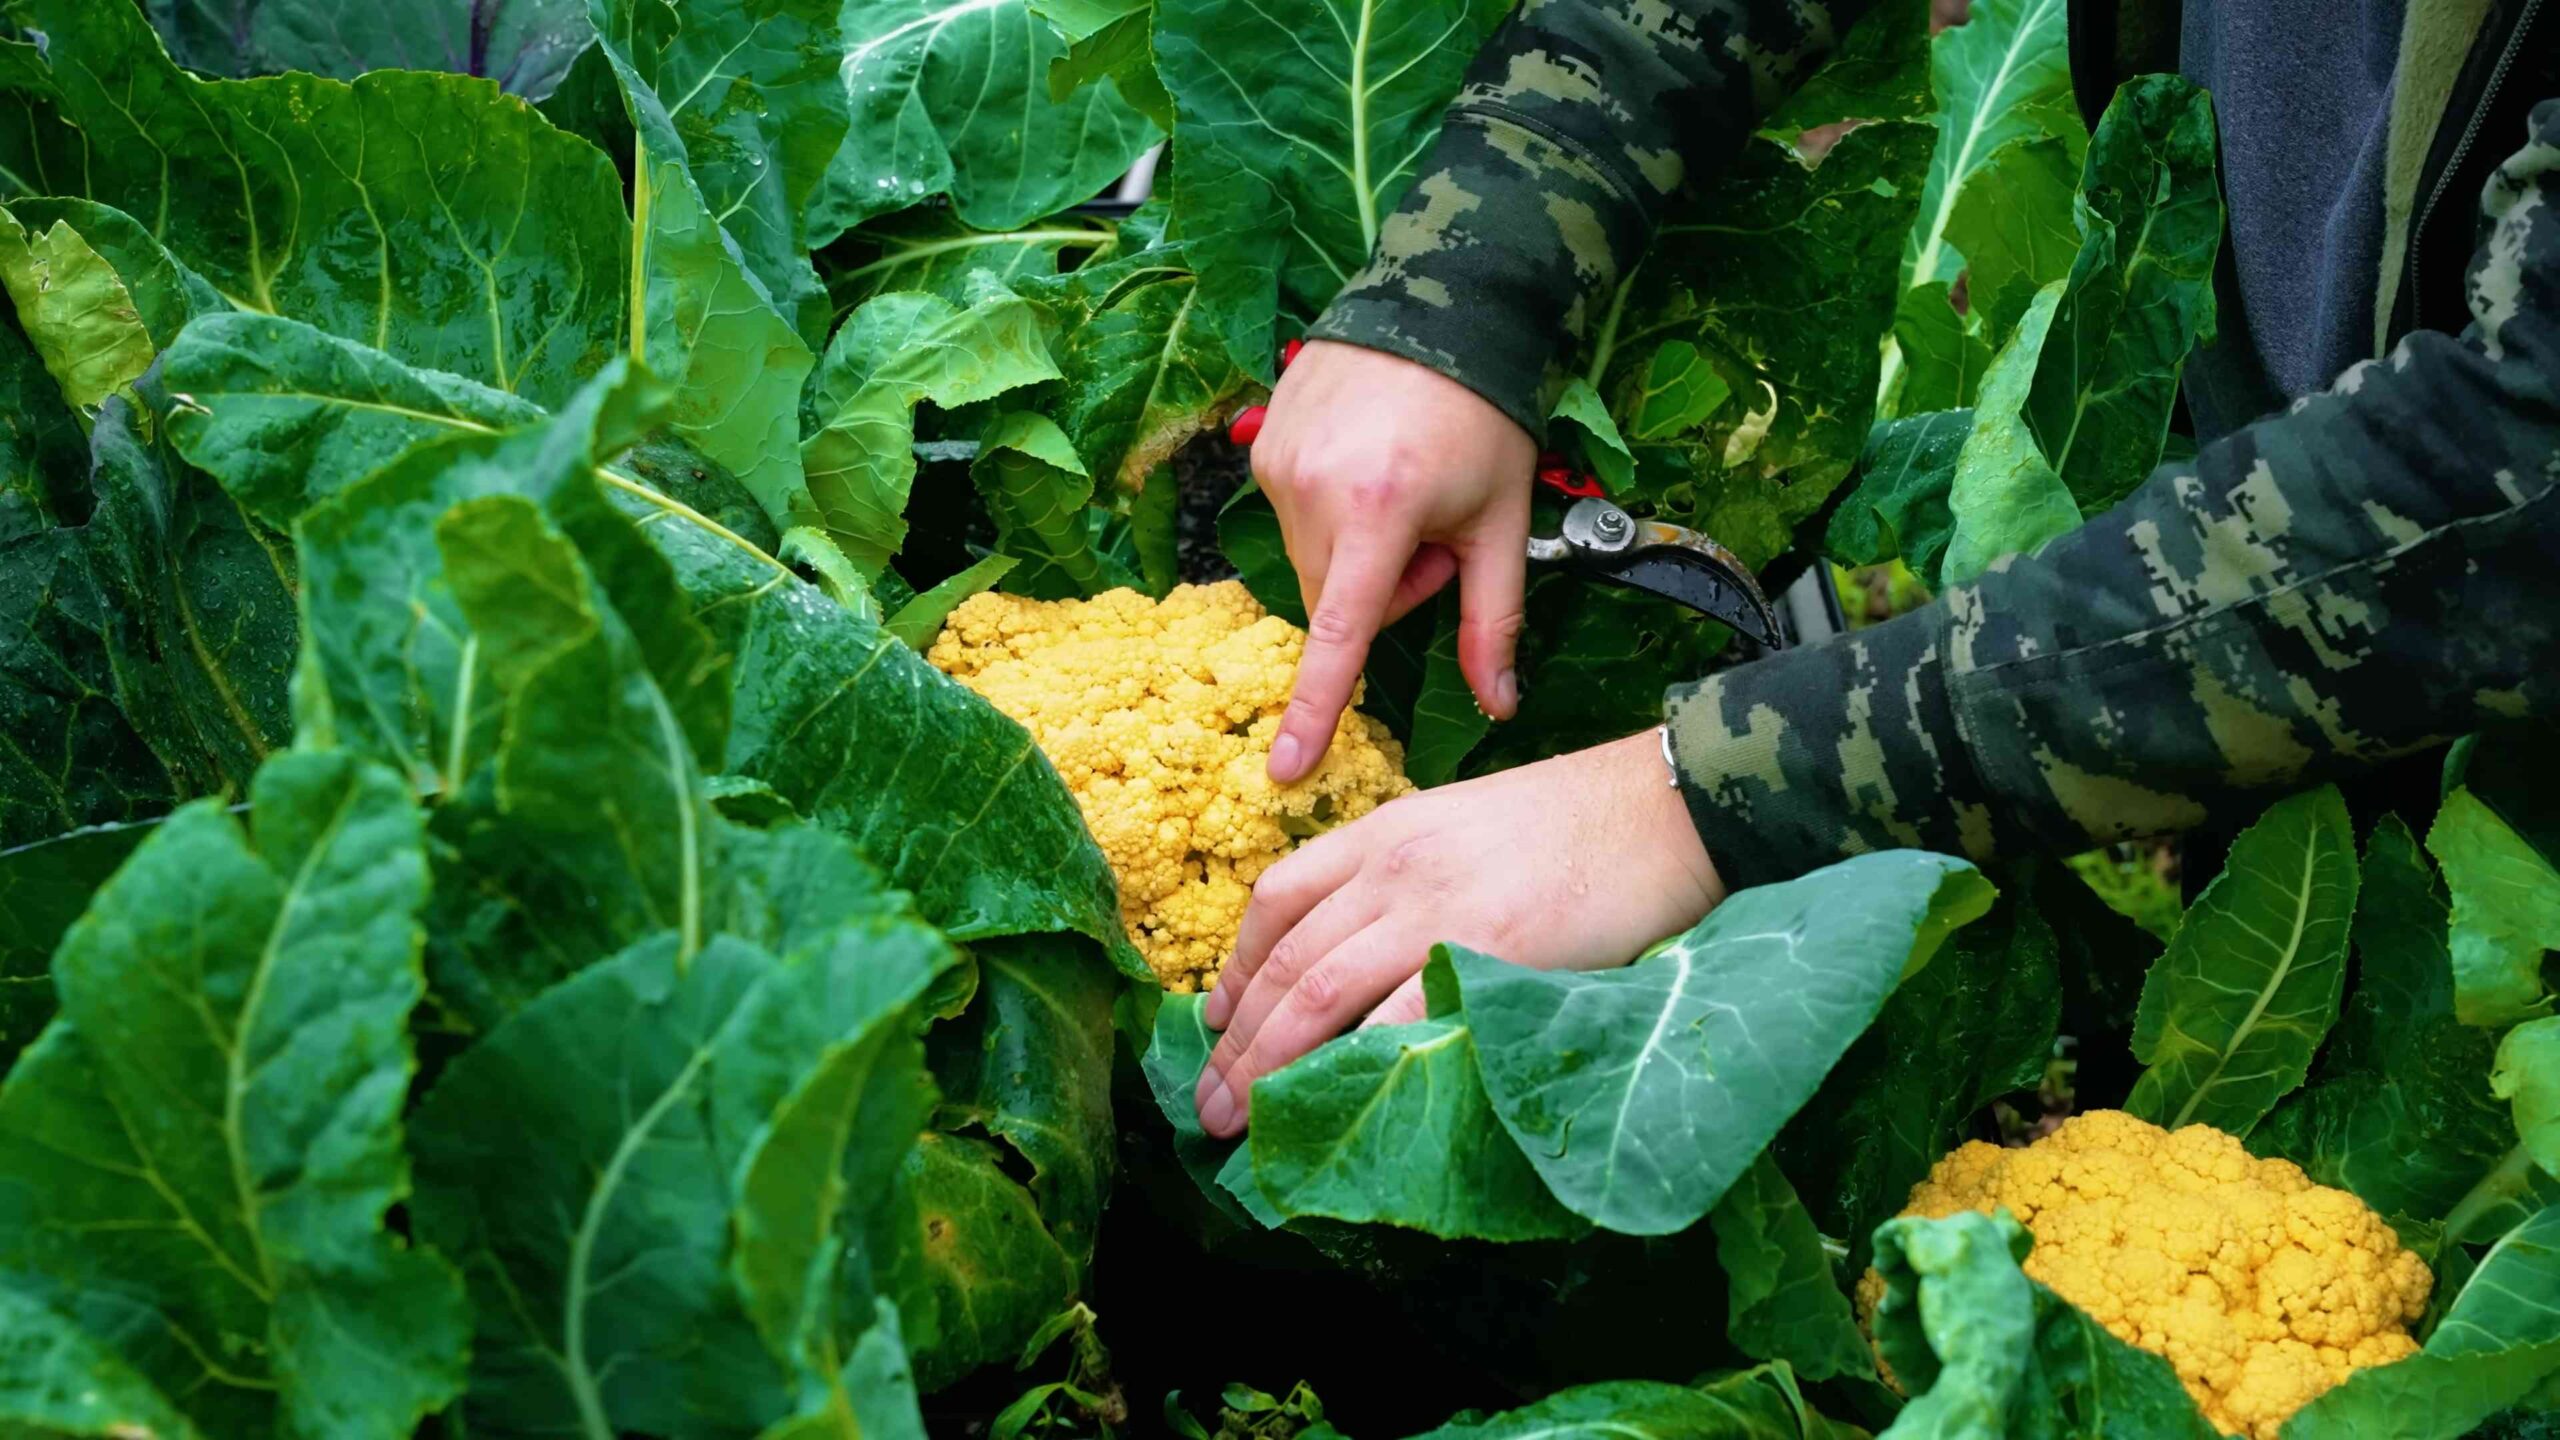
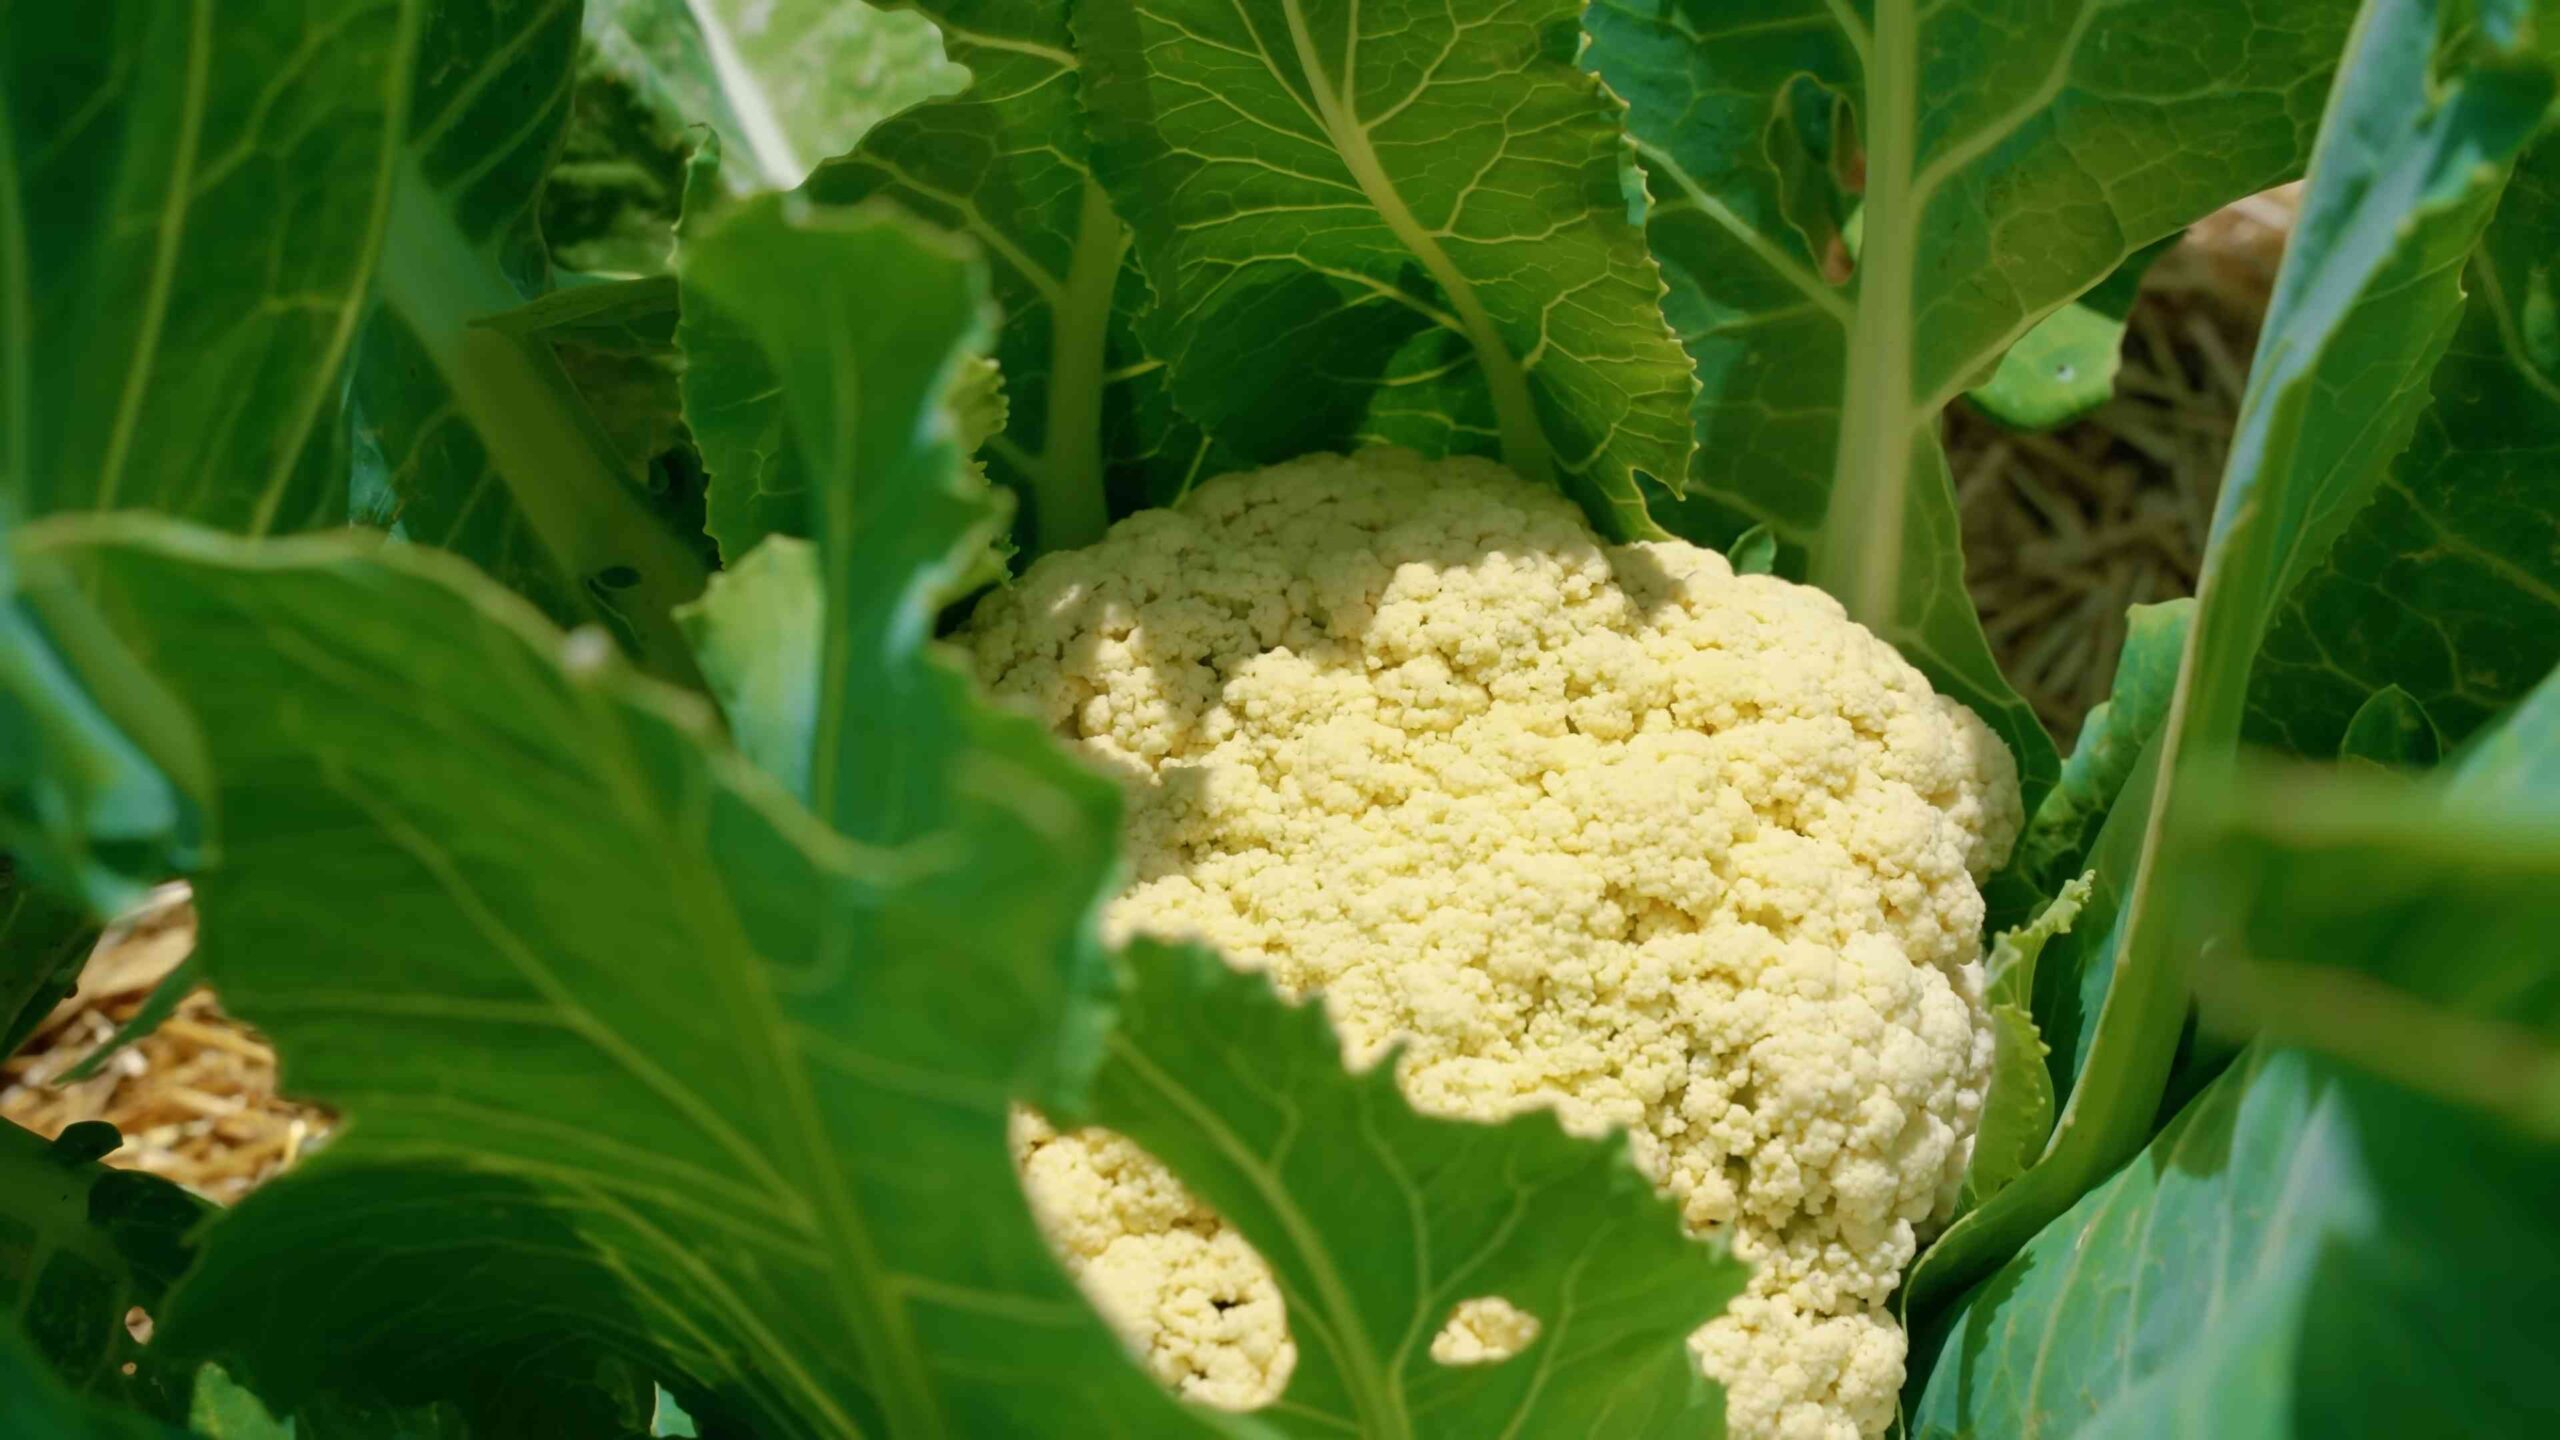
* Blanching (for white varieties): This is an important step for white cauliflower varieties. When the head reaches about 2-3 inches in diameter, blanch it by tying the outer leaves together over the head. This will protect the head from sunlight and prevent it from turning yellow or brown. You can use twine, rubber bands, or even clothespins to tie the leaves together.
Dealing with Common Problems
Even with the best care, you might encounter some problems while growing cauliflower. Here are a few common issues and how to deal with them:
* Cabbage worms: These green caterpillars can devour cauliflower leaves. Handpick them off the plants or use Bacillus thuringiensis (Bt), an organic insecticide.
* Aphids: These small, sap-sucking insects can weaken plants. Spray them with a strong stream of water or use insecticidal soap.
* Clubroot: This fungal disease causes swollen, distorted roots. Prevent it by planting in well-drained soil and rotating crops. If you have clubroot in your soil, consider growing cauliflower in raised beds.
* Buttoning: This occurs when the cauliflower head forms prematurely and remains small. It can be caused by stress, such as lack of water or nutrients. Make sure to provide your plants with consistent moisture and fertilizer.
* Yellowing heads: This can be caused by exposure to sunlight. Blanching the heads will prevent them from turning yellow.
Harvesting Your Cauliflower
The moment you’ve been waiting for! Harvesting your own cauliflower is incredibly rewarding.
1. Timing is crucial: Harvest your cauliflower when the head is firm, compact, and has reached the desired size. The size will vary depending on the variety, but most cauliflower heads are ready to harvest when they are about 6-8 inches in diameter.
2. Cut the head: Use a sharp knife to cut the head from the plant, leaving a few leaves attached to protect the head.
3. Store properly: Store the cauliflower in the refrigerator for up to a week.
Enjoying Your Homegrown Cauliflower
Now that you’ve harvested your cauliflower, it’s time to enjoy it! There are endless ways to prepare cauliflower, from roasting and steaming to making cauliflower rice and mashed cauliflower. I personally love roasting cauliflower with a little olive oil, salt, and pepper. It’s a simple and delicious way to enjoy the fresh flavor of homegrown cauliflower.
So there you have it! My comprehensive guide to growing cauliflower at home. I hope this has inspired you to give it a try. With a little effort and patience, you can enjoy the satisfaction of harvesting your own delicious, homegrown cauliflower. Happy gardening!
Conclusion
So, there you have it! Growing cauliflower at home might seem daunting at first, but with a little patience, the right conditions, and these simple DIY tricks, you’ll be harvesting your own delicious, homegrown cauliflower in no time. Forget those bland, overpriced heads at the grocery store – imagine the satisfaction of serving up a vibrant, flavorful cauliflower that you nurtured from seed to table.
This isn’t just about saving money; it’s about connecting with your food, understanding the growing process, and enjoying the unparalleled taste of freshly harvested produce. Plus, you have complete control over what goes into your cauliflower, ensuring it’s free from harmful pesticides and chemicals.
Why is this DIY approach a must-try? Because it empowers you to take control of your food source, reduces your reliance on commercial agriculture, and provides you with a healthier, tastier alternative. It’s a rewarding experience that connects you to nature and provides a tangible sense of accomplishment.
Don’t be afraid to experiment! Try different cauliflower varieties, such as purple or orange cauliflower, for a splash of color on your plate. Consider companion planting with herbs like rosemary or thyme to deter pests naturally. You can even try succession planting, sowing seeds every few weeks, to ensure a continuous harvest throughout the growing season. For those with limited space, dwarf cauliflower varieties are perfect for container gardening.
We’ve covered the essentials, from seed starting to pest control, but the real learning happens when you get your hands dirty. So, grab your gardening gloves, prepare your soil, and embark on this exciting journey of growing cauliflower at home.
We’re confident that you’ll be amazed by the results. And remember, gardening is a learning process. Don’t be discouraged by initial setbacks. Every mistake is an opportunity to learn and improve.
We encourage you to try these DIY tricks and share your experiences with us! Post photos of your cauliflower harvest on social media using #HomegrownCauliflower and tag us. We’d love to see your successes and learn from your challenges. Let’s build a community of home gardeners who are passionate about growing their own food. Happy gardening!
Frequently Asked Questions (FAQ)
Q: How long does it take to grow cauliflower from seed?
A: Growing cauliflower from seed typically takes between 75 and 85 days, depending on the variety and growing conditions. Starting seeds indoors 6-8 weeks before the last expected frost can give you a head start. Keep in mind that transplanting seedlings can sometimes cause transplant shock, so handle them carefully.
Q: What are the best growing conditions for cauliflower?
A: Cauliflower thrives in cool weather with consistent moisture and well-drained soil. The ideal temperature range is between 60°F and 70°F (15°C and 21°C). It needs at least 6 hours of sunlight per day. Soil pH should be between 6.0 and 7.0. Amending the soil with compost or well-rotted manure before planting is crucial for providing essential nutrients.
Q: How often should I water my cauliflower plants?
A: Cauliflower needs consistent moisture, especially during head formation. Water deeply at least once a week, or more frequently during hot, dry weather. Aim to keep the soil consistently moist but not waterlogged. Using a soaker hose or drip irrigation can help deliver water directly to the roots and prevent fungal diseases. Mulching around the plants can also help retain moisture in the soil.
Q: What are common pests and diseases that affect cauliflower?
A: Common pests include cabbage worms, aphids, flea beetles, and cabbage root maggots. Diseases include clubroot, black rot, and downy mildew. Regularly inspect your plants for signs of pests or diseases. Use organic pest control methods like insecticidal soap, neem oil, or Bacillus thuringiensis (Bt) to control pests. Ensure good air circulation and avoid overhead watering to prevent fungal diseases. Crop rotation can also help prevent soilborne diseases.
Q: How do I prevent cauliflower heads from turning yellow?
A: Cauliflower heads can turn yellow if exposed to direct sunlight. This is called “ricing.” To prevent this, blanch the heads by tying the outer leaves together over the developing head when it reaches about 2-3 inches in diameter. This protects the head from the sun and keeps it white. Check the heads regularly and harvest when they reach the desired size.
Q: When is the best time to harvest cauliflower?
A: Cauliflower is ready to harvest when the head is firm, compact, and reaches the desired size (usually 6-8 inches in diameter). The florets should be tightly closed and not starting to separate. Use a sharp knife to cut the head from the plant, leaving a few leaves attached. Harvest in the morning when the plant is cool.
Q: Can I grow cauliflower in containers?
A: Yes, you can grow cauliflower in containers, especially dwarf varieties. Choose a large container (at least 12 inches in diameter) with drainage holes. Use a high-quality potting mix and provide regular watering and fertilization. Container-grown cauliflower may need more frequent watering than those grown in the ground.
Q: What fertilizer should I use for cauliflower?
A: Cauliflower is a heavy feeder and needs a balanced fertilizer. Use a fertilizer with a higher phosphorus content to promote root development. You can also use a side dressing of nitrogen-rich fertilizer a few weeks after transplanting to encourage leafy growth. Follow the instructions on the fertilizer package carefully.
Q: Can I save seeds from my cauliflower plants?
A: Saving seeds from cauliflower is possible, but it requires allowing the plant to overwinter and produce flowers in the second year. Cauliflower is a biennial plant, meaning it completes its life cycle in two years. Saving seeds can be challenging, especially in colder climates. Also, if you grow hybrid varieties, the seeds may not produce plants that are true to type.
Q: What are some creative ways to use homegrown cauliflower?
A: The possibilities are endless! You can roast it, steam it, grill it, or use it in soups, stews, and casseroles. Try making cauliflower rice, cauliflower pizza crust, or cauliflower mash as a healthy alternative to potatoes. You can also pickle cauliflower or add it to salads. Don’t forget to use the leaves and stems in soups or stir-fries – they are also nutritious and delicious!

Leave a Comment