

Grow Chili Peppers, and ignite your culinary adventures! Have you ever dreamed of plucking fiery peppers straight from your backyard, adding a personal touch of spice to your favorite dishes? I know I have! For centuries, chili peppers have been more than just a food source; they’ve been woven into the cultural tapestry of civilizations worldwide, from ancient Mesoamerica, where they were first cultivated, to the vibrant kitchens of Asia and beyond.
But let’s be honest, the idea of successfully cultivating these flavorful gems can sometimes feel a little intimidating. Maybe you’ve tried before and ended up with lackluster results, or perhaps you’re simply unsure where to even begin. That’s where this DIY guide comes in! I’m here to share some simple yet effective home gardening tricks that will empower you to grow chili peppers like a pro, even if you’re a complete beginner.
Imagine the satisfaction of harvesting your own bounty of vibrant chilies, knowing exactly where they came from and how they were grown. Not only will you have a readily available supply of fresh, flavorful peppers, but you’ll also gain a deeper connection to the food you eat and the natural world around you. So, let’s dive in and unlock the secrets to a thriving chili pepper garden!
Growing Chili Peppers: From Seed to Spice Rack – A DIY Guide
Hey there, fellow spice enthusiasts! Ever dreamt of having a constant supply of fiery chili peppers right at your fingertips? Well, you’ve come to the right place! I’m going to walk you through the entire process of growing chili peppers, from starting seeds indoors to harvesting a bumper crop. Trust me, it’s easier than you think, and the satisfaction of using your own homegrown peppers in your favorite dishes is unbeatable.
Choosing Your Chili Pepper Variety
Before we dive into the nitty-gritty, let’s talk about choosing the right chili pepper for you. The world of chili peppers is vast and varied, ranging from mild and sweet to face-meltingly hot. Consider your spice tolerance and what you plan to use the peppers for.
Here’s a quick rundown of some popular varieties:
* **Bell Peppers:** (Capsicum annuum) These are the sweetest and mildest peppers, perfect for stuffing, salads, and adding a touch of color to your dishes.
* **Jalapeños:** (Capsicum annuum) A classic medium-heat pepper, great for pickling, poppers, and adding a kick to salsas.
* **Serranos:** (Capsicum annuum) A bit hotter than jalapeños, serranos are excellent for adding a fiery touch to Mexican cuisine.
* **Cayenne Peppers:** (Capsicum annuum) These long, thin peppers are commonly dried and ground into cayenne pepper powder. They pack a good punch of heat.
* **Habaneros:** (Capsicum chinense) Now we’re getting into serious heat! Habaneros are fruity and floral, but also incredibly spicy. Use them sparingly!
* **Scotch Bonnets:** (Capsicum chinense) Similar to habaneros in heat and flavor, Scotch bonnets are a staple in Caribbean cuisine.
* **Ghost Peppers (Bhut Jolokia):** (Capsicum chinense) One of the hottest peppers in the world! Handle with extreme care and use only a tiny amount.
* **Carolina Reapers:** (Capsicum chinense) Currently holding the title of the world’s hottest pepper, the Carolina Reaper is not for the faint of heart!
Once you’ve chosen your variety (or varieties!), you can purchase seeds from a reputable supplier. I always recommend buying from a trusted source to ensure you’re getting viable seeds.
Starting Seeds Indoors
Chili peppers need a long growing season, so starting them indoors is essential, especially if you live in a cooler climate. I usually start my seeds about 8-10 weeks before the last expected frost.
Here’s what you’ll need:
* Chili pepper seeds
* Seed starting trays or small pots
* Seed starting mix (a light, well-draining mix is crucial)
* A spray bottle
* A heat mat (optional, but highly recommended)
* A grow light (also optional, but provides the best results)
* A clear plastic dome or plastic wrap
Now, let’s get started:
1. **Prepare your seed starting trays:** Fill your seed starting trays or pots with seed starting mix. Gently tap the trays to settle the mix.
2. **Sow the seeds:** Make a small indentation (about ¼ inch deep) in the center of each cell or pot. Place 1-2 seeds in each indentation.
3. **Cover the seeds:** Gently cover the seeds with seed starting mix.
4. **Water gently:** Use a spray bottle to moisten the soil. Avoid overwatering, as this can lead to damping off (a fungal disease that kills seedlings).
5. **Provide warmth:** Place the seed starting trays on a heat mat. Chili pepper seeds germinate best in warm temperatures (around 80-85°F).
6. **Maintain humidity:** Cover the trays with a clear plastic dome or plastic wrap to create a humid environment.
7. **Provide light:** If you’re using a grow light, position it a few inches above the trays. If you’re not using a grow light, place the trays in a sunny window.
8. **Monitor and water:** Check the trays daily and water as needed to keep the soil moist but not soggy.
9. **Remove the dome:** Once the seedlings emerge (usually within 7-14 days), remove the plastic dome or plastic wrap.
10. **Harden off the seedlings:** Once the seedlings have developed a few sets of true leaves (the leaves that look like miniature versions of the adult plant’s leaves), it’s time to harden them off. This process gradually acclimates the seedlings to outdoor conditions. Start by placing the trays outdoors in a sheltered location for a few hours each day, gradually increasing the amount of time they spend outdoors over the course of a week or two.
Transplanting Seedlings Outdoors
Once the danger of frost has passed and the soil has warmed up, it’s time to transplant your chili pepper seedlings outdoors.
Here’s what you’ll need:
* Your hardened-off chili pepper seedlings
* A garden trowel
* Compost or well-rotted manure
* Fertilizer (specifically formulated for peppers)
* Watering can or hose
* Mulch (optional)
Follow these steps for successful transplanting:
1. **Choose a sunny location:** Chili peppers need at least 6-8 hours of sunlight per day.
2. **Prepare the soil:** Amend the soil with compost or well-rotted manure to improve drainage and fertility.
3. **Dig the holes:** Dig holes that are slightly larger than the root balls of your seedlings. Space the holes about 18-24 inches apart.
4. **Remove the seedlings from their containers:** Gently remove the seedlings from their seed starting trays or pots. Be careful not to damage the roots.
5. **Plant the seedlings:** Place the seedlings in the holes and backfill with soil. Gently firm the soil around the base of the plants.
6. **Water thoroughly:** Water the seedlings thoroughly after planting.
7. **Fertilize:** Apply a fertilizer specifically formulated for peppers according to the package directions.
8. **Mulch (optional):** Apply a layer of mulch around the plants to help retain moisture, suppress weeds, and regulate soil temperature.
Caring for Your Chili Pepper Plants
Now that your chili pepper plants are in the ground, it’s important to provide them with the care they need to thrive.
Here are some key tips:
* **Watering:** Water your chili pepper plants regularly, especially during hot, dry weather. Aim to keep the soil consistently moist but not soggy.
* **Fertilizing:** Fertilize your plants every few weeks with a fertilizer specifically formulated for peppers.
* **Pruning:** Pruning is not essential for chili peppers, but it can help to improve air circulation and encourage bushier growth. You can remove any suckers (small shoots that grow from the base of the plant) or any yellowing or damaged leaves.
* **Pest and disease control:** Keep an eye out for common pests and diseases, such as aphids, spider mites, and blossom end rot. Treat any problems promptly with appropriate organic or chemical controls.
* **Support:** As your chili pepper plants grow, they may need support to prevent them from toppling over. You can use stakes, cages, or trellises to provide support.
Harvesting Your Chili Peppers
The moment you’ve been waiting for! Harvesting your chili peppers is the most rewarding part of the process.
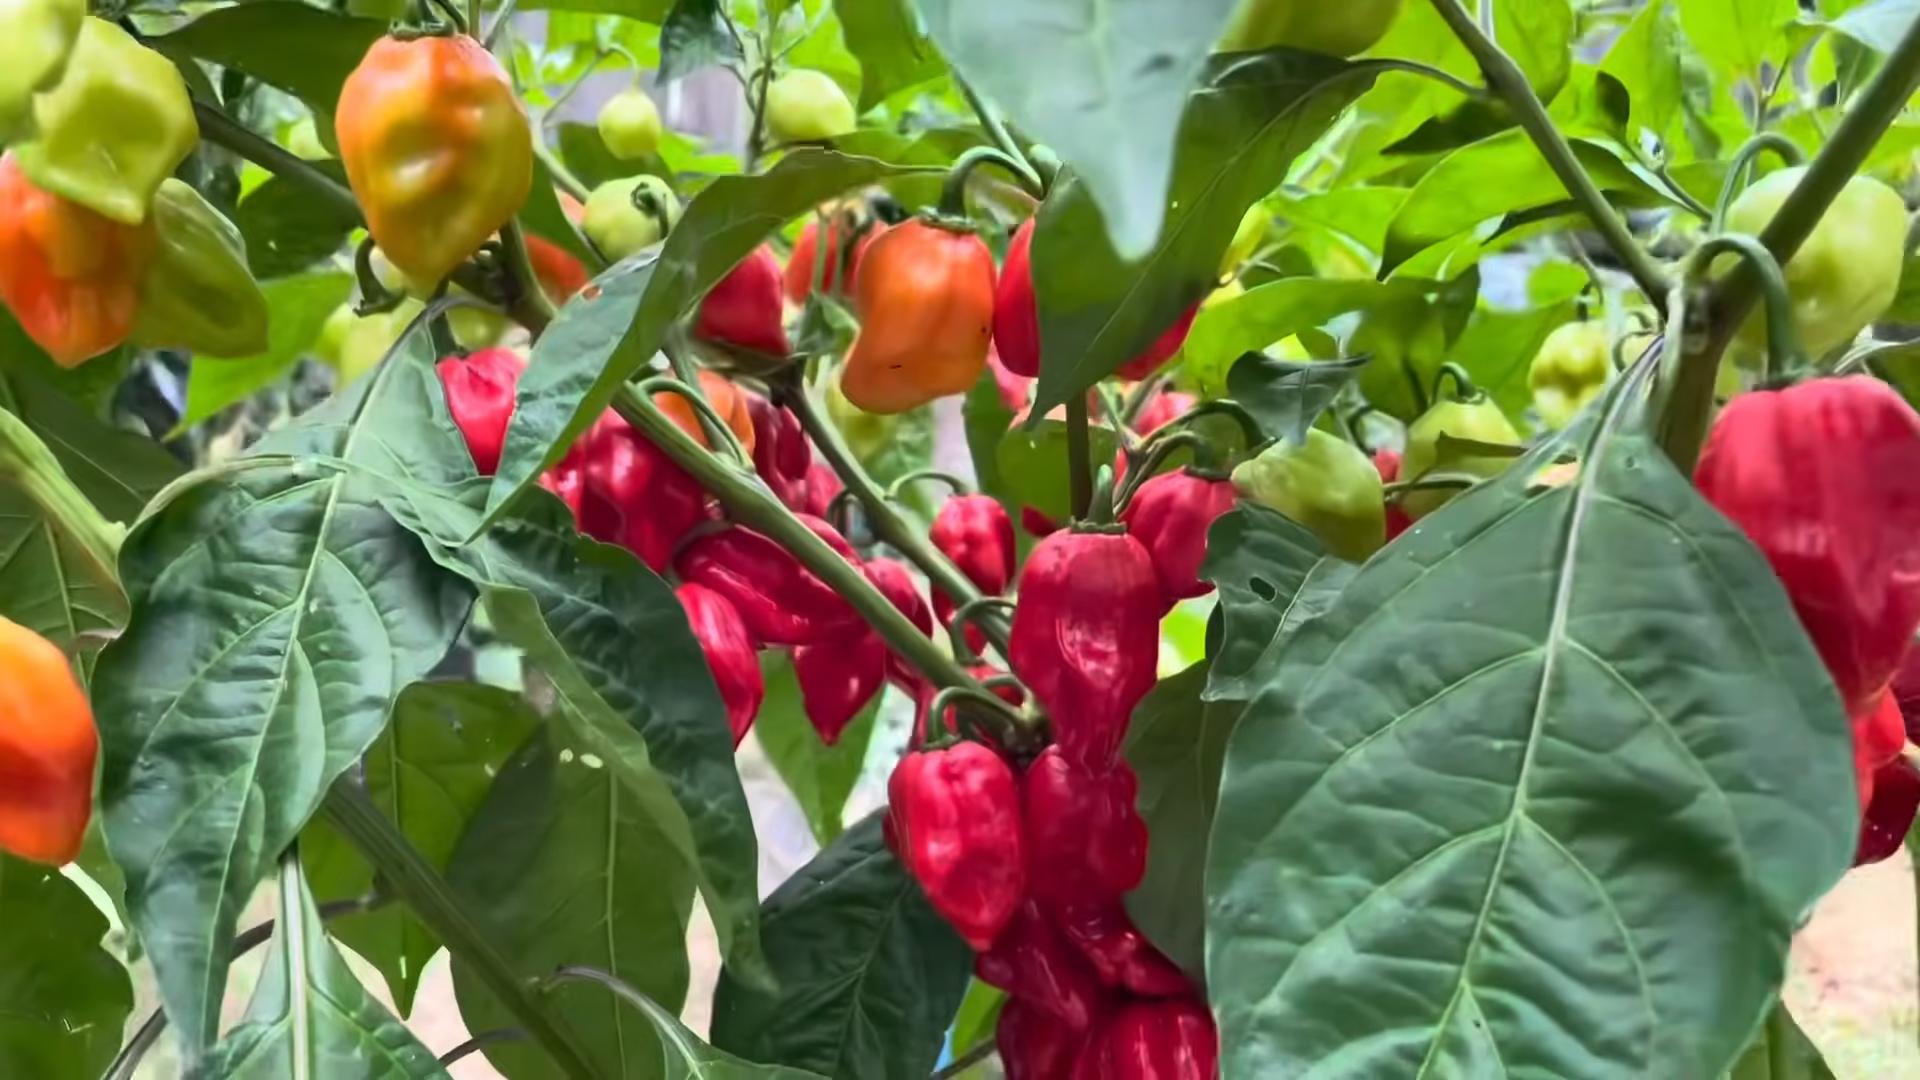
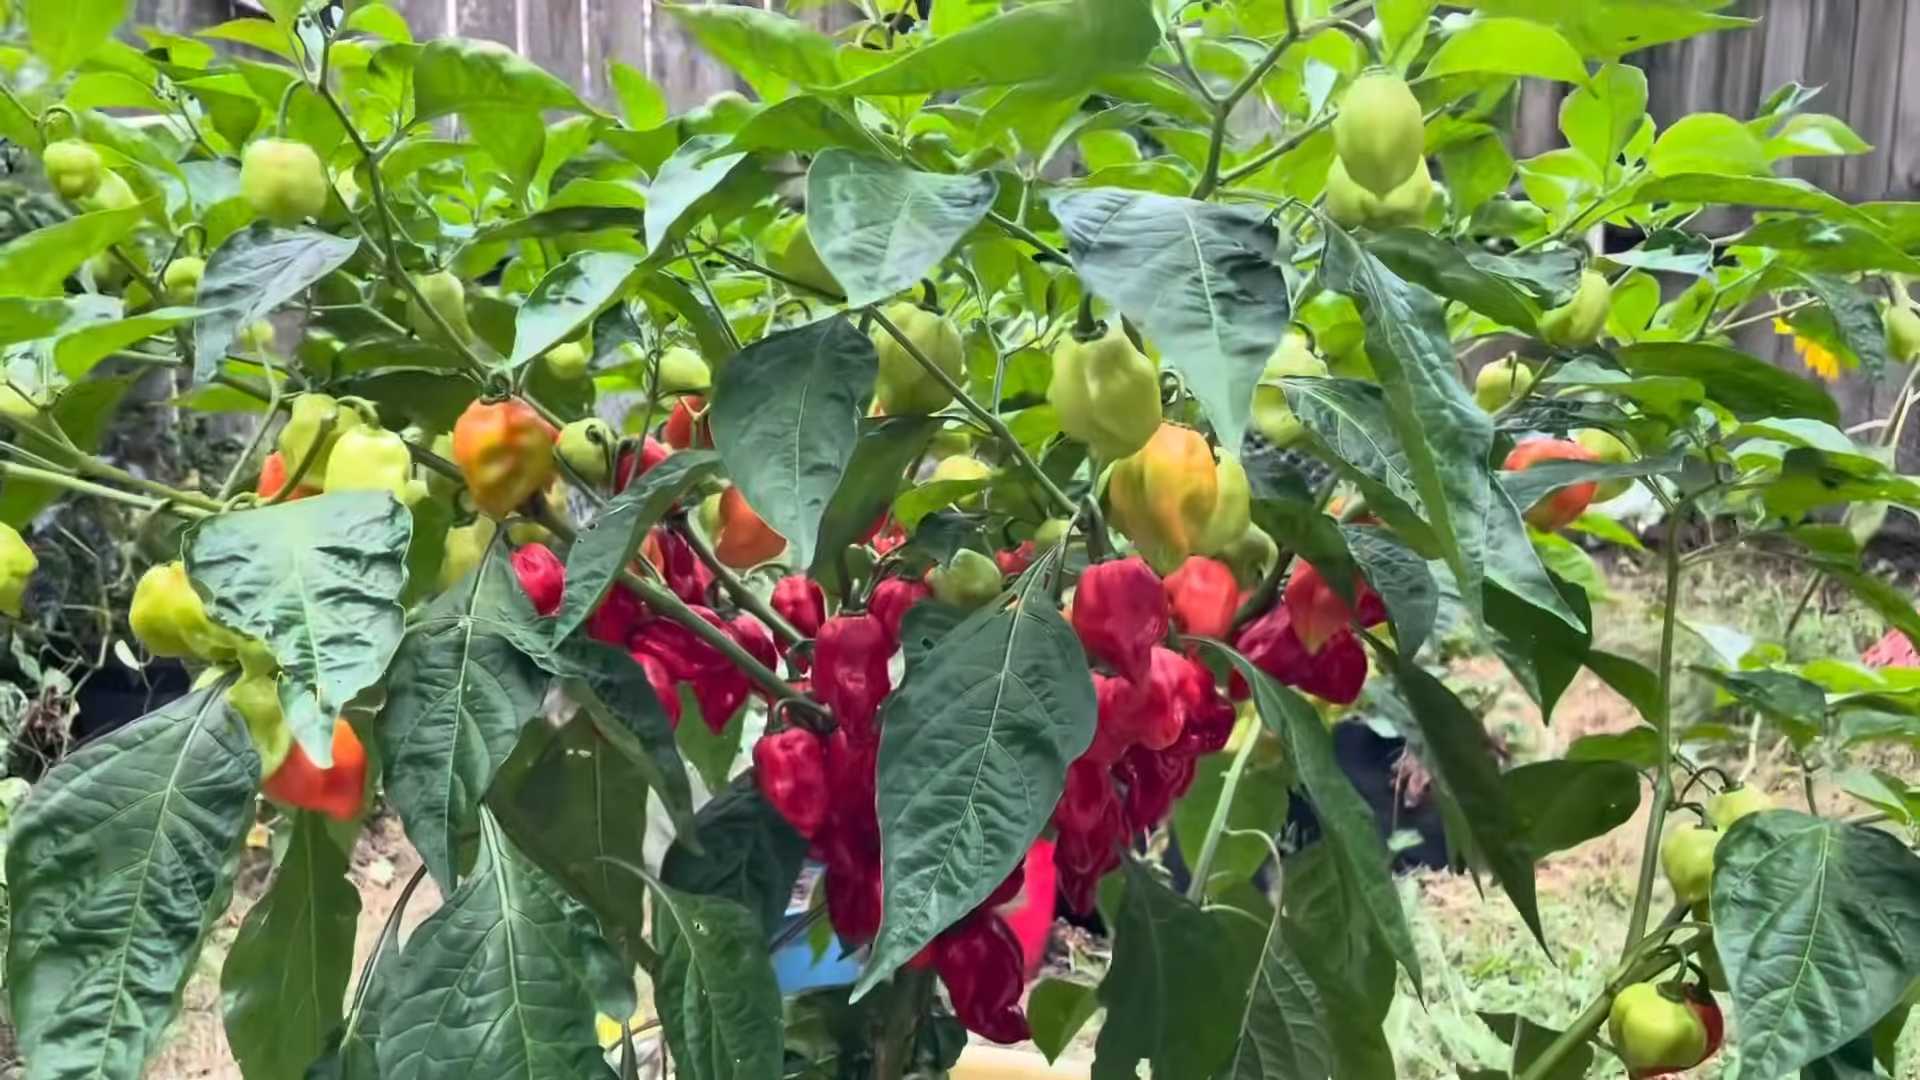
Here’s how to know when your peppers are ready to harvest:
* **Color:** The color of the peppers will change as they ripen. The exact color will depend on the variety, but generally, peppers will turn from green to red, yellow, orange, or brown.
* **Firmness:** Ripe peppers will be firm to the touch.
* **Size:** The size of the peppers will also increase as they ripen.
To harvest your chili peppers, simply snip them off the plant with a pair of scissors or pruning shears. Be careful not to damage the plant.
Important Safety Note: When handling hot chili peppers, it’s always a good idea to wear gloves to protect your skin from the capsaicin (the compound that makes peppers hot). Avoid touching your eyes or face after handling chili peppers.
Drying and Storing Chili Peppers
Once you’ve harvested your chili peppers, you can use them fresh, or you can dry them for later use.
Here are a few ways to dry chili peppers:
* **Air drying:** String the peppers together and hang them in a warm, dry, well-ventilated place. This method can take several weeks.
* **Oven drying:** Spread the peppers on a baking sheet and dry them in a low oven (around 150-170°F) for several hours.
* **Dehydrator:** Use a food dehydrator to dry the peppers according to the manufacturer’s instructions.
Once the peppers are completely dry, store them in an airtight container in a cool, dark place. Dried chili peppers can last for several years.
Conclusion
So, there you have it! Growing chili peppers at home, while it might seem daunting at first, is incredibly rewarding and surprisingly simple with this DIY trick. We’ve walked you through the process, highlighting the key steps to ensure a bountiful harvest of fiery goodness. But why is this DIY approach a must-try?
Firstly, it gives you complete control over the growing environment. You know exactly what your chili peppers are exposed to – no harsh chemicals, no questionable fertilizers, just pure, natural goodness. This translates to healthier plants and, ultimately, more flavorful and potent chili peppers. Imagine the satisfaction of knowing that the heat in your next salsa or stir-fry came directly from your own backyard, nurtured by your own hands.
Secondly, this method is incredibly cost-effective. Forget buying expensive seedlings or pre-grown plants. By starting from seeds and utilizing readily available materials, you can significantly reduce your expenses and still achieve impressive results. Think of all the delicious dishes you can create with the money you save!
Thirdly, and perhaps most importantly, it’s an incredibly fulfilling experience. There’s something truly magical about watching a tiny seed sprout and transform into a vibrant, fruit-bearing plant. It’s a connection to nature that’s both grounding and inspiring. Plus, you’ll have a constant supply of fresh chili peppers right at your fingertips, ready to add a kick to any meal.
Now, let’s talk variations. Feel free to experiment with different types of chili peppers. From the mild and fruity Anaheim to the scorching hot Ghost pepper, the possibilities are endless. You can also adjust the soil composition to suit the specific needs of your chosen variety. Consider adding compost or other organic matter to enrich the soil and provide your plants with the nutrients they need to thrive.
Another fun variation is to try growing your chili peppers in containers. This is a great option if you have limited space or want to move your plants indoors during colder months. Just be sure to choose a container that’s large enough to accommodate the root system and provide adequate drainage.
Don’t be afraid to get creative with your DIY setup. You can repurpose old containers, build your own raised beds, or even create a vertical garden to maximize your growing space. The only limit is your imagination!
We truly believe that anyone can successfully grow chili peppers at home with this DIY trick. It’s a fun, rewarding, and cost-effective way to add some spice to your life. So, what are you waiting for? Grab some seeds, gather your supplies, and get growing!
We’re confident that you’ll be amazed by the results. And once you’ve harvested your first batch of homegrown chili peppers, we encourage you to share your experience with us. Post photos of your plants, share your favorite recipes, and let us know what you learned along the way. We’re excited to see what you create! Remember, successful **grow chili peppers** endeavors start with a single seed and a little bit of effort. Happy growing!
Frequently Asked Questions
What kind of soil is best for growing chili peppers?
Chili peppers thrive in well-draining soil that is rich in organic matter. A slightly acidic to neutral pH (around 6.0 to 7.0) is ideal. You can use a commercial potting mix specifically formulated for vegetables, or create your own mix by combining equal parts of garden soil, compost, and perlite or vermiculite. The compost provides essential nutrients, while the perlite or vermiculite improves drainage and aeration. Avoid using heavy clay soil, as it can become waterlogged and suffocate the roots. Amending clay soil with organic matter can improve its drainage and make it suitable for growing chili peppers.
How much sunlight do chili peppers need?
Chili peppers are sun-loving plants and require at least 6-8 hours of direct sunlight per day to thrive. Insufficient sunlight can result in leggy growth, reduced flowering, and smaller, less flavorful peppers. If you’re growing chili peppers indoors, place them near a sunny window or use grow lights to supplement natural light. Rotate the plants regularly to ensure that all sides receive adequate sunlight. If you live in a hot climate, providing some afternoon shade can prevent the plants from getting scorched.
How often should I water my chili pepper plants?
Water chili pepper plants deeply and regularly, especially during hot and dry weather. The soil should be kept consistently moist, but not waterlogged. Overwatering can lead to root rot, while underwatering can cause the plants to wilt and stress. Check the soil moisture level regularly by sticking your finger about an inch into the soil. If the soil feels dry to the touch, it’s time to water. Water at the base of the plant to avoid wetting the foliage, which can increase the risk of fungal diseases. Mulching around the plants can help retain moisture in the soil and reduce the need for frequent watering.
When should I fertilize my chili pepper plants?
Fertilize chili pepper plants regularly throughout the growing season to provide them with the nutrients they need to produce abundant peppers. Start fertilizing about two weeks after transplanting the seedlings into the garden or containers. Use a balanced fertilizer with an NPK ratio of 10-10-10 or 14-14-14. As the plants begin to flower and set fruit, switch to a fertilizer that is higher in phosphorus and potassium, such as 5-10-10 or 5-15-15. Phosphorus promotes flowering and fruit development, while potassium enhances the flavor and heat of the peppers. Follow the instructions on the fertilizer label for application rates. Avoid over-fertilizing, as this can burn the roots and damage the plants. Organic fertilizers, such as compost tea or fish emulsion, are also excellent options for feeding chili pepper plants.
How do I protect my chili pepper plants from pests and diseases?
Chili pepper plants can be susceptible to various pests and diseases, including aphids, spider mites, whiteflies, and fungal infections. Regularly inspect your plants for signs of infestation or disease. If you spot any pests, try to remove them by hand or spray the plants with insecticidal soap or neem oil. For fungal diseases, such as powdery mildew or leaf spot, apply a fungicide according to the manufacturer’s instructions. Good air circulation and proper watering practices can help prevent fungal diseases. Companion planting with herbs like basil or marigolds can also help deter pests. Consider using row covers to protect your plants from pests early in the season.
How do I know when my chili peppers are ripe?
The color of the chili peppers is the best indicator of ripeness. Most chili peppers will change color from green to red, yellow, orange, or brown as they mature. The exact color depends on the variety. The peppers should also feel firm and slightly glossy. You can also test the ripeness by tasting a small piece of the pepper. If it has the desired level of heat and flavor, it’s ready to harvest. Use pruning shears or scissors to cut the peppers from the plant, leaving a small stem attached.
Can I grow chili peppers indoors?
Yes, you can successfully grow chili peppers indoors, especially if you live in a climate with cold winters. Choose a sunny location near a south-facing window or use grow lights to provide adequate light. Select a container that is at least 12 inches in diameter and has drainage holes. Use a well-draining potting mix and water regularly. Fertilize the plants every two weeks with a balanced fertilizer. Hand-pollinate the flowers by gently shaking the plants or using a small brush to transfer pollen from one flower to another. Keep an eye out for pests and diseases and take appropriate measures to control them.
How do I save seeds from my chili peppers?
Saving seeds from your chili peppers is a great way to ensure that you have a supply of seeds for future growing seasons. Choose ripe, healthy peppers from your best-performing plants. Cut the peppers open and remove the seeds. Spread the seeds out on a paper towel and let them dry completely for several days. Once the seeds are dry, store them in an airtight container in a cool, dark, and dry place. Label the container with the variety of chili pepper and the date of harvest. The seeds should remain viable for several years if stored properly. Remember that hybrid chili peppers may not produce true-to-type offspring, so it’s best to save seeds from open-pollinated varieties.
Leave a Comment