

Grow Gourds at Home – ever dreamt of transforming your backyard into a whimsical wonderland, bursting with unique shapes and textures? I know I have! Gourds, with their fascinating history and incredible versatility, offer just that opportunity. For centuries, these fascinating fruits have been more than just decorative items; they’ve been essential tools, musical instruments, and even vessels for carrying water across cultures worldwide. From ancient civilizations in Africa and Asia to Native American tribes, gourds have played a vital role in daily life.
But why should you consider growing gourds at home? In today’s world, where sustainability and creativity are highly valued, learning to grow gourds at home offers a fantastic way to connect with nature, reduce your environmental footprint, and unleash your inner artist. Imagine crafting your own birdhouses, bowls, or even unique musical instruments from something you nurtured from a tiny seed! Plus, with rising costs and a desire for more personalized home décor, DIY projects are more popular than ever. This article is packed with simple, effective tricks and hacks that will guide you through every step of the process, ensuring a bountiful harvest and a rewarding gardening experience. Let’s get growing!
Growing Gourds: A Comprehensive DIY Guide
Hey there, fellow gardening enthusiasts! I’m so excited to share my experience and knowledge on growing gourds. It’s a rewarding and surprisingly easy project that adds a unique touch to your garden and provides you with beautiful, natural crafts. Let’s dive in!
Choosing Your Gourd Variety
Before we get our hands dirty, it’s crucial to decide what kind of gourd you want to grow. There are two main categories: ornamental gourds and hard-shelled gourds.
* Ornamental Gourds: These are the colorful, often oddly shaped gourds you see in fall decorations. They’re not edible and are primarily grown for their aesthetic appeal. Think of the warty gourds, the swan gourds, and the apple gourds.
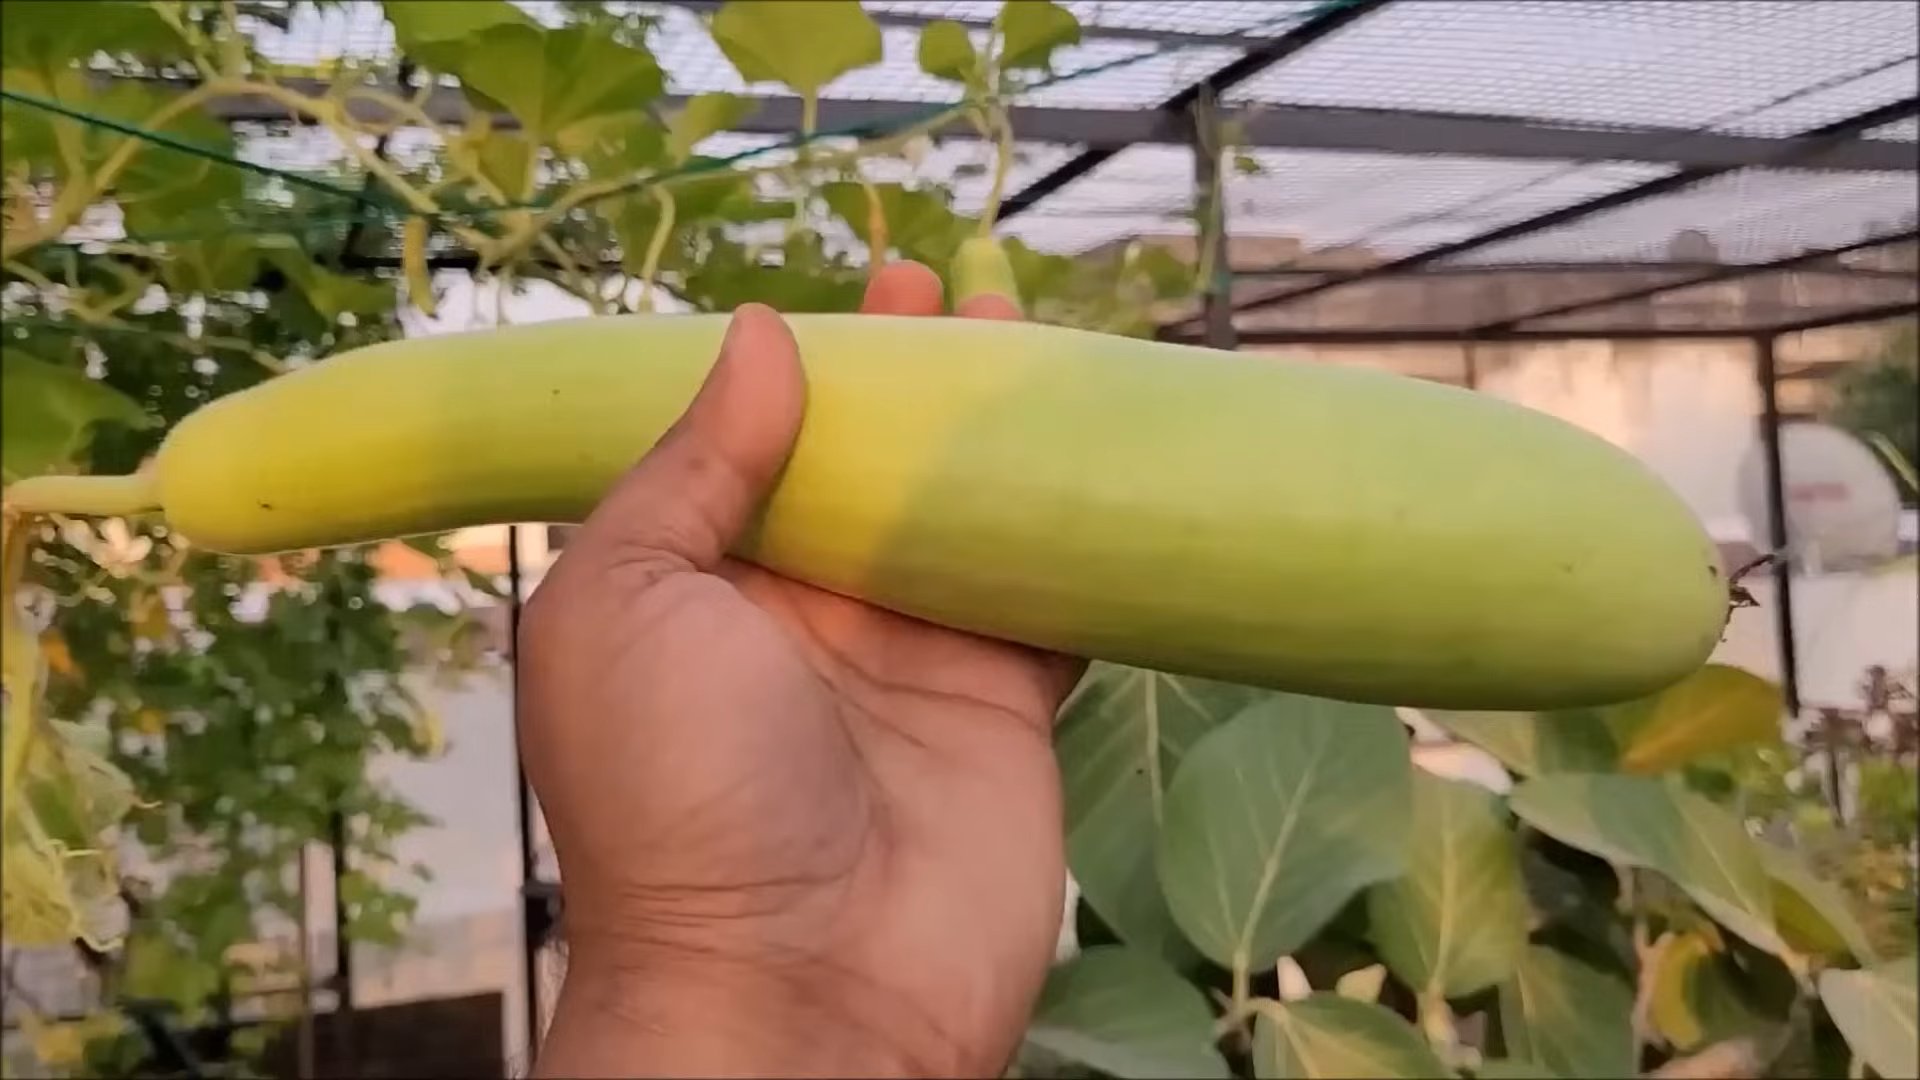
* Hard-Shelled Gourds: These are the gourds that, once dried, can be used for crafting, birdhouses, bowls, and even musical instruments! The most popular variety is the bottle gourd (also known as calabash).
I personally love growing bottle gourds because of their versatility. They take a bit longer to mature and dry, but the end result is so worth it. For this guide, I’ll primarily focus on growing bottle gourds, but the general principles apply to most gourd varieties.
Preparing Your Gourd-Growing Paradise
Gourds are sun-loving, hungry plants. They need a lot of space, sunshine, and nutrients to thrive. Here’s how to prepare your garden for gourd success:
* Sunlight: Gourds need at least 6-8 hours of direct sunlight per day. Choose a location in your garden that gets plenty of sun throughout the day.
* Soil: Gourds prefer well-drained, fertile soil. Amend your soil with plenty of compost or well-rotted manure before planting. This will provide the nutrients your gourds need to grow big and strong. A slightly acidic to neutral pH (around 6.0-7.0) is ideal.
* Space: Gourds are vines that can spread quite a bit. Give them plenty of room to grow. A single gourd plant can easily cover 10-15 square feet. If you’re planting multiple plants, space them at least 3-4 feet apart.
* Support: Gourds are heavy! They need strong support to climb on. A sturdy trellis, fence, or even a pergola will work. Make sure your support system can handle the weight of mature gourds. I’ve even seen people use old swing sets!
Planting Your Gourd Seeds
Now for the fun part! You can either start your gourd seeds indoors or direct sow them in your garden. I prefer direct sowing because it avoids transplant shock.
* Starting Seeds Indoors (Optional): If you live in a colder climate with a shorter growing season, you can start your gourd seeds indoors about 4-6 weeks before the last expected frost.
* Use peat pots or biodegradable pots to avoid disturbing the roots when transplanting.
* Sow the seeds about 1 inch deep in a seed-starting mix.
* Keep the soil moist and warm (around 70-80°F).
* Once the seedlings have a few true leaves, you can harden them off by gradually exposing them to outdoor conditions before transplanting them into your garden.
* Direct Sowing: This is my preferred method.
1. Wait for Warm Weather: Make sure the soil temperature is at least 65°F before planting. Gourds are very sensitive to frost.
2. Prepare the Soil: Loosen the soil and amend it with compost or manure.
3. Sow the Seeds: Plant the seeds about 1 inch deep and 2-3 inches apart.
4. Water Gently: Water the soil gently to avoid washing away the seeds.
5. Thin Seedlings: Once the seedlings emerge and have a few true leaves, thin them to the strongest plant every 3-4 feet.
Caring for Your Growing Gourds
Once your gourd plants are established, it’s important to provide them with the care they need to thrive.
* Watering: Gourds need consistent watering, especially during hot, dry weather. Water deeply and regularly, aiming for about 1 inch of water per week. Avoid overhead watering, as this can lead to fungal diseases. Drip irrigation is ideal.
* Fertilizing: Gourds are heavy feeders. Fertilize them every 2-3 weeks with a balanced fertilizer or compost tea. Avoid over-fertilizing with nitrogen, as this can promote leafy growth at the expense of fruit production.
* Pruning: Pruning can help improve air circulation and encourage fruit production. Remove any yellowing or diseased leaves. You can also prune the vines to control their growth.
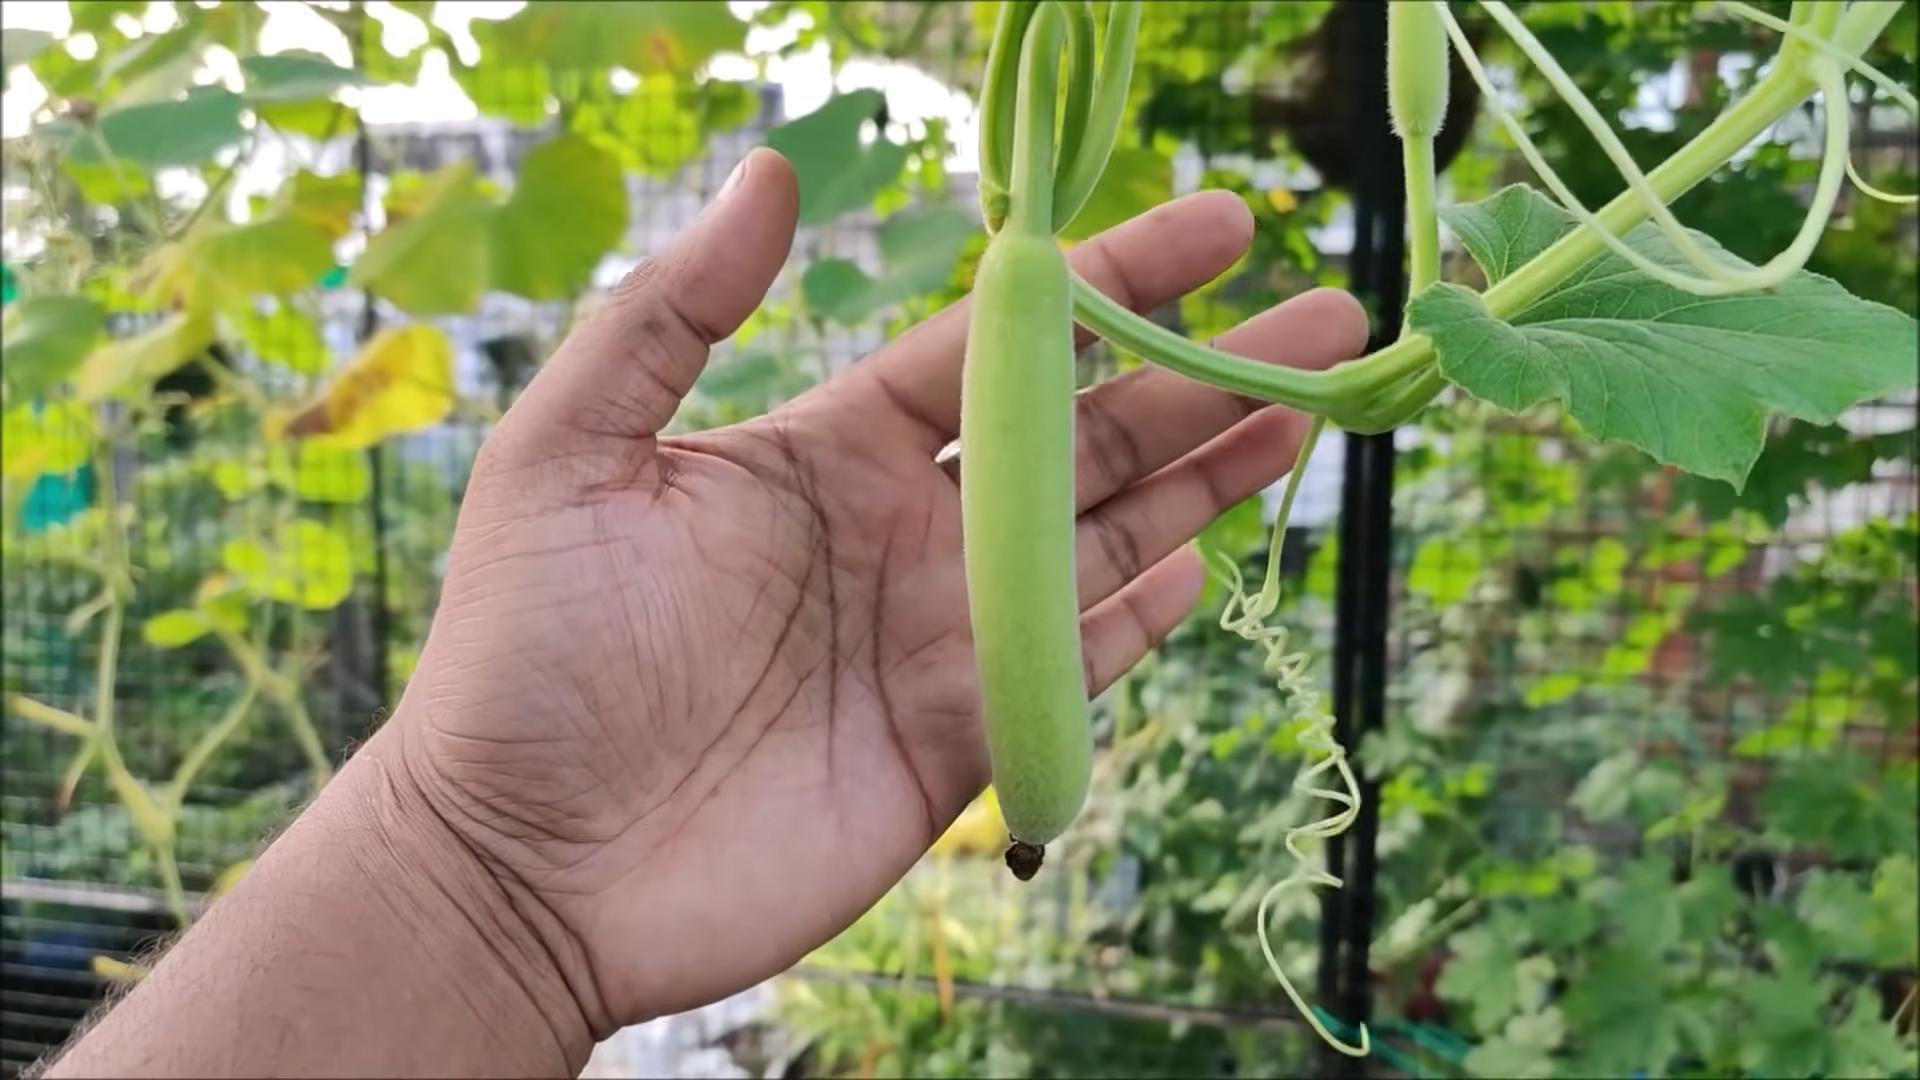
* Pollination: Gourds have separate male and female flowers. The female flowers have a small gourd-like structure at the base. If pollination is poor, you can hand-pollinate the flowers by transferring pollen from the male flowers to the female flowers using a small brush. I usually do this in the early morning when the flowers are fully open.
* Pest and Disease Control: Keep an eye out for common gourd pests like squash bugs, squash vine borers, and cucumber beetles. You can use insecticidal soap or neem oil to control these pests. Fungal diseases like powdery mildew can also be a problem. Improve air circulation by pruning and avoid overhead watering. You can also use a fungicide if necessary.
Harvesting Your Gourds
The timing of your gourd harvest depends on the variety you’re growing and what you plan to use them for.
* Ornamental Gourds: Harvest ornamental gourds when they are fully mature and the stems have started to dry out.
* Hard-Shelled Gourds: Harvest hard-shelled gourds when the stems are completely dry and brown. The gourds should feel lightweight and the seeds should rattle inside. This usually happens in the late fall, after the first frost.
To harvest your gourds, use pruning shears or a sharp knife to cut the stem, leaving a few inches of stem attached to the gourd. This will help prevent rot.
Drying and Curing Your Hard-Shelled Gourds
This is a crucial step for hard-shelled gourds! Proper drying and curing will ensure that your gourds last for years.
1. Wash the Gourds: Wash the gourds with soapy water to remove any dirt or debris.
2. Dry the Gourds: Place the gourds in a well-ventilated area, such as a garage or shed. Avoid direct sunlight, as this can cause the gourds to crack.
3. Elevate the Gourds: Place the gourds on a rack or pallets to allow air to circulate around them.
4. Check Regularly: Check the gourds regularly for signs of rot or mold. If you see any, remove the affected gourd immediately to prevent it from spreading to the others.
5. Be Patient: The drying process can take several weeks or even months, depending on the size of the gourds and the humidity levels. You’ll know the gourds are dry when they are lightweight and the seeds rattle inside.
Cleaning Your Dried Gourds
Once your gourds are completely dry, it’s time to clean them.
1. Soak the Gourds: Soak the gourds in warm, soapy water for a few hours to soften the outer skin.
2. Scrub the Gourds: Use a scrub brush or steel wool to scrub off the outer skin. This can be a messy process, so wear gloves and old clothes.
3. Rinse the Gourds: Rinse the gourds thoroughly with clean water.
4. Dry the Gourds: Allow the gourds to dry completely before using them for crafting.
Crafting with Your Gourds
Now for the really fun part! Once your gourds are cleaned and dried, you can use them for a variety of crafts. Here are just a few ideas:
* Birdhouses: Cut a hole in the gourd and add a perch to create a unique birdhouse.
* Bowls: Cut the gourd in half and hollow it out to create a natural bowl.
* Lamps: Drill holes in the gourd and add a light fixture to create a beautiful lamp.
* Musical Instruments: Use gourds to create rattles, drums, and other musical instruments.
* Painted Decorations: Paint your gourds with colorful designs to create unique decorations.
The possibilities are endless! Let your creativity run wild and see what amazing things you can create with your homegrown gourds.
Troubleshooting Common Gourd-Growing Problems
Even with the best care, you might encounter some problems while growing gourds. Here are a few common issues and how to address them:
* Poor Germination: If your gourd seeds aren’t germinating, make sure the soil temperature is warm enough
Conclusion
So, there you have it! Growing gourds at home is not only achievable, but it’s also a deeply rewarding experience. From the initial thrill of planting the seeds to the satisfaction of harvesting your own unique creations, this DIY project offers a connection to nature and a creative outlet unlike any other. We’ve covered everything from selecting the right gourd varieties for your climate and space, to preparing the soil, providing essential support, and even troubleshooting common problems.
But why is this DIY trick a must-try? Beyond the sheer enjoyment of gardening, growing your own gourds allows you to cultivate varieties that might be difficult or impossible to find in stores. Imagine crafting your own birdhouses, bowls, or decorative art pieces from gourds you nurtured from tiny seeds! The possibilities are truly endless, limited only by your imagination. Plus, you’re contributing to a more sustainable lifestyle by reducing your reliance on commercially produced goods and embracing the beauty of homegrown artistry.
Don’t be afraid to experiment! Consider variations like growing different types of gourds each year to discover your favorites. Try painting or carving your dried gourds for personalized decorations. You could even explore using gourd seeds for culinary purposes, researching safe and delicious recipes. Think about creating a gourd tunnel or archway for a truly stunning garden feature. The journey of growing gourds at home is all about exploration and discovery.
We’ve armed you with the knowledge and confidence to embark on this exciting adventure. Now, it’s your turn to get your hands dirty and experience the magic of growing gourds at home firsthand. We are confident that you will find the process both enjoyable and fulfilling.
We wholeheartedly encourage you to try this DIY trick. Start small, learn as you go, and most importantly, have fun! And once you’ve harvested your first crop of homegrown gourds, we’d love to hear about your experience. Share your photos, tips, and stories in the comments below. Let’s build a community of gourd enthusiasts and inspire others to discover the joy of growing these fascinating plants. Happy growing!
Frequently Asked Questions (FAQ)
What are the best gourd varieties to grow for beginners?
For beginners, some of the easiest and most rewarding gourd varieties to grow include:
* **Birdhouse Gourds:** These are relatively easy to grow and dry, and they make excellent birdhouses, as the name suggests. They are also quite visually appealing.
* **Ornamental Gourds:** These come in a wide array of shapes, sizes, and colors, making them perfect for decorative purposes. They tend to be smaller and dry more quickly than larger varieties.
* **Dipper Gourds:** These are known for their long handles and round bodies, making them ideal for crafting dippers or ladles. They are also relatively easy to grow and dry.
* **Apple Gourds:** These are small, round gourds that resemble apples. They are great for crafting small ornaments or decorations.
When choosing your gourd variety, consider your local climate and the amount of space you have available. Some gourds require a significant amount of space to grow, while others are more compact.
How long does it take for gourds to grow and mature?
The time it takes for gourds to grow and mature can vary depending on the variety, climate, and growing conditions. Generally, it takes around 100 to 150 days from planting to harvest.
* **Seed Germination:** Gourd seeds typically germinate within 7 to 14 days, depending on soil temperature and moisture.
* **Vegetative Growth:** During the vegetative growth phase, the gourd vines will rapidly grow and spread. This phase can last for several weeks.
* **Flowering and Fruit Set:** Once the vines are mature enough, they will begin to produce flowers. Pollination is essential for fruit set.
* **Fruit Development:** After pollination, the gourds will begin to develop and grow in size. This phase can take several weeks or months, depending on the variety.
* **Maturation:** Gourds are typically ready to harvest when the stems begin to dry and turn brown. The gourd skin should also be hard and firm.
Keep in mind that these are just general guidelines. The actual time it takes for your gourds to grow and mature may vary.
What are some common problems when growing gourds, and how can I prevent them?
Growing gourds can be relatively straightforward, but there are a few common problems that you may encounter:
* **Powdery Mildew:** This fungal disease can cause a white, powdery coating on the leaves. To prevent powdery mildew, ensure good air circulation around the plants, avoid overhead watering, and apply a fungicide if necessary.
* **Squash Bugs and Vine Borers:** These pests can damage gourd vines and fruits. To prevent these pests, inspect your plants regularly and remove any bugs or eggs. You can also use row covers to protect your plants.
* **Blossom End Rot:** This condition is caused by a calcium deficiency and can cause the ends of the gourds to rot. To prevent blossom end rot, ensure that your soil is rich in calcium and that your plants are getting enough water.
* **Poor Pollination:** Gourds require pollination to produce fruit. If you are not seeing any fruit set, you may need to hand-pollinate the flowers.
By taking preventative measures and addressing any problems promptly, you can ensure a successful gourd harvest.
How do I dry gourds properly?
Drying gourds properly is crucial for preserving them and preventing them from rotting. Here’s a step-by-step guide:
1. **Harvest Mature Gourds:** Harvest your gourds when the stems are dry and brown and the gourd skin is hard and firm.
2. **Wash and Clean:** Wash the gourds with soapy water to remove any dirt or debris.
3. **Dry the Surface:** Thoroughly dry the surface of the gourds with a clean cloth.
4. **Provide Air Circulation:** Place the gourds in a well-ventilated area, such as a shed or garage. You can place them on a wire rack or hang them from the ceiling.
5. **Allow Time for Drying:** Allow the gourds to dry for several months, or until they are completely dry and lightweight. You may notice mold growing on the surface of the gourds during the drying process. This is normal and can be wiped off with a bleach solution.
6. **Check for Dryness:** To check for dryness, shake the gourds. If you hear the seeds rattling inside, they are dry.
Proper drying is essential for preventing gourds from rotting and ensuring that they will last for years to come.
Can I eat gourds?
While some gourds are edible, many ornamental gourds are not. It’s crucial to identify the specific type of gourd you have before consuming it. Some gourds contain cucurbitacins, which are bitter-tasting compounds that can cause stomach upset or even be toxic.
If you are unsure whether a gourd is edible, it’s best to err on the side of caution and avoid eating it. Edible gourds, such as spaghetti squash and butternut squash, are typically grown for their flesh and are safe to consume when cooked properly. Always research the specific gourd variety before consuming it to ensure its safety.
What are some creative ways to use dried gourds?
Dried gourds offer a wide range of creative possibilities. Here are a few ideas:
* **Birdhouses:** Birdhouse gourds are perfect for creating natural and charming birdhouses.
* **Bowls and Containers:** Larger gourds can be transformed into unique bowls and containers.
* **Musical Instruments:** Gourds can be used to create various musical instruments, such as maracas and drums.
* **Decorative Art:** Gourds can be painted, carved, or decorated to create stunning works of art.
* **Lamps and Lighting Fixtures:** Gourds can be used to create unique and eye-catching lamps and lighting fixtures.
* **Holiday Decorations:** Gourds can be painted and decorated to create festive holiday decorations.
Let your imagination run wild and explore the endless possibilities of using dried gourds in your creative projects.

Leave a Comment