

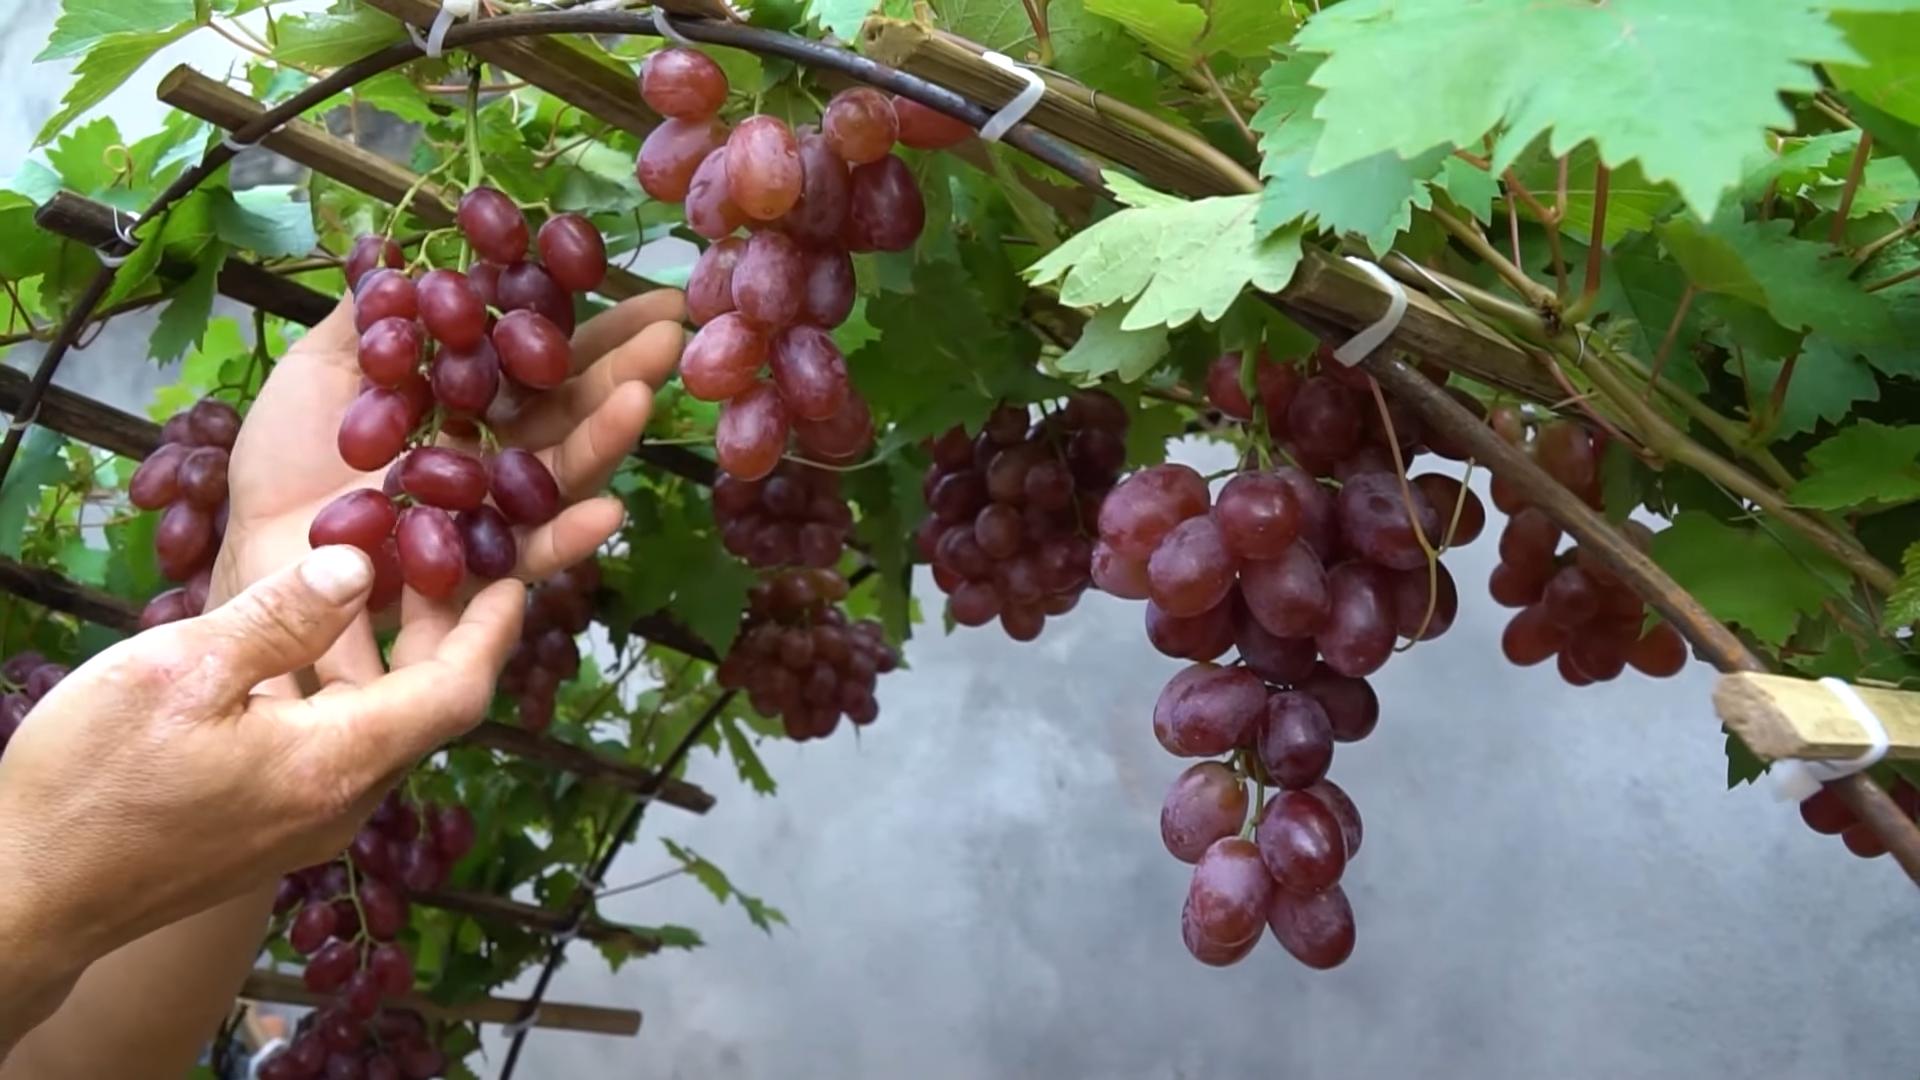
Grow grapes backyard? Absolutely! Imagine stepping into your own backyard oasis, plucking juicy, sun-ripened grapes straight from the vine. Sounds like a dream, right? Well, it doesn’t have to be! For centuries, cultivating grapes has been a symbol of abundance and celebration, dating back to ancient civilizations who revered the fruit for its deliciousness and the wine it produced. From the vineyards of the Mediterranean to the rolling hills of California, grapes have held a special place in our hearts (and stomachs!).
But you don’t need a sprawling vineyard to enjoy the fruits of your labor. I’m here to tell you that growing grapes in your own backyard is totally achievable, even if you’re a beginner gardener. This DIY guide is packed with simple tricks and hacks that will help you successfully grow grapes backyard, regardless of your space or experience.
Why do you need these DIY tricks? Because let’s face it, gardening can sometimes feel overwhelming. But with the right knowledge and a little bit of elbow grease, you can transform your backyard into a thriving grape haven. Plus, imagine the satisfaction of serving homemade grape juice, jams, or even attempting your own wine with grapes you grew yourself! So, grab your gardening gloves, and let’s get started on this exciting journey together!

Growing Grapes in Your Backyard: A Comprehensive DIY Guide
Hey there, fellow gardening enthusiasts! Ever dreamt of strolling through your own backyard vineyard, plucking juicy grapes straight from the vine? Well, dream no more! Growing grapes at home is totally achievable, even if you’re a beginner. I’m going to walk you through everything you need to know, from choosing the right variety to harvesting your delicious bounty. Let’s get started!
Choosing the Right Grape Variety
This is arguably the most important step. You can’t just plant any grape and expect it to thrive. Consider your climate, soil, and what you want to use the grapes for (eating, juice, wine).
* Climate: Grapes need a certain amount of “chill hours” (hours below 45°F) to properly set fruit. Research which varieties are suitable for your region’s climate. Some grapes are more cold-hardy than others.
* Soil: Grapes prefer well-drained soil. If your soil is heavy clay, you’ll need to amend it. We’ll talk about that later.
* Purpose: Table grapes (for eating) are different from wine grapes. Some varieties are better for juice or jelly. Think about what you want to do with your harvest.
Here are a few popular and relatively easy-to-grow grape varieties:
* ‘Concord’: A classic American grape, great for juice and jelly. Very cold-hardy.
* ‘Niagara’: Another American variety, known for its sweet, white grapes.
* ‘Thompson Seedless’: A popular table grape, but may require a warmer climate.
* ‘Reliance’: A seedless red table grape, very cold-hardy.
* ‘Mars’: A seedless blue table grape, disease-resistant.
I highly recommend checking with your local nursery or agricultural extension office for recommendations specific to your area. They’ll know which varieties perform best in your region.
Preparing the Planting Site
Grapes need plenty of sunshine and well-drained soil. Choose a location that gets at least 6-8 hours of direct sunlight per day.
* Sunlight: More sun equals more grapes!
* Drainage: Soggy soil is a grape’s worst enemy.
* Space: Grapevines need room to grow. Allow at least 8-10 feet between vines.
Now, let’s get our hands dirty!
1. Clear the Area: Remove all grass, weeds, rocks, and debris from the planting area. A clean slate is essential.
2. Soil Testing: It’s a good idea to get your soil tested to determine its pH and nutrient levels. You can usually get a soil test kit from your local nursery or agricultural extension office. Grapes prefer a slightly acidic soil pH (around 6.0-7.0).
3. Amend the Soil: Based on your soil test results, amend the soil as needed. If your soil is heavy clay, add plenty of organic matter, such as compost, well-rotted manure, or peat moss, to improve drainage. If your soil is sandy, add organic matter to help retain moisture. I personally like to add a generous amount of compost to my planting holes.
4. Dig the Planting Hole: Dig a hole that is twice as wide and just as deep as the root ball of your grape vine.
5. Prepare the Root Ball: Gently remove the grape vine from its container. Loosen the roots, especially if they are circling the pot. This will encourage them to spread out into the surrounding soil.
Planting Your Grapevine
Okay, we’ve prepped the site, now it’s time to get that grapevine in the ground!
1. Position the Vine: Place the grapevine in the planting hole, making sure the top of the root ball is level with the surrounding soil.
2. Backfill the Hole: Fill the hole with the amended soil, gently tamping it down as you go. Be careful not to compact the soil too much.
3. Water Thoroughly: Water the newly planted grapevine deeply to settle the soil and provide moisture to the roots.
4. Mulch: Apply a layer of mulch around the base of the vine to help retain moisture, suppress weeds, and regulate soil temperature. I like to use wood chips or straw. Keep the mulch a few inches away from the trunk of the vine to prevent rot.
5. Staking (Optional): If your grapevine is small, you may want to stake it to provide support. This will help it grow straight and strong.
Training and Pruning Your Grapevine
Grapevines need to be trained and pruned to produce a good crop of grapes. This can seem daunting at first, but it’s really not that complicated once you get the hang of it.
* Training: Training refers to guiding the growth of the vine along a trellis or other support system.
* Pruning: Pruning involves removing unwanted growth to improve air circulation, sunlight penetration, and fruit production.
There are several different training systems you can use, but I’m going to focus on the two most common:
* Single-Trunk Kniffin System: This is a simple and popular system, especially for beginners. It involves training the vine to a single trunk and then allowing it to branch out along a wire trellis.
* Cane Pruning: This method involves selecting a few strong canes (one-year-old shoots) each year and pruning away the rest.
Training the Vine (First Year)
1. Install a Trellis: Before your vine starts growing, install a trellis system. This can be as simple as two posts with wires strung between them. The height of the trellis will depend on the variety of grape you are growing.
2. Select a Shoot: Choose the strongest, most upright shoot on the vine. This will become the main trunk.
3. Tie the Shoot: Gently tie the chosen shoot to a stake or the trellis wire.
4. Remove Other Shoots: Remove any other shoots that are growing from the base of the vine. You want to focus all the energy on the main trunk.
Pruning the Vine (Second Year and Beyond)
Pruning is best done in late winter or early spring, before the buds start to swell.
1. Establish the Trunk: Continue training the main trunk up the trellis. Once it reaches the top wire, cut it back to encourage branching.
2. Select Canes: Choose 2-4 strong canes on each side of the trunk. These will be your fruiting canes.
3. Prune Canes: Prune the selected canes back to about 8-10 buds each.
4. Remove Old Wood: Remove any old, dead, or diseased wood. Also, remove any suckers (shoots growing from the base of the vine) and water sprouts (vigorous, upright shoots).
Important Note: Pruning is crucial for grape production. Don’t be afraid to prune heavily! Grapes produce fruit on one-year-old wood, so you need to encourage new growth each year.
Watering and Fertilizing
Grapes need consistent watering, especially during dry periods. Water deeply and regularly, especially during the first year.
* Watering: Water deeply when the top inch of soil feels dry. Avoid overwatering, which can lead to root rot.
* Fertilizing: Fertilize your grapevines in the spring with a balanced fertilizer. Follow the instructions on the fertilizer label. Avoid over-fertilizing, which can lead to excessive vegetative growth and reduced fruit production. I like to use a slow-release fertilizer.
Pest and Disease Control
Grapes can be susceptible to various pests and diseases. Here are a few common problems and how to deal with them:
* Japanese Beetles: These pesky beetles can skeletonize the leaves. Hand-picking them off the vines is often the best solution.
* Grape Berry Moth: This moth lays its eggs on the grape berries, and the larvae burrow into the fruit. Use insecticidal soap or Bacillus thuringiensis (Bt) to control them.
* Powdery Mildew: This fungal disease causes a white, powdery coating on the leaves and fruit. Improve air circulation by pruning and use a fungicide if necessary.
* Black Rot: This fungal disease causes dark spots on the leaves and fruit. Remove infected leaves and fruit and use a fungicide.
Prevention is Key: The best way to control pests and diseases is to prevent them in the first place. Choose disease-resistant varieties, provide good air circulation, and keep your vines healthy.
Harvesting Your Grapes
The moment you’ve been waiting for! Harvesting your grapes is the reward for all your hard work.
* Timing: Grapes are usually ready to harvest in late summer or early fall. The exact timing will depend on the variety and your climate.
* Taste
Conclusion
So, there you have it! Growing grapes in your backyard might seem daunting at first, but with a little planning, patience, and this straightforward DIY trick, you’ll be well on your way to harvesting your own delicious, homegrown grapes. This method simplifies the process, making it accessible even if you’re a beginner gardener or have limited space. Forget expensive vineyard tours – your own backyard can become a source of fresh, juicy grapes for snacking, juicing, or even winemaking!
The beauty of this DIY approach is its adaptability. Feel free to experiment with different grape varieties suited to your climate. Consider adding a trellis system for enhanced support and visual appeal. You could even incorporate companion planting around your grapevines to deter pests and attract beneficial insects. Think about planting fragrant herbs like rosemary or lavender nearby – they not only look beautiful but can also help protect your precious grapes.
This DIY grape-growing trick is a must-try because it empowers you to take control of your food source, enjoy the satisfaction of nurturing a plant from start to finish, and ultimately, savor the unparalleled taste of homegrown grapes. Plus, it’s a fantastic way to connect with nature and add a touch of rustic charm to your outdoor space.
Don’t be intimidated by the prospect of growing your own grapes. This method is designed to be simple and effective. Remember to choose the right grape variety for your region, provide adequate sunlight and water, and be patient as your vines mature. The rewards are well worth the effort.
We’re confident that you’ll find this DIY trick incredibly helpful in your grape-growing journey. Now it’s your turn! Give it a try and let us know how it goes. Share your experiences, tips, and photos in the comments below. We’re eager to hear about your success stories and learn from your insights. Happy growing!
Frequently Asked Questions (FAQs)
Q: What are the best grape varieties to grow in my backyard?
A: The best grape varieties depend heavily on your climate and growing zone. For cooler climates, consider varieties like ‘Reliance’ (seedless red), ‘Marquette’ (red wine grape), or ‘Frontenac’ (red wine grape). In warmer climates, ‘Thompson Seedless’ (green table grape), ‘Flame Seedless’ (red table grape), or ‘Muscadine’ varieties (various colors and flavors) are excellent choices. Research grape varieties that are known to thrive in your specific region and consult with your local nursery for recommendations. They can provide valuable insights based on your local conditions. Also, consider the intended use of the grapes – are you planning to eat them fresh, make juice, or produce wine? This will influence your variety selection.
Q: How much sunlight do grapevines need?
A: Grapevines require at least 6-8 hours of direct sunlight per day to thrive. Sunlight is crucial for photosynthesis, which fuels the growth and development of the vines and the ripening of the grapes. Choose a location in your backyard that receives ample sunlight throughout the day. If you live in a particularly hot climate, some afternoon shade may be beneficial to prevent sunburn on the grapes.
Q: What type of soil is best for growing grapes?
A: Grapes prefer well-draining soil with a slightly acidic to neutral pH (between 6.0 and 7.0). Good drainage is essential to prevent root rot. If your soil is heavy clay, amend it with organic matter like compost or well-rotted manure to improve drainage and aeration. Sandy soil can be improved by adding organic matter to help retain moisture and nutrients. A soil test can help you determine the pH and nutrient levels of your soil and guide you on any necessary amendments.
Q: How often should I water my grapevines?
A: Water grapevines deeply but infrequently, especially during dry periods. Young vines need more frequent watering than established vines. Water deeply when the top inch of soil feels dry to the touch. Avoid overwatering, as this can lead to root rot. During the growing season, especially when the grapes are developing, consistent watering is important. However, reduce watering as the grapes begin to ripen to concentrate the sugars and improve flavor.
Q: Do I need to prune my grapevines?
A: Yes, pruning is essential for maintaining the health and productivity of your grapevines. Pruning helps to control the size and shape of the vines, improve air circulation, and promote fruit production. The best time to prune grapevines is during the dormant season, typically in late winter or early spring before new growth begins. There are different pruning methods depending on the grape variety and training system. Research the appropriate pruning technique for your specific grape variety.
Q: How do I protect my grapes from pests and diseases?
A: Monitor your grapevines regularly for signs of pests and diseases. Common grape pests include aphids, Japanese beetles, and grape phylloxera. Common diseases include powdery mildew, downy mildew, and black rot. Use organic pest control methods whenever possible, such as insecticidal soap or neem oil. Ensure good air circulation around the vines by pruning properly. Consider using netting to protect the grapes from birds. If you suspect a disease, identify it accurately and treat it with an appropriate fungicide.
Q: How long does it take for grapevines to produce fruit?
A: Grapevines typically take 2-3 years to start producing fruit. The first year is focused on establishing the root system and vine structure. In the second year, you may see some fruit production, but it will likely be limited. By the third year, you should have a more substantial harvest. Be patient and continue to care for your vines, and you will be rewarded with delicious grapes in the years to come.
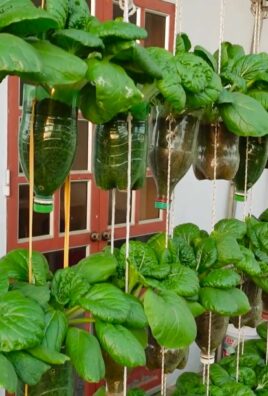
Q: Can I grow grapes in containers?
A: Yes, you can grow grapes in containers, but you’ll need to choose a dwarf or compact variety and use a large container (at least 15-20 gallons). Container-grown grapes will require more frequent watering and fertilization than those grown in the ground. Ensure the container has good drainage. Provide a trellis or support structure for the vines to climb. Container gardening is a great option if you have limited space or poor soil conditions.
Q: What kind of fertilizer should I use for my grapevines?
A: Use a balanced fertilizer with a ratio of 10-10-10 or 12-12-12 in the spring. Avoid over-fertilizing, as this can lead to excessive vegetative growth at the expense of fruit production. You can also amend the soil with compost or well-rotted manure to provide a slow-release source of nutrients. A soil test can help you determine the specific nutrient needs of your soil and guide you on the appropriate fertilizer application.
Leave a Comment