

Grow Kale at Home, you say? Absolutely! Imagine stepping outside your back door and snipping fresh, vibrant kale leaves for your morning smoothie or a delicious salad. It’s not just a dream; it’s a reality you can easily achieve with a few simple tricks and a little DIY spirit. For centuries, kale has been a nutritional powerhouse, gracing tables from peasant kitchens to royal feasts. Its resilience and versatility have made it a staple in many cultures, and now, you can bring that same hardiness and goodness right to your own backyard.
But why bother with growing your own kale? Well, for starters, think about the freshness! Store-bought kale can often be wilted and lacking in flavor. When you grow kale at home, you control the quality from seed to plate. Plus, it’s incredibly satisfying to nurture something from a tiny seed into a thriving plant. In this article, I’m going to share some easy-to-follow DIY tricks and hacks that will help you cultivate a bountiful kale harvest, even if you’re a complete beginner. Get ready to unleash your inner gardener and enjoy the delicious rewards of homegrown kale!
Grow Your Own Delicious Kale: A Beginner’s Guide
Hey there, fellow gardening enthusiasts! I’m so excited to share my experience with growing kale at home. It’s surprisingly easy, incredibly rewarding, and gives you access to fresh, nutritious greens right in your backyard (or even on your balcony!). Kale is a super versatile veggie – you can toss it in salads, blend it into smoothies, sauté it with garlic, or even bake it into crispy kale chips. Let’s dive into how you can get started!
Choosing Your Kale Variety
Before we get our hands dirty, let’s talk kale varieties. There are tons to choose from, each with its own unique flavor and texture. Here are a few popular options:
* Curly Kale (Scotch Kale): This is the classic kale you probably see most often. It has frilly, vibrant green leaves and a slightly bitter taste that mellows out when cooked.
* Lacinato Kale (Dinosaur Kale or Tuscan Kale): Also known as cavolo nero, this kale has long, dark green, almost black leaves with a slightly bumpy texture. It has a milder, sweeter flavor than curly kale and holds up well in cooking.
* Red Russian Kale: This variety has flat, fringed leaves with purple stems and veins. It’s sweeter and more tender than curly kale, making it great for salads.
* Redbor Kale: A beautiful ornamental kale with deeply ruffled, purple-red leaves. It’s slightly tougher than other varieties but adds a pop of color to your garden.
I personally love growing Lacinato kale because of its mild flavor and versatility, but feel free to experiment and find your favorite!
Starting from Seed vs. Buying Seedlings
You have two main options for starting your kale journey: growing from seed or buying seedlings from a nursery.
* Starting from Seed: This is the more economical option, and it gives you more control over the entire process. However, it requires a bit more time and effort.
* Buying Seedlings: This is the quicker and easier option, especially if you’re short on time or space. You’ll get a head start on the growing season, but you’ll have fewer variety choices.
I’ve done both, and honestly, both work great! If you’re a beginner, buying seedlings might be a good starting point. But if you’re feeling adventurous, give starting from seed a try!
Section 1: Starting Kale from Seed (Optional)
If you’re going the seed route, here’s how to do it:
1. Gather Your Supplies: You’ll need kale seeds, seed starting trays or small pots, seed starting mix (a light, sterile soil mix), a spray bottle, and a warm, sunny location or a grow light.
2. Sow the Seeds: Fill your seed starting trays or pots with seed starting mix. Moisten the soil gently with the spray bottle. Sow 2-3 kale seeds per cell or pot, about ¼ inch deep.
3. Provide Light and Warmth: Place the trays or pots in a warm, sunny location or under a grow light. Kale seeds need light to germinate. If using a grow light, keep it on for 12-16 hours per day.
4. Keep the Soil Moist: Water the seeds regularly with the spray bottle to keep the soil consistently moist but not soggy.
5. Thin the Seedlings: Once the seedlings have their first true leaves (the second set of leaves), thin them to one seedling per cell or pot. Choose the strongest, healthiest-looking seedling and snip off the others at the soil line.
6. Harden Off the Seedlings: Before transplanting the seedlings outdoors, you need to “harden them off.” This means gradually exposing them to outdoor conditions over a period of 7-10 days. Start by placing them outside in a sheltered location for an hour or two each day, gradually increasing the amount of time they spend outdoors. This will help them adjust to the sun, wind, and temperature changes.
Section 2: Planting Your Kale
Whether you’re using seedlings you started yourself or ones you bought from a nursery, the planting process is the same.
1. Choose the Right Location: Kale needs at least 6 hours of sunlight per day. Choose a location in your garden that gets plenty of sun.
2. Prepare the Soil: Kale prefers well-drained soil that is rich in organic matter. Amend your soil with compost or well-rotted manure before planting. This will improve drainage, fertility, and water retention.
3. Space the Plants: Space your kale plants 12-18 inches apart. This will give them enough room to grow and prevent overcrowding.
4. Dig the Holes: Dig holes that are slightly larger than the root balls of your seedlings.
5. Plant the Seedlings: Gently remove the seedlings from their containers and loosen the roots slightly. Place the seedlings in the holes and backfill with soil. Make sure the top of the root ball is level with the surrounding soil.
6. Water Thoroughly: Water the newly planted seedlings thoroughly to help them settle in.
7. Mulch Around the Plants: Apply a layer of mulch around the plants to help retain moisture, suppress weeds, and regulate soil temperature. Straw, wood chips, or shredded leaves are all good options.
Section 3: Caring for Your Kale
Now that your kale is planted, it’s time to take care of it!
1. Water Regularly: Kale needs consistent moisture, especially during hot, dry weather. Water deeply whenever the top inch of soil feels dry.
2. Fertilize: Kale is a heavy feeder, so it benefits from regular fertilization. Use a balanced organic fertilizer every 4-6 weeks. You can also side-dress with compost or well-rotted manure.
3. Weed Regularly: Keep the area around your kale plants free of weeds. Weeds compete with kale for nutrients and water.
4. Pest Control: Kale can be susceptible to pests like aphids, cabbage worms, and flea beetles. Inspect your plants regularly for signs of pests.
* Aphids: These tiny insects suck the sap from plants. You can control them by spraying them with a strong stream of water or by using insecticidal soap.
* Cabbage Worms: These green caterpillars can devour kale leaves. Handpick them off the plants or use Bacillus thuringiensis (Bt), a natural bacteria that kills caterpillars.
* Flea Beetles: These tiny beetles jump when disturbed and can create small holes in kale leaves. Cover your plants with row covers to prevent flea beetles from reaching them. You can also use diatomaceous earth, a natural powder that kills insects.
5. Protect from Extreme Weather: Kale is relatively cold-hardy, but it can be damaged by extreme cold or heat. In cold climates, you can protect your kale plants by covering them with row covers or blankets. In hot climates, provide shade during the hottest part of the day.
Section 4: Harvesting Your Kale
The best part of growing kale is harvesting it!
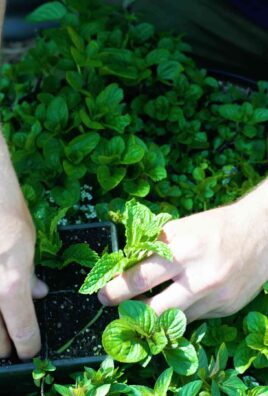
1. When to Harvest: You can start harvesting kale leaves when they are about 6-8 inches long.
2. How to Harvest: Harvest the outer leaves first, leaving the inner leaves to continue growing. This will allow you to harvest kale continuously throughout the growing season. You can use scissors or a knife to cut the leaves off the plant.
3. Storage: Store kale in the refrigerator in a plastic bag or container. It will keep for about a week.
Troubleshooting Common Kale Problems
Even with the best care, you might encounter some problems while growing kale. Here are a few common issues and how to address them:
* Yellowing Leaves: This could be a sign of nutrient deficiency, overwatering, or underwatering. Check the soil moisture and fertilize if necessary.
* Holes in Leaves: This is usually caused by pests like cabbage worms or flea beetles. Inspect your plants for pests and take appropriate action.
* Stunted Growth: This could be caused by poor soil, lack of sunlight, or pests. Amend the soil, ensure adequate sunlight, and control pests.
* Bolting (Flowering): Kale can bolt (go to seed) in hot weather. This will make the leaves bitter. To prevent bolting, provide shade during the hottest part of the day and harvest regularly.
Enjoying Your Homegrown Kale
Now that you’ve harvested your delicious kale, it’s time to enjoy it! Here are a few ideas:
* Kale Salad: Massage kale leaves with olive oil, lemon juice, and salt. Add your favorite toppings, such as nuts, seeds, dried fruit, and cheese.
* Kale Smoothie: Blend kale with fruit, yogurt, and juice for a healthy and refreshing smoothie.
* Sautéed Kale: Sauté kale with garlic, olive oil, and red pepper flakes for a simple and flavorful side dish.
Conclusion
So, there you have it! Growing kale at home isn’t just a trendy gardening fad; it’s a genuinely rewarding experience that puts fresh, nutritious greens right at your fingertips. We’ve walked you through the simple steps, from selecting the right seeds to harvesting your bountiful crop. But why is this DIY trick a must-try?
Firstly, consider the unparalleled freshness. Store-bought kale, even organic varieties, can’t compete with the vibrant flavor and crisp texture of kale harvested moments before you eat it. The difference is truly remarkable. Secondly, you have complete control over the growing process. No need to worry about harmful pesticides or herbicides – you’re in charge of creating a healthy, sustainable environment for your kale to thrive. This is especially important if you are health-conscious and want to ensure the quality of your food.
Beyond the health benefits and superior taste, growing your own kale is incredibly cost-effective. A single packet of seeds can yield a continuous supply of kale for months, significantly reducing your grocery bill. Plus, it’s a fantastic way to connect with nature and learn about the food you eat. It’s a therapeutic and educational experience for the whole family.
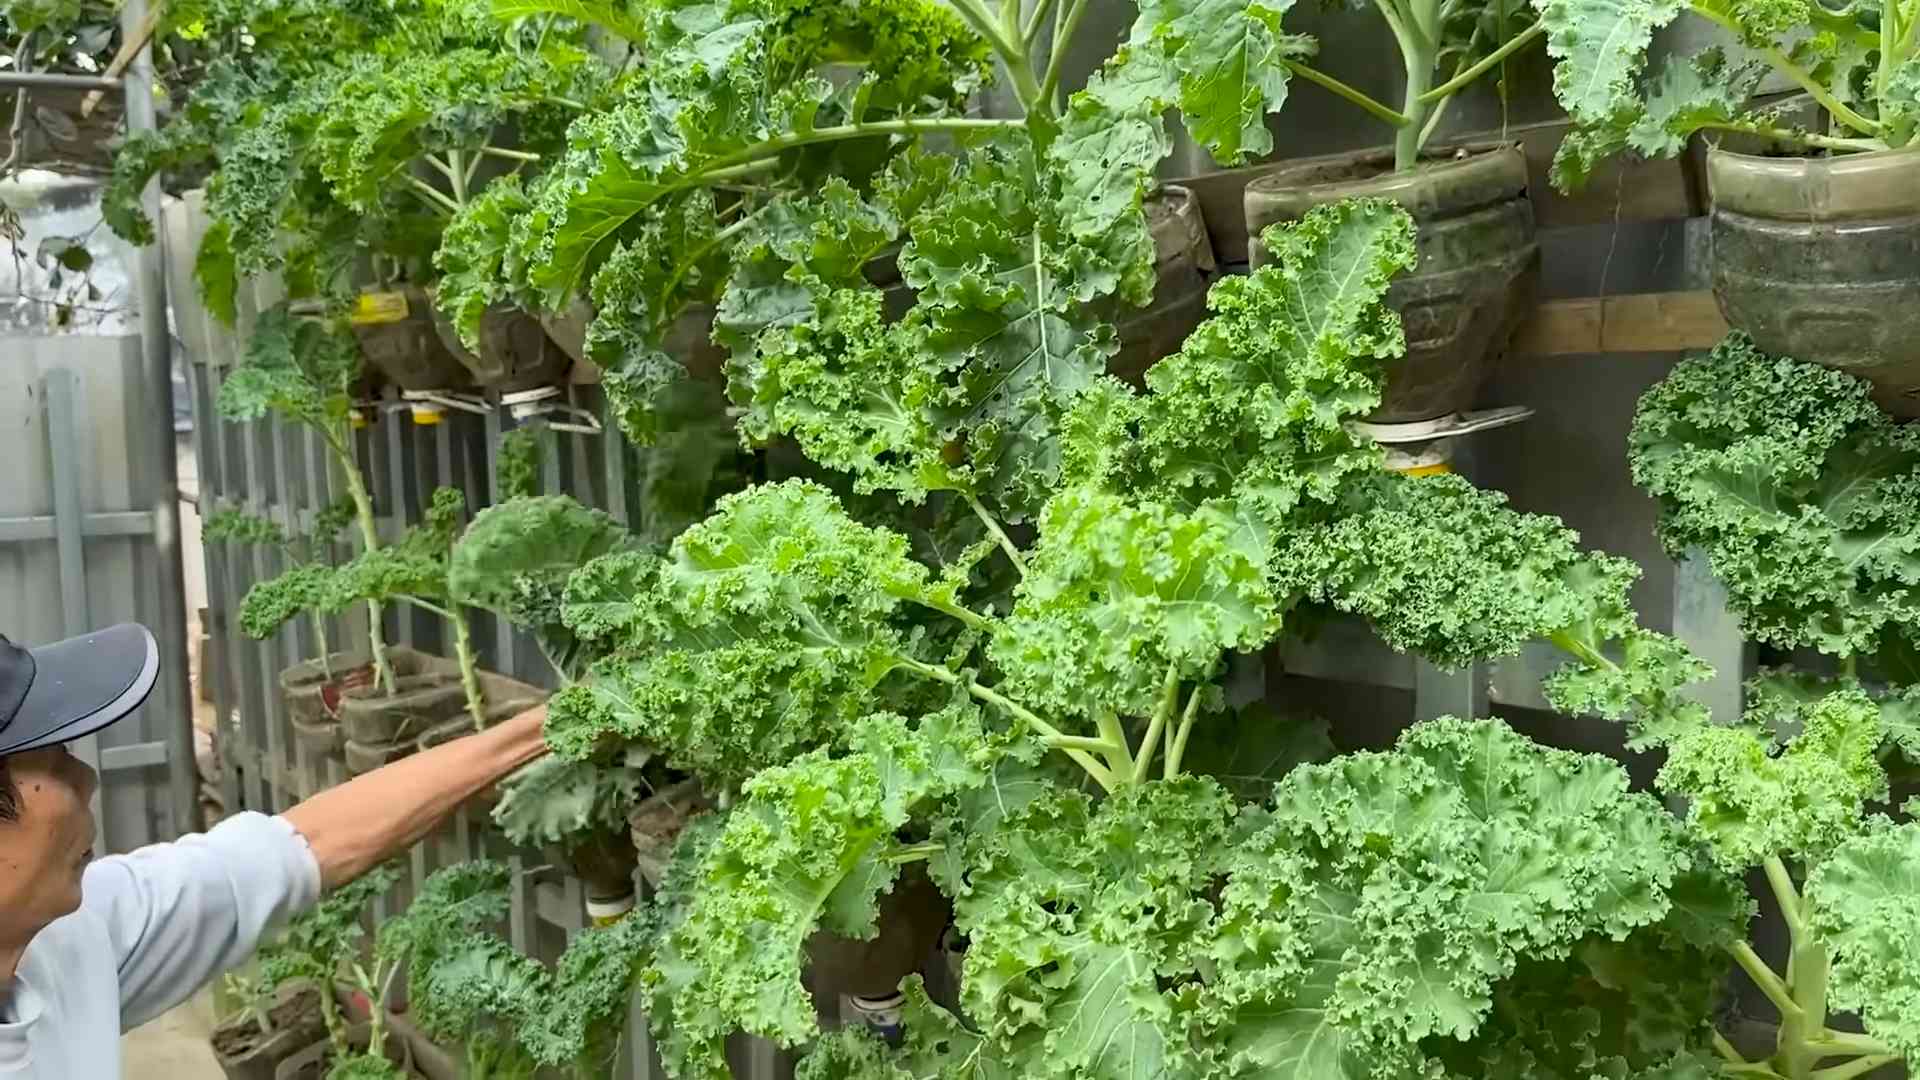
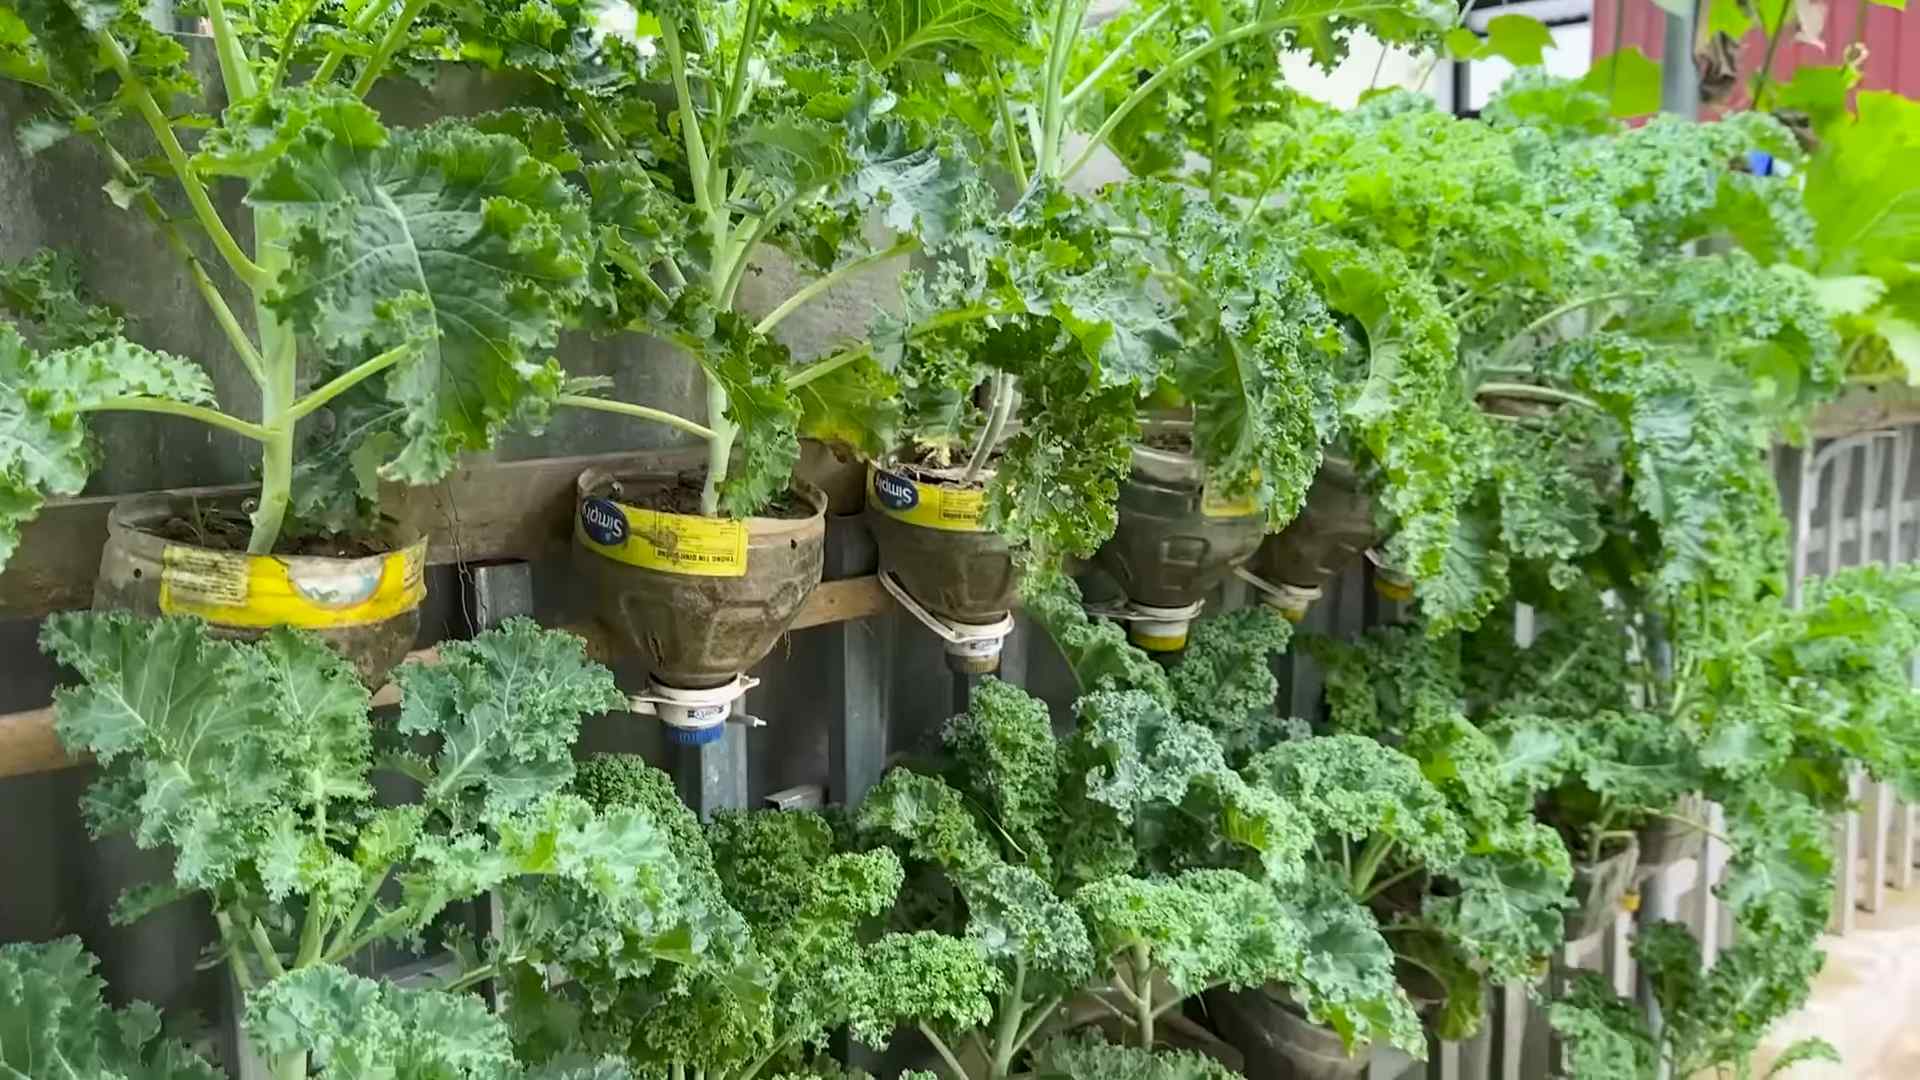
But the beauty of growing kale at home lies in its versatility. Feel free to experiment with different varieties. Try ‘Lacinato’ (dinosaur kale) for its unique texture and nutty flavor, or ‘Red Russian’ for its beautiful purple stems and milder taste. You can also adjust your growing methods to suit your space and preferences. If you’re short on space, consider growing kale in containers on your balcony or patio. Vertical gardening is another excellent option for maximizing space and adding a touch of greenery to your home.
Don’t be afraid to get creative with your kale harvest! Use it in smoothies, salads, soups, stir-fries, or even bake it into crispy kale chips. The possibilities are endless. And remember, even the stems are edible! Simply chop them finely and add them to your favorite recipes.
We strongly encourage you to give this DIY trick a try. It’s easier than you might think, and the rewards are well worth the effort. Start small, be patient, and don’t be afraid to experiment. You’ll be amazed at how quickly you can transform your garden (or even your windowsill) into a thriving kale patch.
Once you’ve experienced the joy of growing your own kale, we’d love to hear about it! Share your tips, tricks, and successes with us in the comments below. Let’s build a community of home gardeners and inspire others to embrace the goodness of homegrown kale. What are you waiting for? Get your hands dirty and start growing your own delicious, nutritious kale today! This is the best way to ensure you have access to fresh, healthy greens whenever you need them.
Frequently Asked Questions (FAQ)
What is the best time of year to plant kale?
Kale is a cool-season crop, meaning it thrives in cooler temperatures. The best time to plant kale depends on your climate. In general, you can plant kale in early spring (as soon as the ground can be worked) or in late summer/early fall for a fall or winter harvest. For spring planting, start seeds indoors 6-8 weeks before the last expected frost. For fall planting, sow seeds directly into the garden in late summer. If you live in a region with mild winters, you can even grow kale throughout the winter.
How much sunlight does kale need?
Kale needs at least 6 hours of sunlight per day to thrive. Choose a sunny location in your garden that receives plenty of direct sunlight. If you’re growing kale indoors, place it near a sunny window or use grow lights to supplement natural light. Insufficient sunlight can result in leggy, weak plants with poor leaf production.
What kind of soil is best for growing kale?
Kale prefers well-drained, fertile soil with a pH between 6.0 and 7.5. Amend your soil with compost or other organic matter to improve drainage and fertility. Kale also benefits from soil that is rich in nitrogen, which promotes leafy growth. You can add a nitrogen-rich fertilizer or amendment to your soil before planting.
How often should I water kale?
Kale needs consistent moisture to thrive. Water deeply and regularly, especially during dry periods. Aim to keep the soil consistently moist but not waterlogged. Overwatering can lead to root rot, while underwatering can cause the leaves to wilt and become tough. A good rule of thumb is to water when the top inch of soil feels dry to the touch. Mulching around your kale plants can help retain moisture and suppress weeds.
What are some common pests and diseases that affect kale?
Kale can be susceptible to several pests and diseases, including aphids, cabbage worms, flea beetles, and fungal diseases. Regularly inspect your plants for signs of infestation or disease.
* **Aphids:** These small, sap-sucking insects can cluster on the undersides of leaves. Control aphids with insecticidal soap or by introducing beneficial insects like ladybugs.
* **Cabbage Worms:** These green caterpillars can devour kale leaves. Handpick them off the plants or use Bacillus thuringiensis (Bt), a natural insecticide.
* **Flea Beetles:** These tiny beetles can create small holes in kale leaves. Cover your plants with row covers to prevent flea beetle damage.
* **Fungal Diseases:** Fungal diseases like powdery mildew can affect kale in humid conditions. Improve air circulation around your plants and avoid overhead watering to prevent fungal diseases.
How do I harvest kale?
You can begin harvesting kale leaves when they are about 4-6 inches long. Harvest the outer leaves first, leaving the inner leaves to continue growing. This cut-and-come-again method allows you to harvest kale continuously throughout the growing season. Simply snap or cut the leaves off near the base of the plant. Avoid harvesting more than one-third of the plant at a time to ensure continued growth.
Can I grow kale in containers?
Yes, kale grows well in containers. Choose a container that is at least 12 inches deep and wide to provide enough room for the roots to grow. Use a well-draining potting mix and water regularly. Container-grown kale may need more frequent watering and fertilization than kale grown in the ground. Place your container in a sunny location that receives at least 6 hours of sunlight per day.
How do I store kale after harvesting?
To store kale after harvesting, wash the leaves thoroughly and dry them completely. Wrap the dry leaves in a paper towel and store them in a plastic bag in the refrigerator. Kale can be stored in the refrigerator for up to a week. You can also freeze kale for longer storage. To freeze kale, blanch the leaves in boiling water for 2-3 minutes, then plunge them into ice water to stop the cooking process. Drain the kale thoroughly and freeze it in freezer bags or containers.
Can I eat kale stems?
Yes, kale stems are edible, although they can be a bit tough. To make them more palatable, chop them finely and cook them longer than the leaves. You can add kale stems to soups, stews, stir-fries, or smoothies.
What are some creative ways to use kale?
Kale is a versatile vegetable that can be used in a variety of dishes. Here are a few creative ideas:
* **Kale Chips:** Toss kale leaves with olive oil and salt, then bake them in the oven until crispy.
* **Kale Smoothies:** Add kale to your favorite smoothie recipe for a boost of nutrients.
* **Kale Salad:** Massage kale leaves with olive oil and lemon juice to tenderize them, then add your favorite toppings.
* **Kale Soup:** Add kale to soups and stews for added flavor and nutrition.
* **Kale Stir-Fry:** Stir-fry kale with other vegetables and your favorite protein.
Is growing kale at home organic?
Growing kale at home allows you to control the entire process, making it easy to grow organically. By avoiding synthetic pesticides, herbicides, and fertilizers, you can ensure that your kale is free from harmful chemicals. Use organic soil amendments, such as compost and manure, to nourish your plants. Control pests and diseases with natural methods, such as handpicking, insecticidal soap, and beneficial insects.
Leave a Comment