

Grow Potatoes Backyard – sounds like a dream, right? Imagine stepping outside your back door and harvesting your own fresh, earthy potatoes, ready to be roasted, mashed, or fried to crispy perfection. It’s not just a dream; it’s an achievable reality with a few simple tricks and a little DIY spirit! For centuries, potatoes have been a staple food around the world, originating in the Andes Mountains and spreading globally, nourishing communities and cultures. Now, you can bring that rich history and deliciousness right to your own backyard.
But why bother growing your own potatoes? Well, store-bought potatoes can sometimes lack that fresh, vibrant flavor. Plus, you have no control over the pesticides or growing conditions. With these DIY hacks, you’ll not only enjoy the unparalleled taste of homegrown potatoes, but you’ll also know exactly what went into growing them. I’m going to show you how to grow potatoes backyard with minimal effort and maximum yield. Whether you have a sprawling garden or just a small patio, I’ve got tips and tricks to help you cultivate your own potato patch. Get ready to dig in and discover the joy of homegrown goodness!
Growing Potatoes in Your Backyard: A Beginner’s Guide
Okay, so you want to grow potatoes in your backyard? Awesome! It’s surprisingly easy and incredibly rewarding. There’s nothing quite like digging up your own homegrown spuds. I’m going to walk you through everything you need to know, from choosing the right potatoes to harvesting your bounty. Let’s get started!
Choosing Your Seed Potatoes
First things first, you can’t just plant any old potato from the grocery store. Those are often treated to prevent sprouting. You need what are called “seed potatoes.” These are potatoes specifically grown for planting.
* Where to Get Them: You can find seed potatoes at your local garden center, nurseries, or online retailers. Look for certified disease-free seed potatoes. This is super important to avoid introducing diseases to your garden.
* Variety is the Spice of Life (and Potatoes!): There are tons of potato varieties to choose from, each with its own flavor, texture, and growing characteristics. Some popular choices include:
* Russet: Great for baking and frying.
* Yukon Gold: Buttery and versatile.
* Red Potatoes: Waxy and good for boiling.
* Fingerling Potatoes: Unique shape and flavor.
* Sizing Up Your Seed Potatoes: Smaller seed potatoes (about the size of a chicken egg) can be planted whole. Larger ones should be cut into pieces, making sure each piece has at least one or two “eyes” (those little buds that will sprout).
Preparing Your Seed Potatoes
This step is crucial for getting a good head start. It’s called “chitting” or “sprouting.”
* Why Chit? Chitting encourages the seed potatoes to sprout before planting, giving them a jumpstart and shortening the time to harvest.
* How to Chit:
1. A few weeks before planting (about 4-6 weeks), place your seed potatoes in a cool, bright location. An egg carton or a tray works well.
2. Make sure the “eyes” are facing upwards.
3. Avoid direct sunlight, as this can dry them out.
4. You’ll start to see small, green sprouts emerging from the eyes. These are what you want!
Preparing Your Garden Bed
Potatoes need well-drained soil that’s rich in organic matter.
* Sunlight is Key: Choose a spot in your backyard that gets at least 6-8 hours of sunlight per day.
* Soil Testing (Optional but Recommended): A soil test can tell you the pH level and nutrient content of your soil. Potatoes prefer a slightly acidic soil (pH 6.0-6.5). You can buy a soil testing kit at most garden centers.
* Amending the Soil:
1. Dig the soil to a depth of at least 12 inches.
2. Mix in plenty of compost, well-rotted manure, or other organic matter. This will improve drainage, aeration, and nutrient content.
3. Remove any rocks, weeds, or debris.
* Creating Rows or Hills: Potatoes are typically planted in rows or hills.
* Rows: Dig trenches about 6-8 inches deep and 2-3 feet apart.
* Hills: Create mounds of soil about 8-10 inches high and 2-3 feet apart.
Planting Your Potatoes
Now for the fun part!
1. When to Plant: Plant your potatoes in the spring, after the last frost. The soil temperature should be at least 45°F (7°C).
2. Spacing: Place your seed potatoes (or cut pieces) about 12 inches apart in the rows or hills.
3. Planting Depth: Cover the seed potatoes with about 4 inches of soil.
4. Watering: Water thoroughly after planting.
Hilling Your Potatoes
This is a crucial step for maximizing your potato harvest.
* What is Hilling? Hilling involves gradually adding soil around the potato plants as they grow. This encourages the plants to produce more potatoes along the stems.
* When to Hill: Start hilling when the potato plants are about 6-8 inches tall.
* How to Hill:
1. Use a hoe or shovel to pull soil from between the rows or hills and mound it around the base of the plants, covering the stems up to the lower leaves.
2. Repeat this process every 2-3 weeks as the plants grow, until the hills are about 12-18 inches high.
Caring for Your Potato Plants
* Watering: Potatoes need consistent moisture, especially during tuber formation. Water deeply whenever the soil feels dry to the touch. Avoid overwatering, as this can lead to rot.
* Fertilizing: Potatoes are heavy feeders. You can fertilize them with a balanced fertilizer (e.g., 10-10-10) a few weeks after planting and again after hilling. Follow the instructions on the fertilizer package.
* Weeding: Keep the garden bed free of weeds, as they can compete with the potato plants for nutrients and water.
* Pest and Disease Control: Keep an eye out for common potato pests and diseases, such as potato beetles, aphids, and blight. There are many organic and conventional methods for controlling these problems. Consult your local garden center for recommendations.
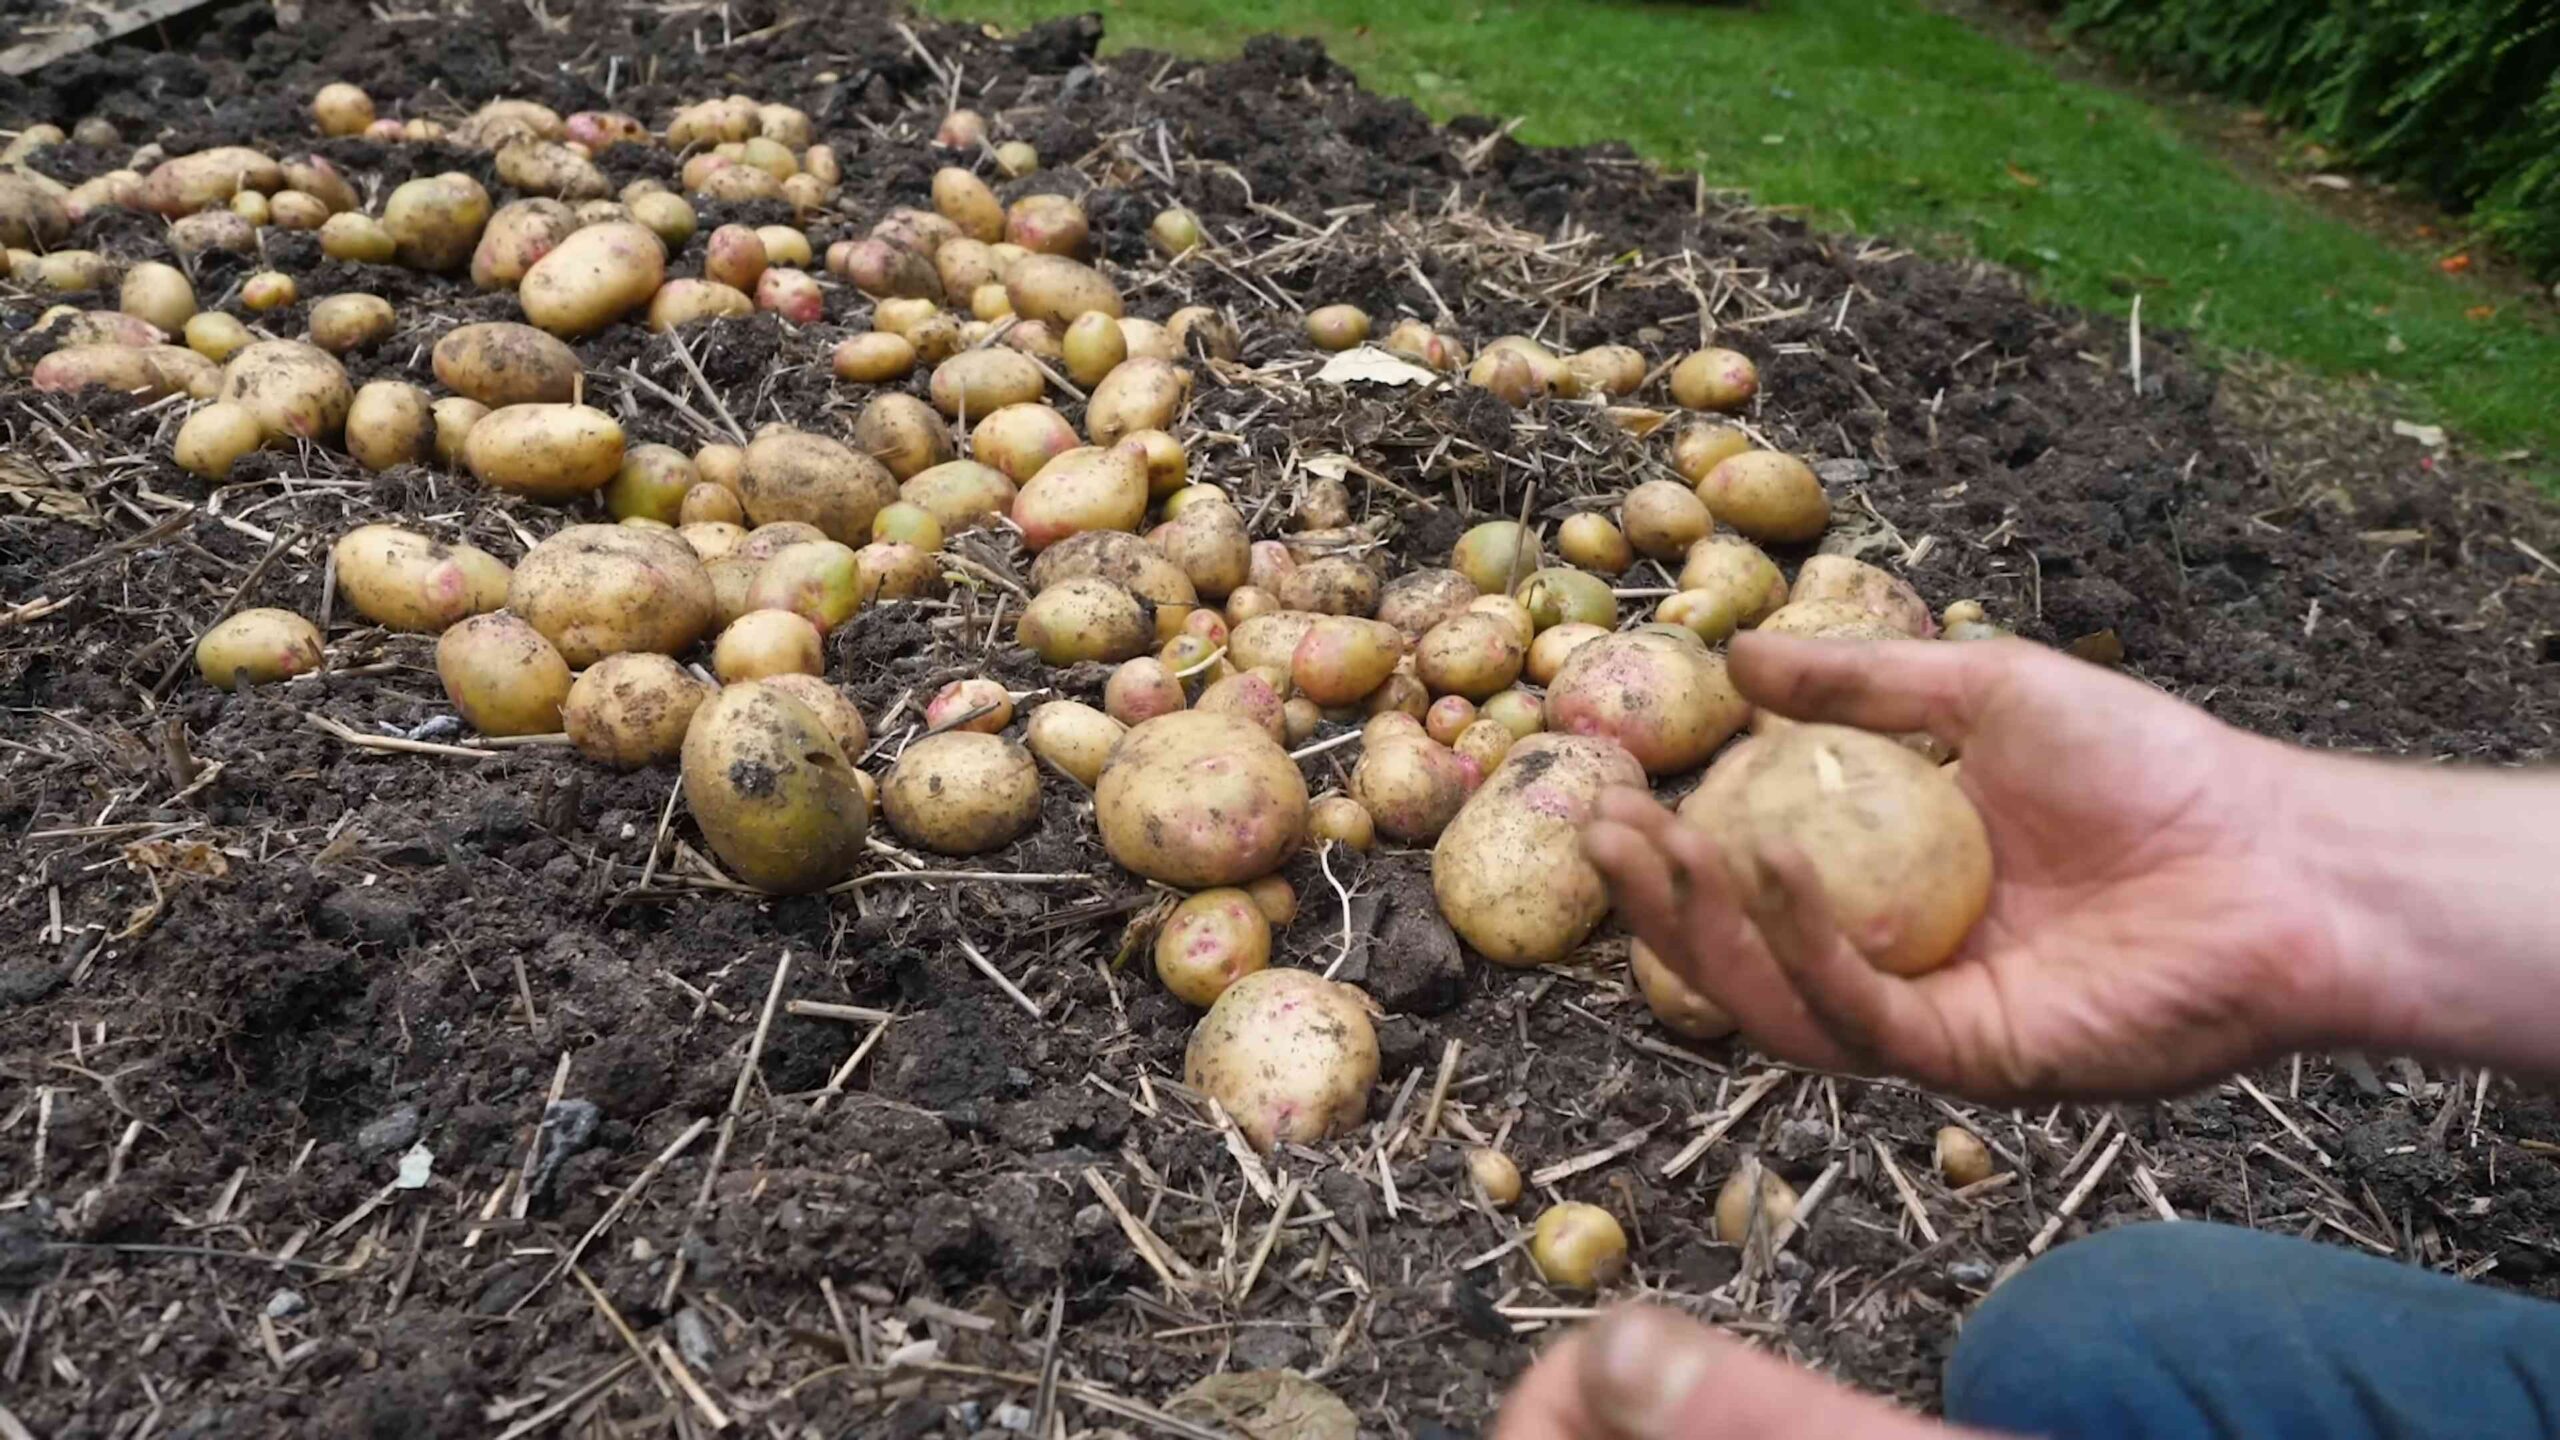
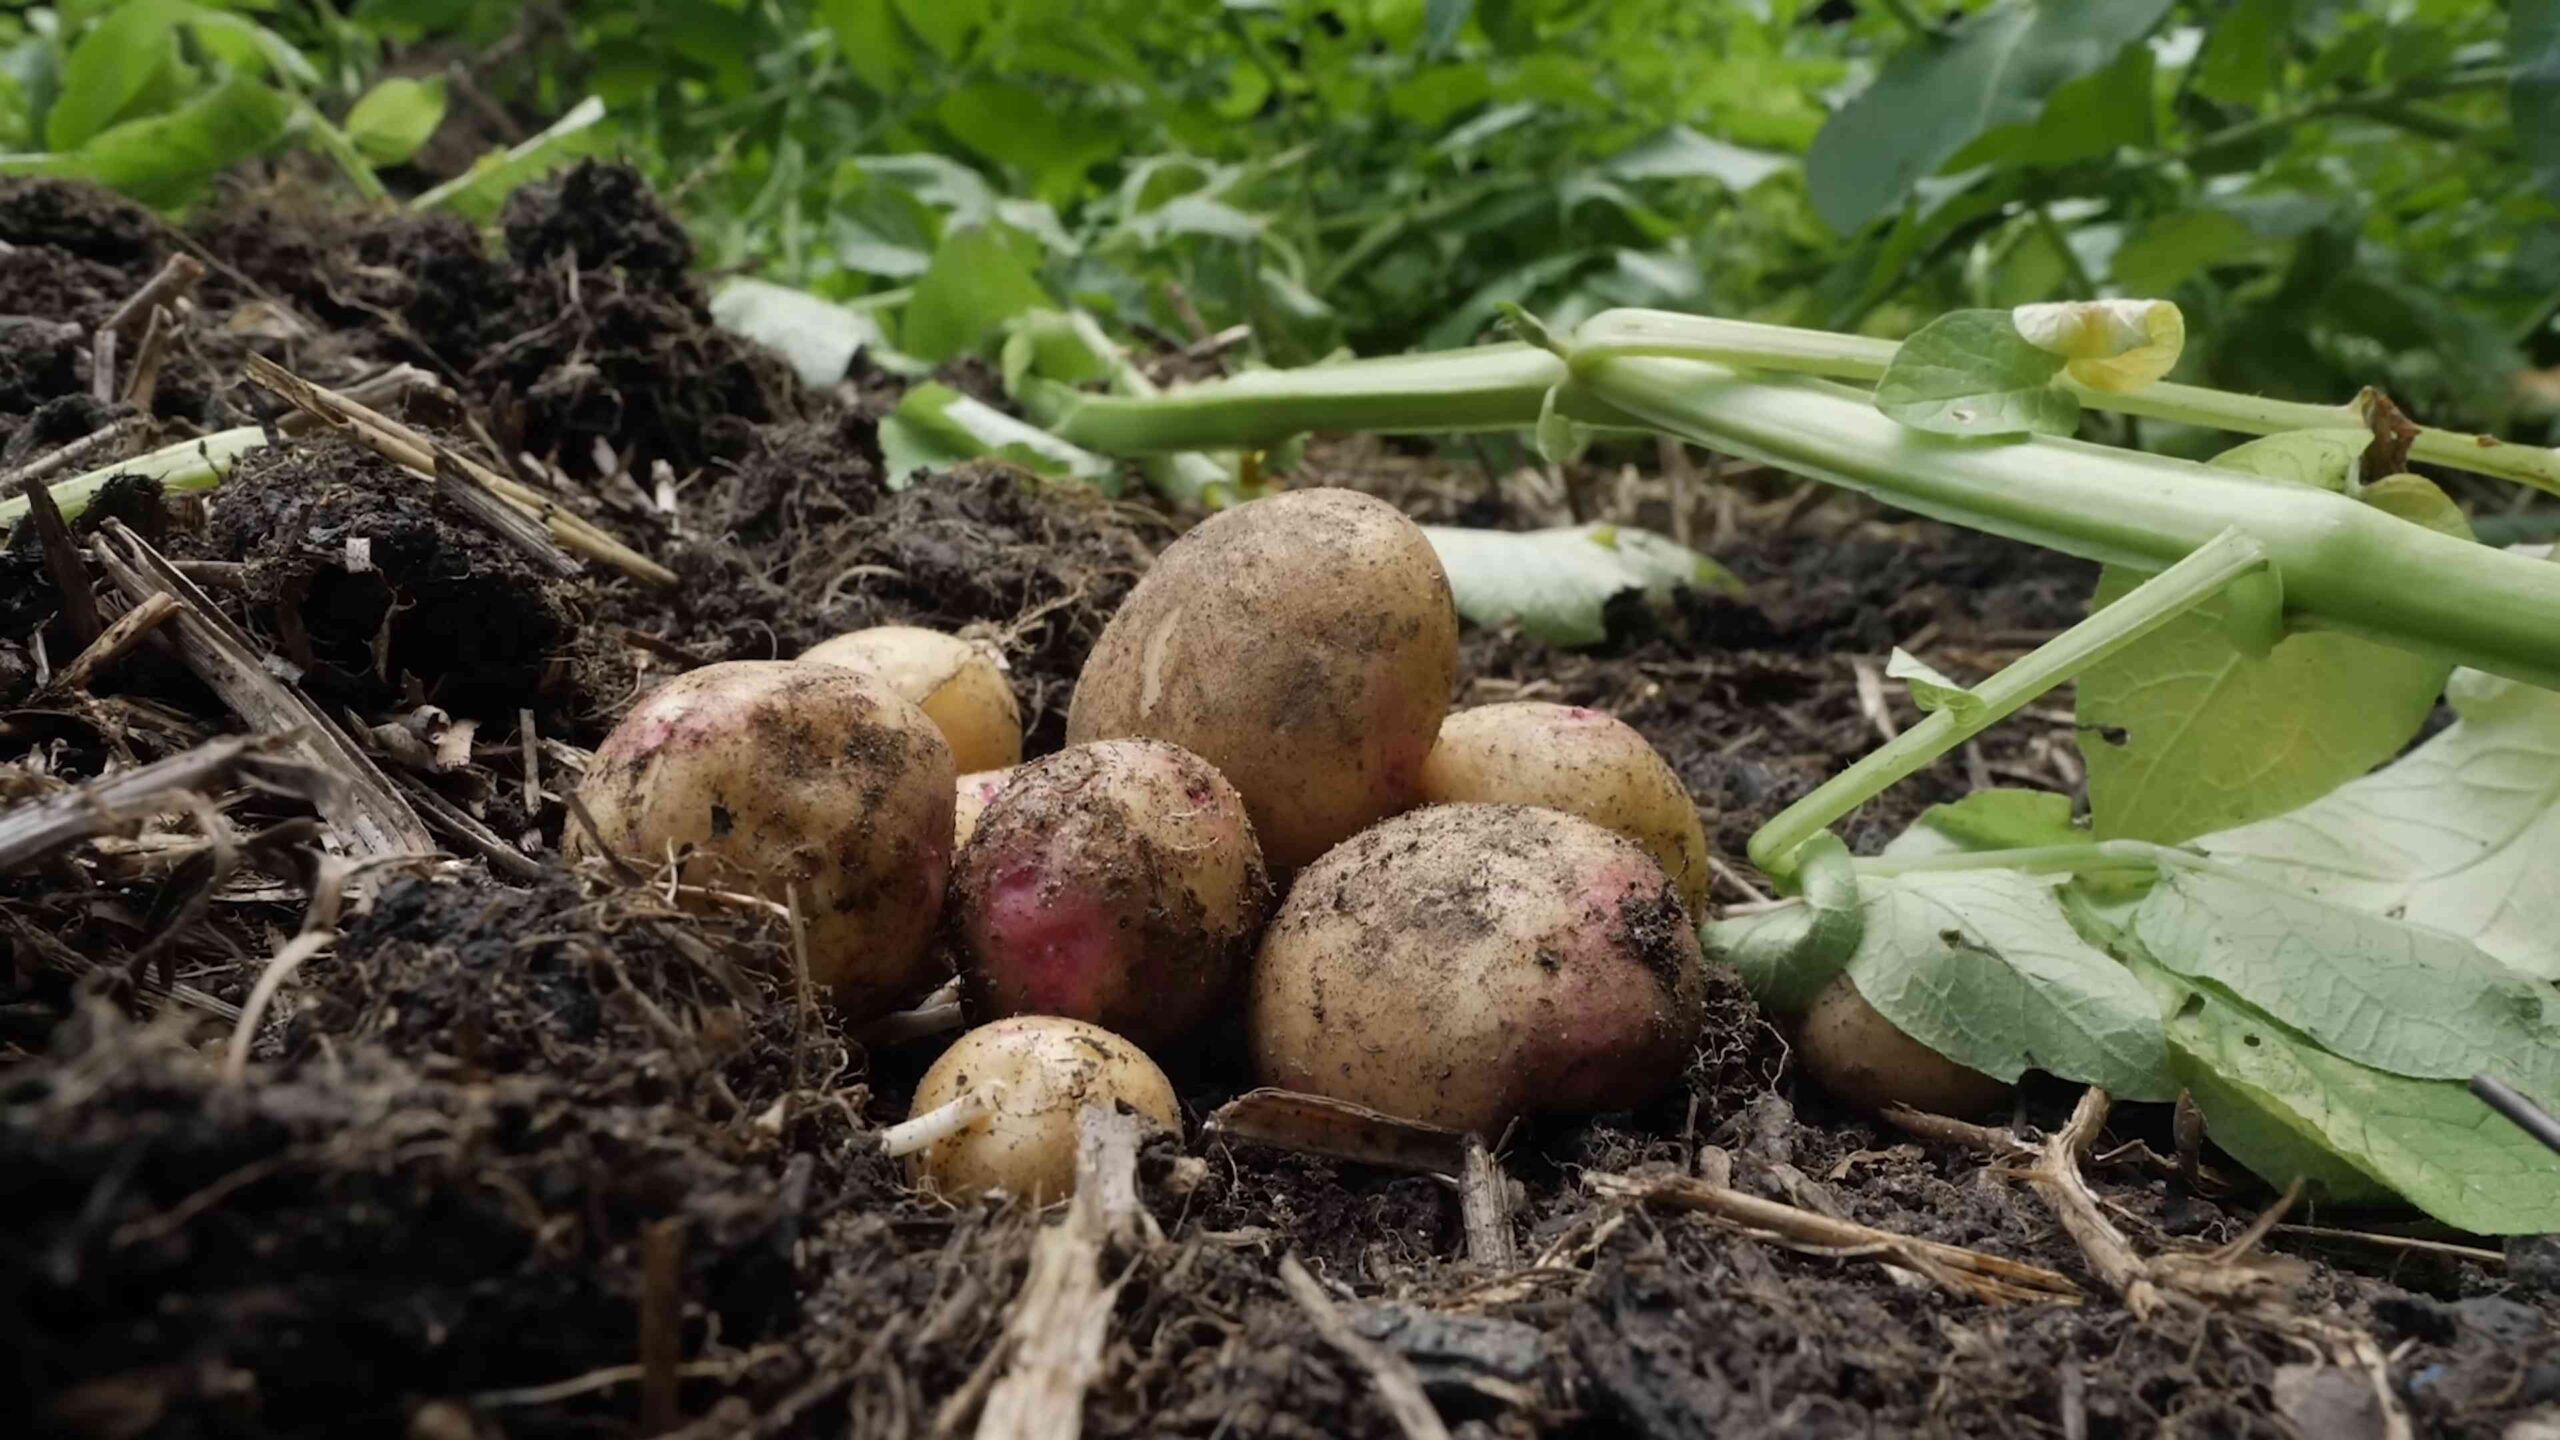
Harvesting Your Potatoes
The moment you’ve been waiting for!
* When to Harvest: The timing of your harvest depends on the potato variety and your desired size.
* New Potatoes: These are small, tender potatoes that can be harvested about 2-3 weeks after the plants flower.
* Mature Potatoes: These are larger potatoes that are harvested after the plants have died back. This usually takes about 80-100 days after planting.
* How to Harvest:
1. Gently dig around the base of the plant with a garden fork or shovel.
2. Lift the plant and carefully remove the potatoes from the soil.
3. Be careful not to damage the potatoes.
* Curing Your Potatoes: Curing helps to toughen the skin and prevent rot.
1. After harvesting, brush off any excess soil.
2. Place the potatoes in a cool, dark, and well-ventilated place for about 1-2 weeks.
3. Avoid direct sunlight, as this can cause the potatoes to turn green.
Storing Your Potatoes
Proper storage is essential for keeping your potatoes fresh and delicious.
* Ideal Storage Conditions: Store your cured potatoes in a cool, dark, and dry place with good ventilation. The ideal temperature is between 40-50°F (4-10°C).
* Avoid Sunlight: Sunlight can cause potatoes to turn green and produce solanine, a toxic compound.
* Don’t Wash Before Storing: Washing potatoes before storing them can promote rot.
* Storage Containers: Use burlap sacks, paper bags, or well-ventilated plastic containers.
* Check Regularly: Check your potatoes regularly for signs of rot or sprouting. Remove any damaged potatoes to prevent the spread of rot.
Troubleshooting Common Problems
* Green Potatoes: As mentioned earlier, green potatoes contain solanine and should not be eaten. Discard any green potatoes.
* Potato Scab: This is a common soilborne disease that causes rough, scabby patches on the potato skin. It doesn’t affect the taste or edibility of the potatoes, but it can be unsightly. To prevent potato scab, maintain a slightly acidic soil pH and avoid overwatering.
* Potato Beetles: These pests can defoliate potato plants. Handpick them off the plants or use an organic insecticide.
* Blight: This is a fungal disease that can cause the leaves and stems of potato plants to turn brown and die. To prevent blight, choose disease-resistant varieties, provide good air circulation, and avoid overhead watering.
Extra Tips for Potato Growing Success
* Crop Rotation: Don’t plant potatoes in the same spot year after year. Rotate your crops to prevent the buildup of soilborne diseases and pests.
* Companion Planting: Plant potatoes with beneficial companion plants, such as beans, cabbage, and marigolds.
* Succession Planting: Plant potatoes in stages to extend your harvest season.
* Enjoy the Process! Growing potatoes is a fun and rewarding experience. Don’t be afraid to experiment and learn from your mistakes.
Understanding Potato Diseases and Pests
Let’s dive a little deeper into some common potato problems and how to tackle them.
Common Potato Diseases
* Early Blight: This fungal disease shows up as dark
Conclusion
So, there you have it! Growing potatoes in your backyard, especially using the container method we’ve outlined, is not just a gardening project; it’s a rewarding experience that connects you to your food source and provides a delicious, homegrown harvest. Forget the supermarket spuds – imagine the taste of freshly dug, earthy potatoes gracing your dinner table, knowing you nurtured them from seed to plate.
This DIY potato-growing trick is a must-try for several compelling reasons. Firstly, it’s incredibly space-efficient. Whether you have a sprawling garden or a small balcony, container gardening allows you to cultivate potatoes even in limited areas. Secondly, it offers superior control over the growing environment. You can tailor the soil composition, watering schedule, and sun exposure to optimize potato growth, minimizing the risk of pests and diseases. Thirdly, and perhaps most importantly, it’s incredibly satisfying! Witnessing the potato plants flourish and then unearthing your own homegrown bounty is a truly gratifying experience.
But don’t stop there! Feel free to experiment with different potato varieties. Russets are fantastic for baking and frying, Yukon Golds offer a creamy texture perfect for mashed potatoes, and red potatoes hold their shape well in salads. You can also explore different container types – from traditional pots to repurposed burlap sacks or even old tires. Just ensure adequate drainage and sufficient space for the potatoes to develop.
Consider adding companion plants to your potato containers. Marigolds can deter pests, while basil can improve the flavor of your potatoes. A sprinkle of Epsom salts can provide magnesium, which is essential for healthy potato growth.
We wholeheartedly encourage you to give this DIY potato-growing trick a try. It’s a fun, educational, and ultimately delicious way to connect with nature and enjoy the fruits (or rather, tubers) of your labor. Don’t be intimidated if you’re a beginner gardener; the process is surprisingly simple, and the rewards are well worth the effort.
Once you’ve harvested your homegrown potatoes, we’d love to hear about your experience! Share your photos, tips, and stories in the comments section below. Let’s build a community of backyard potato growers and inspire others to embrace the joys of homegrown produce. What variety did you grow? What challenges did you face, and how did you overcome them? Your insights can help others succeed in their own potato-growing adventures. Let’s get growing!
Frequently Asked Questions (FAQs)
Q: What kind of container is best for growing potatoes?
A: The best container for growing potatoes is one that is large enough to accommodate the growing root system and allows for proper drainage. A container that is at least 2 feet in diameter and 2 feet deep is generally recommended. You can use plastic pots, wooden crates, grow bags, or even repurposed containers like old tires or burlap sacks. Ensure that the container has drainage holes to prevent waterlogging, which can lead to root rot. Fabric pots or grow bags are particularly beneficial as they allow for air pruning of the roots, promoting healthier growth.
Q: What type of soil should I use for growing potatoes in containers?
A: Potatoes thrive in well-draining, slightly acidic soil. A good mix consists of equal parts of compost, potting soil, and perlite or vermiculite. Compost provides essential nutrients, potting soil offers a good base for root growth, and perlite or vermiculite improves drainage and aeration. Avoid using garden soil directly in containers, as it can be too heavy and compact, hindering root development. You can also add a slow-release fertilizer to the soil mix to provide a steady supply of nutrients throughout the growing season.
Q: How often should I water my potato plants?
A: Potato plants need consistent moisture, especially during tuber formation. Water deeply whenever the top inch of soil feels dry to the touch. Avoid overwatering, as this can lead to root rot and other fungal diseases. The frequency of watering will depend on the weather conditions, the size of the container, and the type of soil you are using. In hot, dry weather, you may need to water daily, while in cooler, wetter weather, you may only need to water every few days. Check the soil moisture regularly and adjust your watering schedule accordingly.
Q: How much sunlight do potato plants need?
A: Potato plants need at least 6-8 hours of direct sunlight per day to thrive. Choose a location for your container that receives ample sunlight throughout the day. If you live in a particularly hot climate, you may need to provide some afternoon shade to prevent the plants from overheating. Insufficient sunlight can result in weak, leggy growth and reduced tuber production.
Q: How do I “hill” my potato plants in a container?
A: “Hilling” is the process of covering the stems of the potato plants with soil as they grow. This encourages the formation of more tubers along the buried stems. When the potato plants are about 6 inches tall, add a layer of soil or compost around the base of the plants, leaving only the top few leaves exposed. Repeat this process every few weeks as the plants grow, until the container is almost full. This technique maximizes potato production within the container.
Q: When is the best time to harvest my potatoes?
A: The best time to harvest your potatoes depends on the variety and your desired use. “New potatoes,” which are small and tender, can be harvested about 2-3 weeks after the plants flower. For mature potatoes, wait until the foliage begins to yellow and die back, usually about 80-100 days after planting. To harvest, gently tip the container over and carefully remove the potatoes from the soil.
Q: What are some common pests and diseases that affect potato plants?
A: Common pests that affect potato plants include aphids, potato beetles, and flea beetles. Diseases include early blight, late blight, and potato scab. To prevent pests and diseases, choose disease-resistant potato varieties, practice crop rotation, and keep the area around your plants clean and free of debris. You can also use organic pest control methods, such as insecticidal soap or neem oil, to control pests. Ensure good air circulation around the plants to minimize the risk of fungal diseases.
Q: Can I grow potatoes from store-bought potatoes?
A: While you can technically grow potatoes from store-bought potatoes, it’s generally not recommended. Store-bought potatoes may be treated with chemicals to prevent sprouting, and they may also carry diseases that can affect your plants. It’s best to use certified seed potatoes, which are specifically grown for planting and are guaranteed to be disease-free.
Q: How do I store my harvested potatoes?
A: Store your harvested potatoes in a cool, dark, and well-ventilated place. A temperature of around 40-50°F (4-10°C) is ideal. Avoid storing potatoes in the refrigerator, as this can cause them to develop a sweet taste. Store potatoes away from apples and bananas, as these fruits release ethylene gas, which can cause potatoes to sprout prematurely. Properly stored potatoes can last for several months.
Leave a Comment