

Grow Radishes in Small Spaces? Absolutely! And I’m here to show you how. Forget sprawling gardens and acres of land; you can cultivate these peppery delights even if you’re working with a tiny balcony, a sunny windowsill, or just a few spare containers.
Radishes have been a culinary staple for centuries, dating back to ancient Egypt and Greece, where they were valued not only for their taste but also for their medicinal properties. Today, they remain a popular choice for gardeners of all levels, thanks to their quick growth and relatively low maintenance. But what if you’re short on space? That’s where these clever DIY tricks and hacks come in!
Let’s face it, not everyone has the luxury of a sprawling backyard. Many of us are living in apartments, condos, or homes with limited outdoor areas. But that doesn’t mean we have to miss out on the joy of growing our own food. Learning how to grow radishes in small spaces opens up a world of possibilities, allowing you to enjoy fresh, homegrown produce no matter where you live. Plus, who doesn’t love the satisfaction of harvesting something they’ve nurtured from seed to table? This article is packed with easy-to-follow tips and DIY projects that will help you maximize your space and enjoy a bountiful radish harvest. Get ready to get your hands dirty and discover the secrets to successful small-space radish gardening!
Grow Radishes Like a Pro, Even in Tiny Spaces!
Hey there, fellow gardening enthusiasts! Ever dreamed of harvesting your own crisp, peppery radishes but thought you didn’t have the space? Well, think again! Radishes are the ultimate fast-growing, space-saving crop, perfect for balconies, patios, or even a sunny windowsill. I’m going to walk you through everything you need to know to grow a bumper crop of radishes, no matter how small your garden is. Let’s get digging!
Choosing the Right Radish Variety
First things first, let’s talk radish varieties. While all radishes are relatively compact, some are better suited for container gardening than others. Here are a few of my favorites:
* Cherry Belle: This is a classic, round, bright red radish that matures super quickly (about 22 days!). It’s a reliable choice and tastes great.
* French Breakfast: These elongated radishes have a mild flavor and a beautiful red and white coloration. They’re ready to harvest in around 25 days.
* Easter Egg: If you want a colorful harvest, go for Easter Egg radishes! They come in a mix of red, pink, purple, and white. They mature in about 28 days.
* Sparkler: Similar to Cherry Belle, but with a white tip. A great choice for beginners.
* Round Black Spanish: If you’re feeling adventurous, try these! They take a bit longer to mature (around 50 days) and have a stronger, more pungent flavor.
Gathering Your Supplies
Before we start planting, let’s make sure we have everything we need. Here’s a checklist:
* Container: Choose a container that’s at least 6 inches deep. Radishes need room to grow downwards. The wider the container, the more radishes you can plant. I’ve had great success with old buckets, plastic tubs, and even repurposed laundry baskets (with drainage holes, of course!).
* Potting Mix: Don’t use garden soil in containers! It compacts too easily and doesn’t drain well. Use a high-quality potting mix that’s light and airy.
* Radish Seeds: Pick your favorite variety (or a mix!) from a reputable seed supplier.
* Watering Can or Hose: You’ll need a gentle way to water your radishes.
* Fertilizer (Optional): A balanced liquid fertilizer can give your radishes a boost, but it’s not essential.
* Trowel or Small Shovel: For filling your container with potting mix.
* Marker or Labels: To keep track of what you’ve planted.
Planting Your Radish Seeds
Alright, let’s get our hands dirty! This is the fun part.
1. Prepare Your Container: Fill your container with potting mix, leaving about an inch of space at the top. Gently pat down the soil to remove any large air pockets.
2. Sow the Seeds: Radish seeds are small, so be careful not to plant them too deeply. I usually aim for about ½ inch deep. Space the seeds about an inch apart. If you’re planting in rows, space the rows about 2 inches apart.
3. Cover the Seeds: Gently cover the seeds with a thin layer of potting mix.
4. Water Thoroughly: Water the container gently but thoroughly until the soil is evenly moist. Be careful not to wash away the seeds.
5. Label Your Container: Don’t forget to label your container with the radish variety and the date you planted them. This will help you keep track of when to expect your harvest.
Caring for Your Radishes
Now that your radishes are planted, it’s time to give them the TLC they need to thrive.
1. Watering: Radishes need consistent moisture to grow quickly and develop a good flavor. Water them regularly, especially during hot, dry weather. The soil should be moist but not soggy. I usually check the soil moisture every day and water when the top inch feels dry.
2. Sunlight: Radishes need at least 6 hours of sunlight per day. If you’re growing them indoors, place them near a sunny window or use a grow light.
3. Thinning: Once your radish seedlings emerge (usually within a few days), you’ll need to thin them out. This means removing some of the seedlings to give the remaining ones enough space to grow. Thin them to about 1-2 inches apart. Don’t just pull them out! Gently snip them off at the soil line with scissors to avoid disturbing the roots of the remaining plants.
4. Fertilizing (Optional): If you want to give your radishes a boost, you can fertilize them with a balanced liquid fertilizer diluted to half strength. I usually fertilize them once or twice during their growing cycle. Follow the instructions on the fertilizer package.
5. Weed Control: Keep your container free of weeds. Weeds compete with your radishes for water and nutrients.
Dealing with Pests and Diseases
Radishes are generally pretty easy to grow, but they can be susceptible to a few pests and diseases. Here are some common problems and how to deal with them:
* Flea Beetles: These tiny beetles can chew small holes in the leaves of your radishes. To prevent flea beetles, cover your plants with row covers. You can also spray them with insecticidal soap.
* Root Maggots: These pests can tunnel into the roots of your radishes, causing them to rot. To prevent root maggots, rotate your crops and avoid planting radishes in the same spot year after year. You can also cover your plants with row covers.
* Downy Mildew: This fungal disease can cause yellow spots on the leaves of your radishes. To prevent downy mildew, provide good air circulation and avoid overwatering. You can also spray your plants with a fungicide.
Harvesting Your Radishes
The best part of growing radishes is harvesting them! Radishes are ready to harvest when they reach the size specified on the seed packet. This is usually about 3-4 weeks after planting, depending on the variety.
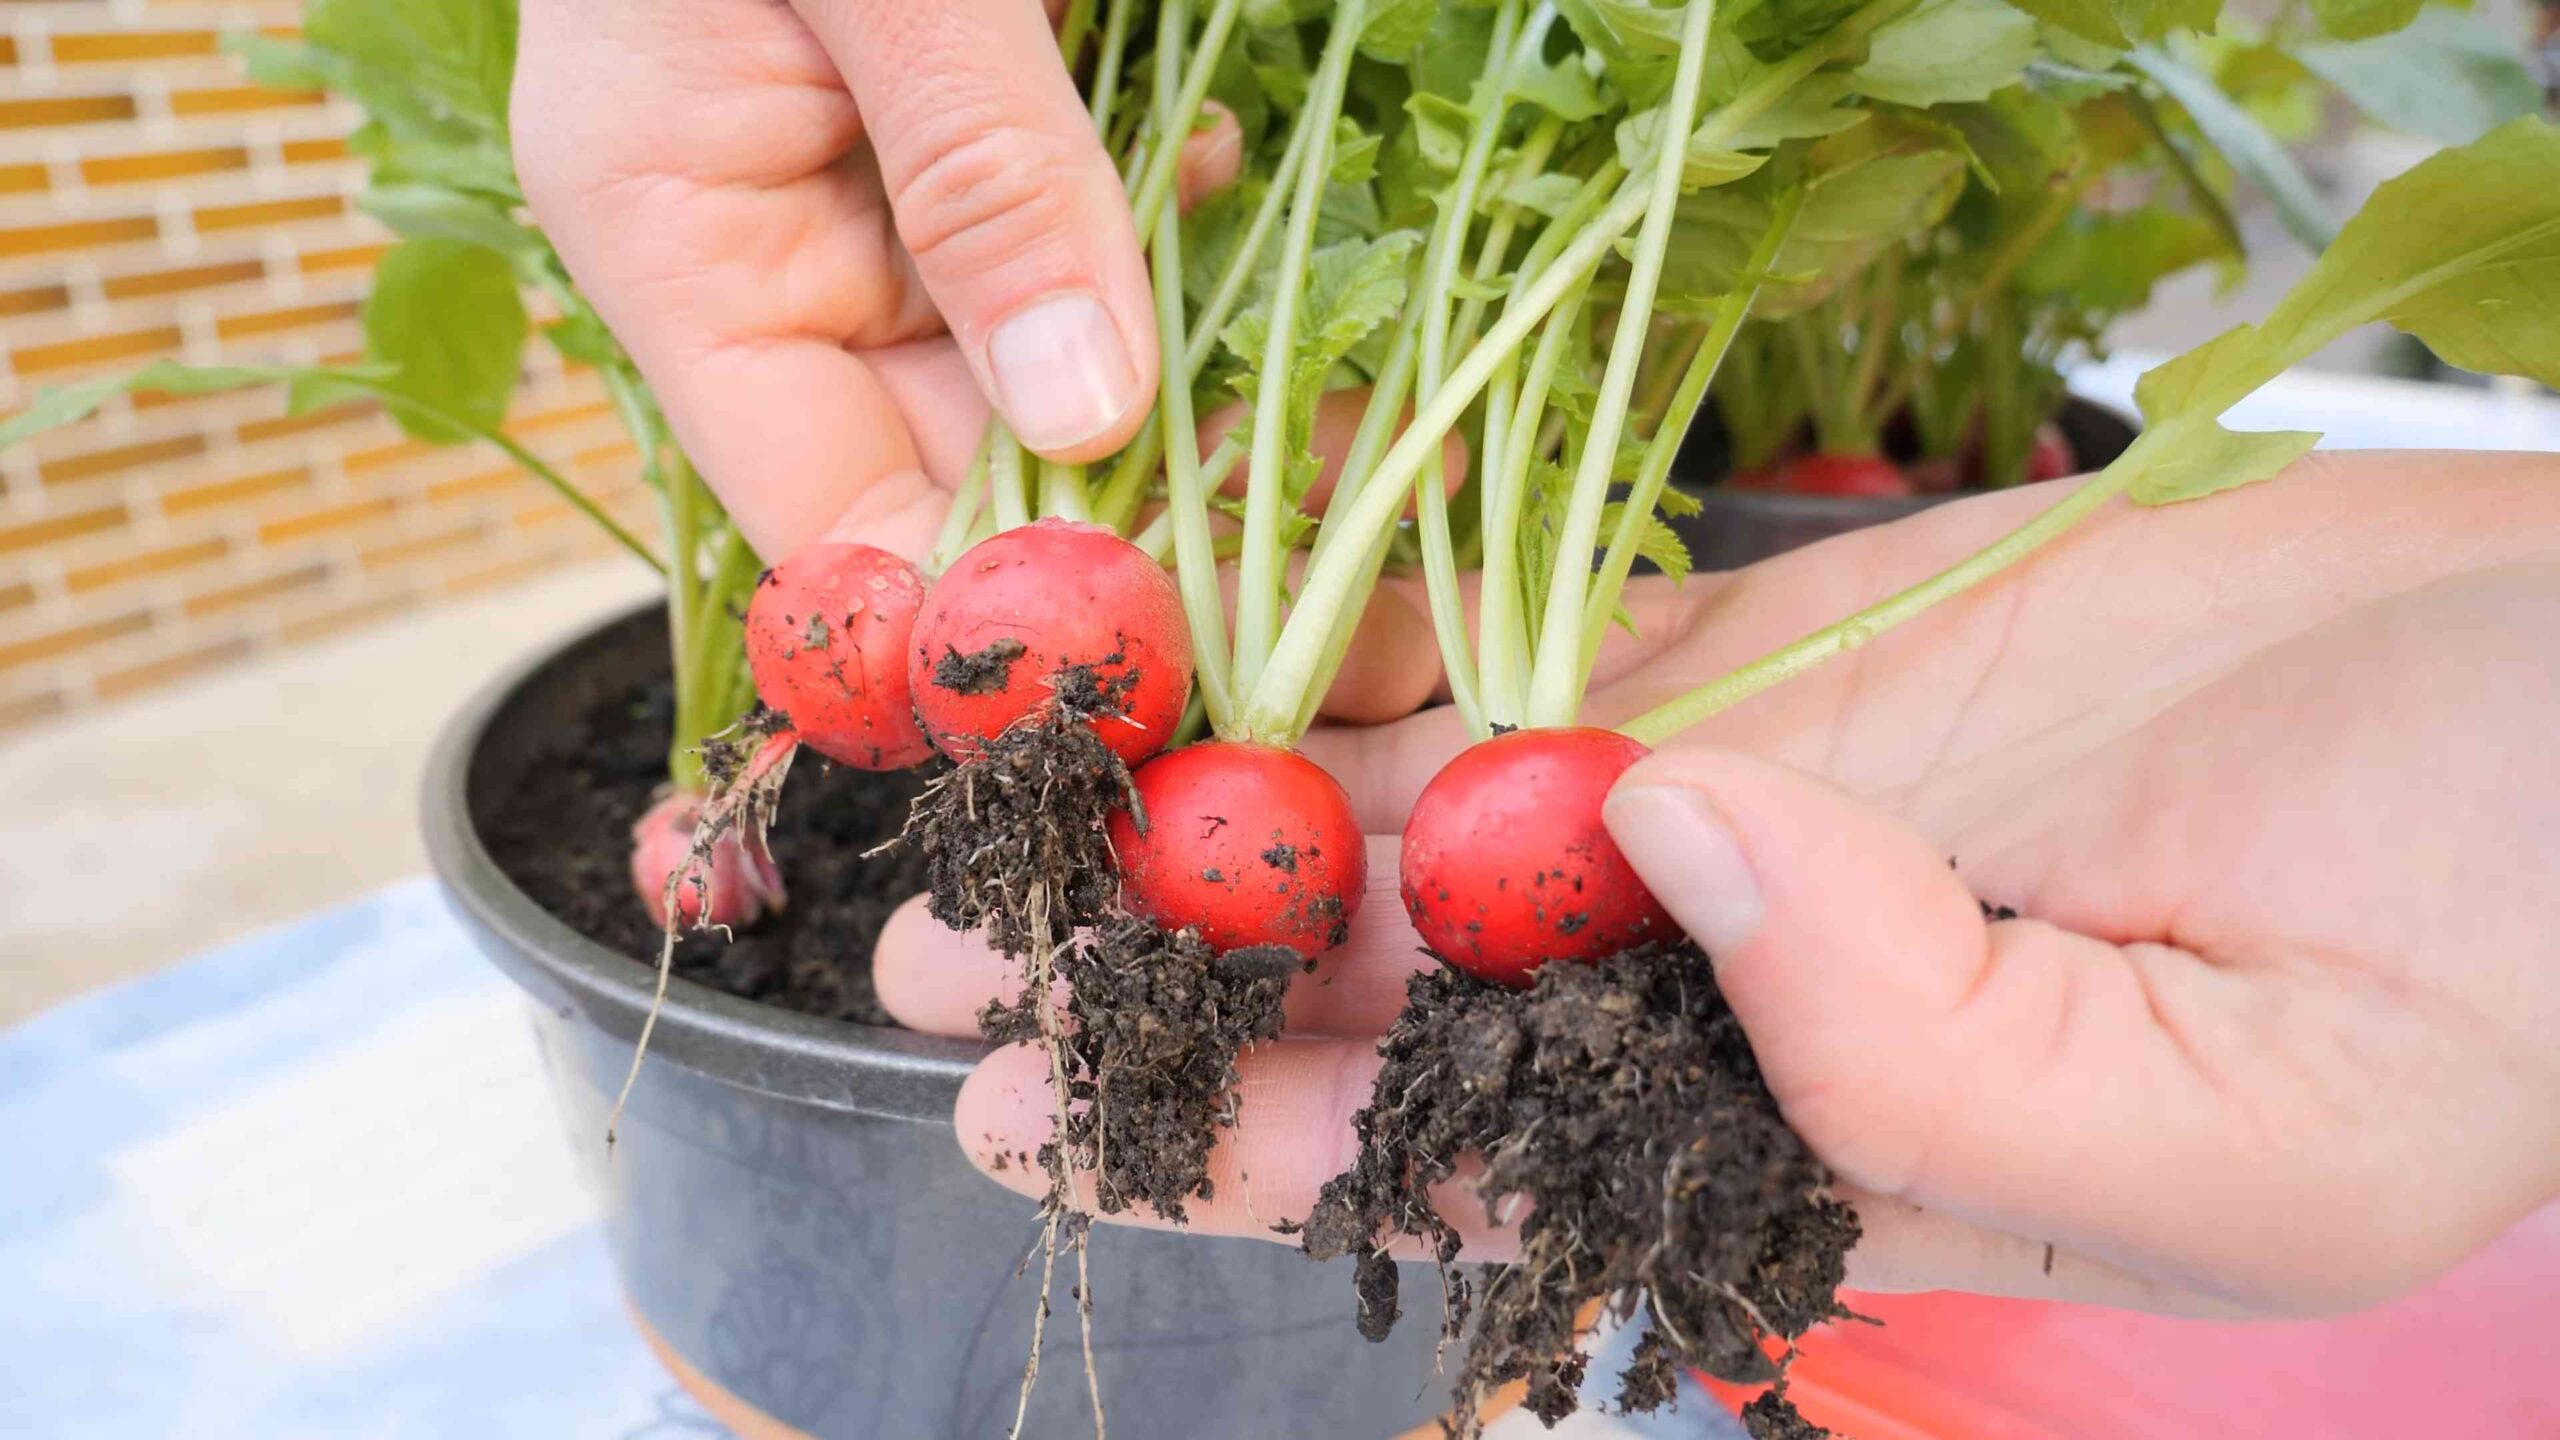
1. Check for Size: Gently brush away the soil around the base of the radish to check its size.
2. Pull Gently: Grasp the radish leaves near the base and gently pull the radish out of the soil. If it’s difficult to pull, loosen the soil around the radish with a trowel.
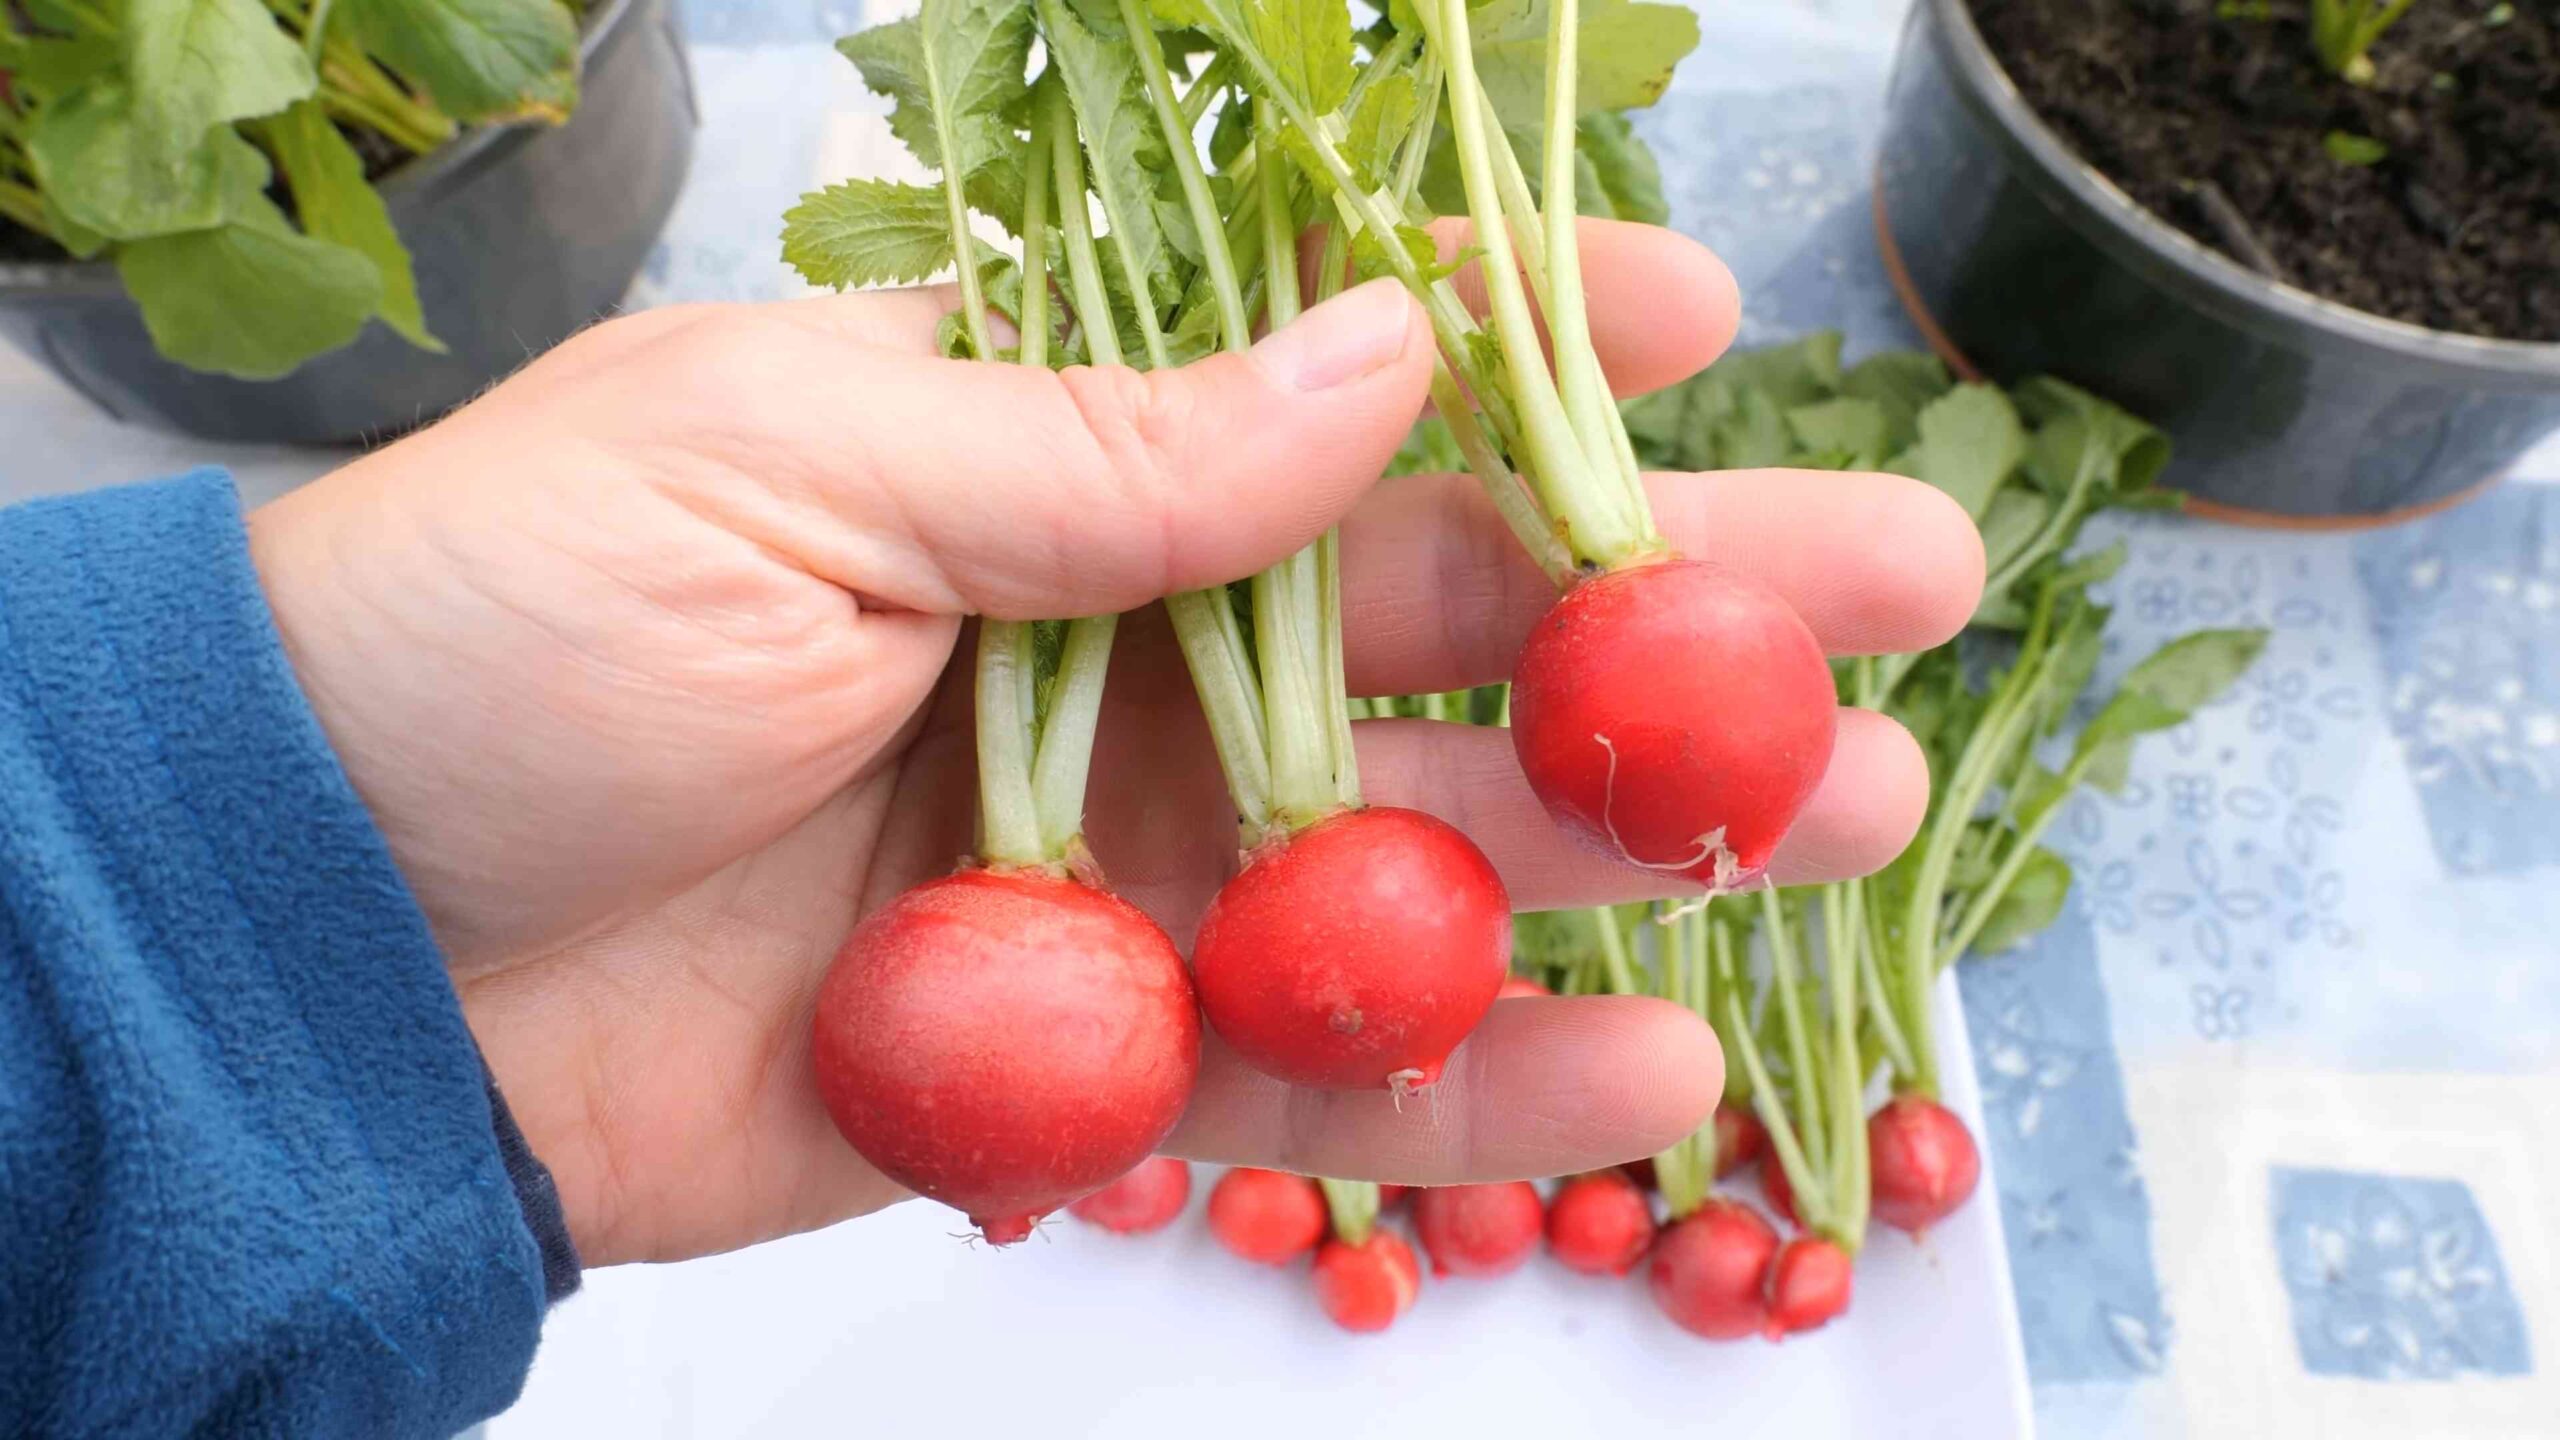
3. Wash and Enjoy: Wash the radishes thoroughly and enjoy them fresh! You can eat them raw in salads, on sandwiches, or as a snack. You can also cook them.
Tips for Success
Here are a few extra tips to help you grow the best radishes ever:
* Succession Planting: Plant a new batch of radish seeds every 1-2 weeks for a continuous harvest.
* Grow in Cool Weather: Radishes prefer cool weather. They tend to bolt (go to seed) in hot weather, which makes them taste bitter. Plant them in early spring or late summer for the best results.
* Don’t Overcrowd: Give your radishes enough space to grow. Overcrowding can lead to small, misshapen radishes.
* Use Companion Plants: Plant radishes with other vegetables that benefit from their presence. Carrots, lettuce, and spinach are good companion plants for radishes.
* Enjoy the Greens: Don’t throw away the radish greens! They’re edible and nutritious. You can add them to salads, stir-fries, or soups.
Troubleshooting
Sometimes, things don’t go exactly as planned. Here are some common problems you might encounter and how to fix them:
* Radishes are small and skinny: This could be due to overcrowding, lack of water, or poor soil. Thin your plants, water them regularly, and fertilize them if necessary.
* Radishes are bitter: This is usually caused by hot weather or letting the radishes grow too large. Harvest them when they’re the right size and plant them in cool weather.
* Radishes are cracked: This is usually caused by inconsistent watering. Water your radishes regularly and evenly.
* Radishes don’t form bulbs: This could be due to planting too deeply, poor soil, or lack of sunlight. Plant the seeds at the correct depth, use a good-quality potting mix, and make sure your radishes get enough sunlight.
Growing radishes in small spaces is a rewarding and easy gardening project. With a little bit of care and attention, you can enjoy a delicious harvest of fresh, homegrown radishes in just a few weeks. So, get out there and start planting! Happy gardening!
Conclusion
So, there you have it! Growing radishes in small spaces is not only achievable but also incredibly rewarding. We’ve walked through the simple steps, highlighted the key considerations, and hopefully, inspired you to transform even the tiniest balcony, patio, or windowsill into a thriving radish garden.
Why is this DIY trick a must-try? Because it offers a fast, fresh, and flavorful return on minimal investment. Radishes are among the quickest vegetables to mature, meaning you can enjoy a peppery harvest in as little as three weeks. Imagine adding freshly picked radishes to your salads, sandwiches, or enjoying them as a crisp and refreshing snack – all grown with your own two hands! Beyond the deliciousness, growing your own food, even in a small way, connects you to nature, reduces your reliance on store-bought produce, and provides a sense of accomplishment that’s hard to beat. Plus, it’s a fantastic way to introduce children to the joys of gardening and healthy eating.
But the fun doesn’t stop there! Feel free to experiment with different radish varieties. From the classic red globe radishes to the elongated French Breakfast radishes or even the vibrant watermelon radishes, there’s a whole world of radish flavors and colors to explore. Consider companion planting to maximize your small space. Carrots and lettuce are excellent companions for radishes, as they help deter pests and improve soil conditions. You can also try succession planting, sowing a new batch of seeds every week or two, to ensure a continuous harvest throughout the growing season.
Don’t be afraid to get creative with your containers! While we’ve suggested using pots and raised beds, you can also repurpose old buckets, crates, or even plastic storage bins. Just make sure they have adequate drainage holes. Vertical gardening is another excellent option for maximizing space. Consider using hanging baskets or vertical planters to grow your radishes upwards.
The key to success with this DIY trick is consistent watering, adequate sunlight, and well-draining soil. Keep a close eye on your plants, and don’t hesitate to adjust your watering schedule based on the weather conditions. Remember, radishes prefer cool weather, so if you live in a warmer climate, try growing them in the shade or during the cooler months.
We are confident that you can successfully grow radishes in small spaces. It’s a simple, satisfying, and delicious project that anyone can undertake. So, grab your seeds, prepare your soil, and get ready to enjoy the fruits (or rather, the roots!) of your labor.
Now, we want to hear from you! Have you tried growing radishes in small spaces before? What tips and tricks have you learned along the way? Share your experiences, photos, and questions in the comments below. We’re eager to learn from your successes and help you troubleshoot any challenges you may encounter. Let’s build a community of small-space radish growers and inspire others to embrace the joys of urban gardening! Happy growing!
Frequently Asked Questions (FAQ)
What kind of soil is best for growing radishes in small spaces?
Radishes thrive in loose, well-draining soil that is rich in organic matter. A good potting mix specifically formulated for vegetables is an excellent choice. You can also amend your existing soil with compost or well-rotted manure to improve its drainage and fertility. Avoid heavy clay soils, as they can become compacted and hinder root development. The ideal pH for radishes is between 6.0 and 7.0.
How much sunlight do radishes need?
Radishes need at least six hours of direct sunlight per day to grow properly. However, they can tolerate partial shade, especially in warmer climates. If you are growing radishes indoors, place them near a sunny window or use grow lights to supplement natural light. Insufficient sunlight can result in leggy plants with small, underdeveloped roots.
How often should I water my radishes?
Radishes need consistent moisture to grow quickly and develop crisp, flavorful roots. Water them regularly, especially during dry spells. The soil should be kept consistently moist but not waterlogged. Overwatering can lead to root rot, while underwatering can cause the radishes to become tough and bitter. A good rule of thumb is to water deeply whenever the top inch of soil feels dry to the touch.
How long does it take for radishes to mature?
One of the best things about radishes is their quick growth rate. Most varieties mature in just 21 to 30 days. However, the exact time will depend on the variety, growing conditions, and weather. Check the seed packet for specific information on the maturity time for your chosen variety.
What are some common pests and diseases that affect radishes?
Radishes are generally pest-resistant, but they can be susceptible to certain pests and diseases, such as flea beetles, root maggots, and fungal diseases. Flea beetles can chew small holes in the leaves, while root maggots can damage the roots. Fungal diseases can cause the leaves to turn yellow or brown. To prevent these problems, practice good garden hygiene, such as removing weeds and debris, and avoid overwatering. You can also use row covers to protect your plants from pests. If you encounter any serious pest or disease problems, consult with your local garden center for advice on appropriate treatments.
Can I eat the radish greens?
Yes, radish greens are edible and nutritious! They have a peppery flavor similar to the roots and can be used in salads, soups, or stir-fries. Harvest the greens when they are young and tender for the best flavor. Avoid eating the greens if they have been treated with pesticides.
What are some good companion plants for radishes?
Radishes are excellent companion plants for many other vegetables. They can help deter pests and improve soil conditions. Some good companion plants for radishes include carrots, lettuce, spinach, beans, and peas. Avoid planting radishes near hyssop, as it can inhibit their growth.
How do I know when my radishes are ready to harvest?
Radishes are ready to harvest when the roots are about 1 inch in diameter. Gently loosen the soil around the radish and pull it out of the ground. If the roots are too small, they will be bland and underdeveloped. If they are too large, they may become tough and bitter.
Can I grow radishes in containers indoors?
Yes, you can absolutely grow radishes in containers indoors. Choose a container that is at least 6 inches deep and has drainage holes. Use a good quality potting mix and place the container in a sunny location or under grow lights. Water regularly and fertilize every few weeks with a balanced fertilizer.
What if my radishes are all greens and no root?
This is a common problem and usually indicates that the radishes are not getting enough sunlight or are planted too close together. Make sure your radishes are getting at least six hours of direct sunlight per day. Thin out the seedlings so that they are spaced about 1 inch apart. Also, ensure the soil is not too rich in nitrogen, as this can promote leafy growth at the expense of root development.
Can I save radish seeds for next year?
Saving radish seeds is possible, but it requires allowing the plants to bolt (flower and go to seed). This typically happens in the second year of growth. However, radishes are often cross-pollinated, so the seeds may not produce plants that are true to type. If you want to save seeds, choose a variety that is known to be relatively stable and isolate it from other radish varieties. Allow the seed pods to dry on the plant before harvesting them. Store the seeds in a cool, dry place.

Leave a Comment