

Grow Sponge Gourd at Home and unlock a world of fresh, homegrown goodness right in your backyard! Have you ever dreamed of harvesting your own vibrant, slightly sweet sponge gourds, perfect for stir-fries, soups, and even natural sponges? Well, dream no more! This DIY guide is your ticket to cultivating these fascinating vegetables with ease.
Sponge gourds, also known as loofah gourds, have a rich history, deeply rooted in Asian and African cultures. For centuries, they’ve been valued not only for their culinary uses but also for their incredible versatility as natural cleaning tools and exfoliating sponges. Imagine the satisfaction of using a sponge you grew yourself!
In today’s world, where sustainability and self-sufficiency are increasingly important, learning to grow sponge gourd at home is more relevant than ever. Not only will you enjoy delicious, organic produce, but you’ll also reduce your reliance on store-bought sponges, contributing to a healthier planet. Plus, it’s a rewarding and fun project for the whole family! This guide will provide you with simple, step-by-step instructions and insider tips to ensure a bountiful harvest, even if you’re a beginner gardener. Let’s get started and transform your garden into a sponge gourd paradise!
Grow Your Own Delicious Sponge Gourds: A DIY Guide
Hey there, fellow gardening enthusiasts! I’m so excited to share my experience growing sponge gourds at home. It’s surprisingly easy, rewarding, and you get your own natural sponges at the end! Plus, the young gourds are delicious in stir-fries and soups. Let’s dive in!
Choosing the Right Variety and Starting Seeds
Before we get our hands dirty, let’s talk about choosing the right sponge gourd variety and starting those seeds.
* Variety Selection: There are a few different types of sponge gourds (also known as loofah gourds), varying in size and texture. I personally prefer the smooth-skinned varieties for both eating and sponge-making. Check your local garden center or online seed suppliers for options that thrive in your climate.
* Seed Starting Time: Sponge gourds need a long growing season, so it’s best to start seeds indoors 6-8 weeks before the last expected frost. This gives them a head start.
* Seed Starting Supplies: You’ll need seed starting trays or small pots, seed starting mix (a light, well-draining soil), and a heat mat (optional, but helpful for germination).
Now, let’s get those seeds started!
1. Soak the Seeds: To encourage germination, soak the sponge gourd seeds in warm water for 24 hours. This helps soften the hard outer shell.
2. Prepare the Seed Starting Trays: Fill your seed starting trays or pots with seed starting mix. Gently press down to remove any air pockets.
3. Sow the Seeds: Make a small hole (about 1/2 inch deep) in the center of each cell or pot. Place one seed in each hole and cover it with soil.
4. Water Gently: Water the soil gently using a spray bottle or watering can with a fine rose. You want to moisten the soil without disturbing the seeds.
5. Provide Warmth and Light: Place the seed starting trays on a heat mat (if using) and under grow lights or in a warm, sunny location. Sponge gourd seeds need warmth to germinate.
6. Keep the Soil Moist: Check the soil moisture daily and water as needed to keep it consistently moist, but not soggy.
7. Wait for Germination: Germination usually takes 7-14 days. Be patient!
8. Thin Seedlings (If Necessary): If more than one seedling emerges in a cell or pot, thin them out by snipping off the weaker seedlings at the soil line. This ensures that the remaining seedling has enough space and nutrients to thrive.
Preparing the Garden Bed and Transplanting Seedlings
Once your seedlings have developed a few sets of true leaves (the leaves that look like miniature versions of the adult plant’s leaves), it’s time to prepare the garden bed and transplant them outdoors.
* Choosing the Right Location: Sponge gourds need full sun (at least 6-8 hours of direct sunlight per day) and well-drained soil. They are also heavy feeders, so choose a location where the soil is rich in organic matter.
* Soil Preparation: Amend the soil with compost or well-rotted manure to improve its fertility and drainage. I like to add a generous amount of compost to my garden beds before planting anything.
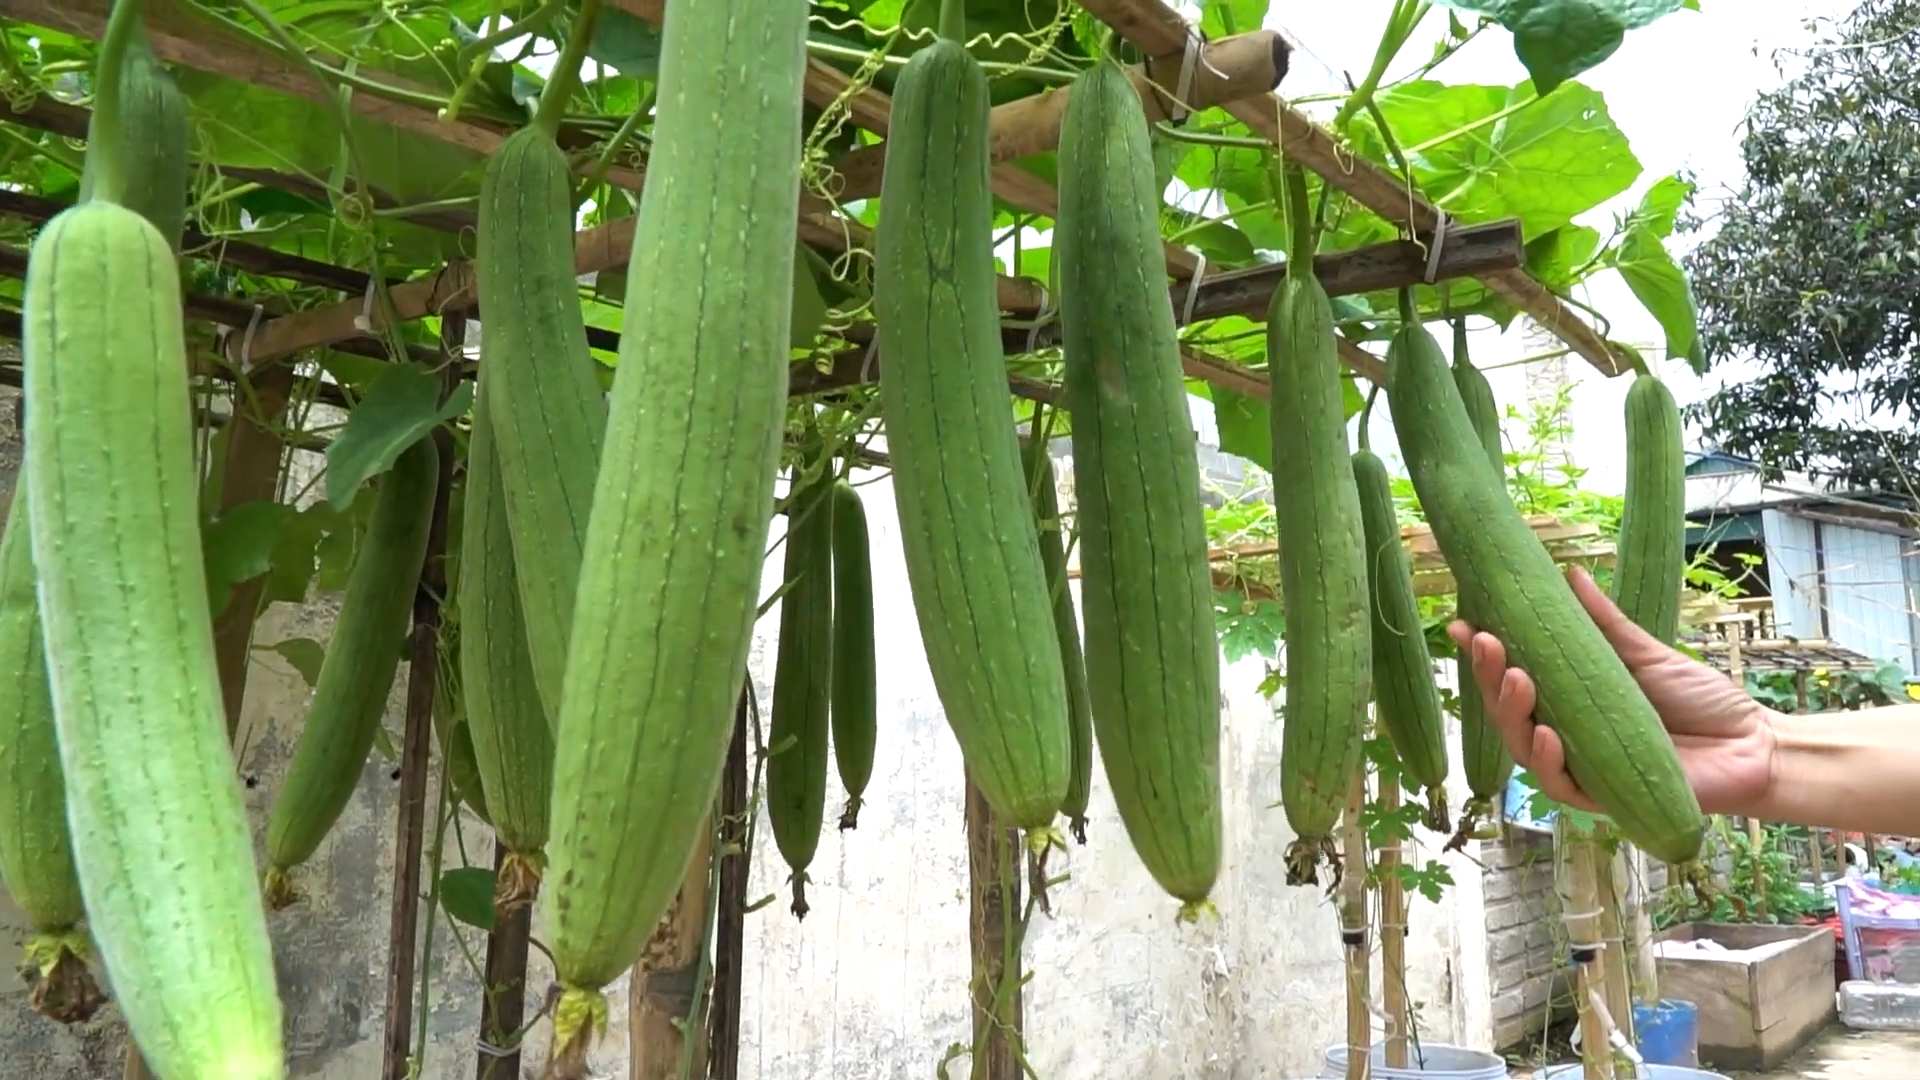
* Trellising: Sponge gourds are vines and need a strong trellis to climb on. You can use a fence, arbor, or build your own trellis using wood or metal. Make sure the trellis is sturdy enough to support the weight of the mature vines and gourds.
Now, let’s get those seedlings transplanted!
1. Harden Off the Seedlings: Before transplanting, you need to harden off the seedlings. This means gradually exposing them to outdoor conditions over a period of 7-10 days. Start by placing them in a sheltered location outdoors for a few hours each day, gradually increasing the amount of time they spend outside. This helps them acclimate to the sun, wind, and temperature changes.
2. Dig the Planting Holes: Dig holes that are slightly larger than the root balls of the seedlings. Space the holes about 2-3 feet apart.
3. Gently Remove Seedlings: Carefully remove the seedlings from their trays or pots. Be gentle to avoid damaging the roots.
4. Plant the Seedlings: Place the seedlings in the holes and backfill with soil. Gently firm the soil around the base of the plants.
5. Water Thoroughly: Water the newly transplanted seedlings thoroughly to help them settle in.
6. Mulch Around the Plants: Apply a layer of mulch around the plants to help retain moisture, suppress weeds, and regulate soil temperature. I like to use straw or wood chips.
7. Train the Vines: As the vines grow, gently train them to climb the trellis. You can use twine or plant clips to secure them to the trellis.
Caring for Your Sponge Gourd Plants
Once your sponge gourd plants are established, it’s important to provide them with proper care to ensure a bountiful harvest.
* Watering: Sponge gourds need consistent moisture, especially during hot, dry weather. Water deeply and regularly, especially when the gourds are developing. Aim for about 1-2 inches of water per week.
* Fertilizing: Sponge gourds are heavy feeders and benefit from regular fertilization. Use a balanced fertilizer or a fertilizer specifically formulated for vegetables. Follow the instructions on the fertilizer label. I like to use a liquid fertilizer every 2-3 weeks.
* Pruning: Pruning can help improve air circulation and encourage fruit production. Remove any yellowing or dead leaves. You can also prune the vines to control their growth and prevent them from becoming too crowded.
* Pest and Disease Control: Sponge gourds can be susceptible to pests such as squash bugs, vine borers, and aphids. Inspect your plants regularly for signs of pests and take action promptly. You can use insecticidal soap, neem oil, or other organic pest control methods. They can also be susceptible to fungal diseases like powdery mildew. Ensure good air circulation and avoid overhead watering to minimize the risk of disease. You can also use a fungicide if necessary.
Harvesting and Processing Sponge Gourds
The best part! Harvesting and processing your own natural sponges.
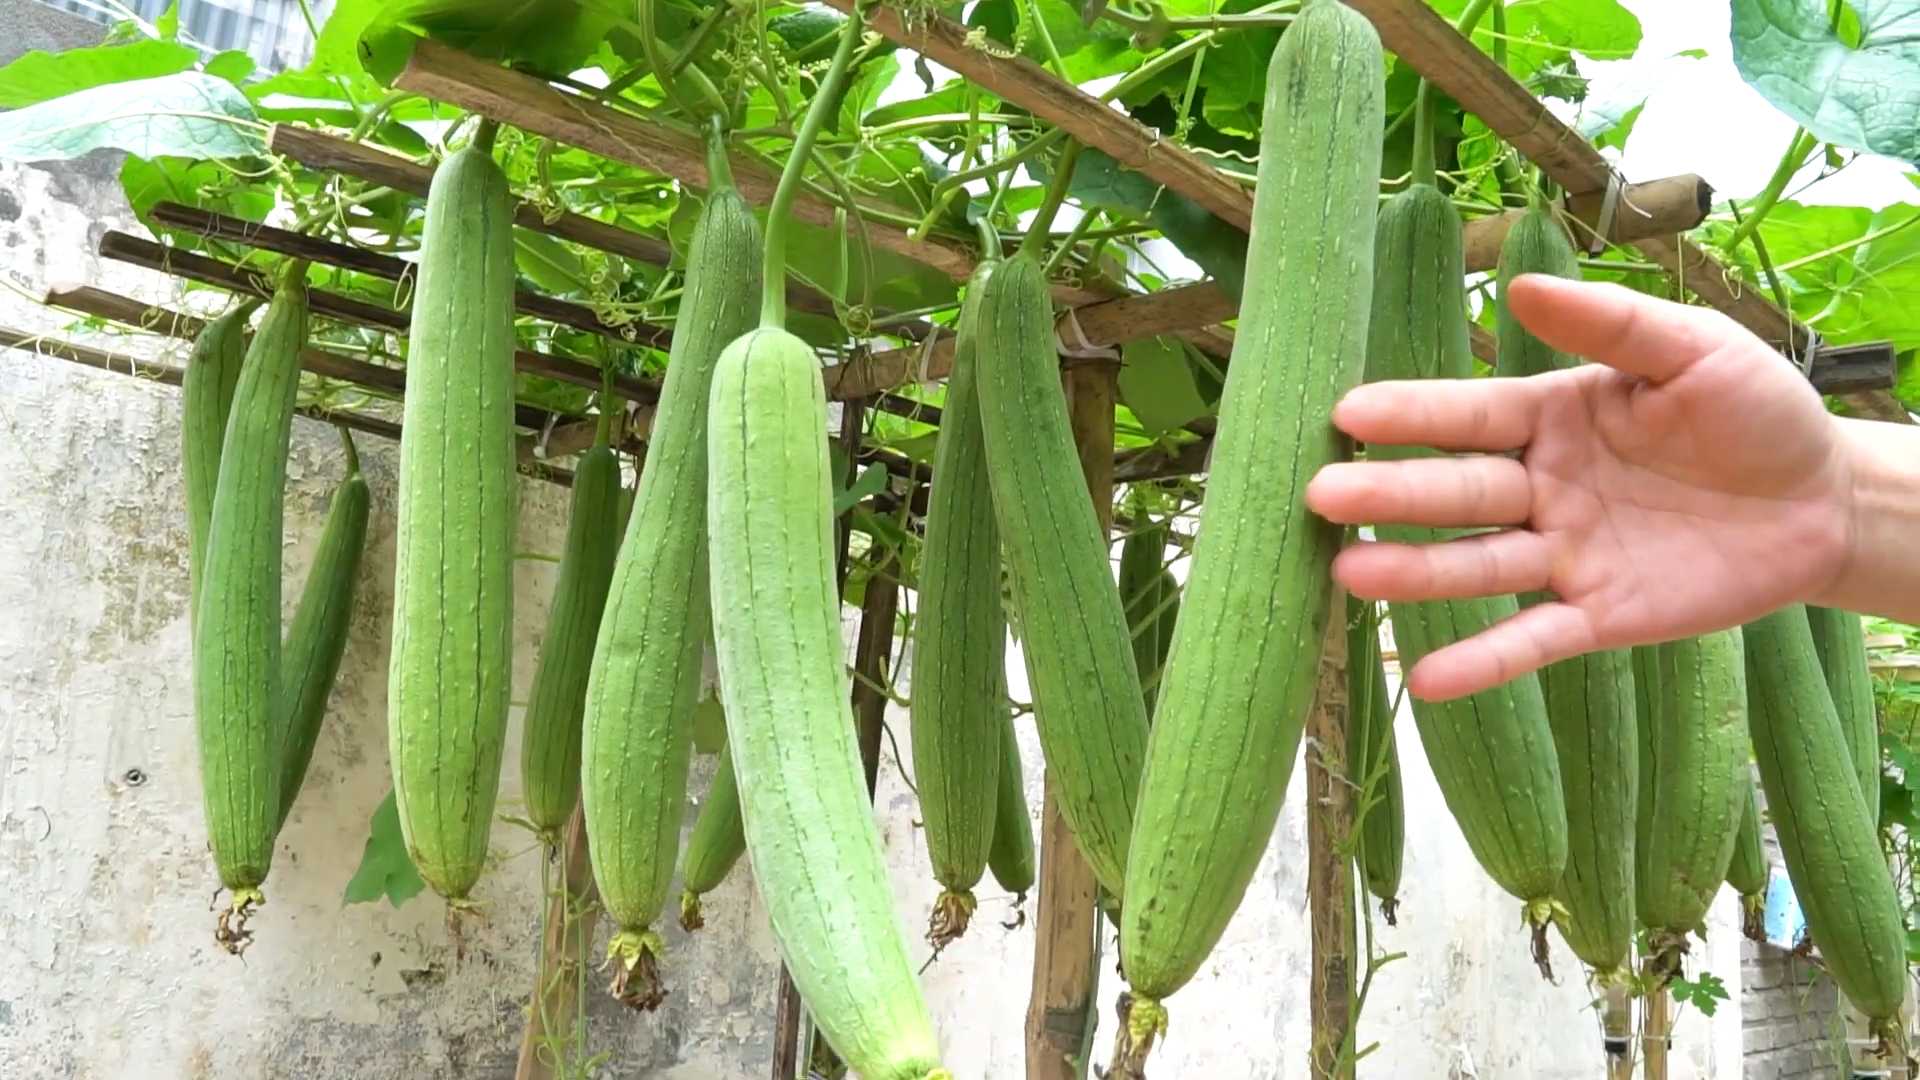
* Harvesting for Eating: Young sponge gourds can be harvested for eating when they are about 6-8 inches long and still tender. The skin should be smooth and easily pierced with your fingernail.
* Harvesting for Sponges: To harvest sponge gourds for sponges, wait until the gourds are fully mature and the skin has turned brown and dry. The gourds should feel lightweight and hollow.
* Processing the Sponges: This is where the magic happens!
1. Cut the Gourds from the Vine: Use pruning shears or a sharp knife to cut the gourds from the vine. Leave a few inches of stem attached.
2. Dry the Gourds: Allow the gourds to dry completely in a well-ventilated area. This may take several weeks. You can hang them upside down to dry.
3. Soak the Dried Gourds: Once the gourds are completely dry, soak them in water for several days to soften the skin. You may need to change the water periodically.
4. Remove the Skin: After soaking, the skin should be easy to peel off. You can use your hands or a knife to remove the skin.
5. Remove the Seeds: Shake out the seeds from the inside of the gourd. You can save the seeds for planting next year.
6. Rinse the Sponge: Rinse the sponge thoroughly to remove any remaining pulp or debris.
7. Dry the Sponge: Allow the sponge to dry completely in a well-ventilated area.
8. Cut and Shape the Sponge: Once the sponge is dry, you can cut it into smaller pieces and shape it as desired.
9. Enjoy Your Homemade Sponge! You now have your own natural, biodegradable sponge! Use it for washing dishes, scrubbing surfaces, or exfoliating your skin.
Troubleshooting Common Problems
Even with the best care, you might encounter some problems while growing sponge gourds. Here are a few common issues and how to address them:
* Poor Germination: If your seeds aren’t germinating, make sure they are getting enough warmth and moisture. You can also try scarifying the seeds by gently rubbing them with sandpaper before soaking them.
* Slow Growth: If your plants are growing slowly, make sure they are getting enough sunlight, water, and nutrients. Amend the soil with compost or fertilizer.
* Pest Infestations: Inspect your plants regularly for signs of pests and take action promptly. Use insecticidal soap, neem oil, or other organic pest control methods.
* Disease Problems: Ensure good air circulation and avoid overhead watering to minimize the risk of disease. You can also use a fungicide if
Conclusion
So, there you have it! Growing sponge gourd at home is not only achievable but also incredibly rewarding. From the satisfaction of nurturing a plant from seed to the joy of harvesting your own fresh, organic produce, this DIY project offers a unique connection to nature and a delicious addition to your culinary repertoire.
Why is this a must-try? Because store-bought sponge gourd simply can’t compare to the vibrant flavor and texture of a homegrown one. You control the growing conditions, ensuring it’s free from harmful pesticides and bursting with natural goodness. Plus, the process itself is a fantastic learning experience, connecting you to the cycle of life and providing a sense of accomplishment.
Beyond the basic method outlined, there’s plenty of room for experimentation. Consider these variations to tailor your sponge gourd growing experience:
* Vertical Gardening: If you’re short on space, train your sponge gourd vines to climb a trellis or fence. This not only maximizes your growing area but also creates a beautiful green wall.
* Companion Planting: Plant basil, marigolds, or nasturtiums near your sponge gourd to deter pests and attract beneficial insects.
* Seed Saving: Once your sponge gourds mature, save the seeds for future planting. This ensures a continuous supply of homegrown goodness and allows you to adapt your plants to your specific climate.
* Gourd Art: Allow some of your sponge gourds to fully mature and dry on the vine. These can then be used for crafting and decorative purposes, adding a unique touch to your home.
* Different Varieties: Explore different varieties of sponge gourd! Some are smoother, some are more ribbed, and some have slightly different flavor profiles. Experiment to find your favorite.
Don’t be intimidated if you’re a beginner gardener. Growing sponge gourd is surprisingly forgiving, and the rewards far outweigh the effort. The key is to provide the right conditions – plenty of sunlight, well-drained soil, and consistent watering. With a little patience and care, you’ll be harvesting your own delicious sponge gourds in no time.
We wholeheartedly encourage you to embark on this DIY adventure. Imagine the pride of serving a meal featuring sponge gourd you grew yourself! The taste is fresher, the texture is firmer, and the satisfaction is immeasurable.
So, grab your seeds, prepare your garden, and get ready to experience the joy of growing sponge gourd at home. We’re confident you’ll be amazed by the results.
And most importantly, we want to hear about your experience! Share your tips, tricks, and triumphs in the comments below. Let’s create a community of sponge gourd enthusiasts and learn from each other. What challenges did you face? What techniques worked best for you? Your insights could help other aspiring gardeners achieve their own sponge gourd growing success. Let’s cultivate a thriving community around this fantastic DIY project!
Frequently Asked Questions (FAQ)
What is the best time of year to plant sponge gourd seeds?
The ideal time to plant sponge gourd seeds is in late spring or early summer, after the last frost has passed and the soil has warmed up to at least 70°F (21°C). Sponge gourds are warm-weather crops and require a long growing season of at least 120 days to mature fully. Starting seeds indoors 4-6 weeks before the last expected frost can give you a head start, especially in regions with shorter summers.
How much sunlight does sponge gourd need?
Sponge gourd plants require at least 6-8 hours of direct sunlight per day to thrive. Choose a planting location that receives ample sunlight throughout the day. Insufficient sunlight can lead to stunted growth, reduced flowering, and smaller fruit. If you live in a particularly hot climate, some afternoon shade may be beneficial to prevent the plants from overheating.
What type of soil is best for growing sponge gourd?
Sponge gourd prefers well-drained, fertile soil that is rich in organic matter. Amend your soil with compost, aged manure, or other organic materials before planting to improve drainage, fertility, and water retention. The ideal soil pH for sponge gourd is between 6.0 and 7.0. A slightly acidic to neutral soil pH promotes optimal nutrient uptake.
How often should I water my sponge gourd plants?
Sponge gourd plants need consistent watering, especially during hot and dry weather. Water deeply and regularly, ensuring that the soil remains consistently moist but not waterlogged. Avoid overhead watering, as this can increase the risk of fungal diseases. Drip irrigation or soaker hoses are excellent options for delivering water directly to the roots. Mulching around the plants can also help to retain moisture and suppress weeds.
What are some common pests and diseases that affect sponge gourd?
Common pests that can affect sponge gourd include aphids, squash bugs, squash vine borers, and cucumber beetles. Regularly inspect your plants for signs of infestation and take appropriate action, such as hand-picking pests, using insecticidal soap, or applying neem oil. Common diseases include powdery mildew, downy mildew, and fungal leaf spots. Ensure good air circulation around the plants, avoid overhead watering, and apply fungicides if necessary.
How do I know when my sponge gourd is ready to harvest?
The harvesting time for sponge gourd depends on its intended use. For culinary purposes, harvest the gourds when they are young and tender, typically around 6-8 inches long. The skin should be smooth and easily punctured with a fingernail. If you plan to use the sponge gourd for crafting or as a natural sponge, allow the gourds to mature fully on the vine until the skin turns brown and hard. The gourd will become lighter as it dries.
Can I grow sponge gourd in containers?
Yes, you can grow sponge gourd in containers, but you’ll need a large container (at least 20 gallons) to accommodate the plant’s extensive root system. Choose a container with good drainage holes and use a high-quality potting mix. Provide a sturdy trellis or support structure for the vines to climb. Container-grown sponge gourd plants may require more frequent watering and fertilization than those grown in the ground.
How do I save seeds from my sponge gourd?
To save seeds from your sponge gourd, allow the gourd to mature fully on the vine until it is completely dry and brown. Cut open the gourd and remove the seeds. Wash the seeds thoroughly and spread them out on a paper towel to dry completely. Store the dried seeds in an airtight container in a cool, dark, and dry place. Properly stored seeds can remain viable for several years.
My sponge gourd plant is flowering, but not producing fruit. What could be the problem?
There are several reasons why your sponge gourd plant might be flowering but not producing fruit. One common reason is a lack of pollination. Sponge gourds have separate male and female flowers, and pollination is required for fruit set. You can hand-pollinate the flowers by transferring pollen from the male flowers to the female flowers using a small brush. Other potential causes include insufficient sunlight, inadequate watering, nutrient deficiencies, or extreme temperatures.
How can I encourage more female flowers on my sponge gourd plant?
To encourage more female flowers on your sponge gourd plant, ensure that it receives adequate sunlight, water, and nutrients. Avoid over-fertilizing with nitrogen, as this can promote vegetative growth at the expense of flowering. Pinching off the tips of the vines can also encourage branching and the development of more female flowers. Some gardeners also recommend applying a foliar spray of seaweed extract to promote flowering.


Leave a Comment