

Grow Your Own Potatoes – imagine harvesting a bounty of fresh, earthy potatoes right from your backyard! There’s something incredibly satisfying about nurturing a plant from seed (or in this case, a seed potato!) to a delicious meal. For centuries, potatoes have been a staple food source, originating in the Andes Mountains and spreading across the globe, nourishing communities and fueling civilizations.
But let’s be honest, heading to the grocery store for potatoes is easy. So, why bother with the effort of growing them yourself? Well, for starters, the taste of homegrown potatoes is simply unmatched – fresher, more flavorful, and bursting with nutrients. Plus, you have complete control over what goes into your food, avoiding harmful pesticides and chemicals.
This DIY guide is your ticket to unlocking the secrets of successful potato cultivation, even if you have limited space or gardening experience. I’m going to share some clever tricks and hacks that will help you grow your own potatoes with ease, from choosing the right varieties to maximizing your yield. Get ready to get your hands dirty and enjoy the rewarding experience of harvesting your very own spuds!
Grow Your Own Potatoes: A Beginner’s Guide to Bountiful Harvests
Hey there, fellow garden enthusiasts! I’m so excited to share my experience and guide you through the rewarding process of growing your own potatoes. There’s nothing quite like digging up your own homegrown spuds – the taste is incredible, and the satisfaction is immense. Don’t worry if you’re a complete beginner; I’ll walk you through every step, from choosing the right potatoes to harvesting your delicious crop. Let’s get started!
Choosing Your Seed Potatoes
First things first, you can’t just plant any old potato from the grocery store. You need seed potatoes, which are specially grown potatoes certified to be disease-free and ready to sprout.
* Where to Buy: You can find seed potatoes at your local garden center, nurseries, or online retailers.
* Variety is the Spice of Life: Consider different varieties based on your taste preferences and growing conditions. Some popular choices include:
* Russet: Great for baking and frying.
* Yukon Gold: All-purpose, with a buttery flavor.
* Red Potatoes: Waxy texture, perfect for boiling and salads.
* Fingerling Potatoes: Unique shape and flavor, excellent roasted.
* Size Matters: Choose seed potatoes that are about the size of a chicken egg. Larger potatoes can be cut into pieces, ensuring each piece has at least one or two “eyes” (those little buds where sprouts will emerge).
* Inspect for Health: Make sure your seed potatoes are firm, free from soft spots, and haven’t already sprouted too much. A little sprouting is fine, but avoid potatoes with long, spindly sprouts.
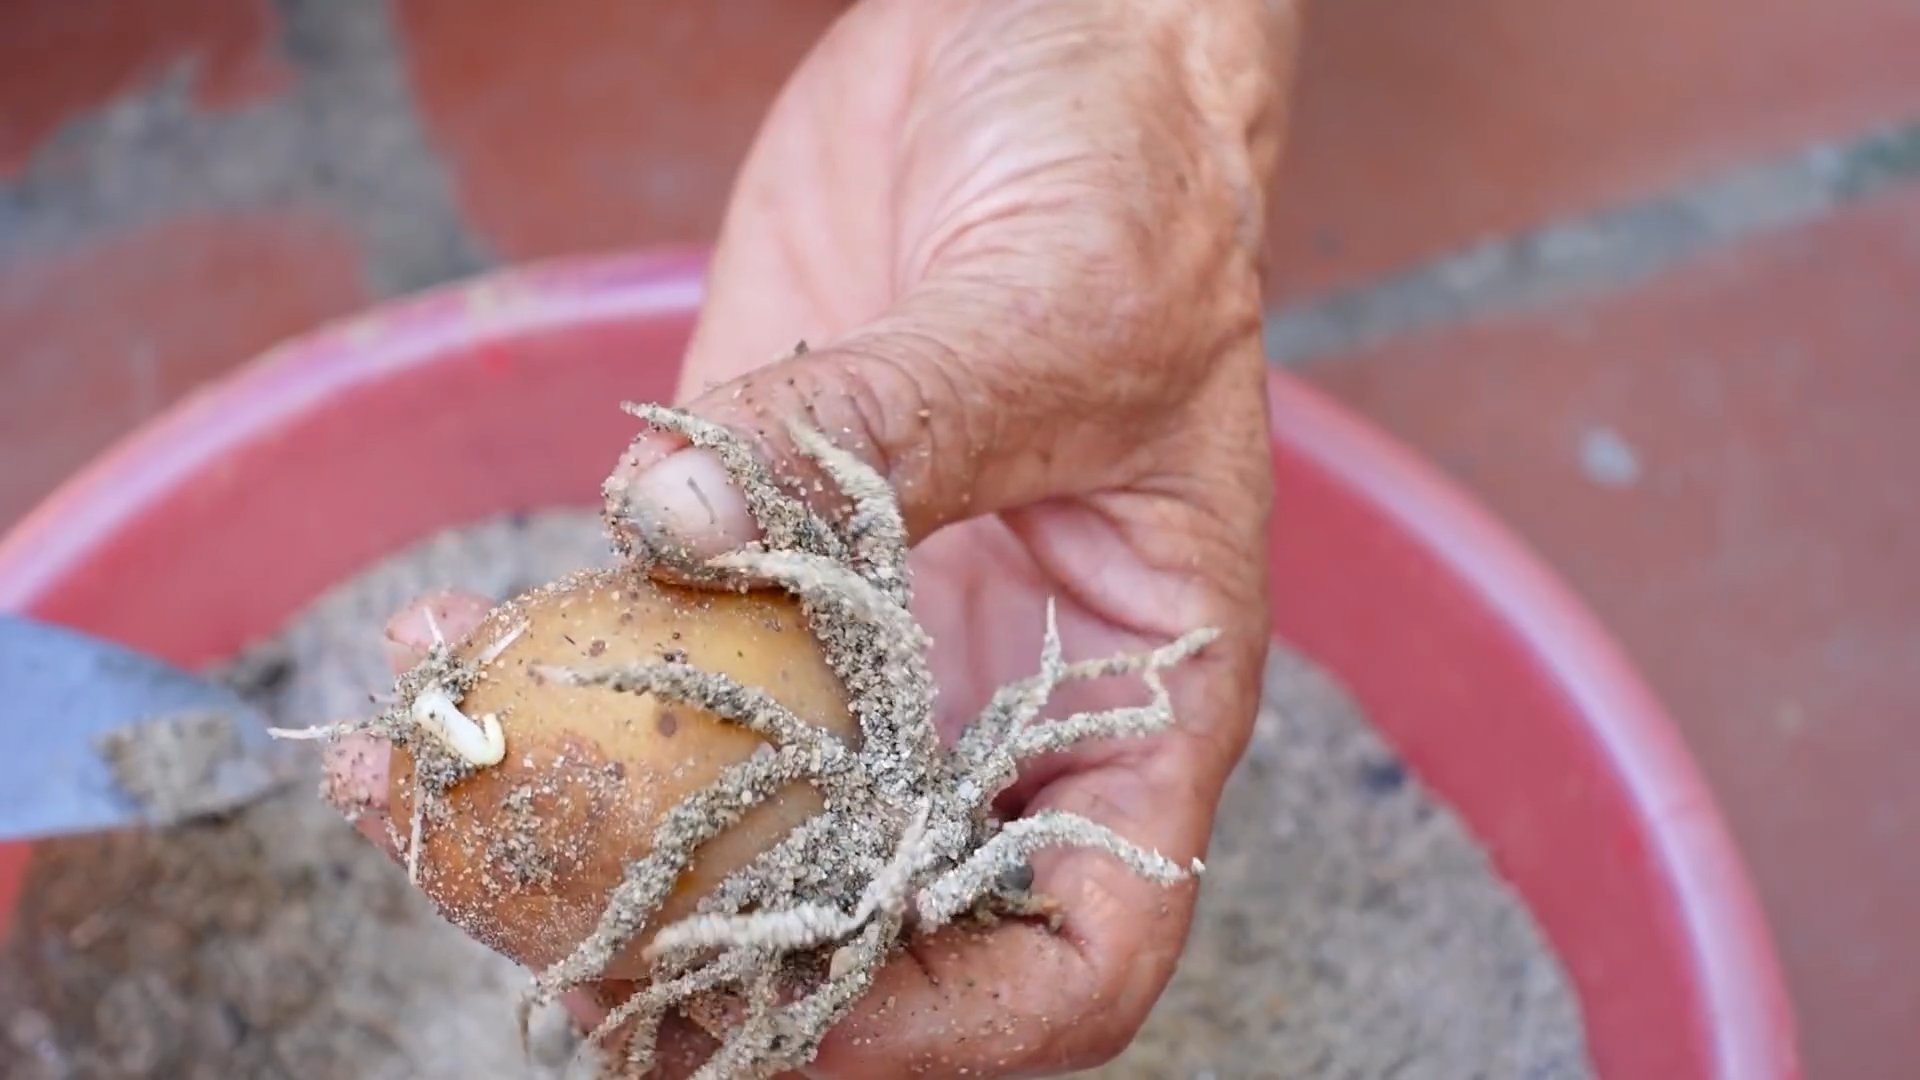
Sprouting Your Seed Potatoes (Chitting)
Chitting, or pre-sprouting, your seed potatoes gives them a head start and can result in an earlier harvest. It’s not absolutely necessary, but I highly recommend it!
* The Process:
* About 4-6 weeks before planting, place your seed potatoes in a cool, bright location (but not in direct sunlight).
* Egg cartons or trays work perfectly for holding the potatoes.
* The “eyes” will start to sprout, forming short, green shoots.
* Rotate the potatoes occasionally to ensure even sprouting.
* Aim for sprouts that are about 1/2 to 1 inch long before planting.
Preparing Your Planting Site
Potatoes need well-drained, slightly acidic soil and plenty of sunlight (at least 6-8 hours per day).
* Soil Preparation:
* Choose a sunny spot in your garden.
* Loosen the soil to a depth of at least 12 inches.
* Amend the soil with compost or well-rotted manure to improve drainage and fertility. Potatoes are heavy feeders!
* Remove any rocks, weeds, or debris from the planting area.
* Planting Options:
* In-Ground Planting: The traditional method, suitable for larger gardens.
* Raised Beds: Excellent drainage and easier to manage.
* Containers: A great option for small spaces or patios. Use large containers (at least 10 gallons) with drainage holes.
* Soil pH: Ideally, your soil pH should be between 5.5 and 6.5. You can test your soil with a home testing kit or send a sample to your local agricultural extension office.
Planting Your Potatoes
Now for the fun part!
1. Timing is Key: Plant your potatoes in early spring, about 2-4 weeks before the last expected frost. The soil temperature should be at least 45°F (7°C).
2. Cutting Seed Potatoes (If Necessary): If you’re using large seed potatoes, cut them into pieces, ensuring each piece has at least one or two “eyes.” Allow the cut surfaces to dry and callous over for a day or two before planting to prevent rotting.
3. Digging the Trenches: Dig trenches that are about 6-8 inches deep and 2-3 feet apart.
4. Planting the Seed Potatoes: Place the seed potatoes (or cut pieces) in the trenches, with the sprouts facing upwards. Space them about 12 inches apart.
5. Covering the Potatoes: Cover the potatoes with soil, gently firming it down.
6. Watering: Water the newly planted potatoes thoroughly.
Hilling Your Potatoes
Hilling is a crucial step in potato growing. It involves gradually mounding soil around the potato plants as they grow. This encourages more potato production along the buried stems.
* Why Hill?
* Increases potato yield by providing more space for tubers to form.
* Protects developing potatoes from sunlight, which can cause them to turn green and produce solanine (a toxic compound).
* Improves drainage around the roots.
* When to Hill:
* When the potato plants are about 6-8 inches tall, begin hilling.
* Repeat the hilling process every 2-3 weeks as the plants continue to grow.
* How to Hill:
* Use a hoe or shovel to draw soil from between the rows up around the base of the plants, covering the lower part of the stems.
* Leave about 4-6 inches of the plant exposed.
* Continue hilling until the mounds are about 12 inches high.
Watering and Fertilizing
Potatoes need consistent moisture, especially during tuber formation.
* Watering:
* Water deeply and regularly, especially during dry periods.
* Avoid overwatering, which can lead to rot.
* Aim for about 1-2 inches of water per week.
* Fertilizing:
* Potatoes are heavy feeders, so fertilizing is important.
* Use a balanced fertilizer (e.g., 10-10-10) at planting time.
* Side-dress with a nitrogen-rich fertilizer (e.g., ammonium sulfate) after the plants have emerged and again after hilling.
* Follow the instructions on the fertilizer package carefully.
* Organic options include compost tea and fish emulsion.
Pest and Disease Control
Potatoes can be susceptible to various pests and diseases. Here’s how to protect your crop:
* Common Pests:
* Colorado Potato Beetles: Handpick them off the plants or use an insecticide.
* Aphids: Spray with insecticidal soap or neem oil.
* Flea Beetles: Cover plants with row covers or use an insecticide.
* Potato Leafhoppers: Control with insecticides or row covers.
* Common Diseases:
* Early Blight: Prevent with good air circulation and fungicide applications.
* Late Blight: A serious disease that can quickly destroy potato plants. Use resistant varieties and apply fungicides preventatively.
* Scab: Avoid planting in alkaline soils and use disease-free seed potatoes.
* Prevention is Key:
* Choose disease-resistant varieties.
* Practice crop rotation.
* Maintain good air circulation.
* Remove and destroy any infected plants immediately.
* Monitor your plants regularly for signs of pests or diseases.
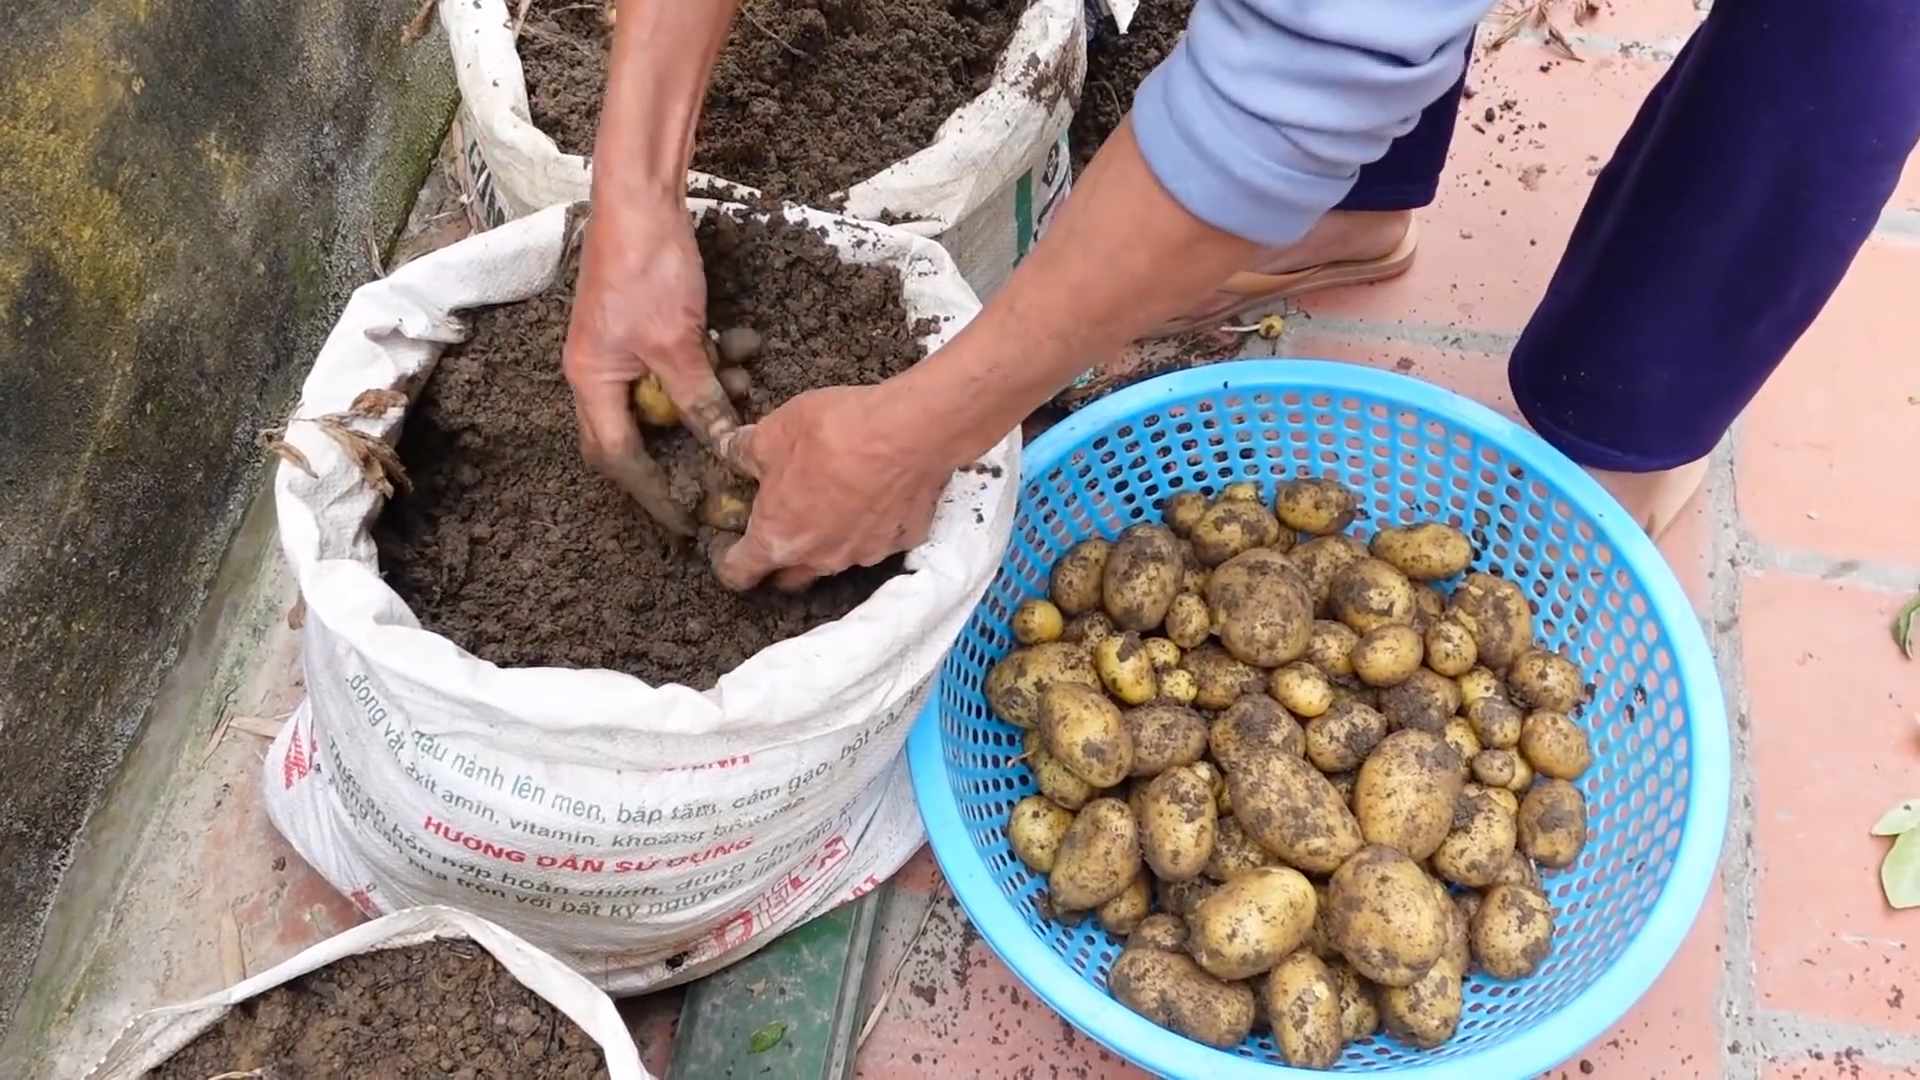
Harvesting Your Potatoes
The moment you’ve been waiting for!
* When to Harvest:
* New Potatoes: Can be harvested about 2-3 weeks after flowering. These are small, tender potatoes with thin skins.
* Mature Potatoes: Harvest when the plants have flowered and the foliage starts to die back. This usually takes about 80-100 days.
* How to Harvest:
* Gently dig around the base of the plants with a garden fork or shovel.
* Lift the plants carefully, being careful not to damage the potatoes.
* Brush off any excess soil.
* Curing and Storing:
* Allow the potatoes to dry in a cool, dark, well-ventilated place for a few days to cure. This helps to toughen the skins and prevent rot.
* Store the cured potatoes in a cool, dark, dry place (ideally around 40-50°F or 4-10°C).
* Avoid storing potatoes near apples or onions, as they can cause them to sprout prematurely.
* Properly stored potatoes can last for several months.
Troubleshooting
Even with the best planning, things can sometimes go wrong. Here are a few common problems and how to address them:
* Green Potatoes: Exposure to sunlight causes potatoes to turn green and produce
Conclusion
So, there you have it! Growing your own potatoes isn’t just a fun gardening project; it’s a rewarding experience that connects you to your food in a profound way. From the satisfaction of nurturing a tiny seed potato to the joy of harvesting a bounty of fresh, flavorful spuds, this DIY trick is a must-try for any home gardener, food enthusiast, or anyone simply looking for a sustainable and delicious way to supplement their meals.
Think about it: no more wondering where your potatoes come from or what chemicals they might have been exposed to. You’re in complete control, from choosing the variety to ensuring they’re grown with love and care. And the taste? Forget those bland, store-bought potatoes. Homegrown potatoes burst with an earthy sweetness that you simply can’t find anywhere else.
But the benefits extend beyond just taste and control. Growing your own potatoes is also an incredibly educational experience. You’ll learn about soil composition, plant life cycles, and the importance of sustainable gardening practices. It’s a fantastic way to get your hands dirty (literally!) and connect with nature.
Don’t be afraid to experiment! Try different varieties of potatoes to discover your favorites. Consider growing them in containers if you have limited space, or even in potato grow bags for added convenience. You can also explore different planting techniques, such as the “no-dig” method, to minimize soil disturbance and maximize yields.
Ready to take the plunge and grow your own potatoes? We encourage you to give it a try! It’s easier than you might think, and the rewards are well worth the effort. And once you’ve harvested your first crop, don’t forget to share your experience with us! We’d love to hear about your successes, your challenges, and any tips or tricks you’ve learned along the way. Share your photos and stories in the comments below, or tag us on social media. Let’s build a community of potato-growing enthusiasts and inspire others to discover the joy of homegrown goodness.
Remember, the key to successful potato growing is patience, observation, and a little bit of love. So, get your hands dirty, embrace the process, and enjoy the delicious fruits (or rather, tubers!) of your labor. Happy growing!
Frequently Asked Questions (FAQ)
What is the best time to plant potatoes?
The ideal time to plant potatoes depends on your climate. Generally, you should plant them in early spring, about 2-4 weeks before the last expected frost. The soil temperature should be at least 45°F (7°C). In warmer climates, you can plant a second crop in late summer for a fall harvest. Check your local gardening resources for specific planting dates in your area.
What kind of soil is best for growing potatoes?
Potatoes thrive in well-drained, loose soil that is rich in organic matter. Sandy loam is ideal, as it allows for good drainage and easy tuber development. Avoid heavy clay soils, as they can become waterlogged and hinder growth. Amend your soil with compost or well-rotted manure to improve drainage and fertility. A slightly acidic soil pH of 6.0 to 6.5 is optimal.
How much sunlight do potatoes need?
Potatoes need at least 6-8 hours of direct sunlight per day to grow properly. Choose a planting location that receives plenty of sunlight throughout the day. If you’re growing potatoes in containers, make sure to place them in a sunny spot. Insufficient sunlight can lead to weak growth and reduced yields.
How often should I water my potato plants?
Water your potato plants regularly, especially during dry periods. Keep the soil consistently moist, but avoid overwatering, which can lead to rot. Water deeply when the top inch of soil feels dry to the touch. During hot weather, you may need to water more frequently. Mulching around the plants can help retain moisture in the soil.
How do I know when my potatoes are ready to harvest?
The timing of harvest depends on the variety of potato and whether you want “new potatoes” or mature potatoes. New potatoes can be harvested about 2-3 weeks after the plants flower. They are small, tender, and have thin skins. Mature potatoes are harvested after the foliage has died back and turned brown. This usually takes about 80-100 days after planting. To harvest, carefully dig around the plants with a garden fork, being careful not to damage the tubers.
What are some common potato pests and diseases, and how can I prevent them?
Some common potato pests include potato beetles, aphids, and wireworms. Common diseases include blight, scab, and early blight. To prevent these problems, practice crop rotation, use disease-resistant varieties, and inspect your plants regularly for signs of pests or diseases. You can also use organic pest control methods, such as insecticidal soap or neem oil. Ensure good air circulation around the plants to prevent fungal diseases.
Can I grow potatoes in containers?
Yes, potatoes can be successfully grown in containers. Choose a large container with drainage holes, at least 15-20 gallons in size. Fill the container with a well-draining potting mix. Plant seed potatoes about 4 inches deep and cover with soil. As the plants grow, gradually add more soil to the container, burying the stems to encourage more tuber production. Water regularly and fertilize as needed.
What are some different varieties of potatoes I can grow?
There are many different varieties of potatoes to choose from, each with its own unique characteristics. Some popular varieties include Russet Burbank (for baking), Yukon Gold (for all-purpose use), Red Norland (for boiling), and Fingerling potatoes (for roasting or salads). Consider your climate, soil type, and culinary preferences when selecting potato varieties.
How do I store my harvested potatoes?
Store your harvested potatoes in a cool, dark, and well-ventilated place. The ideal temperature is between 40-50°F (4-10°C). Avoid storing potatoes in direct sunlight or near ethylene-producing fruits, such as apples and bananas, as this can cause them to sprout. Store them in a burlap sack or a well-ventilated container. Properly stored potatoes can last for several months.
Can I grow potatoes from store-bought potatoes?
While you can technically grow potatoes from store-bought potatoes, it’s generally not recommended. Store-bought potatoes may have been treated with sprout inhibitors, which can prevent them from growing. They may also carry diseases that can infect your garden soil. It’s best to use certified seed potatoes, which are specifically grown for planting and are disease-free.
What is “hilling” potatoes, and why is it important?
Hilling potatoes involves gradually adding soil around the base of the potato plants as they grow. This encourages the plants to produce more tubers along the buried stems. As the plant grows, cover the stem with soil, leaving only the top few leaves exposed. Repeat this process several times throughout the growing season. Hilling also helps to protect the developing tubers from sunlight, which can cause them to turn green and become bitter.
How do I fertilize my potato plants?
Potatoes benefit from regular fertilization. Use a balanced fertilizer with a ratio of 10-10-10 or 14-14-14. Apply the fertilizer at planting time and then again when the plants are about 6 inches tall. You can also side-dress the plants with compost or well-rotted manure throughout the growing season. Avoid over-fertilizing, as this can lead to excessive foliage growth and reduced tuber production.
What if my potato plants are flowering but not producing potatoes?
Flowering is a natural part of the potato plant’s life cycle and doesn’t necessarily indicate that tubers are not forming. However, if you’re concerned about tuber production, make sure your plants are receiving adequate sunlight, water, and nutrients. Also, check the soil pH to ensure it’s within the optimal range. Some varieties of potatoes flower more profusely than others, so don’t be alarmed if your plants are flowering heavily.
How can I prevent my potatoes from turning green?
Potatoes turn green when they are exposed to sunlight. The green color is due to the production of chlorophyll and solanine, a toxic alkaloid. To prevent greening, hill your potato plants regularly to keep the tubers covered with soil. Also, store your harvested potatoes in a dark place. If you find any green potatoes, discard them, as they are not safe to eat.


Leave a Comment