

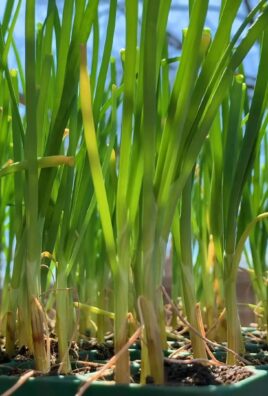
Growing Mibuna in Plastic Bottles: Sounds a bit unconventional, right? But trust me, this simple DIY project can bring a touch of Japanese flavor right to your kitchen windowsill! For centuries, Mibuna, a leafy green vegetable with a mild mustard-like taste, has been a staple in Japanese cuisine, adding a peppery kick to salads, stir-fries, and soups. Imagine having fresh, organic Mibuna readily available whenever you need it, without even stepping foot in a grocery store.
I know what you’re thinking: “Gardening is hard!” But that’s where this clever hack comes in. We’re taking the intimidation out of gardening and making it accessible to everyone, even those with limited space or a less-than-green thumb. This DIY method of growing Mibuna in plastic bottles is not only eco-friendly (repurposing those bottles!), but it’s also incredibly easy and rewarding.
In today’s busy world, finding time for healthy eating can be a challenge. This project allows you to cultivate your own fresh produce, ensuring you know exactly what’s going into your food. Plus, it’s a fantastic way to reduce your carbon footprint and connect with nature, even in the heart of the city. So, are you ready to transform those empty plastic bottles into a thriving Mibuna garden? Let’s get started!

Growing Mibuna in Plastic Bottles: A Beginner’s Guide
Hey there, fellow gardening enthusiasts! Ever thought about turning those empty plastic bottles into a mini-Mibuna farm? It’s a fantastic way to recycle, save space, and enjoy fresh, peppery greens right at your fingertips. Mibuna, also known as Japanese mustard greens, is super easy to grow and adds a delicious kick to salads, stir-fries, and soups. Let’s dive into this fun and rewarding DIY project!
What You’ll Need
Before we get started, gather these supplies:
* Empty plastic bottles (2-liter soda bottles or similar work great)
* Scissors or a utility knife
* Potting mix (a well-draining mix is ideal)
* Mibuna seeds
* Watering can or spray bottle
* Drill or nail (for drainage holes)
* Optional: Twine or rope (for hanging)
* Optional: Sandpaper (to smooth rough edges)
Preparing the Plastic Bottles
This is where we transform those discarded bottles into cozy homes for our Mibuna.
1. Clean the Bottles: First things first, give those bottles a good rinse with soap and water. Make sure to remove any sticky residue or labels. A clean bottle is a happy bottle!
2. Cut the Bottles: Now, decide how you want to orient your planters. You have a couple of options:
* Horizontal Planters: For this, you’ll cut a large rectangular opening along one side of the bottle, leaving the bottom intact. This creates a trough-like planter. I usually cut about two-thirds of the way down the bottle’s side, leaving enough plastic to provide structural support.
* Vertical Planters: Cut the bottle in half horizontally. You’ll use the bottom half as the planter and the top half (inverted) as a sort of humidity dome or to help with watering.
3. Smooth the Edges (Optional): After cutting, the edges of the plastic can be a bit sharp. Use sandpaper to gently smooth them down. This is especially important if you have kids or pets around.
4. Drill Drainage Holes: This is crucial! Mibuna doesn’t like soggy roots. Use a drill or a nail (heated carefully over a flame if using a nail) to create several drainage holes in the bottom of each bottle. I usually aim for at least 4-5 holes, spaced evenly.
5. Hanging Option (Optional): If you want to hang your planters, now’s the time to add the hanging mechanism. For horizontal planters, you can drill two small holes near the top of each end and thread twine or rope through them. Make sure the rope is strong enough to support the weight of the soil and plants. For vertical planters, you can create a macrame-style hanger or use a simple wire support.
Planting the Mibuna Seeds
Alright, let’s get those seeds in the ground (or, in this case, the bottle!).
1. Fill with Potting Mix: Fill your prepared plastic bottles with potting mix, leaving about an inch of space at the top. Gently pat down the soil to remove any air pockets.
2. Sow the Seeds: Mibuna seeds are tiny, so sprinkle them evenly over the surface of the soil. Don’t overcrowd them; give them a little space to grow. I usually aim for about 10-15 seeds per bottle, depending on the size.
3. Cover the Seeds: Lightly cover the seeds with a thin layer of potting mix. They don’t need to be buried deep; just a light dusting will do.
4. Water Gently: Use a watering can or spray bottle to gently water the soil. You want to moisten the soil without dislodging the seeds. Be patient and water slowly.
5. Humidity Dome (Vertical Planters): If you’re using the vertical planter method, place the inverted top half of the bottle over the bottom half to create a humidity dome. This will help keep the soil moist and promote germination.
Caring for Your Mibuna
Now comes the fun part – watching your Mibuna grow!
1. Location, Location, Location: Place your planters in a location that receives at least 4-6 hours of sunlight per day. Mibuna can tolerate partial shade, but it will grow best in full sun. A sunny windowsill, balcony, or patio is perfect.
2. Watering: Keep the soil consistently moist, but not soggy. Water when the top inch of soil feels dry to the touch. Check the moisture level regularly, especially during hot weather. Remember, good drainage is key to preventing root rot.
3. Fertilizing (Optional): Mibuna doesn’t require heavy feeding, but you can give it a boost with a diluted liquid fertilizer every few weeks. Look for a fertilizer that’s specifically formulated for leafy greens. Follow the instructions on the fertilizer package carefully.
4. Thinning (If Necessary): If your seedlings are growing too close together, thin them out by gently removing some of the weaker plants. This will give the remaining plants more room to grow and prevent overcrowding.
5. Pest Control: Mibuna is relatively pest-resistant, but keep an eye out for common garden pests like aphids or slugs. If you spot any pests, you can try spraying them with insecticidal soap or hand-picking them off the plants.
Harvesting Your Mibuna
The best part! You can start harvesting your Mibuna when the leaves are about 4-6 inches long, usually within 3-4 weeks of planting.
1. Cut the Leaves: Use scissors or a knife to cut the leaves near the base of the plant. You can harvest individual leaves or cut the entire plant, leaving about an inch of stem to regrow.
2. Succession Planting: To ensure a continuous supply of Mibuna, sow new seeds every few weeks. This is called succession planting, and it’s a great way to keep your garden productive throughout the growing season.
3. Enjoy Your Harvest: Wash the harvested leaves thoroughly and enjoy them in salads, stir-fries, soups, or as a garnish. Mibuna has a slightly peppery flavor that adds a delicious kick to any dish.
Troubleshooting
Even with the best planning, sometimes things don’t go exactly as expected. Here are a few common issues you might encounter and how to address them:
* Seeds Not Germinating: Make sure the soil is consistently moist and the temperature is warm enough. Mibuna seeds germinate best at temperatures between 60-70°F (15-21°C). You can also try soaking the seeds in water for a few hours before planting to improve germination rates.
* Yellowing Leaves: This could be a sign of overwatering or nutrient deficiency. Check the soil moisture and adjust your watering schedule accordingly. If the soil is well-drained and you’re still seeing yellowing leaves, try fertilizing with a diluted liquid fertilizer.
* Leggy Seedlings: This means your seedlings aren’t getting enough light. Move your planters to a sunnier location or supplement with artificial light.
* Pests: As mentioned earlier, keep an eye out for pests and take action promptly. Insecticidal soap is a good option for controlling aphids and other soft-bodied insects.
Extra Tips and Tricks
* Label Your Planters: Use a permanent marker to label each bottle with the type of plant and the date you planted it. This will help you keep track of your garden.
* Recycle More Than Just Bottles: You can also use other recycled containers, such as yogurt cups or plastic tubs, to start your Mibuna seeds.
* Get Creative with Decoration: Decorate your plastic bottle planters with paint, markers, or stickers to add a personal touch.
* Experiment with Different Varieties: There are several different varieties of Mibuna available, each with its own unique flavor and appearance. Try growing a few different varieties to see which ones you like best.
* Composting: Use your kitchen scraps to make compost and enrich your potting mix. This is a great way to reduce waste and improve the health of your plants.
Growing Mibuna in plastic bottles is a simple, sustainable, and rewarding project that anyone can do. With a little bit of effort and creativity, you can transform those discarded bottles into a thriving mini-garden and enjoy fresh, delicious greens all season long. Happy gardening!

Conclusion
So, there you have it! Transforming humble plastic bottles into thriving Mibuna gardens is not just a clever upcycling project; it’s a gateway to fresh, flavorful greens right at your fingertips. We’ve walked through the simple steps, highlighting the ease and accessibility of this DIY method. But why is this a must-try?
Firstly, it’s incredibly space-efficient. Whether you have a sprawling backyard or a tiny balcony, vertical gardening with plastic bottles allows you to maximize your growing area. Secondly, it’s budget-friendly. Reusing plastic bottles significantly reduces the cost of gardening, making fresh produce accessible to everyone. Thirdly, it’s environmentally conscious. By repurposing waste, you’re actively contributing to a more sustainable lifestyle. And finally, and perhaps most importantly, it’s rewarding! There’s immense satisfaction in nurturing a plant from seed to harvest, knowing you’ve created something delicious and healthy with your own hands.
But the beauty of this DIY project lies in its adaptability. Feel free to experiment with different types of plastic bottles. Larger bottles can accommodate more plants, while smaller bottles are perfect for creating intricate vertical designs. Consider painting the bottles to add a splash of color to your garden or using different types of growing mediums to see what works best for your local climate. You could even incorporate a simple self-watering system using a wick and a reservoir at the bottom of the bottle.
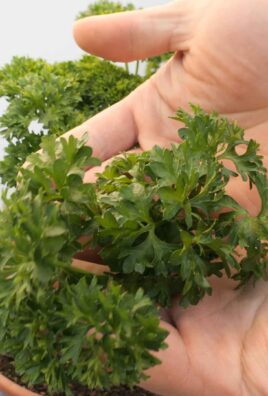
Don’t limit yourself to just Mibuna! This method is also fantastic for growing other leafy greens like lettuce, spinach, and even herbs like basil and parsley. The possibilities are truly endless.
We wholeheartedly encourage you to give this DIY Mibuna growing trick a try. It’s a fun, educational, and rewarding experience that will connect you with nature and provide you with a constant supply of fresh, healthy greens. Once you’ve set up your plastic bottle garden and harvested your first batch of Mibuna, we’d love to hear about your experience! Share your photos, tips, and variations in the comments below. Let’s build a community of resourceful gardeners and inspire others to embrace sustainable living, one plastic bottle at a time. Remember, growing your own food, especially delicious Mibuna, is easier than you think!
Frequently Asked Questions (FAQ)
What type of plastic bottles are best for growing Mibuna?
Ideally, you should use food-grade plastic bottles, such as those used for water, juice, or soda. These are generally made from PET (polyethylene terephthalate) or HDPE (high-density polyethylene), which are considered safe for growing food. Avoid using bottles that have contained harsh chemicals or cleaning products. Thoroughly wash and rinse the bottles before using them for planting. Clear or translucent bottles are preferable as they allow sunlight to reach the growing medium.
How often should I water my Mibuna plants in plastic bottles?
The watering frequency depends on several factors, including the size of the bottle, the type of growing medium, the climate, and the stage of growth of the Mibuna plants. Generally, you should water when the top inch of the soil feels dry to the touch. In hot, sunny weather, you may need to water daily, while in cooler, cloudy weather, you may only need to water every few days. Ensure that the bottles have adequate drainage holes to prevent waterlogging, which can lead to root rot. A good rule of thumb is to water deeply until you see water draining from the bottom of the bottle.
What kind of soil or growing medium should I use?
A well-draining potting mix is ideal for growing Mibuna in plastic bottles. You can use a commercially available potting mix or create your own by combining equal parts of compost, perlite, and vermiculite. Compost provides nutrients, perlite improves drainage, and vermiculite helps retain moisture. Avoid using garden soil, as it can be too heavy and compact, hindering root growth. You can also experiment with soilless growing mediums like coco coir or rockwool, but these may require more frequent watering and fertilization.
How much sunlight do Mibuna plants need?
Mibuna thrives in partial to full sunlight, requiring at least 4-6 hours of direct sunlight per day. If you’re growing your Mibuna indoors, place the plastic bottle garden near a sunny window or supplement with artificial grow lights. Insufficient sunlight can result in leggy growth and reduced yields. If you live in a hot climate, provide some afternoon shade to prevent the plants from overheating.
Do I need to fertilize my Mibuna plants?
Yes, Mibuna plants benefit from regular fertilization, especially when grown in containers. Use a balanced liquid fertilizer diluted to half strength every 2-3 weeks. Alternatively, you can incorporate slow-release fertilizer granules into the growing medium at planting time. Look for a fertilizer that is specifically formulated for leafy greens or vegetables. Avoid over-fertilizing, as this can lead to nutrient burn and damage the plants.
How do I prevent pests and diseases from affecting my Mibuna plants?
Regularly inspect your Mibuna plants for signs of pests or diseases. Common pests that may affect Mibuna include aphids, slugs, and snails. You can control these pests by handpicking them off the plants, using insecticidal soap, or applying diatomaceous earth. To prevent fungal diseases, ensure good air circulation around the plants and avoid overwatering. If you notice any signs of disease, remove the affected leaves or plants immediately.
When can I harvest my Mibuna?
Mibuna can be harvested at any stage of growth, depending on your preference. For baby greens, you can start harvesting when the leaves are about 3-4 inches long. For larger leaves, wait until they are 6-8 inches long. To harvest, simply cut the outer leaves near the base of the plant, leaving the inner leaves to continue growing. This cut-and-come-again method allows you to harvest multiple times from the same plant.
Can I grow Mibuna indoors year-round using this method?
Yes, you can grow Mibuna indoors year-round using plastic bottles, provided you have adequate lighting and temperature control. Place the bottles near a sunny window or use grow lights to supplement natural light. Maintain a consistent temperature between 60-75°F (15-24°C). Ensure good air circulation to prevent fungal diseases. With proper care, you can enjoy fresh Mibuna greens throughout the year.
How do I prepare the plastic bottles for planting?
First, thoroughly wash the plastic bottles with soap and water to remove any residue. Then, cut the bottles in half or create openings on the sides, depending on your desired design. Make sure to create drainage holes at the bottom of each bottle to prevent waterlogging. You can use a drill, a knife, or a hot nail to create the holes. If you’re using clear bottles, consider painting the outside with a light-colored paint to reflect sunlight and prevent the growing medium from overheating.
What are some creative ways to arrange the plastic bottle garden?
There are numerous creative ways to arrange your plastic bottle garden. You can hang the bottles vertically from a wall, fence, or balcony railing using rope or wire. You can also stack the bottles horizontally to create a tiered garden. Consider painting the bottles in different colors or adding decorative elements to personalize your garden. You can even create a self-watering system by connecting the bottles with tubing and a reservoir. Let your imagination run wild and create a unique and eye-catching Mibuna garden.
Leave a Comment