

Growing onions in plastic bottles might sound like something out of a science fiction movie, but trust me, it’s a surprisingly effective and incredibly rewarding way to cultivate these kitchen staples right at home! Forget those sprawling garden beds – we’re going vertical and eco-friendly! Have you ever dreamed of harvesting a bountiful onion crop without dedicating a huge chunk of your backyard? Or perhaps you’re looking for a clever way to recycle those ever-accumulating plastic bottles? Well, you’re in the right place!
Onions have been cultivated for thousands of years, with evidence suggesting their use dates back to ancient Egypt and beyond. They were valued not only for their culinary properties but also for their medicinal and even symbolic significance. Now, we’re taking this ancient crop and giving it a modern, sustainable twist.
Let’s face it, traditional gardening can be intimidating. Space constraints, soil quality, and pesky pests can all throw a wrench in your plans. That’s where this DIY trick comes in. Growing onions in plastic bottles offers a simple, space-saving solution that’s perfect for apartment dwellers, balcony gardeners, or anyone looking to maximize their yield. Plus, it’s a fantastic way to reduce waste and contribute to a greener lifestyle. I’m excited to share this easy-to-follow guide that will have you harvesting fresh, delicious onions in no time!
Growing Onions in Plastic Bottles: A Beginner’s Guide
Hey there, fellow gardening enthusiasts! Ever thought about growing onions in plastic bottles? It’s a fantastic way to recycle, save space, and enjoy fresh, homegrown onions right from your windowsill or balcony. I’ve been doing this for a while now, and I’m excited to share my secrets with you. It’s easier than you think, and the results are incredibly rewarding. Let’s dive in!
What You’ll Need
Before we get started, let’s gather all the necessary materials. Trust me, having everything ready beforehand will make the process much smoother.
* Plastic Bottles: The star of the show! I prefer using 2-liter soda bottles or larger water bottles. Make sure they’re clean and dry. You’ll need one bottle per onion you want to grow.
* Potting Soil: Good quality potting soil is crucial for healthy onion growth. Avoid using garden soil, as it can be too dense and may contain pests or diseases.
* Onion Sets or Seedlings: You can use onion sets (small, immature onions) or onion seedlings. Sets are generally easier for beginners. You can find these at most garden centers.
* Scissors or a Utility Knife: For cutting the plastic bottles. Be careful!
* Drill or Nail (Optional): For creating drainage holes.
* Watering Can or Spray Bottle: For watering your onions.
* Gloves (Optional): To keep your hands clean.
* Small Pebbles or Gravel (Optional): For drainage at the bottom of the bottle.
* Fertilizer (Optional): A balanced liquid fertilizer can help boost growth.
Preparing the Plastic Bottles
This is where we transform those empty bottles into mini onion gardens!
1. Clean the Bottles: Thoroughly wash the plastic bottles with soap and water to remove any residue. Rinse them well and let them dry completely. This is important to prevent mold or bacteria growth.
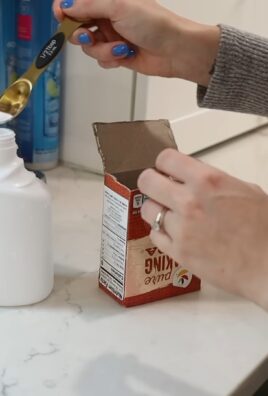
2. Cut the Bottles: Using your scissors or utility knife, carefully cut the top portion of the bottle off. I usually cut it about one-third of the way down from the top. You can discard the top portion or save it for other gardening projects.
3. Create Drainage Holes: This is essential for preventing waterlogging, which can rot the onion roots. If you have a drill, use a small drill bit to create several holes in the bottom of the bottle. If you don’t have a drill, you can use a nail and hammer to carefully poke holes. I usually make about 5-6 holes.
4. Add Drainage Layer (Optional): To further improve drainage, you can add a layer of small pebbles or gravel to the bottom of the bottle. This will help prevent the soil from becoming waterlogged. I usually add about an inch or two of pebbles.
Planting the Onions
Now for the fun part – planting the onions!
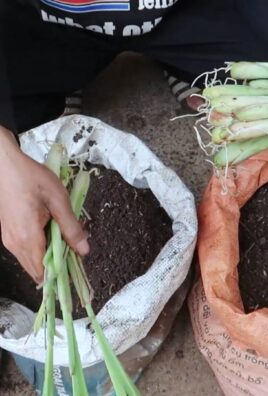
1. Fill the Bottle with Potting Soil: Carefully fill the prepared bottle with potting soil, leaving about an inch of space at the top. Gently tap the bottle to settle the soil.
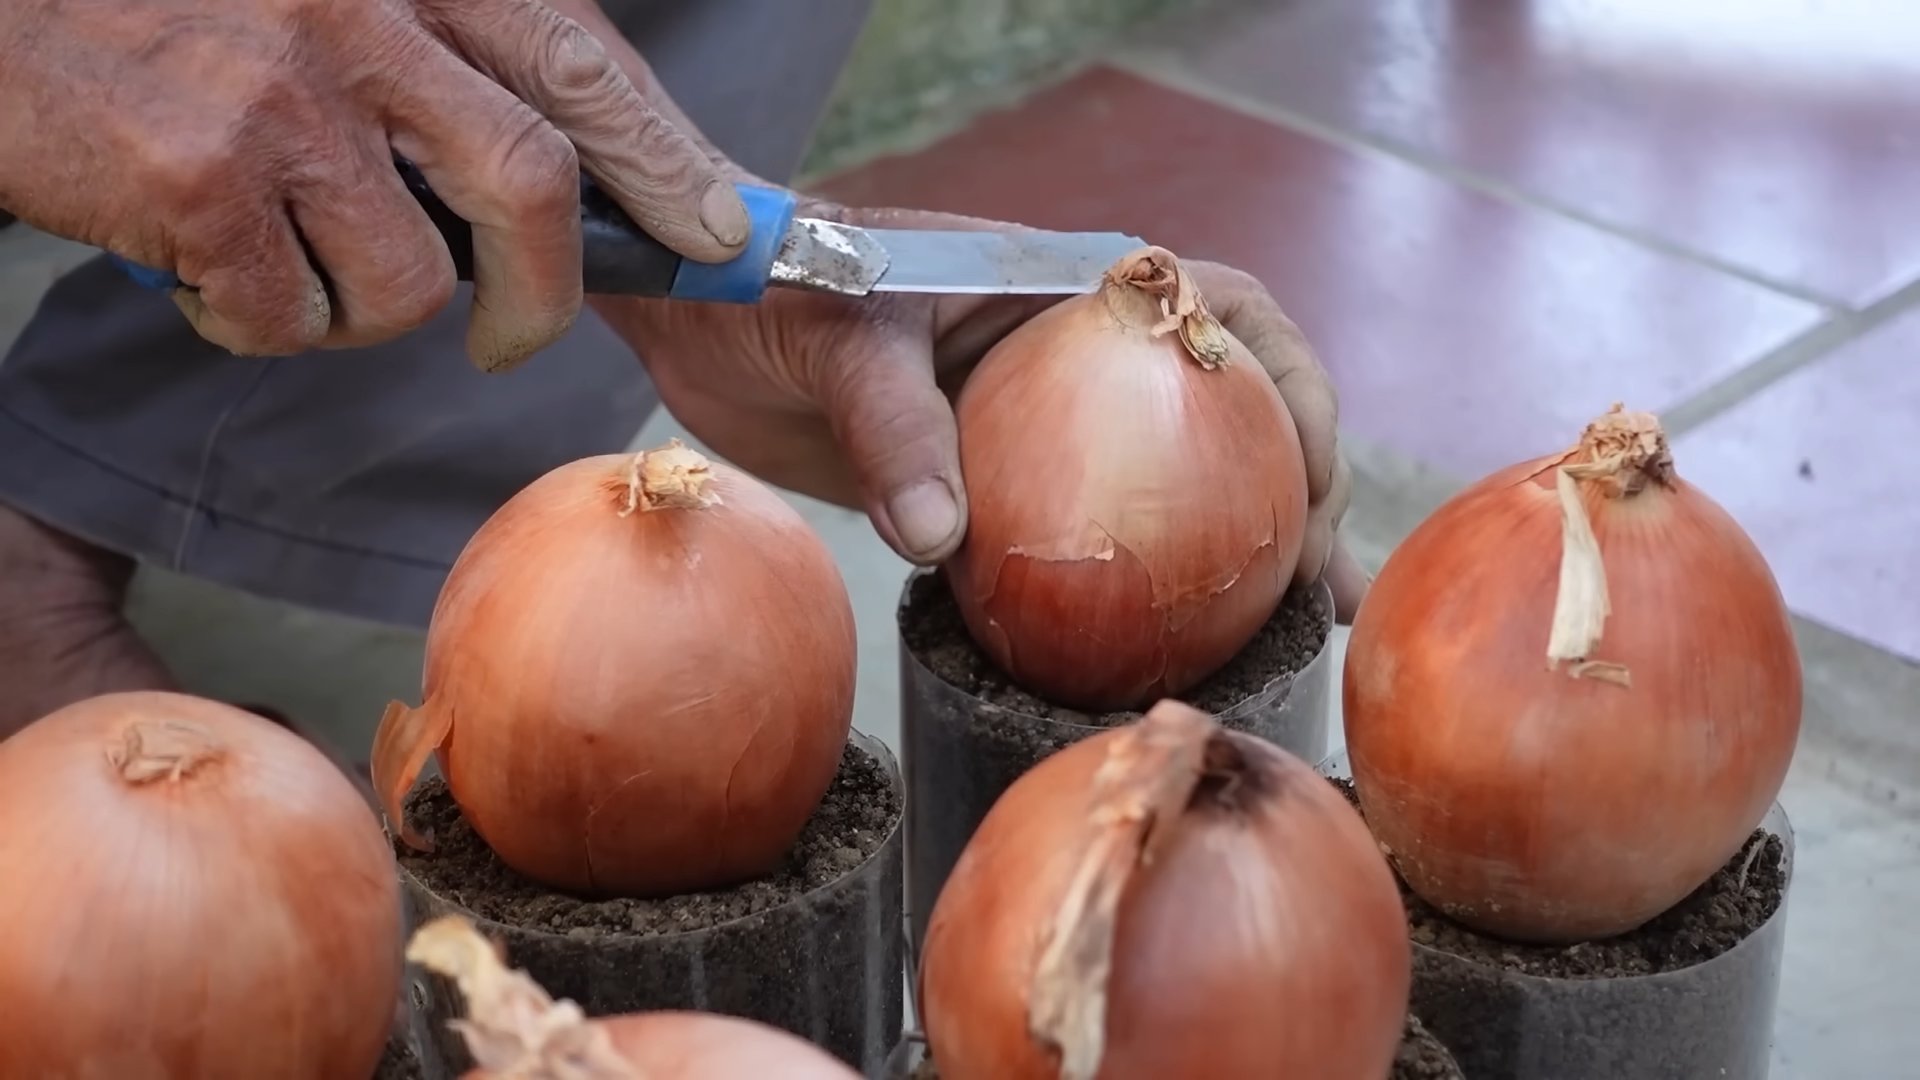
2. Plant the Onion Sets or Seedlings: If you’re using onion sets, make a small hole in the soil with your finger. Plant the set with the root end facing down, burying it about an inch deep. If you’re using seedlings, gently separate them and plant them at the same depth they were growing in their original container.
3. Space the Onions: If you’re planting multiple onions in one bottle (which I sometimes do with larger bottles), make sure to space them a few inches apart to allow them room to grow.
4. Water Thoroughly: After planting, water the onions thoroughly until the water drains out of the drainage holes. This will help settle the soil and encourage root growth.
Caring for Your Onions
Proper care is key to growing healthy and delicious onions.
1. Sunlight: Onions need plenty of sunlight to thrive. Place your bottles in a location that receives at least 6-8 hours of direct sunlight per day. A sunny windowsill, balcony, or patio is ideal.
2. Watering: Water your onions regularly, keeping the soil consistently moist but not waterlogged. Check the soil moisture by sticking your finger into the soil. If it feels dry, it’s time to water. I usually water every 2-3 days, depending on the weather.
3. Fertilizing (Optional): To boost growth, you can fertilize your onions every 2-3 weeks with a balanced liquid fertilizer. Follow the instructions on the fertilizer package. I like to use a fertilizer that’s specifically formulated for vegetables.
4. Weeding: Keep an eye out for weeds and remove them promptly. Weeds can compete with your onions for nutrients and water.
5. Pest Control: Onions are generally pest-resistant, but occasionally they can be affected by pests like onion maggots or thrips. If you notice any signs of pests, you can use an organic insecticide to control them. I prefer using neem oil, which is a natural and effective pest control solution.
6. Rotation: Rotate the bottles regularly to ensure that all sides of the onions receive equal sunlight. This will help them grow evenly.
Harvesting Your Onions
The moment you’ve been waiting for!
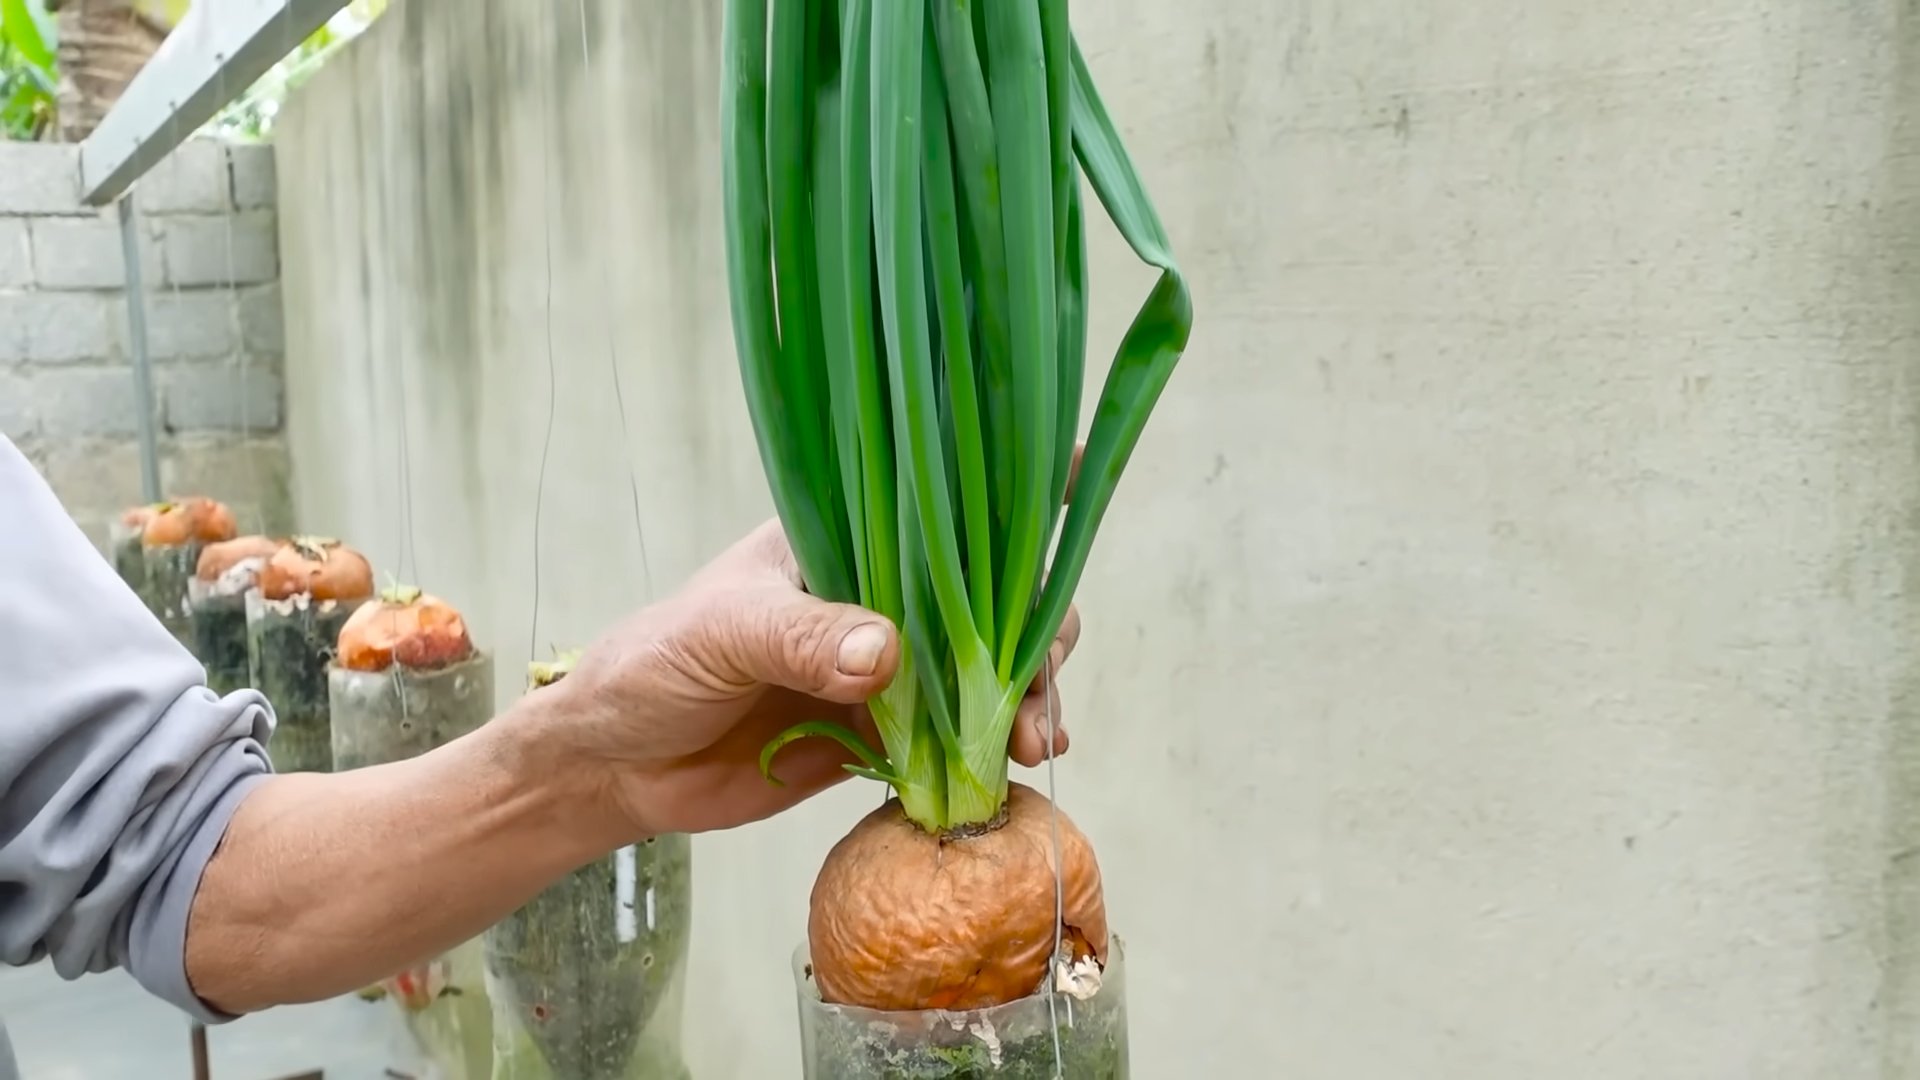
1. Harvest Time: Onions are typically ready to harvest in about 90-120 days, depending on the variety and growing conditions. You’ll know they’re ready when the tops start to turn yellow and fall over.
2. Harvesting: To harvest your onions, gently pull them out of the bottle. If the soil is dry, you may need to loosen it first.
3. Curing: After harvesting, cure your onions by laying them out in a warm, dry, and well-ventilated place for about 1-2 weeks. This will help them develop a papery outer skin and prevent them from rotting.
4. Storing: Once cured, you can store your onions in a cool, dry, and dark place for several months. I like to store mine in a mesh bag or basket.
Troubleshooting
Even with the best care, you might encounter some challenges along the way. Here are a few common problems and how to fix them:
* Yellowing Leaves: This could be a sign of overwatering, underwatering, or nutrient deficiency. Check the soil moisture and adjust your watering accordingly. If the soil is dry, water more frequently. If the soil is waterlogged, allow it to dry out before watering again. You can also try fertilizing your onions with a balanced fertilizer.
* Slow Growth: This could be due to insufficient sunlight, poor soil, or lack of nutrients. Make sure your onions are getting enough sunlight and that the soil is well-draining and fertile. You can also try fertilizing them with a balanced fertilizer.
* Pests: Keep an eye out for pests like onion maggots or thrips. If you notice any signs of pests, you can use an organic insecticide to control them. I prefer using neem oil.
* Rotting: This is usually caused by overwatering or poor drainage. Make sure your bottles have adequate drainage holes and avoid overwatering. If you notice any signs of rotting, remove the affected onions immediately to prevent the rot from spreading.
Choosing the Right Onion Variety
The type of onion you choose to grow will influence the flavor, size, and storage potential of your harvest. Here are a few popular varieties that do well in containers:
* Green Onions (Scallions): These are super easy to grow and can be harvested continuously as needed. They don’t form large bulbs, but their green tops are delicious in salads, soups, and stir-fries.
* Shallots: These have a milder, sweeter flavor than regular onions and are great for cooking. They also store well.
* Red Onions: These have a beautiful color and a slightly pungent flavor. They’re great for salads, sandwiches, and grilling.
* Yellow Onions: These are the most common type of onion and have a versatile flavor that works well in a variety of dishes.
* White Onions: These have a milder flavor than yellow onions and are often used in Mexican and Southwestern cuisine.
Tips for Success
Here are a few extra tips to help you grow the best onions possible:
* Start with Good Quality Sets or Seedlings: Choose healthy, disease-free sets or seedlings from a reputable source.
* Use Well-Draining Potting Soil: Avoid using garden soil, as it can be too dense and may contain pests or diseases.
* Provide Plenty of Sunlight: Onions need at least 6-8 hours of direct sunlight per day.
* Water Regularly: Keep the soil consistently moist but not waterlogged.
* Fertilize Regularly: Fertilize your onions every 2-3 weeks
Conclusion
So, there you have it! Growing onions in plastic bottles isn’t just a quirky gardening experiment; it’s a genuinely effective and space-saving method for cultivating these kitchen staples, especially if you’re short on garden space or dealing with poor soil conditions. We’ve walked you through the simple steps, highlighting the benefits of this innovative approach. From repurposing waste to enjoying a continuous supply of fresh onions, the advantages are undeniable.
This method allows you to control the growing environment to a greater extent. You can easily move your onion bottles to chase the sun or protect them from harsh weather. Plus, the confined space encourages denser root growth, potentially leading to more robust bulb development. Think about it: no more battling weeds around your precious onion patch, no more back-breaking tilling, and a significantly reduced risk of soilborne pests and diseases.
But the real magic lies in the adaptability of this technique. Feel free to experiment with different onion varieties. Shallots, scallions, and even smaller bulb onions can thrive in these recycled containers. Consider adding companion plants like marigolds or basil to your bottle gardens to deter pests naturally. You can also adjust the soil mix to suit your specific onion variety. For example, adding a bit more compost to the mix can provide extra nutrients for hungry onions.
Don’t be afraid to get creative with your bottle gardens! Paint them, decorate them, or arrange them in eye-catching displays. This is your chance to turn a practical gardening solution into a beautiful and unique feature of your home. Imagine a vertical garden of onions cascading down a sunny wall – a testament to your resourcefulness and green thumb.
The key to success with growing onions in plastic bottles is consistency. Regular watering, proper drainage, and adequate sunlight are crucial. Monitor your plants closely for any signs of pests or diseases, and address them promptly. Remember, patience is a virtue in gardening. It may take a few weeks to see significant growth, but the reward of harvesting your own homegrown onions is well worth the wait.
We firmly believe that this DIY trick is a game-changer for urban gardeners, apartment dwellers, and anyone looking for a sustainable and efficient way to grow their own food. It’s a simple, cost-effective, and environmentally friendly solution that puts fresh, flavorful onions within easy reach.
So, what are you waiting for? Gather your plastic bottles, prepare your soil, and get ready to embark on this exciting gardening adventure. We’re confident that you’ll be amazed by the results. And most importantly, we want to hear about your experience! Share your photos, tips, and stories with us in the comments below. Let’s build a community of bottle-gardening enthusiasts and inspire others to embrace this innovative approach to growing onions. Let us know what worked for you, what challenges you faced, and any creative variations you came up with. Together, we can unlock the full potential of growing onions in plastic bottles and transform our homes into thriving urban farms.
Frequently Asked Questions (FAQ)
What type of plastic bottles are best for growing onions?
Ideally, you should use sturdy, food-grade plastic bottles. Two-liter soda bottles or larger water bottles work well. Avoid using bottles that have contained harsh chemicals or pesticides, as these could contaminate your soil and onions. Make sure to thoroughly clean the bottles before using them. Clear or translucent bottles are preferable as they allow you to monitor the soil moisture levels. Darker bottles can also be used, but you’ll need to be more diligent about checking the soil.
How often should I water my onions grown in plastic bottles?
Watering frequency depends on several factors, including the weather, the type of soil you’re using, and the size of the bottle. Generally, you should water your onions when the top inch of soil feels dry to the touch. Avoid overwatering, as this can lead to root rot. Ensure that your bottles have adequate drainage holes to prevent water from accumulating at the bottom. During hot, dry weather, you may need to water daily, while during cooler, wetter periods, you may only need to water every few days. A good rule of thumb is to check the soil moisture regularly and adjust your watering schedule accordingly.
What kind of soil should I use for growing onions in plastic bottles?
A well-draining potting mix is essential for growing healthy onions in plastic bottles. A mixture of equal parts potting soil, compost, and perlite or vermiculite is ideal. The potting soil provides nutrients, the compost adds organic matter, and the perlite or vermiculite improves drainage and aeration. Avoid using garden soil, as it can be too heavy and compact, leading to poor drainage and root problems. You can also add a slow-release fertilizer to the soil mix to provide a steady supply of nutrients to your onions.
How much sunlight do onions need when grown in plastic bottles?
Onions need at least 6-8 hours of direct sunlight per day to thrive. Place your bottle gardens in a sunny location, such as a south-facing window or balcony. If you don’t have access to enough natural sunlight, you can supplement with grow lights. Rotate the bottles regularly to ensure that all sides of the plants receive adequate light. Insufficient sunlight can lead to weak, leggy growth and reduced bulb size.
Can I grow onions from seed in plastic bottles?
Yes, you can grow onions from seed in plastic bottles. Start by sowing the seeds indoors in seed trays or small pots about 8-10 weeks before the last expected frost. Once the seedlings are large enough to handle, transplant them into your prepared plastic bottles. Alternatively, you can directly sow the seeds into the bottles, but this may result in lower germination rates. When transplanting or sowing seeds, be sure to space them adequately to allow for proper growth.
What are some common pests and diseases that affect onions grown in plastic bottles?
Onions grown in plastic bottles can be susceptible to common pests and diseases such as onion maggots, thrips, and fungal diseases like downy mildew and onion rot. Regularly inspect your plants for any signs of infestation or disease. Use organic pest control methods, such as neem oil or insecticidal soap, to control pests. Ensure good air circulation around the plants to prevent fungal diseases. Remove any infected leaves or plants immediately to prevent the spread of disease.
How do I know when my onions are ready to harvest from plastic bottles?
Onions are typically ready to harvest when the tops begin to turn yellow or brown and fall over. This usually occurs about 90-120 days after planting. Gently pull the onions from the bottles and allow them to dry in the sun for a few days before storing them. Properly cured onions will have a papery outer skin and a firm bulb. Store them in a cool, dry, and well-ventilated place.
Can I reuse the plastic bottles for growing onions again?
Yes, you can reuse the plastic bottles for growing onions again. However, it’s important to thoroughly clean and disinfect them before each use to prevent the spread of diseases. Wash the bottles with soap and water, and then rinse them with a solution of bleach and water (1 part bleach to 9 parts water). Allow the bottles to air dry completely before refilling them with fresh soil.
What are some variations I can try when growing onions in plastic bottles?
There are many variations you can try when growing onions in plastic bottles. You can experiment with different onion varieties, such as red onions, white onions, or shallots. You can also try growing other vegetables or herbs in the same bottle, such as lettuce, spinach, or basil. Consider creating a vertical garden by stacking multiple bottles on top of each other. You can also add decorative elements to your bottle gardens, such as paint, stones, or shells. The possibilities are endless!
Is growing onions in plastic bottles truly sustainable?
Yes, growing onions in plastic bottles can be a very sustainable practice. It promotes recycling by repurposing plastic waste, reduces the need for large garden spaces, minimizes soil disturbance, and allows for localized food production. By growing your own onions, you can reduce your reliance on commercially grown produce, which often involves long-distance transportation and the use of pesticides and herbicides. Furthermore, you can compost the spent soil and onion scraps to create nutrient-rich compost for future plantings, closing the loop and further enhancing the sustainability of this method.
Leave a Comment