

Growing Pechay in Pots: Imagine stepping outside your door and harvesting fresh, crisp pechay right from your own backyard – or even your balcony! It’s not just a dream; it’s an achievable reality with a little know-how. For generations, cultivating your own food has been a cornerstone of self-sufficiency and a connection to the earth. From ancient civilizations tending their herb gardens to modern urban dwellers embracing container gardening, the desire to nurture and harvest has always been a part of us.
But let’s be honest, not everyone has acres of land to dedicate to a sprawling vegetable garden. That’s where the magic of growing pechay in pots comes in! This DIY guide is your passport to fresh, homegrown goodness, even if you’re short on space. I’m going to share some simple yet effective tricks and hacks that will transform your pots into thriving pechay patches.
Why do you need this? Because store-bought vegetables, while convenient, often lack the vibrant flavor and nutritional value of homegrown produce. Plus, there’s nothing quite like the satisfaction of nurturing a plant from seed to harvest. So, whether you’re a seasoned gardener or a complete beginner, get ready to discover the joy of growing pechay in pots and enjoy the freshest, most delicious pechay you’ve ever tasted!
Growing Pechay in Pots: A Beginner’s Guide
Hey there, fellow gardening enthusiasts! So, you want to grow your own pechay (also known as bok choy) in pots? Awesome! It’s totally doable, even if you’re a complete newbie. Pechay is a fast-growing, nutritious, and delicious leafy green that’s perfect for small spaces. I’ve grown it myself countless times, and I’m here to share all my secrets to help you succeed. Let’s get started!
What You’ll Need
Before we dive into the nitty-gritty, let’s gather all the supplies you’ll need. This will save you time and frustration later on.
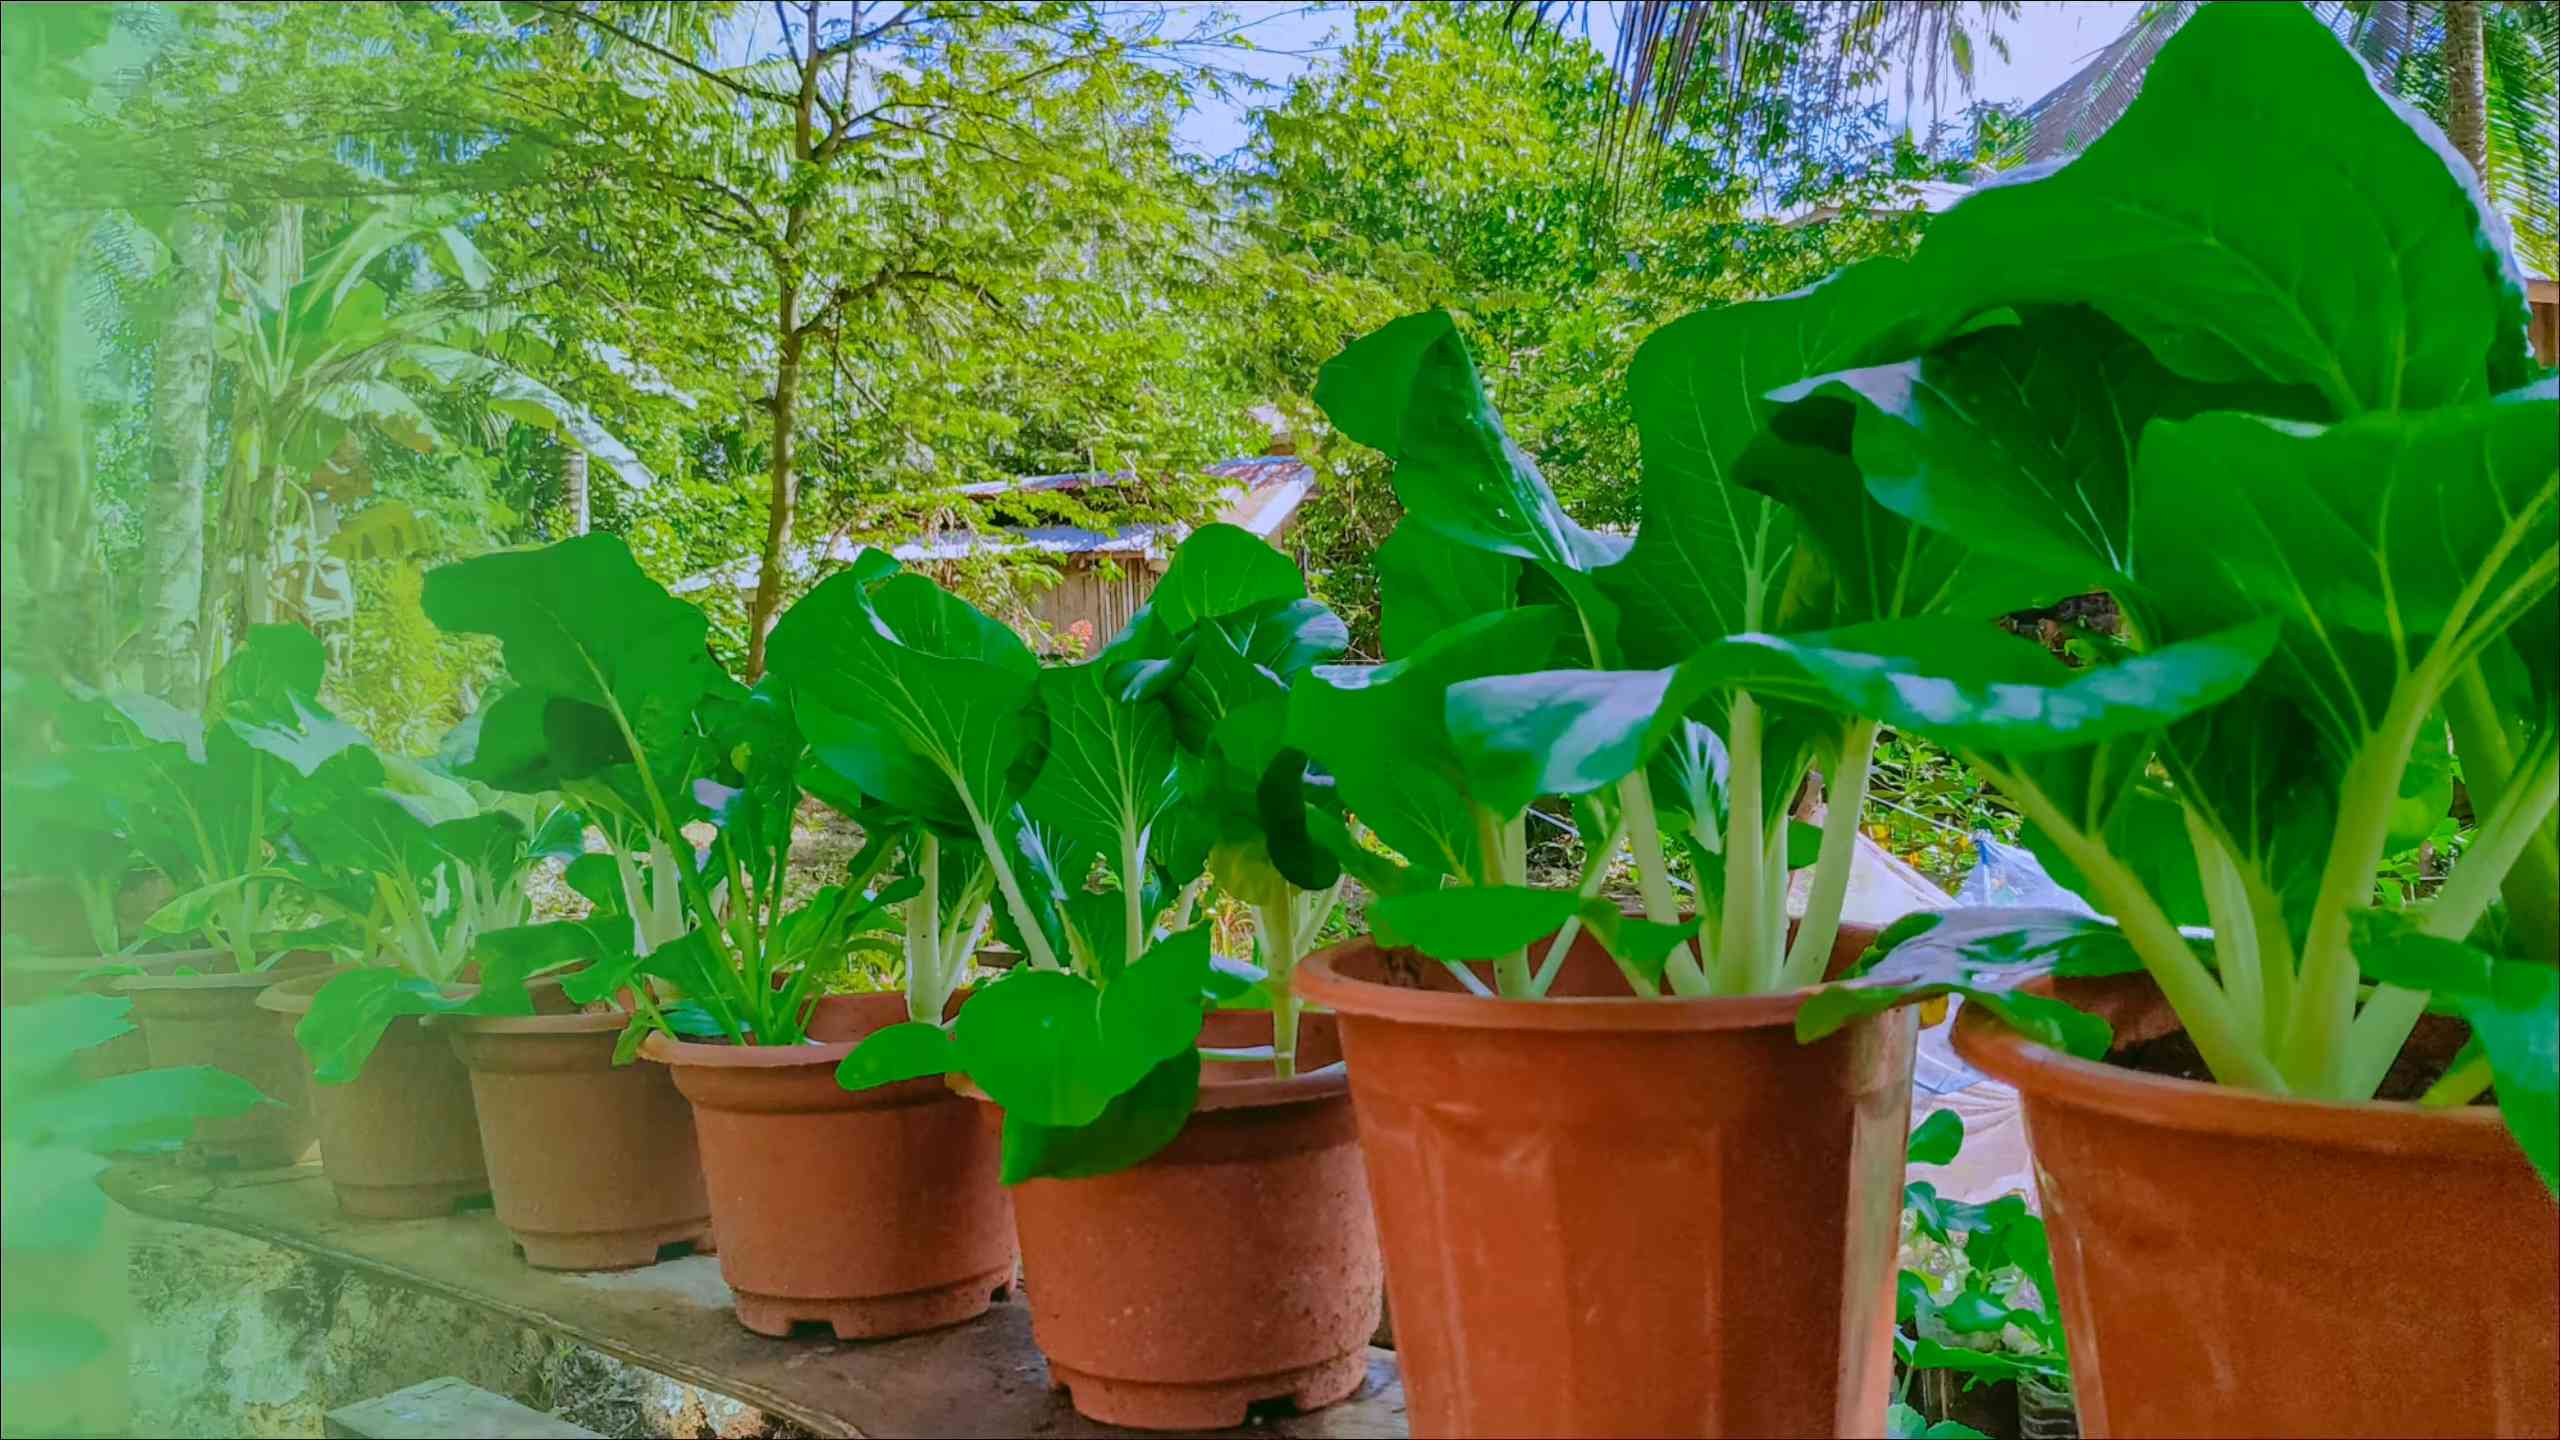
* Pots: Choose pots that are at least 6-8 inches deep and wide. Pechay needs room for its roots to grow. I prefer using plastic pots because they’re lightweight and retain moisture well, but terracotta pots work too, just keep in mind they dry out faster.
* Potting Mix: Don’t use garden soil! It’s too heavy and compacts easily. Opt for a well-draining potting mix specifically formulated for containers. I usually go for a mix that contains peat moss, perlite, and vermiculite.
* Pechay Seeds: You can find these at most garden centers or online. Choose a variety that suits your climate and preferences. Some popular varieties include ‘Black Summer,’ ‘Mei Qing Choi,’ and ‘Joi Choi.’
* Watering Can or Hose: For watering your pechay plants, of course! A gentle watering can is ideal, especially when the seedlings are young.
* Fertilizer: A balanced liquid fertilizer (like 10-10-10) or a slow-release granular fertilizer will provide your pechay with the nutrients it needs to thrive.
* Trowel or Small Shovel: For filling the pots with potting mix and transplanting seedlings.
* Optional:
* Seed starting tray or small pots (if you’re starting seeds indoors).
* Plant labels (to keep track of your varieties).
* Organic pest control (like neem oil or insecticidal soap).
Step-by-Step Planting Guide
Okay, now that we have everything we need, let’s get our hands dirty!
1. Sowing Seeds (Directly in Pots or Starting Indoors): You have two options here: direct sowing or starting seeds indoors.
* Direct Sowing: This is the easiest method. Fill your pots with potting mix, leaving about an inch of space at the top. Moisten the soil thoroughly. Sow the pechay seeds about 1/4 inch deep and 1 inch apart. Gently cover the seeds with soil and water again.
* Starting Seeds Indoors: If you live in an area with a short growing season or want a head start, start your seeds indoors 4-6 weeks before the last expected frost. Fill a seed starting tray or small pots with seed starting mix. Sow the seeds as described above. Keep the soil moist and provide plenty of light (either natural or artificial). Once the seedlings have a few true leaves, you can transplant them into your larger pots.
2. Choosing the Right Location: Pechay loves sunlight! Choose a location that receives at least 4-6 hours of direct sunlight per day. However, in hot climates, some afternoon shade can be beneficial to prevent the leaves from scorching. I usually place my pechay pots on my balcony, where they get plenty of morning sun.
3. Watering: Consistent watering is crucial for pechay. Keep the soil consistently moist, but not waterlogged. Water deeply whenever the top inch of soil feels dry to the touch. Avoid overhead watering, as this can lead to fungal diseases. I prefer to water at the base of the plant.
4. Fertilizing: Pechay is a heavy feeder, so regular fertilization is important. If you’re using a liquid fertilizer, dilute it according to the package instructions and apply it every 2-3 weeks. If you’re using a slow-release granular fertilizer, mix it into the potting mix at planting time.
5. Thinning Seedlings (If Necessary): If you direct sowed your seeds, you may need to thin the seedlings once they’re a few inches tall. Thin them to about 4-6 inches apart to give them enough room to grow. Don’t just pull them out! Gently snip them off at the soil line to avoid disturbing the roots of the remaining plants.
6. Pest Control: Pechay can be susceptible to pests like aphids, cabbage worms, and slugs. Regularly inspect your plants for signs of infestation. If you spot any pests, you can try handpicking them off or using organic pest control methods like neem oil or insecticidal soap. I’ve found that spraying my plants with a diluted solution of neem oil every week helps to keep pests at bay.
7. Weed Control: Keep your pots free of weeds. Weeds compete with your pechay plants for nutrients and water. Hand-pull any weeds that appear.
Harvesting Your Pechay
This is the fun part! Pechay is a fast-growing crop, and you can usually start harvesting it about 45-50 days after planting.
* When to Harvest: You can harvest pechay at any stage of growth, depending on your preference. For baby greens, harvest when the leaves are about 4-6 inches long. For mature plants, harvest when the leaves are about 8-12 inches long.
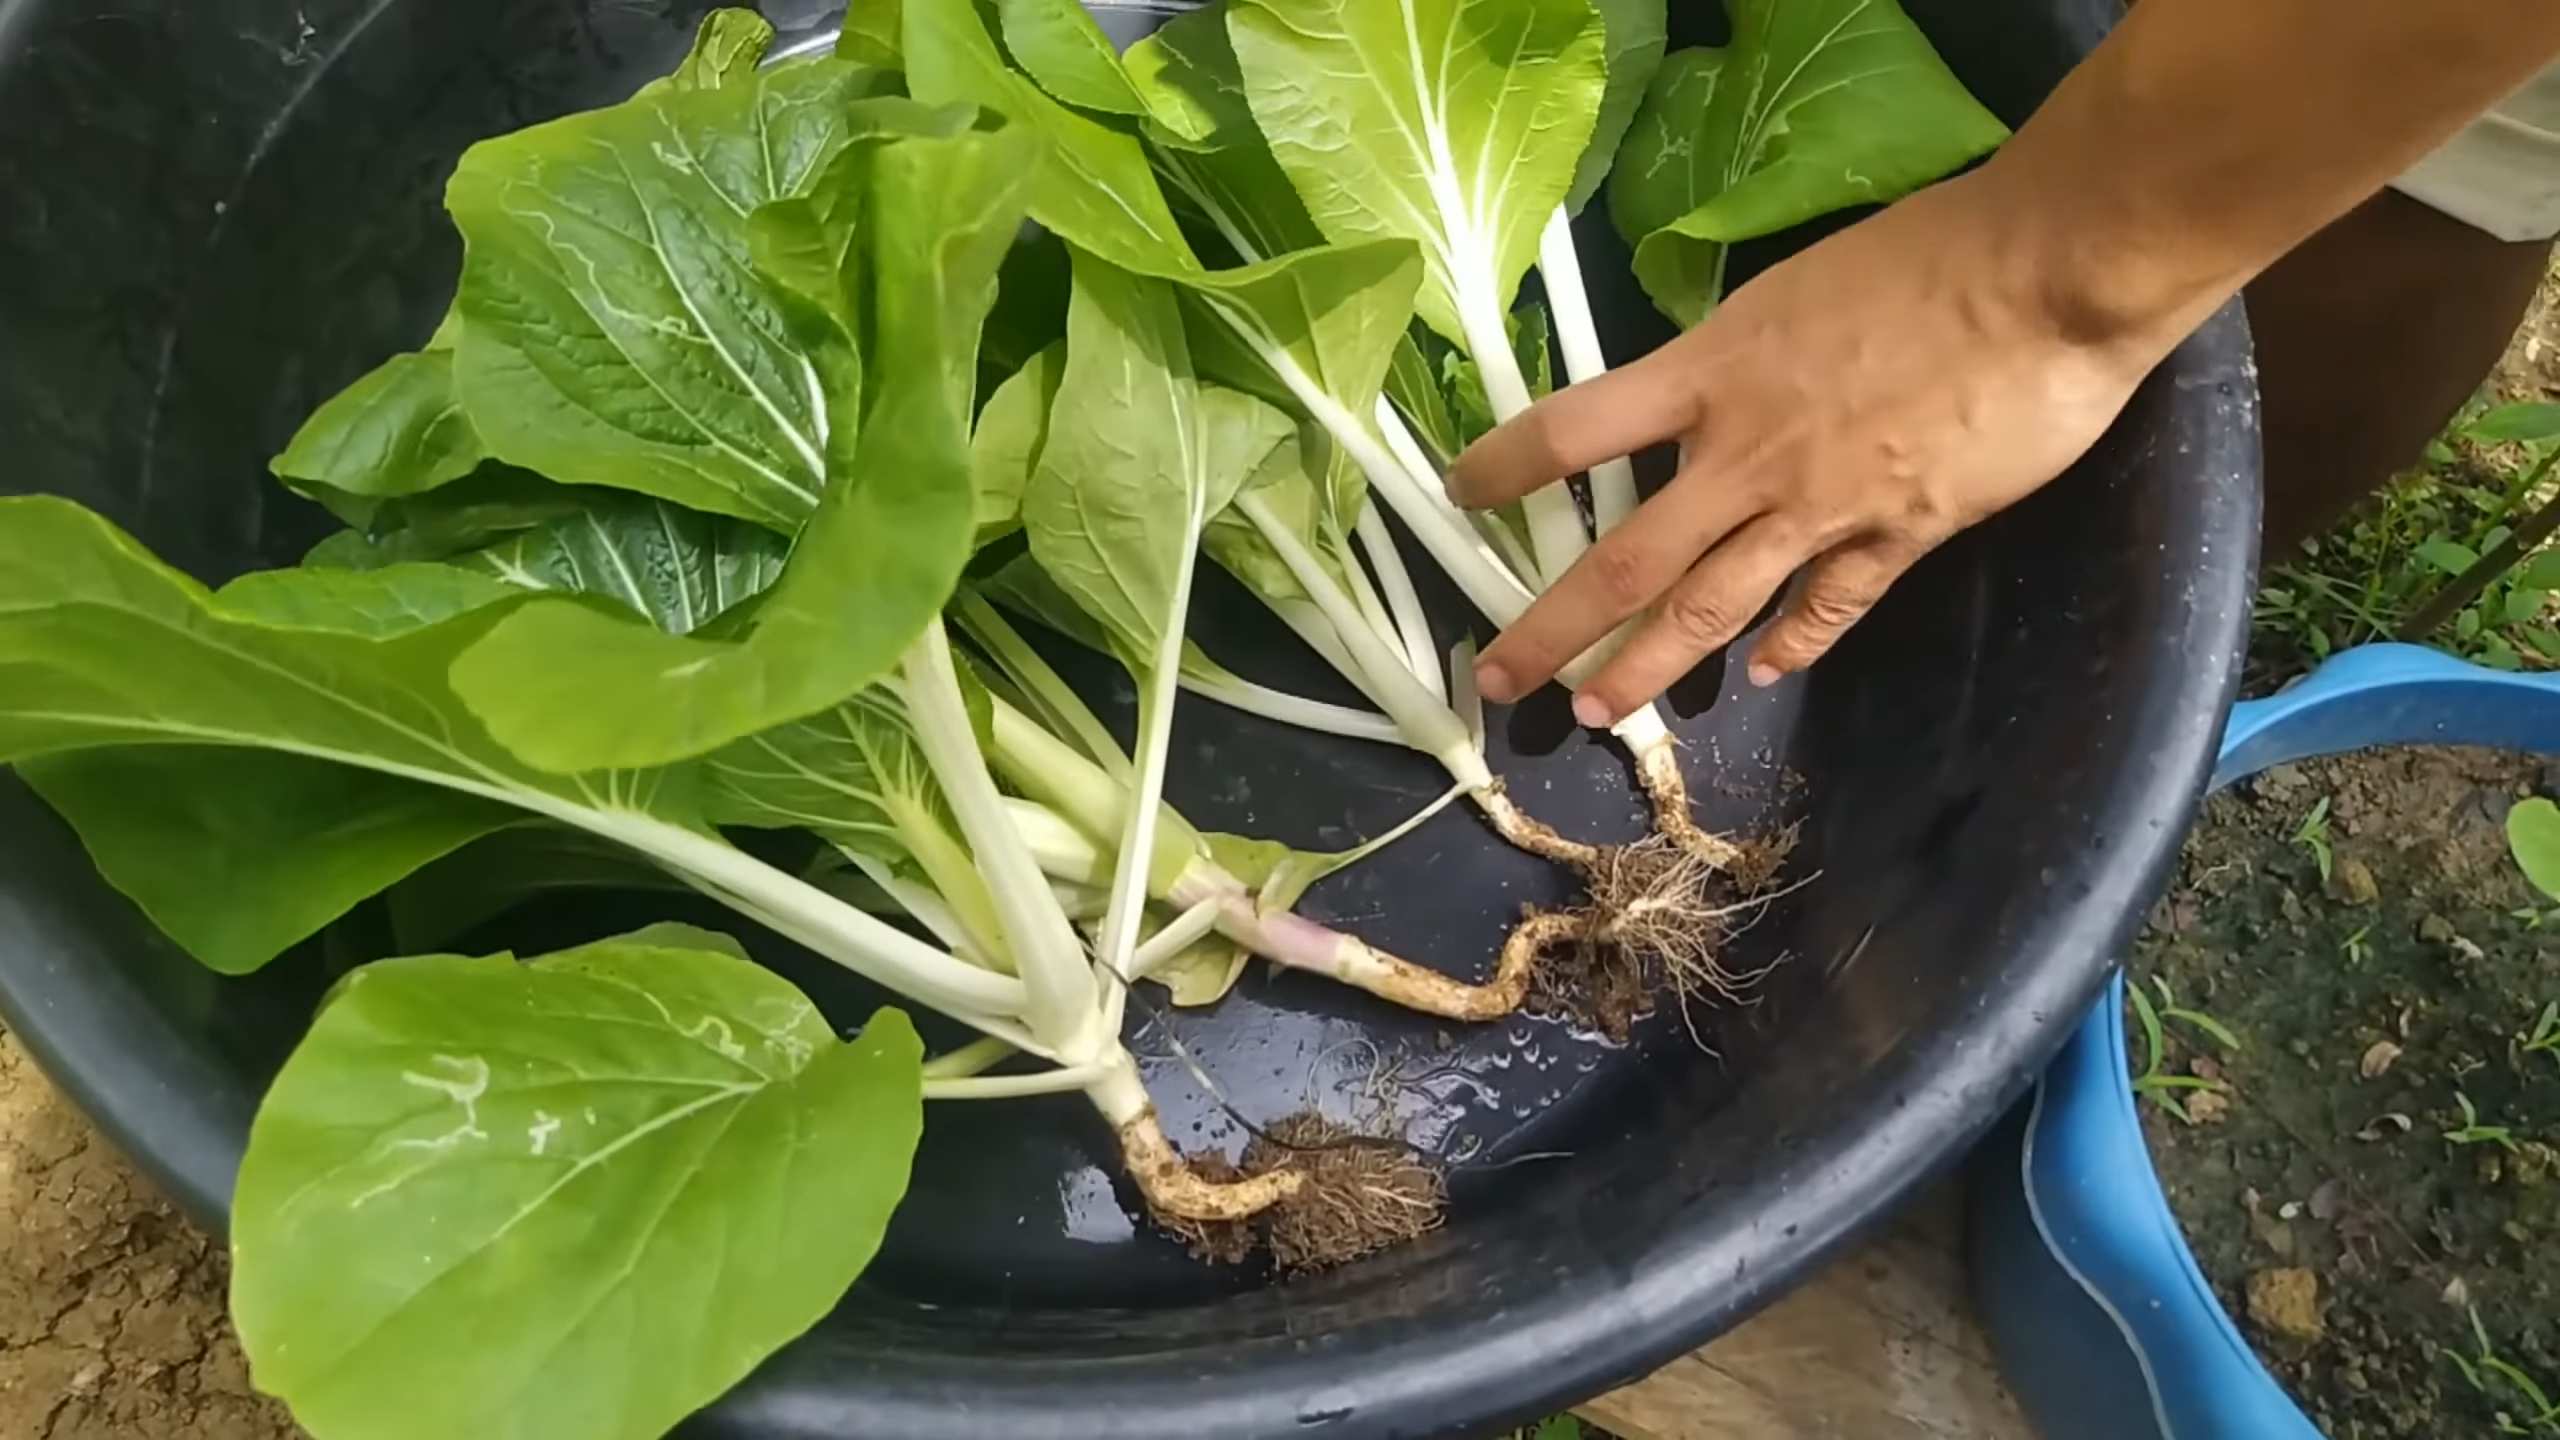
* How to Harvest: You can harvest the entire plant at once by cutting it off at the base, or you can harvest individual leaves as needed. If you harvest individual leaves, start with the outer leaves and work your way inwards. This will allow the plant to continue producing new leaves.
* Post-Harvest Care: After harvesting, wash the pechay leaves thoroughly and store them in the refrigerator. They will keep for several days.
Troubleshooting Common Problems
Even with the best care, you might encounter some problems while growing pechay. Here are some common issues and how to address them:
* Yellowing Leaves: This could be a sign of overwatering, underwatering, or nutrient deficiency. Check the soil moisture and adjust your watering accordingly. If the soil is consistently moist, you may be overwatering. If the soil is dry, you may be underwatering. If the leaves are yellowing all over, it could be a sign of nutrient deficiency. Try fertilizing your plants with a balanced fertilizer.
* Stunted Growth: This could be caused by poor soil, lack of sunlight, or pest infestation. Make sure your plants are growing in well-draining potting mix and receiving enough sunlight. Inspect your plants for pests and take appropriate action.
* Bolting (Premature Flowering): Pechay is prone to bolting in hot weather. Bolting makes the leaves bitter. To prevent bolting, try to provide some afternoon shade during hot weather. You can also choose bolt-resistant varieties.
* Pest Infestation: As mentioned earlier, pechay can be susceptible to pests like aphids, cabbage worms, and slugs. Regularly inspect your plants for signs of infestation and take appropriate action.
Tips for Success
Here are a few extra tips to help you grow the best pechay possible:
* Succession Planting: To ensure a continuous harvest, sow new seeds every 2-3 weeks.
* Choose the Right Variety: Select a variety that is well-suited to your climate and growing conditions.
* Provide Adequate Drainage: Make sure your pots have drainage holes to prevent waterlogging.
* Mulch: Applying a layer of mulch around your plants can help to retain moisture, suppress weeds, and regulate soil temperature.
* Rotate Crops: Avoid planting pechay in the same spot year after year. Crop rotation can help to prevent soilborne diseases and pest infestations.
Growing pechay in pots is a rewarding experience. With a little bit of care and attention, you can enjoy fresh, homegrown pechay all season long. Happy gardening!
Conclusion
So, there you have it! Growing your own pechay in pots is not only achievable, but it’s also incredibly rewarding. From the satisfaction of nurturing a plant from seed to harvest, to the unparalleled freshness of homegrown greens gracing your table, this DIY project is a must-try for any gardening enthusiast, regardless of experience level.
Why is this a must-try? Because it puts you in control. You dictate the growing conditions, ensuring your pechay is free from harmful pesticides and bursting with flavor. Plus, it’s a fantastic way to connect with nature, even if you only have a small balcony or patio. Imagine stepping outside and snipping fresh leaves for your stir-fries, salads, or soups – the convenience and quality are simply unmatched.
But the beauty of this project lies in its adaptability. Feel free to experiment with different varieties of pechay. Some popular choices include ‘Black Summer,’ known for its dark green leaves, or ‘Tokyo Bekana,’ which offers a milder, sweeter taste. You can also explore companion planting. Marigolds, for example, can help deter pests, while basil can enhance the flavor of your pechay.
Consider the size of your pots as well. While we’ve recommended a certain size, you might find that larger pots allow for even more robust growth. Just be sure to adjust your watering and fertilizing schedule accordingly. And don’t be afraid to get creative with your potting mix. Adding compost or other organic matter can significantly improve drainage and nutrient availability.
Furthermore, think about your local climate. If you live in a particularly hot or sunny area, you might need to provide some shade for your pechay, especially during the hottest part of the day. Conversely, if you live in a cooler climate, you might need to start your seeds indoors or provide some protection from frost.
The key is to observe your plants closely and adjust your care accordingly. Pay attention to the color of the leaves, the moisture level of the soil, and any signs of pests or diseases. The more you learn about your plants, the better you’ll become at growing them.
We are confident that with a little effort and attention, you can successfully grow your own delicious and nutritious pechay in pots. It’s a fun, affordable, and sustainable way to enjoy fresh greens, and it’s a project that the whole family can get involved in.
So, what are you waiting for? Grab some seeds, pots, and soil, and get started today! We’re eager to hear about your experiences. Share your photos, tips, and challenges in the comments below. Let’s create a community of pechay growers and learn from each other. Happy gardening! Remember, mastering the art of growing pechay in pots is within your reach, and the rewards are well worth the effort.
Frequently Asked Questions (FAQ)
What is the best time of year to plant pechay in pots?
The best time to plant pechay depends on your local climate. Pechay thrives in cooler temperatures, ideally between 60°F and 70°F (15°C and 21°C). In most regions, this means planting in early spring or late summer/early fall. Avoid planting during the hottest months of summer, as high temperatures can cause the plants to bolt (go to seed prematurely), resulting in bitter-tasting leaves. If you live in a region with mild winters, you may be able to grow pechay year-round. Check your local weather patterns and adjust your planting schedule accordingly. Starting seeds indoors a few weeks before the last expected frost can give you a head start on the growing season.
How much sunlight does pechay need when grown in pots?
Pechay requires at least 4-6 hours of direct sunlight per day to thrive. However, in hotter climates, providing some afternoon shade can prevent the leaves from scorching. If you’re growing pechay indoors, place the pots near a sunny window or use grow lights to supplement natural light. Insufficient sunlight can lead to leggy growth and reduced yields. Observe your plants closely and adjust their position as needed to ensure they receive adequate sunlight. If the leaves appear pale or stretched, it’s a sign that they need more light.
What kind of soil is best for growing pechay in pots?
Pechay prefers well-draining, fertile soil that is rich in organic matter. A good potting mix for pechay should consist of a combination of garden soil, compost, and perlite or vermiculite. The compost provides essential nutrients, while the perlite or vermiculite improves drainage and aeration. Avoid using heavy clay soil, as it can become waterlogged and suffocate the roots. The ideal pH level for pechay is between 6.0 and 7.5. You can test the pH of your soil using a soil testing kit and amend it as needed with lime (to raise the pH) or sulfur (to lower the pH).
How often should I water pechay grown in pots?
Pechay needs consistent moisture to thrive, but it’s important to avoid overwatering, which can lead to root rot. Water your pechay plants whenever the top inch of soil feels dry to the touch. During hot, dry weather, you may need to water them daily. Water deeply, ensuring that the water reaches the roots. Avoid watering the leaves directly, as this can promote fungal diseases. A good way to check if your plants need water is to lift the pot. If it feels light, it’s likely time to water.
What kind of fertilizer should I use for pechay in pots?
Pechay is a heavy feeder and benefits from regular fertilization. Use a balanced fertilizer with an NPK ratio of 10-10-10 or 20-20-20. You can also use a fertilizer specifically formulated for leafy greens. Apply the fertilizer according to the package instructions, typically every 2-3 weeks. Alternatively, you can use organic fertilizers such as compost tea or fish emulsion. These are gentler on the plants and provide a slow-release source of nutrients. Avoid over-fertilizing, as this can lead to excessive leaf growth and reduced flavor.
How do I deal with pests and diseases affecting pechay in pots?
Pechay can be susceptible to various pests and diseases, including aphids, cabbage worms, and fungal diseases. Regularly inspect your plants for signs of infestation or disease. If you spot any pests, you can try removing them by hand or spraying the plants with insecticidal soap or neem oil. For fungal diseases, ensure good air circulation and avoid overwatering. You can also use a fungicide if necessary. Companion planting with herbs like basil or marigolds can help deter pests. Practicing crop rotation and using disease-resistant varieties can also help prevent problems.
When and how should I harvest pechay from pots?
Pechay can be harvested as soon as the leaves are large enough to eat, typically about 3-4 weeks after planting. You can harvest individual leaves as needed or harvest the entire plant at once. To harvest individual leaves, simply snip them off near the base of the plant. To harvest the entire plant, cut it off at the base. Regular harvesting encourages new growth and extends the harvest period. Harvest in the morning when the leaves are crisp and fresh.
Can I grow pechay indoors year-round?
Yes, you can grow pechay indoors year-round, provided you can provide adequate light and temperature. Place the pots near a sunny window or use grow lights to supplement natural light. Maintain a temperature between 60°F and 70°F (15°C and 21°C). Ensure good air circulation to prevent fungal diseases. Water regularly and fertilize as needed. With proper care, you can enjoy fresh pechay from your indoor garden all year long.
What are some creative ways to use homegrown pechay?
Homegrown pechay is incredibly versatile and can be used in a variety of dishes. It’s delicious in stir-fries, soups, salads, and steamed dishes. You can also use it as a substitute for spinach or other leafy greens in your favorite recipes. Try adding it to smoothies for a boost of nutrients. The possibilities are endless! Experiment with different recipes and find your favorite ways to enjoy your homegrown pechay.

Leave a Comment