

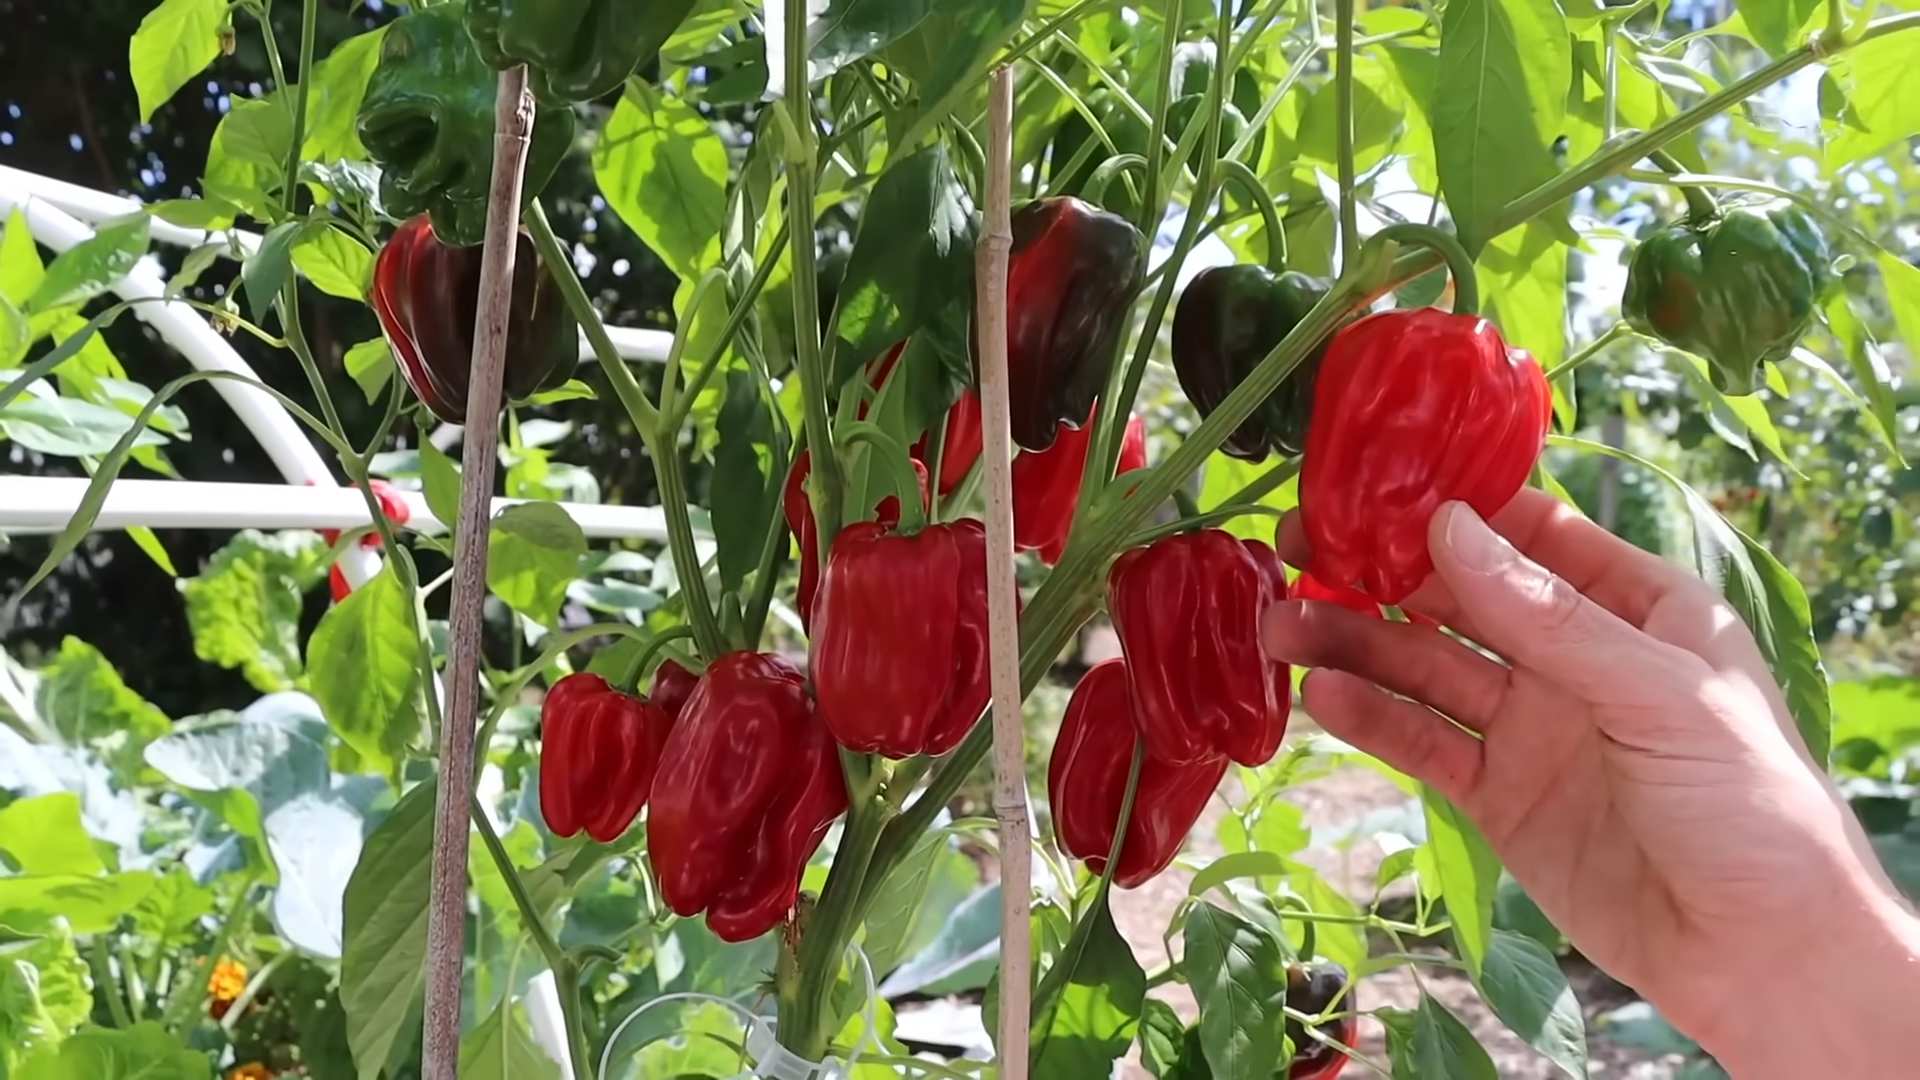
Growing Peppers Backyard doesn’t have to be a daunting task! Imagine stepping outside your back door and plucking fresh, vibrant peppers straight from the vine. Sounds idyllic, right? Well, it’s totally achievable, even if you don’t have acres of land or a green thumb that seems to work magic. For centuries, peppers have been a staple in cuisines around the globe, adding spice and flavor to dishes from Mexico to India. Their cultivation dates back thousands of years, and now, you can easily bring that rich history into your own backyard.
But let’s be honest, sometimes growing peppers backyard can feel like a battle against pests, diseases, and unpredictable weather. That’s where these DIY tricks and hacks come in! I’m here to share some simple, yet effective, strategies that will help you cultivate a thriving pepper patch, no matter your experience level. Whether you’re dreaming of fiery habaneros or sweet bell peppers, these tips will empower you to create a bountiful harvest. So, ditch the store-bought peppers and get ready to enjoy the satisfaction of growing your own delicious peppers right in your backyard!
Growing Peppers Like a Pro: My Backyard Pepper Paradise Guide
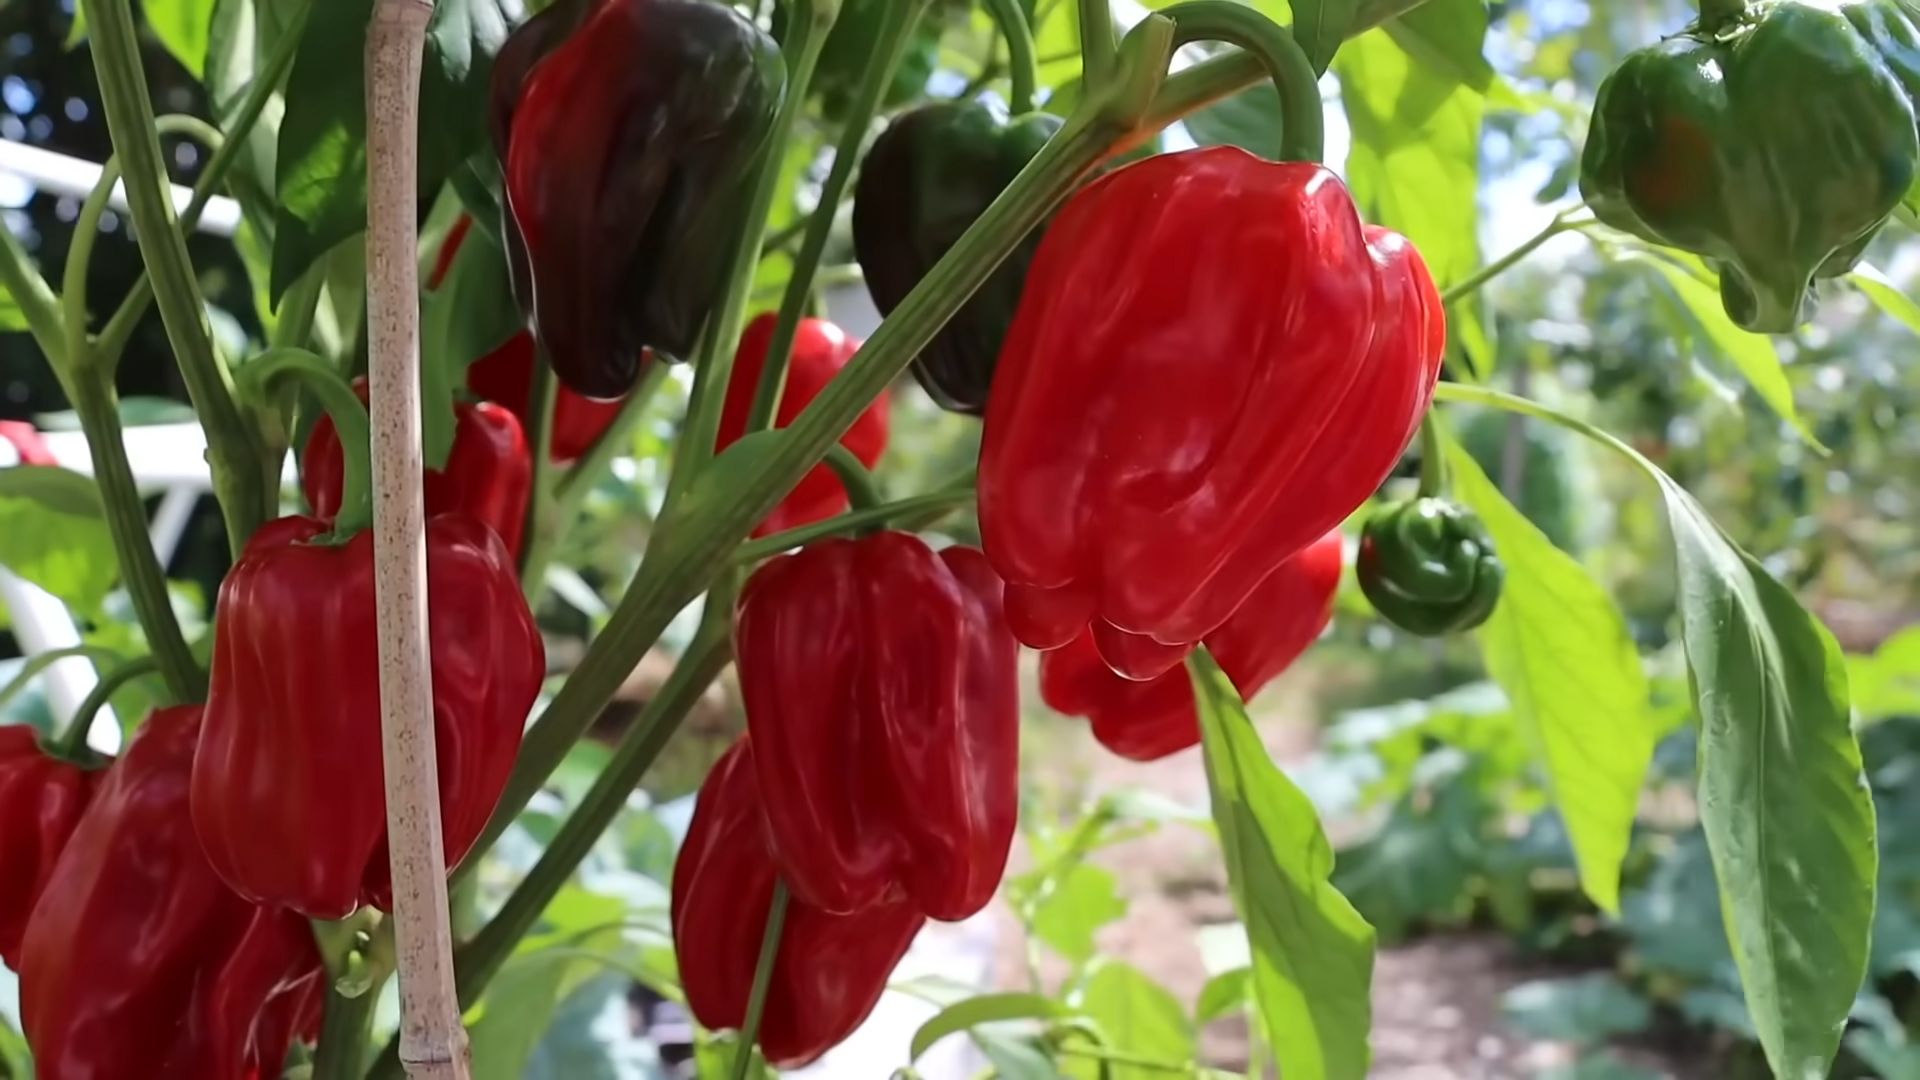
Hey there, fellow gardening enthusiasts! I’m so excited to share my tried-and-true method for growing a bumper crop of peppers right in your own backyard. Forget those bland, store-bought peppers – we’re talking vibrant colors, incredible flavors, and the satisfaction of knowing you grew them yourself. This guide is packed with everything I’ve learned over the years, from choosing the right varieties to troubleshooting common problems. Let’s get started!
Choosing Your Pepper Varieties
Before we even think about planting, let’s talk peppers! The world of peppers is vast and exciting, so choosing the right varieties is crucial for success. Consider your taste preferences, climate, and available space.
* Sweet Peppers: These are your bell peppers (red, yellow, orange, green), banana peppers, and pimentos. They’re mild, versatile, and great for stuffing, salads, or grilling.
* Mildly Spicy Peppers: Think poblano, Anaheim, and shishito peppers. They offer a gentle kick and are perfect for adding depth of flavor to dishes.
* Hot Peppers: This category includes jalapeños, serranos, cayenne, and habaneros. Be careful! Their heat levels vary significantly, so choose wisely based on your tolerance.
* Super Hot Peppers: We’re talking ghost peppers, Scotch bonnets, and Carolina reapers. These are for the serious chiliheads only! Handle with extreme caution.
My Personal Recommendations:
* For beginners, I always suggest starting with bell peppers (they’re reliable and easy to grow) and jalapeños (they’re prolific and add a nice kick).
* If you’re feeling adventurous, try growing some poblano peppers for making delicious chili rellenos.
* And if you’re a heat seeker, a few cayenne plants will provide you with plenty of peppers for making your own hot sauce.
Getting Started: Seeds vs. Seedlings
You have two main options for starting your pepper plants: from seeds or from seedlings (small plants you buy at a nursery).
* Starting from Seeds: This gives you more control over the varieties you grow and can be more cost-effective. However, it requires more time and effort, as you’ll need to start the seeds indoors 6-8 weeks before the last expected frost.
* Buying Seedlings: This is the easier option, especially for beginners. You’ll save time and effort, but you’ll have fewer variety choices.
My Preference: I usually start my peppers from seeds indoors because I love having a wide selection of varieties. But if you’re short on time or space, buying seedlings is perfectly fine!
Starting Peppers from Seeds (My Method)
If you’re going the seed route, here’s my step-by-step guide:
1. Gather Your Supplies: You’ll need:
* Pepper seeds (from a reputable source)
* Seed starting trays or small pots
* Seed starting mix (a light, sterile soil mix)
* A spray bottle filled with water
* A heat mat (optional, but recommended)
* A grow light (optional, but recommended)
* A clear plastic dome or plastic wrap
2. Sow the Seeds: Fill your seed starting trays or pots with seed starting mix. Moisten the mix with the spray bottle. Sow the seeds about 1/4 inch deep, placing 2-3 seeds per cell or pot.
3. Cover and Warm: Cover the trays or pots with a clear plastic dome or plastic wrap to create a humid environment. Place them on a heat mat to maintain a soil temperature of 75-85°F (24-29°C). This warmth is crucial for germination.
4. Provide Light: Once the seeds germinate (usually within 7-14 days), remove the plastic dome or wrap and place the seedlings under a grow light. If you don’t have a grow light, place them in a sunny window, but be sure to rotate them regularly to prevent them from becoming leggy.
5. Water Carefully: Keep the soil consistently moist, but not soggy. Water from the bottom by placing the trays in a shallow dish of water and allowing the soil to absorb it. This prevents damping off, a fungal disease that can kill young seedlings.
6. Thin the Seedlings: Once the seedlings have their first true leaves (the second set of leaves that appear after the initial seed leaves), thin them to one seedling per cell or pot. Choose the strongest, healthiest-looking seedling and snip off the others at the soil line.
7. Fertilize Gently: After a few weeks, start fertilizing the seedlings with a diluted liquid fertilizer specifically formulated for seedlings. Follow the instructions on the fertilizer label.
8. Harden Off the Seedlings: Before transplanting the seedlings outdoors, you need to “harden them off.” This gradually acclimates them to the outdoor environment. Start by placing them outdoors in a sheltered location for an hour or two each day, gradually increasing the amount of time they spend outdoors over the course of a week or two.
Preparing Your Garden Bed
Whether you started from seeds or bought seedlings, preparing your garden bed is essential for healthy pepper plants.
1. Choose a Sunny Location: Peppers need at least 6-8 hours of sunlight per day. Choose a location in your garden that receives plenty of sun.
2. Improve the Soil: Peppers prefer well-drained soil that is rich in organic matter. Amend your soil with compost, aged manure, or other organic materials.
3. Check the Soil pH: Peppers prefer a slightly acidic soil pH of 6.0-6.8. You can test your soil pH with a soil testing kit and amend it accordingly.
4. Prepare the Planting Holes: Dig holes that are slightly larger than the root balls of your seedlings. Space the holes about 18-24 inches apart, depending on the variety of pepper you’re growing.
Transplanting Your Pepper Plants
Now for the exciting part – planting your peppers in the garden!
1. Choose the Right Time: Wait until the danger of frost has passed and the soil has warmed up to at least 60°F (15°C).
2. Water the Seedlings: Water the seedlings thoroughly before transplanting them.
3. Gently Remove the Seedlings: Gently remove the seedlings from their trays or pots, being careful not to damage the roots.
4. Plant the Seedlings: Place the seedlings in the prepared holes and backfill with soil. Gently firm the soil around the base of the plants.
5. Water Thoroughly: Water the newly transplanted peppers thoroughly.
6. Mulch Around the Plants: Apply a layer of mulch around the base of the plants to help retain moisture, suppress weeds, and regulate soil temperature. I like to use straw or shredded leaves.
7. Provide Support (Optional): Taller pepper varieties, especially those with heavy fruit, may need support. You can use stakes, cages, or trellises to prevent the plants from toppling over.
Caring for Your Pepper Plants
Once your peppers are planted, it’s time to provide them with the care they need to thrive.
1. Water Regularly: Peppers need consistent moisture, especially during hot, dry weather. Water deeply and regularly, aiming to keep the soil consistently moist but not soggy.
2. Fertilize Regularly: Peppers are heavy feeders and benefit from regular fertilization. Use a balanced fertilizer or a fertilizer specifically formulated for peppers. Follow the instructions on the fertilizer label. I like to use a liquid fertilizer every few weeks.
3. Pinch Off Early Flowers (Optional): Pinching off the first few flowers that appear on your pepper plants can encourage them to focus on vegetative growth, resulting in stronger, more productive plants. This is especially helpful for hot pepper varieties.
4. Control Pests and Diseases: Keep an eye out for common pepper pests and diseases, such as aphids, whiteflies, and blossom end rot. Take action promptly to control any problems that arise. I prefer using organic pest control methods whenever possible.
5. Weed Regularly: Keep your garden bed free of weeds, which can compete with your pepper plants for nutrients and water.
Dealing with Common Pepper Problems
Even with the best care, you may encounter some problems while growing peppers. Here are a few common issues and how to address them:
* Blossom End Rot: This is a common problem that causes the bottom of the pepper to rot. It’s usually caused by calcium deficiency or inconsistent watering. To prevent blossom end rot, ensure your soil is rich in calcium and water your plants consistently. You can also add calcium to the soil by mixing in crushed eggshells or bone meal.
* Aphids: These tiny pests can suck the sap from your pepper plants, causing them to weaken and become stunted. You can control aphids by spraying them with a strong stream
Conclusion
So, there you have it! Mastering the art of growing peppers in your backyard is not only achievable but incredibly rewarding. We’ve explored a simple yet effective DIY trick that can significantly boost your pepper production, leading to a bountiful harvest of vibrant, flavorful peppers right outside your door.
Why is this DIY trick a must-try? Because it addresses a fundamental need for pepper plants: consistent warmth and moisture retention. By creating a mini-greenhouse effect around your plants, you’re essentially optimizing their growing environment, allowing them to thrive even in less-than-ideal conditions. This translates to faster growth, earlier fruiting, and a higher yield of peppers. Imagine the satisfaction of harvesting baskets full of your own homegrown peppers, knowing you played a direct role in their success.
But the beauty of this DIY approach lies in its adaptability. Feel free to experiment with variations to suit your specific needs and preferences. For instance, if you live in a particularly windy area, consider using sturdier materials for your protective covers, such as repurposed plastic containers or even small cloches. You could also incorporate organic mulches around the base of your plants to further enhance moisture retention and suppress weeds. Another variation could involve using different types of clear plastic, experimenting with thickness and UV protection to see what works best in your climate. If you’re growing a variety of peppers with different heat levels, consider color-coding your protective covers for easy identification.
Beyond the basic technique, remember the importance of other essential pepper-growing practices. Ensure your plants receive adequate sunlight (at least 6-8 hours per day), provide them with well-draining soil rich in organic matter, and fertilize them regularly with a balanced fertilizer. Monitor your plants for pests and diseases, and take prompt action to address any issues that arise. With a little care and attention, you’ll be well on your way to enjoying a pepper harvest that rivals anything you can find at the grocery store.
Growing peppers backyard doesn’t have to be a daunting task. This DIY trick simplifies the process and empowers you to take control of your pepper production. It’s a cost-effective, environmentally friendly way to enjoy fresh, flavorful peppers all season long.
We wholeheartedly encourage you to try this DIY trick for growing peppers in your backyard. We’re confident that you’ll be amazed by the results. And once you’ve experienced the joy of harvesting your own homegrown peppers, we’d love to hear about it! Share your experiences, tips, and photos with us in the comments section below. Let’s create a community of pepper-growing enthusiasts and learn from each other’s successes (and even our failures!). Together, we can unlock the secrets to a bountiful pepper harvest and enjoy the delicious rewards of our labor. So, get out there, get your hands dirty, and start growing! Your taste buds will thank you.
Frequently Asked Questions (FAQ)
What type of plastic is best for creating the protective covers?
Clear plastic is essential for allowing sunlight to reach your pepper plants. You can use various types of clear plastic, including plastic wrap, plastic bags, or even clear plastic sheeting. The thickness of the plastic will depend on your climate and the level of protection you need. Thicker plastic will provide more insulation and protection from wind, but it may also reduce the amount of sunlight that reaches your plants. Experiment to find what works best for you. Consider using UV-resistant plastic if you live in an area with intense sunlight to prevent the plastic from degrading quickly. Recycled plastic options are also a great eco-friendly choice.
How often should I water my pepper plants when using this DIY trick?
The frequency of watering will depend on several factors, including the weather, the type of soil you’re using, and the size of your plants. Generally, you should water your pepper plants when the top inch of soil feels dry to the touch. When using protective covers, be mindful of condensation buildup. If you notice excessive moisture inside the covers, you may need to reduce your watering frequency to prevent root rot. Check the soil moisture regularly and adjust your watering schedule accordingly. Using a moisture meter can be helpful in determining the moisture levels in the soil.
Will this DIY trick work for all types of peppers?
Yes, this DIY trick can be beneficial for growing most types of peppers, from sweet bell peppers to spicy chili peppers. However, some pepper varieties may be more sensitive to heat and humidity than others. Monitor your plants closely and adjust the ventilation of the protective covers as needed to prevent overheating. For example, hotter pepper varieties like habaneros and scotch bonnets might benefit from slightly more ventilation than bell peppers. Consider the specific needs of the pepper varieties you’re growing and tailor your approach accordingly.
How long should I keep the protective covers on my pepper plants?
The duration for which you keep the protective covers on your pepper plants will depend on the weather conditions and the stage of growth. In cooler climates, you may need to keep the covers on for longer periods, especially during the early stages of growth. As the weather warms up, you can gradually increase the ventilation by opening the covers during the day and closing them at night. Once the plants are well-established and the weather is consistently warm, you can remove the covers altogether. Pay attention to the weather forecast and adjust the covers accordingly to protect your plants from frost or extreme heat.
Can I use this DIY trick in a container garden?
Absolutely! This DIY trick is just as effective for growing peppers in containers as it is for growing them in the ground. Simply adapt the size of the protective covers to fit your containers. Ensure that your containers have adequate drainage holes to prevent waterlogging. Container gardening allows for greater flexibility in terms of location, making it easier to provide your pepper plants with optimal sunlight and protection from the elements. Choose containers that are large enough to accommodate the mature size of your pepper plants.
What if I see pests or diseases on my pepper plants under the covers?
Regularly inspect your pepper plants for signs of pests or diseases, even when they are under protective covers. If you notice any problems, take immediate action to address them. Remove any affected leaves or plants and treat them with an appropriate organic pesticide or fungicide. Ensure good ventilation to prevent the buildup of humidity, which can promote fungal diseases. Consider using companion planting to deter pests and attract beneficial insects. Early detection and prompt treatment are crucial for preventing pests and diseases from spreading and damaging your pepper plants.
How do I ensure proper ventilation under the covers to prevent overheating?
Ventilation is crucial to prevent overheating and excessive humidity under the protective covers. You can provide ventilation by creating small holes in the plastic or by partially opening the covers during the day. Monitor the temperature inside the covers and adjust the ventilation accordingly. On hot days, you may need to remove the covers completely to prevent your plants from scorching. Consider using shade cloth in conjunction with the covers to reduce the intensity of the sunlight. Proper ventilation will help to create a healthy growing environment for your pepper plants.
What type of fertilizer should I use for my pepper plants?
Pepper plants benefit from a balanced fertilizer that provides essential nutrients for growth and fruiting. Look for a fertilizer with an NPK ratio (nitrogen, phosphorus, potassium) that is appropriate for peppers. During the early stages of growth, a fertilizer with a higher nitrogen content can promote leafy growth. As the plants begin to flower and fruit, switch to a fertilizer with a higher phosphorus and potassium content to support fruit development. Organic fertilizers, such as compost tea or fish emulsion, are also excellent choices for providing nutrients to your pepper plants. Follow the instructions on the fertilizer label and avoid over-fertilizing, which can damage your plants.
Can I use this trick to extend the growing season for my peppers?
Yes, this DIY trick is an excellent way to extend the growing season for your peppers. By providing protection from frost and cold temperatures, you can start your pepper plants earlier in the spring and continue harvesting them later into the fall. The protective covers will help to retain heat and create a microclimate that is more favorable for pepper growth. Monitor the weather forecast and adjust the covers accordingly to protect your plants from frost or extreme cold. With a little care and attention, you can enjoy a longer and more productive pepper-growing season.

Leave a Comment