

Growing Pointed Cabbage at Home can be surprisingly rewarding, even if you’re a beginner gardener! Have you ever dreamt of strolling into your backyard and harvesting fresh, crisp cabbage for a delicious slaw or a hearty winter stew? Well, dream no more! This DIY guide will unlock the secrets to cultivating these unique, cone-shaped cabbages right in your own garden, regardless of your experience level.
Cabbage, in general, boasts a rich history, dating back to ancient times where it was valued for its nutritional benefits and ease of cultivation. Different varieties have emerged across cultures, each with its own unique shape and flavor profile. Pointed cabbage, with its distinctive conical head, offers a slightly sweeter and more tender taste compared to its rounder cousins, making it a delightful addition to any meal.
But why should you bother with this particular DIY project? In today’s world, knowing where your food comes from and having control over its quality is more important than ever. Plus, growing pointed cabbage at home allows you to enjoy fresh, organic produce without the hefty price tag or the uncertainty of store-bought options. I’m excited to share these simple tricks and hacks that will help you achieve a bountiful harvest, transforming your garden into a source of fresh, healthy, and delicious pointed cabbage!

Growing Your Own Pointed Cabbage: A Beginner’s Guide
Okay, so you want to grow your own pointed cabbage? Awesome! It’s easier than you might think, and nothing beats the taste of fresh, homegrown veggies. I’m going to walk you through everything you need to know, from starting seeds to harvesting your beautiful pointed cabbages. Let’s get started!
What You’ll Need
Before we dive in, let’s gather our supplies. This will make the whole process smoother and more enjoyable.
* Pointed Cabbage Seeds: Choose a variety that suits your climate and taste preferences. ‘Hispi’ is a popular and reliable choice.
* Seed Starting Trays or Pots: These are essential for starting your seeds indoors.
* Seed Starting Mix: This is a light, well-draining mix specifically designed for seedlings.
* Larger Pots (Optional): If you’re not planting directly into the garden, you’ll need larger pots for transplanting.
* Garden Soil: Rich, well-draining soil is crucial for healthy cabbage growth. Amend your soil with compost or well-rotted manure for best results.
* Compost or Well-Rotted Manure: This will provide essential nutrients for your cabbage plants.
* Fertilizer: A balanced fertilizer (e.g., 10-10-10) or a fertilizer specifically formulated for vegetables will help your cabbages thrive.
* Watering Can or Hose: For regular watering.
* Gardening Gloves: To protect your hands.
* Trowel or Spade: For planting and transplanting.
* Netting or Row Covers (Optional): To protect your plants from pests like cabbage white butterflies.
* Slug and Snail Bait (Optional): If you have a slug or snail problem.
Starting Your Seeds Indoors (Recommended)
Starting your seeds indoors gives you a head start on the growing season, especially if you live in a cooler climate. I highly recommend this method!
1. Prepare Your Seed Starting Trays: Fill your seed starting trays or pots with seed starting mix. Gently firm the mix down, but don’t pack it too tightly.
2. Sow Your Seeds: Make a small indentation (about 1/4 inch deep) in the center of each cell or pot. Place 2-3 seeds in each indentation. This increases your chances of at least one seed germinating.
3. Cover the Seeds: Gently cover the seeds with a thin layer of seed starting mix.
4. Water Gently: Water the trays or pots gently using a watering can or spray bottle. You want to moisten the soil without disturbing the seeds.
5. Provide Warmth and Light: Place the trays or pots in a warm location (around 65-75°F) with plenty of light. A sunny windowsill or a grow light works well.
6. Keep the Soil Moist: Keep the soil consistently moist, but not soggy. Check the soil daily and water as needed.
7. Thin Seedlings (If Necessary): Once the seedlings emerge (usually within 5-10 days), thin them to one strong seedling per cell or pot. Snip off the weaker seedlings at the soil line with scissors. This prevents overcrowding and allows the remaining seedling to thrive.
Transplanting Your Seedlings
Once your seedlings have developed a few sets of true leaves (usually after 4-6 weeks), they’re ready to be transplanted into larger pots or directly into the garden.
1. Harden Off Your Seedlings: Before transplanting, you need to “harden off” your seedlings. This process gradually acclimates them to outdoor conditions. Start by placing the trays or pots outdoors in a sheltered location for a few hours each day, gradually increasing the amount of time they spend outside over the course of a week. This will help them adjust to the sun, wind, and temperature changes.
2. Prepare Your Planting Location: Choose a sunny location in your garden with well-draining soil. Pointed cabbages need at least 6 hours of sunlight per day. Amend the soil with compost or well-rotted manure to improve its fertility and drainage.
3. Dig Holes: Dig holes that are slightly larger than the root balls of your seedlings. Space the holes about 12-18 inches apart. This gives the cabbages enough room to grow.
4. Carefully Remove Seedlings: Gently remove the seedlings from their trays or pots. Be careful not to damage the roots. If the roots are tightly bound, gently loosen them before planting.
5. Plant the Seedlings: Place the seedlings in the holes and backfill with soil. Make sure the top of the root ball is level with the surrounding soil.
6. Water Thoroughly: Water the newly transplanted seedlings thoroughly. This will help settle the soil and encourage root growth.
7. Mulch (Optional): Apply a layer of mulch around the plants to help retain moisture, suppress weeds, and regulate soil temperature. Straw, wood chips, or shredded leaves work well.
Direct Sowing (Alternative)
If you live in a warmer climate with a longer growing season, you can also direct sow your pointed cabbage seeds directly into the garden.
1. Prepare Your Planting Location: Choose a sunny location in your garden with well-draining soil. Amend the soil with compost or well-rotted manure.
2. Sow Your Seeds: Sow the seeds about 1/2 inch deep and 12-18 inches apart.
3. Water Gently: Water the soil gently to keep it moist.
4. Thin Seedlings: Once the seedlings emerge, thin them to one strong seedling per space.
Caring for Your Pointed Cabbages
Once your cabbages are planted, it’s important to provide them with the care they need to thrive.
1. Water Regularly: Pointed cabbages need consistent moisture, especially during hot, dry weather. Water deeply and regularly, aiming to keep the soil consistently moist but not waterlogged.
2. Fertilize: Fertilize your cabbages every 2-3 weeks with a balanced fertilizer or a fertilizer specifically formulated for vegetables. Follow the instructions on the fertilizer package.
3. Weed Regularly: Keep the area around your cabbages free of weeds. Weeds compete with your cabbages for nutrients and water.
4. Pest Control: Cabbage white butterflies and slugs are common pests of pointed cabbages.
* Cabbage White Butterflies: These butterflies lay their eggs on the underside of cabbage leaves, and the caterpillars can quickly devour your plants. To prevent this, cover your plants with netting or row covers. You can also handpick the caterpillars off the plants.
* Slugs and Snails: These pests can damage cabbage leaves, especially young seedlings. Use slug and snail bait or traps to control them. You can also create barriers around your plants using copper tape or diatomaceous earth.
5. Monitor for Diseases: Keep an eye out for signs of disease, such as yellowing leaves or spots on the leaves. If you notice any signs of disease, take action immediately to prevent it from spreading.
Harvesting Your Pointed Cabbages
Pointed cabbages are typically ready to harvest about 60-80 days after planting.
1. Check for Firmness: The cabbage head should feel firm and solid when you squeeze it gently.
2. Cut the Head: Use a sharp knife to cut the cabbage head from the stem. Leave a few outer leaves on the stem, as these may produce smaller side shoots that you can harvest later.
3. Enjoy Your Harvest: Enjoy your fresh, homegrown pointed cabbage in salads, slaws, stir-fries, or any other dish you like!
Troubleshooting
Even with the best care, you might encounter some problems while growing your pointed cabbages. Here are a few common issues and how to address them:
* Yellowing Leaves: This could be a sign of nutrient deficiency, overwatering, or disease. Check the soil drainage, fertilize your plants, and monitor for signs of disease.
* Stunted Growth: This could be caused by poor soil, lack of sunlight, or pest infestation. Amend the soil, ensure your plants are getting enough sunlight, and control pests.
* Bolting (Premature Flowering): This can happen if the plants are stressed by heat or lack of water. Provide consistent moisture and try to protect your plants from extreme heat.
Extra Tips for Success
* Succession Planting: Plant new cabbage seeds every few weeks to ensure a continuous harvest throughout the growing season.
* Companion Planting: Plant your cabbages with companion plants like dill, rosemary, and thyme to deter pests.
* Soil Testing: Test your soil to determine its pH and nutrient levels. This

Conclusion
So, there you have it! Growing pointed cabbage at home isn’t just a gardening project; it’s an investment in fresh, flavorful, and incredibly versatile produce. We’ve walked through the steps, from selecting the right seeds to harvesting your own beautiful, conical cabbages. But why should you dedicate your precious garden space to this particular variety?
The answer lies in the unparalleled taste and texture of pointed cabbage. Unlike its rounder cousins, pointed cabbage boasts a sweeter, more delicate flavor and a tender, less fibrous texture. This makes it ideal for everything from fresh salads and slaws to stir-fries, braised dishes, and even grilling. Imagine the satisfaction of serving a dish featuring cabbage you nurtured from a tiny seed!
Beyond the superior taste, growing your own pointed cabbage allows you to control the entire process, ensuring that your vegetables are free from harmful pesticides and herbicides. You’ll know exactly what went into your cabbage, giving you peace of mind and a healthier, more sustainable food source. Plus, the act of gardening itself is incredibly rewarding, offering a connection to nature and a sense of accomplishment.
Don’t be afraid to experiment with different varieties of pointed cabbage. Some are sweeter, some are more compact, and some mature earlier than others. Try growing a few different types to discover your personal favorite. You can also play around with companion planting. Marigolds, for example, can help deter pests, while herbs like dill and chamomile can attract beneficial insects. Consider interplanting your cabbage with these companions to create a thriving and balanced garden ecosystem.
And if you’re feeling adventurous, why not try fermenting your pointed cabbage to make sauerkraut or kimchi? The slightly sweeter flavor of pointed cabbage lends itself beautifully to these traditional preservation methods. You can also experiment with different seasonings and spices to create your own unique fermented creations.
Growing pointed cabbage at home is a journey, not just a destination. There will be challenges along the way, but the rewards are well worth the effort. From the satisfaction of watching your seedlings sprout to the joy of harvesting your own delicious cabbages, this is a gardening project that will bring you pleasure and nourishment for months to come.
We strongly encourage you to give this DIY trick a try. Start small, learn as you go, and don’t be afraid to ask for help. The gardening community is incredibly supportive, and there are countless resources available online and in your local area.
Once you’ve harvested your first pointed cabbage, we’d love to hear about your experience! Share your photos, recipes, and tips in the comments below. Let’s create a community of pointed cabbage enthusiasts and inspire others to grow their own food. Happy gardening!
Frequently Asked Questions (FAQ)
What is the best time of year to plant pointed cabbage?
The ideal time to plant pointed cabbage depends on your climate. In general, pointed cabbage is a cool-season crop, meaning it thrives in temperatures between 60°F and 70°F (15°C and 21°C). For spring harvests, start seeds indoors 6-8 weeks before the last expected frost. Transplant seedlings outdoors 2-3 weeks before the last frost. For fall harvests, sow seeds directly into the garden in mid-summer, about 10-12 weeks before the first expected frost. Check your local frost dates to determine the best planting time for your region.
How much sunlight does pointed cabbage need?
Pointed cabbage requires at least 6 hours of direct sunlight per day. Choose a location in your garden that receives full sun for optimal growth and head development. If you live in a particularly hot climate, some afternoon shade can be beneficial to prevent the leaves from scorching.
What kind of soil is best for growing pointed cabbage?
Pointed cabbage prefers well-drained, fertile soil that is rich in organic matter. Amend your soil with compost or well-rotted manure before planting to improve drainage and fertility. The ideal soil pH for pointed cabbage is between 6.0 and 7.0. You can test your soil pH using a soil testing kit and adjust it accordingly with lime (to raise pH) or sulfur (to lower pH).
How often should I water my pointed cabbage plants?
Water your pointed cabbage plants regularly, especially during dry periods. Aim to keep the soil consistently moist but not waterlogged. Water deeply at the base of the plants, avoiding wetting the foliage, which can increase the risk of fungal diseases. Mulching around the plants can help retain moisture and suppress weeds.
What are some common pests and diseases that affect pointed cabbage?
Pointed cabbage can be susceptible to various pests and diseases, including cabbage worms, aphids, flea beetles, clubroot, and black rot. Regularly inspect your plants for signs of infestation or disease. Use organic pest control methods, such as handpicking pests, using insecticidal soap, or applying Bacillus thuringiensis (Bt) for cabbage worms. To prevent diseases, practice crop rotation, ensure good air circulation, and avoid overhead watering.
How do I know when my pointed cabbage is ready to harvest?
Pointed cabbage is typically ready to harvest when the head is firm and compact. The exact size and shape of the head will vary depending on the variety. Gently squeeze the head to check for firmness. If it feels solid and dense, it’s likely ready to harvest. You can also check the maturity date on the seed packet or plant tag as a general guideline.
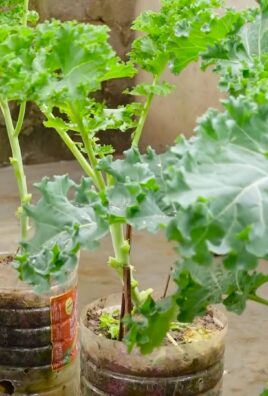
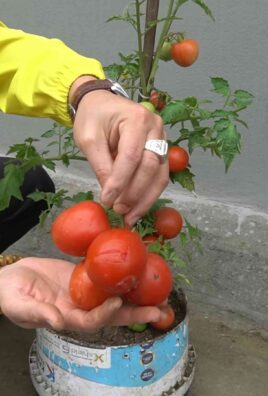
Can I grow pointed cabbage in containers?
Yes, pointed cabbage can be grown in containers, but you’ll need to choose a large container that is at least 12 inches in diameter and depth. Use a high-quality potting mix that is well-draining and rich in organic matter. Water regularly and fertilize every few weeks with a balanced fertilizer. Be sure to provide adequate sunlight and protect the plants from extreme temperatures.
What are some good companion plants for pointed cabbage?
Good companion plants for pointed cabbage include marigolds, nasturtiums, dill, chamomile, rosemary, thyme, and onions. Marigolds and nasturtiums help deter pests, while dill and chamomile attract beneficial insects. Rosemary and thyme can help repel cabbage moths. Onions can help deter cabbage root flies. Avoid planting pointed cabbage near other brassicas, such as broccoli, cauliflower, and kale, as they can attract the same pests and diseases.
How do I store pointed cabbage after harvesting?
Pointed cabbage can be stored in the refrigerator for several weeks. Wrap the head tightly in plastic wrap or place it in a plastic bag to prevent it from drying out. You can also store pointed cabbage in a root cellar or cool, dark place for longer periods.
Can I freeze pointed cabbage?
Yes, you can freeze pointed cabbage, but it’s best to blanch it first to preserve its texture and flavor. Cut the cabbage into smaller pieces and blanch them in boiling water for 2-3 minutes. Then, transfer the cabbage to an ice bath to stop the cooking process. Drain well and pack the cabbage into freezer bags or containers. Frozen pointed cabbage can be stored for up to 12 months.

Leave a Comment