

Harvesting Pumpkins at Home can feel like the ultimate fall accomplishment! Imagine the satisfaction of carving a jack-o’-lantern from a pumpkin you nurtured from seed to glorious gourd. But knowing when and how to harvest your pumpkins is crucial for a successful and long-lasting crop.
Pumpkins have a rich history, deeply intertwined with autumn festivals and traditions around the world. From ancient Native American diets to the modern-day pumpkin spice craze, these vibrant orange vegetables hold a special place in our hearts and on our tables. For centuries, they’ve symbolized abundance and the changing seasons.
I know, I know, you’re probably thinking, “Why do I need a guide on harvesting pumpkins? Just pick ’em, right?” Well, not quite! Premature or improper harvesting can lead to pumpkins that rot quickly or lack that rich, sweet flavor we all crave. Plus, who wants to lug a pumpkin inside only to find it’s already starting to soften? That’s why I’m sharing my favorite DIY tricks and tips to ensure you’re harvesting pumpkins at home like a pro. I’ll walk you through everything from identifying ripeness to proper cutting techniques, so you can enjoy your homegrown pumpkins for weeks to come. Let’s get started!
Harvesting Pumpkins Like a Pro: A DIY Guide
Okay, so you’ve nurtured your pumpkin patch all summer, and now those glorious orange globes are finally starting to look ripe and ready. Harvesting pumpkins might seem straightforward, but there’s a right way and a wrong way to do it. Trust me, you don’t want to ruin your hard work by accidentally damaging your pumpkins and shortening their shelf life. I’m going to walk you through everything you need to know to harvest your pumpkins like a seasoned pro!
What You’ll Need
Before we dive in, let’s gather our supplies. Having everything ready will make the process smooth and efficient.
* Sharp Knife or Pruning Shears: A dull blade is a recipe for disaster. You want a clean cut to avoid damaging the vine and the pumpkin.
* Gloves: Pumpkin vines can be prickly and irritating to the skin. Protect your hands!
* Measuring Tape (Optional): If you’re entering your pumpkins in a contest, you’ll want to measure them accurately.
* Clean Cloth or Brush: To gently remove any dirt or debris from the pumpkins.
* Wheelbarrow or Wagon: Depending on the size and number of your pumpkins, you’ll need something to transport them.
* Bleach Solution (Optional): For cleaning the pumpkins to prevent rot. I usually use a diluted solution of one part bleach to ten parts water.
* Curing Area: A dry, well-ventilated space to cure your pumpkins.
Determining Pumpkin Ripeness
Knowing when your pumpkins are ready to harvest is crucial. Don’t jump the gun! Here’s how to tell if your pumpkins are ripe:
* Color: The pumpkin should be a deep, rich color, typical for its variety. For example, a ‘Jack O’ Lantern’ pumpkin should be a vibrant orange.
* Hard Rind: This is the most important indicator. The rind should be hard and resistant to scratching. Try pressing your fingernail into the skin. If it easily punctures, the pumpkin isn’t ready.
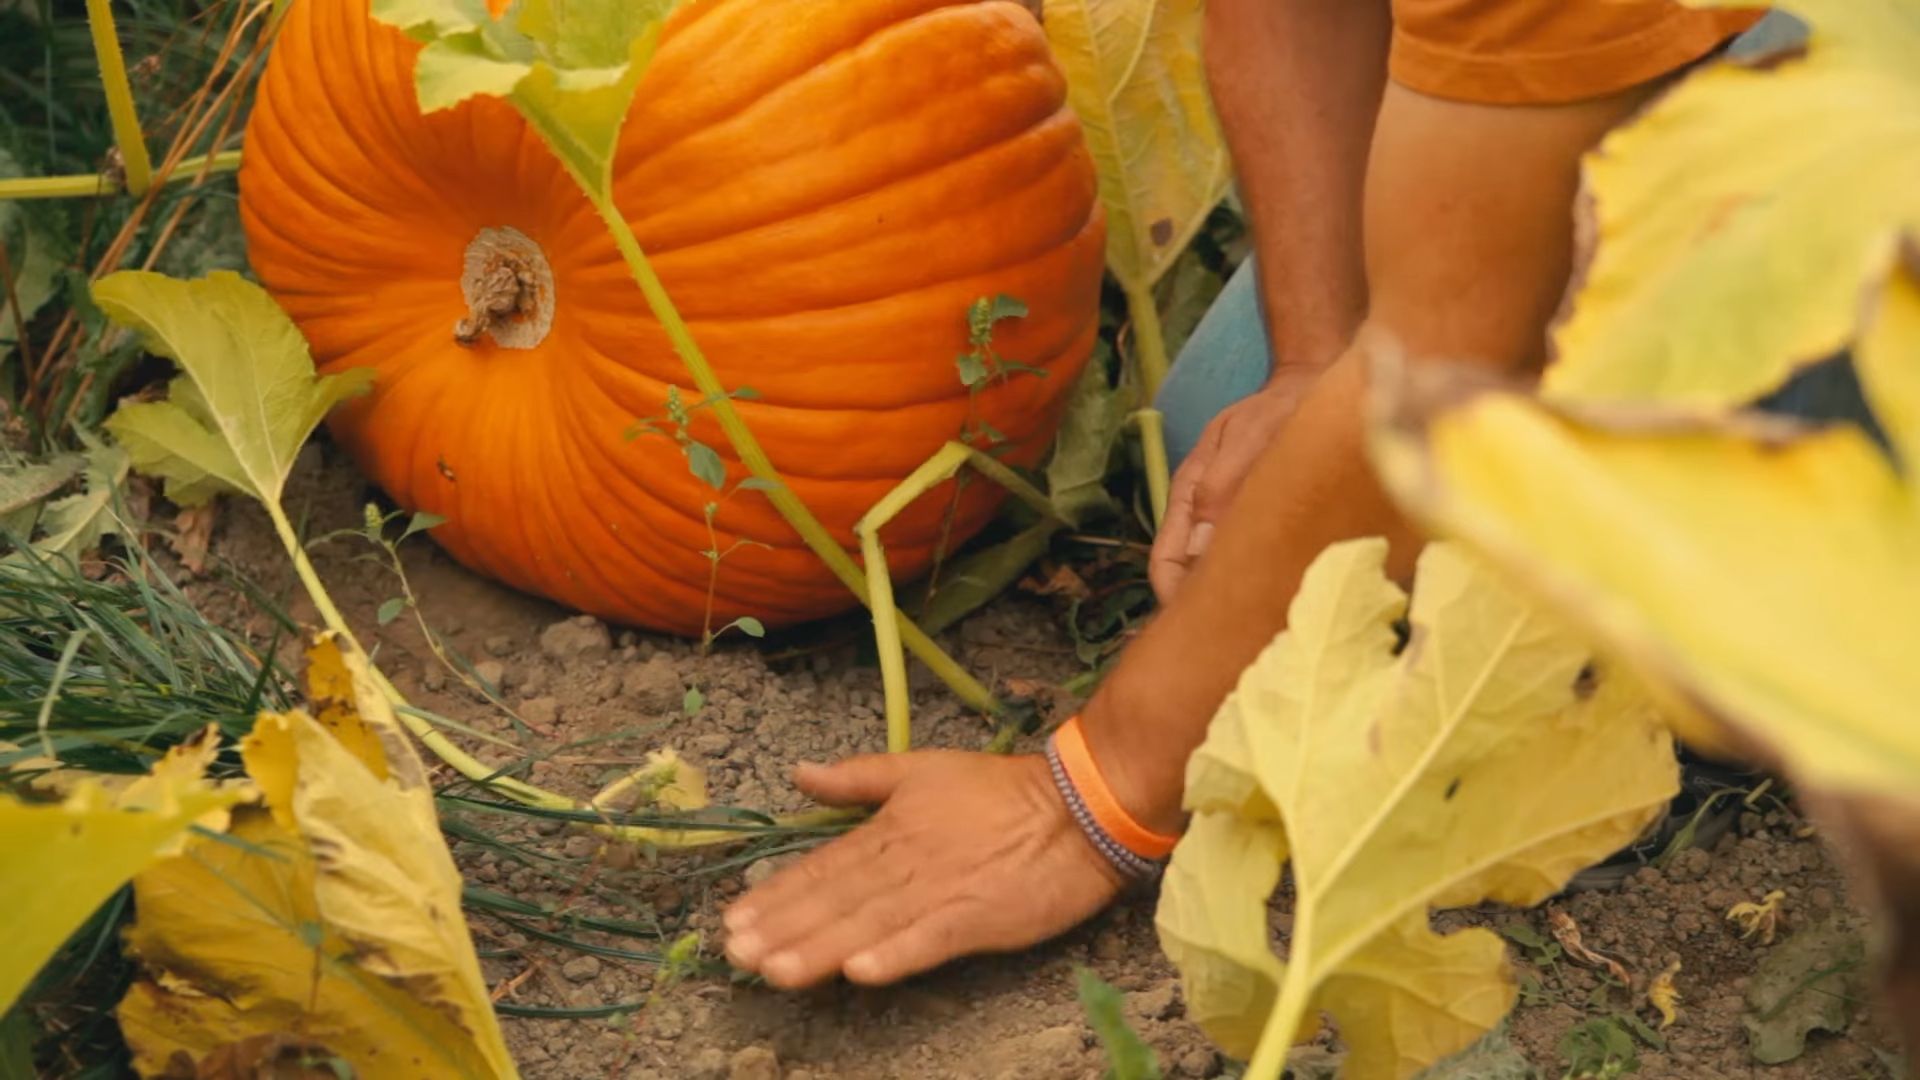
* Dry Stem: The stem (also called the peduncle) should be dry, hard, and starting to turn brown.
* Hollow Sound: Give the pumpkin a gentle thump. A ripe pumpkin will sound hollow.
* Vine Condition: The vine itself will start to wither and die back, signaling that the pumpkin has reached maturity.
Harvesting Your Pumpkins: Step-by-Step
Alright, let’s get to the fun part! Follow these steps carefully to ensure a successful harvest.
1. Choose a Dry Day: Avoid harvesting pumpkins after rain or when the ground is wet. Moisture can promote rot.
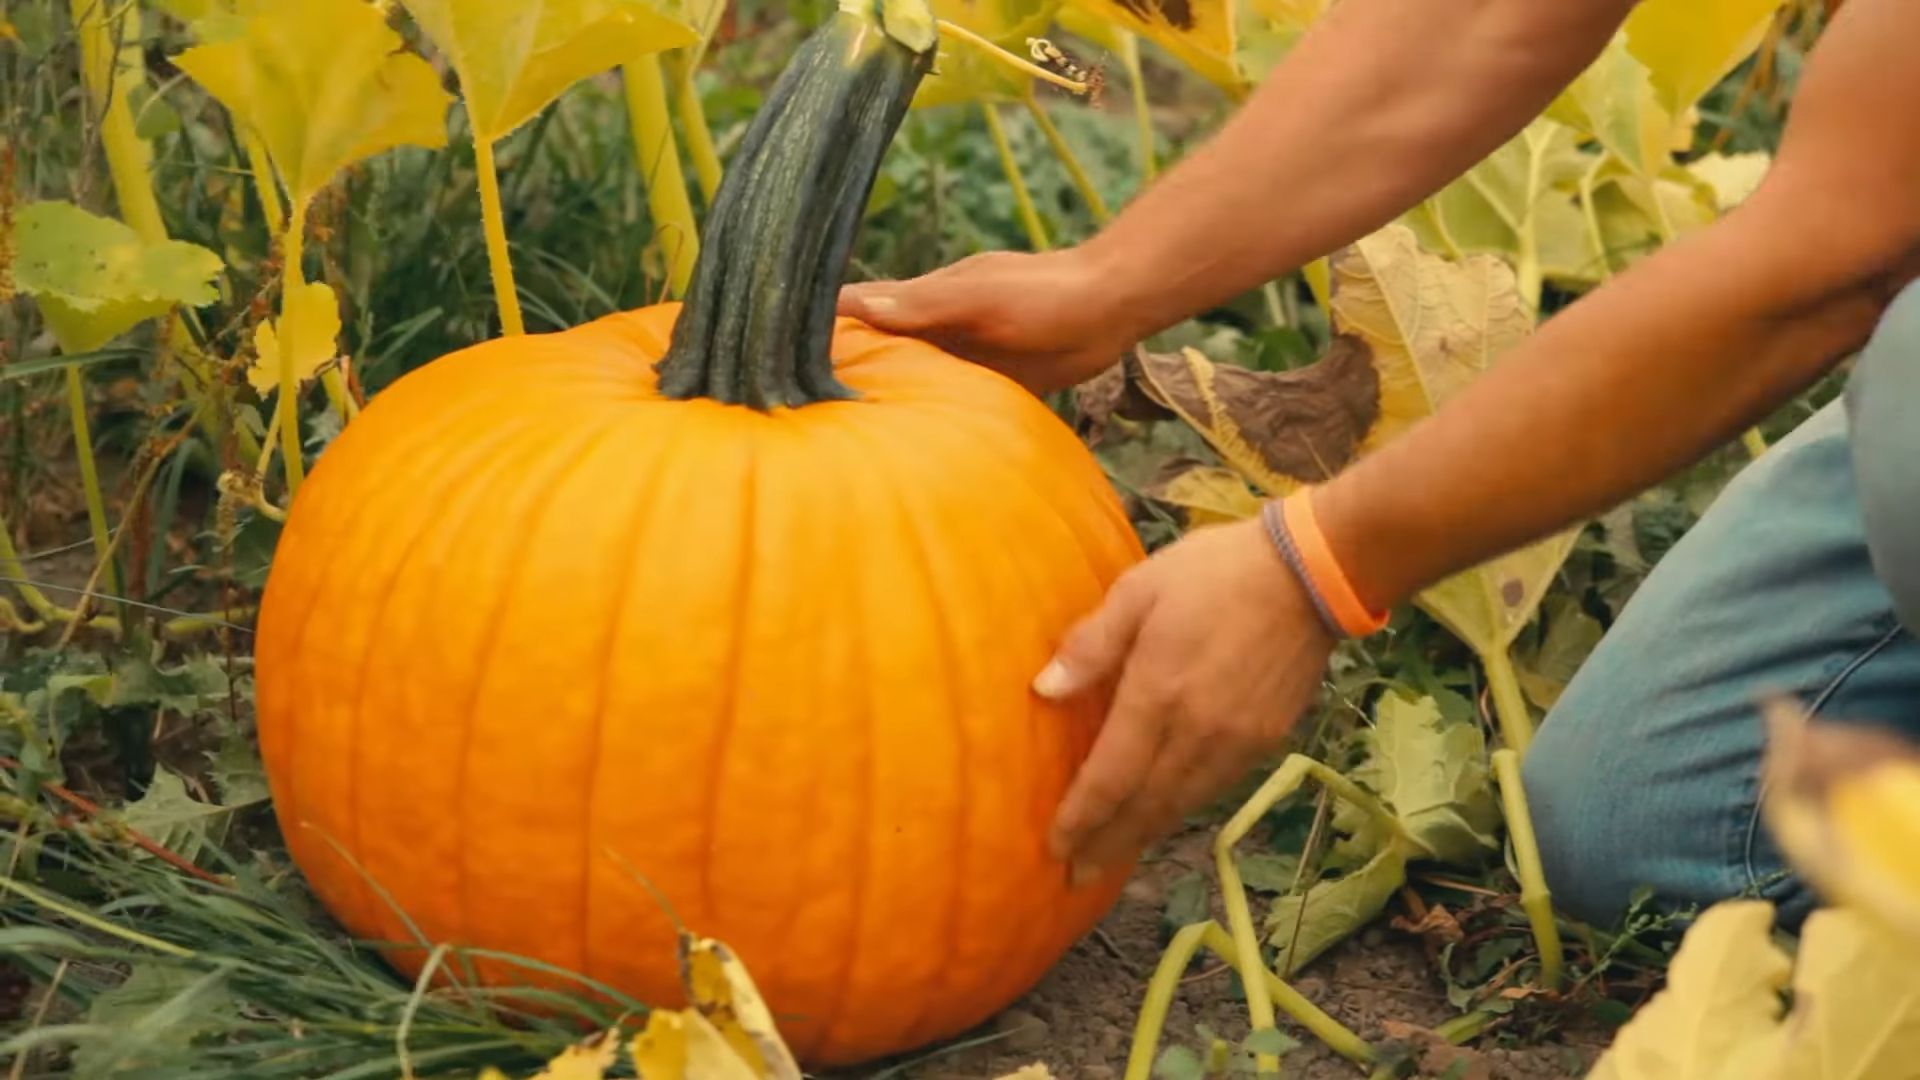
2. Cut the Stem: Using your sharp knife or pruning shears, carefully cut the stem, leaving at least 3-4 inches attached to the pumpkin. This is super important! A long stem helps prevent rot and extends the pumpkin’s shelf life. Never break the stem off or pull the pumpkin from the vine.
3. Handle with Care: Lift the pumpkin gently, supporting it from underneath. Avoid dropping or bumping it, as this can cause bruising and shorten its storage life.
4. Clean the Pumpkin: Use a clean cloth or brush to gently remove any dirt or debris from the surface of the pumpkin. Be careful not to scratch the rind.
5. Inspect for Damage: Check the pumpkin for any cuts, bruises, or soft spots. Damaged pumpkins are more susceptible to rot and should be used immediately.
6. Sanitize (Optional): If you want to be extra cautious, you can wipe the pumpkin down with a diluted bleach solution (one part bleach to ten parts water). This helps kill any surface bacteria or fungi that could cause rot. Let the pumpkin air dry completely.
7. Transport Carefully: Place the pumpkins in your wheelbarrow or wagon, making sure they don’t bump into each other.
Curing Your Pumpkins for Longer Storage
Curing your pumpkins is essential for extending their shelf life. This process hardens the rind and helps heal any minor scratches or abrasions.
1. Choose a Curing Location: Select a dry, well-ventilated area with a temperature between 80-85°F (27-29°C). A sunny porch, garage, or shed works well. Avoid areas with high humidity.
2. Arrange the Pumpkins: Place the pumpkins in a single layer, making sure they don’t touch each other. This allows for good air circulation.
3. Curing Time: Cure the pumpkins for 10-14 days. Turn them occasionally to ensure even curing.
4. Monitor for Rot: Check the pumpkins regularly for any signs of rot, such as soft spots or mold. Remove any pumpkins that show signs of decay to prevent it from spreading to the others.
Storing Your Cured Pumpkins
Once your pumpkins are cured, you can store them for several months.
1. Choose a Storage Location: Select a cool, dry, and well-ventilated area with a temperature between 50-60°F (10-15°C). A basement or root cellar is ideal. Avoid storing pumpkins in areas that are too warm or humid.
2. Arrange the Pumpkins: Place the pumpkins in a single layer, making sure they don’t touch each other. You can place them on shelves, pallets, or even cardboard.
3. Check Regularly: Inspect the pumpkins regularly for any signs of rot. Remove any pumpkins that show signs of decay immediately.
Troubleshooting Common Pumpkin Problems
Even with the best care, you might encounter some problems during the harvesting and storage process. Here are a few common issues and how to address them:
* Soft Spots: Soft spots are a sign of rot. If the soft spot is small, you can try cutting it out and using the rest of the pumpkin immediately. If the soft spot is large, discard the pumpkin.
* Mold: Mold indicates that the pumpkin is rotting. Discard the pumpkin immediately to prevent the mold from spreading.
* Insect Damage: If you notice insect damage, such as holes or tunnels, use the pumpkin immediately or discard it.
* Premature Harvest: If you accidentally harvest a pumpkin before it’s fully ripe, you can try ripening it indoors. Place the pumpkin in a warm, sunny location and wait for it to ripen. However, it may not store as well as a fully ripe pumpkin.
Creative Ways to Use Your Pumpkin Harvest
Now that you’ve successfully harvested and stored your pumpkins, it’s time to get creative! Here are a few ideas:
* Pumpkin Pie: A classic! Use your pumpkins to make delicious homemade pumpkin pie.
* Pumpkin Soup: Warm and comforting, pumpkin soup is perfect for a chilly autumn evening.
* Pumpkin Bread: A sweet and spicy treat that’s perfect for breakfast or dessert.
* Pumpkin Seeds: Don’t throw away the seeds! Roast them for a healthy and delicious snack.
* Pumpkin Carving: Of course, you can’t forget about carving jack-o’-lanterns for Halloween!
* Pumpkin Decorations: Use your pumpkins to create festive fall decorations for your home.
* Pumpkin Butter: A delicious spread for toast, bagels, or crackers.
* Pumpkin Spice Latte: Make your own homemade pumpkin spice latte for a fraction of the cost of buying one at a coffee shop.
Tips for a Bountiful Pumpkin Harvest Next Year
Want to ensure an even better pumpkin harvest next year? Here are a few tips:
* Choose the Right Variety: Select pumpkin varieties that are well-suited to your climate and growing conditions.
* Start Seeds Indoors: Start your pumpkin seeds indoors a few weeks before the last frost to give them a head start.
* Prepare the Soil: Pumpkins need rich, well-drained soil. Amend your soil with compost or other organic matter before planting.
* Provide Plenty of Sunlight: Pumpkins need at least six hours of sunlight per day.
* Water Regularly: Water your pumpkins regularly, especially during dry spells.
* Fertilize: Fertilize your pumpkins with a balanced fertilizer every few weeks.
* Control Pests and Diseases: Monitor your pumpkins for pests and diseases and take action to control them promptly.
* Rotate Crops: Avoid planting pumpkins in the same location year after year to prevent soilborne diseases.
By following these tips, you can enjoy a bountiful pumpkin harvest year after year! I hope this guide has been helpful. Happy harvesting!
Conclusion
So, there you have it! Harvesting pumpkins at home isn’t just a chore; it’s an experience, a connection to the earth, and a pathway to some seriously delicious fall treats. We’ve walked you through the signs of ripeness, the gentle art of the cut, and the crucial steps for curing your gourds to ensure they last well into the winter months.
But why is this DIY trick a must-try? Because it’s about more than just getting a pumpkin. It’s about knowing where your food comes from, appreciating the process of growth, and enjoying the satisfaction of nurturing something from seed to table. It’s about creating memories with family and friends, whether you’re tromping through the pumpkin patch together or carving jack-o’-lanterns on a crisp autumn evening. And, let’s be honest, it’s about saving a few bucks while getting a far superior, fresher pumpkin than you’ll find at the store.
Think about the possibilities! You could try growing different varieties of pumpkins next year – perhaps some charming miniature pumpkins for decoration, or a unique heirloom variety for a truly special pie. You could even experiment with different curing methods, like using a slightly warmer or cooler environment to see how it affects the pumpkin’s longevity. Consider saving the seeds from your best pumpkins to plant next year, continuing the cycle and creating your own unique pumpkin lineage.
Don’t be intimidated if you’re a beginner. Harvesting pumpkins at home is surprisingly straightforward, and the rewards are well worth the effort. The taste of a freshly harvested pumpkin pie, the glow of a jack-o’-lantern carved from your own homegrown gourd – these are the simple pleasures that make autumn so special.
We wholeheartedly encourage you to give this a try. Plant a few pumpkin seeds next spring, nurture them throughout the summer, and experience the joy of harvesting your own pumpkins this fall. And most importantly, share your experience with us! We’d love to hear about your successes, your challenges, and your favorite ways to use your homegrown pumpkins. Post pictures of your pumpkin patch, share your favorite pumpkin recipes, and let us know what you learned along the way. Together, we can create a community of pumpkin-loving gardeners who are passionate about growing and enjoying the fruits (or rather, vegetables!) of their labor. So, get out there, get your hands dirty, and get ready to experience the magic of harvesting pumpkins at home!
Frequently Asked Questions (FAQ)
Q: How do I know when my pumpkin is truly ripe and ready to harvest?
A: This is a crucial question! The most reliable indicator is the color. A ripe pumpkin will have a deep, rich color that is characteristic of its variety. For example, a ‘Jack O’ Lantern’ pumpkin should be a vibrant orange. Also, the rind should be hard and resistant to scratching. You can test this by gently pressing your fingernail into the skin. If it’s difficult to make an indentation, the pumpkin is likely ripe. Finally, the stem should be dry, brown, and starting to shrivel. A green stem indicates that the pumpkin is not yet fully mature.
Q: What’s the best way to cut the pumpkin from the vine?
A: Use a sharp knife or pruning shears to cut the stem, leaving at least 3-4 inches of stem attached to the pumpkin. This stem acts as a barrier against bacteria and rot, helping to prolong the pumpkin’s shelf life. Avoid pulling or twisting the pumpkin from the vine, as this can damage the stem and create an entry point for decay. Make a clean, angled cut to prevent water from pooling on the cut surface.
Q: What if my pumpkin gets damaged during harvesting?
A: Minor scratches or abrasions are usually not a problem, but if your pumpkin has a significant bruise or cut, it’s best to use it as soon as possible. Damaged pumpkins are more susceptible to rot and won’t store as well. You can cut away the damaged area and use the remaining pumpkin flesh for cooking or baking.
Q: How important is curing, and what’s the best way to do it?
A: Curing is essential for extending the storage life of your pumpkins. It allows the skin to harden and helps to heal any minor wounds, preventing rot. To cure your pumpkins, place them in a warm, dry, and well-ventilated area for about 10-14 days. The ideal temperature is between 80-85°F (27-29°C). Avoid direct sunlight, which can cause the pumpkins to overheat. Turn the pumpkins occasionally to ensure even curing.
Q: Can I eat all types of pumpkins?
A: While all pumpkins are technically edible, some varieties are better suited for cooking and baking than others. ‘Jack O’ Lantern’ pumpkins, while great for carving, tend to be stringy and less flavorful. Varieties like ‘Sugar Pie’, ‘Cinderella’, and ‘Long Island Cheese’ are known for their sweet, dense flesh and are excellent for pies, soups, and other culinary creations. Do some research on different pumpkin varieties to find the best ones for your needs.
Q: How long will my harvested pumpkins last?
A: Properly cured pumpkins can last for several months if stored correctly. Store them in a cool, dry, and well-ventilated place, ideally between 50-60°F (10-15°C). Avoid storing them in humid environments, as this can promote mold growth. Check your pumpkins regularly for any signs of rot or spoilage.
Q: What can I do with the pumpkin seeds?
A: Don’t throw away those pumpkin seeds! They’re a delicious and nutritious snack. Rinse the seeds to remove any pulp, then toss them with a little oil and your favorite seasonings (salt, pepper, garlic powder, paprika, etc.). Spread them in a single layer on a baking sheet and roast them in a preheated oven at 300°F (150°C) for about 20-25 minutes, or until they’re golden brown and crispy.
Q: What are some creative ways to use my homegrown pumpkins besides pie?
A: The possibilities are endless! You can use pumpkin puree in soups, stews, chili, and even smoothies. Roasted pumpkin is a delicious side dish. You can also use pumpkin to make bread, muffins, pancakes, and waffles. Don’t forget about savory dishes like pumpkin risotto or pumpkin ravioli. Get creative and experiment with different recipes!
Q: I live in an apartment with no garden. Can I still grow pumpkins?
A: While pumpkins are traditionally grown in gardens, you can try growing them in large containers on a balcony or patio. Choose a compact variety and make sure the container is large enough to accommodate the plant’s root system. You’ll also need to provide adequate sunlight and water. It might be a bit more challenging, but it’s definitely possible to grow pumpkins in a limited space.
Q: What if my pumpkins get a powdery mildew?
A: Powdery mildew is a common fungal disease that affects pumpkins. It appears as a white, powdery coating on the leaves. To prevent powdery mildew, ensure good air circulation around your plants and avoid overhead watering. If you notice powdery mildew, you can try spraying the affected leaves with a solution of baking soda and water or a commercially available fungicide.
Leave a Comment