

Ink stain removal toothpaste: Sounds too good to be true, right? I know, I thought so too! But trust me, this simple DIY trick can save your favorite shirt, your expensive rug, or even that important document from the dreaded ink blot. We’ve all been there – a rogue pen explodes, a leaky marker leaves its mark, and suddenly panic sets in. Before you resign yourself to throwing it away or spending a fortune at the dry cleaner, let’s explore this surprisingly effective solution.
The use of toothpaste for cleaning isn’t exactly new. In fact, some historical accounts suggest that early forms of toothpaste, even before the invention of the modern tube, were used for polishing various surfaces. While not specifically for ink, the mild abrasives and cleaning agents in toothpaste have long been recognized for their stain-lifting properties. Think of it as a gentle scrub for your fabrics!
But why is ink stain removal toothpaste such a game-changer? Because it’s readily available, affordable, and often works wonders on fresh ink stains. In today’s world, where sustainability and resourcefulness are increasingly important, learning simple DIY hacks like this can save you money, reduce waste, and give you a sense of accomplishment. Plus, who doesn’t love a quick and easy fix? So, let’s dive in and discover how this everyday item can become your secret weapon against pesky ink stains!
DIY Ink Stain Removal with Toothpaste: A Comprehensive Guide
Hey there, fellow DIY enthusiasts! Ever accidentally decorated your favorite shirt with a rogue pen mark? Don’t panic! Before you resign yourself to wearing it only around the house, let me share a simple yet effective trick I’ve used countless times: removing ink stains with toothpaste. Yes, you read that right! That minty fresh paste in your bathroom can be your stain-fighting superhero.
This guide will walk you through the process step-by-step, ensuring you can salvage your garments and other items from the dreaded ink blot. Let’s get started!
What You’ll Need
Before we dive in, gather these essential supplies:
* Non-gel toothpaste: This is crucial! Opt for a plain, white toothpaste. Gel toothpastes often lack the necessary abrasive qualities for stain removal and might even contain dyes that could worsen the situation. Think classic, old-school toothpaste.
* Soft-bristled toothbrush or clean cloth: An old toothbrush works wonders for scrubbing the stain, especially on textured fabrics. A clean, soft cloth is perfect for more delicate materials.
* Clean water: For rinsing and blotting.
* Clean, dry cloth or paper towels: For blotting and drying.
* Optional: Mild dish soap: For pre-treating stubborn stains.
* Optional: Hairdryer: To speed up the drying process.
Testing is Key!
Important: Before applying toothpaste to the entire stain, test it on an inconspicuous area of the fabric first. This is especially important for delicate fabrics or brightly colored items. Apply a small amount of toothpaste to a hidden seam or inside hem, let it sit for a few minutes, and then rinse. If there’s no discoloration or damage, you’re good to go!
Step-by-Step Ink Stain Removal
Here’s the breakdown of how to banish those pesky ink stains:
1. Pre-Treat (Optional, but Recommended for Stubborn Stains):
* If the ink stain is particularly stubborn or has been there for a while, pre-treating it can significantly improve your chances of success.
* Mix a small amount of mild dish soap with lukewarm water.
* Gently dab the solution onto the ink stain using a clean cloth.
* Let it sit for about 5-10 minutes.
* Blot the area with a clean, damp cloth to remove the soap.
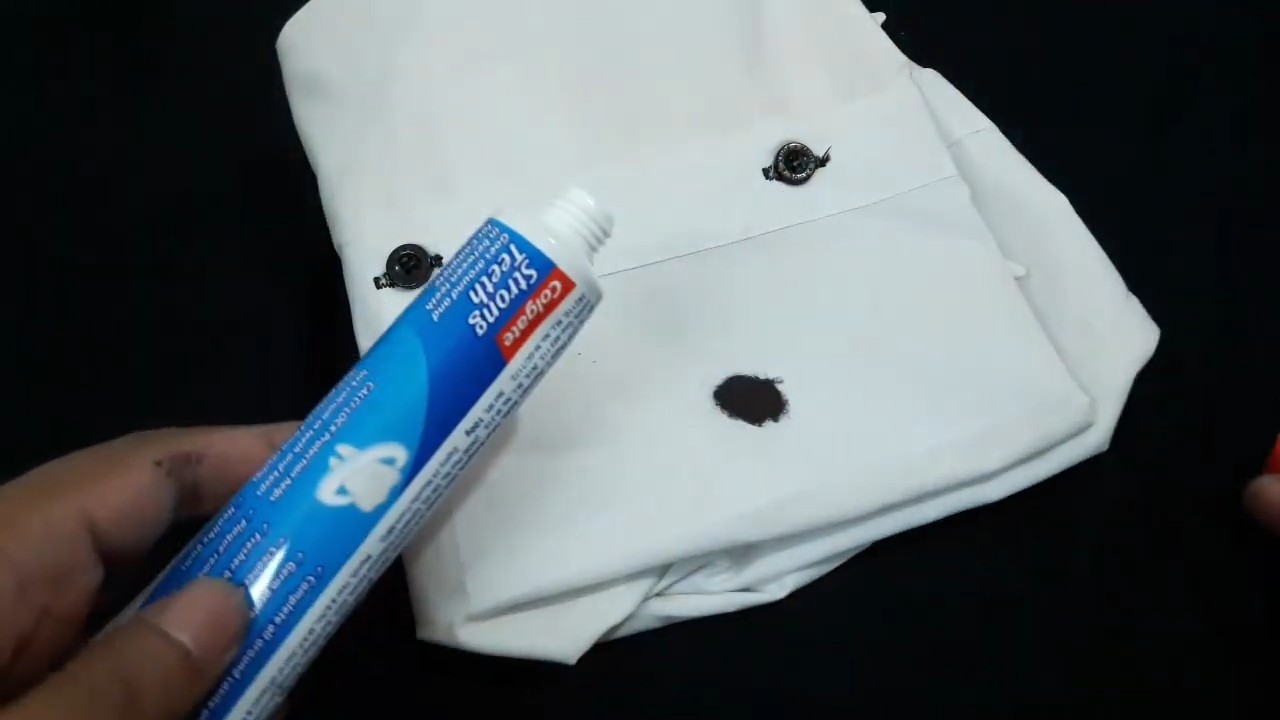
2. Apply the Toothpaste:
* Squeeze a generous amount of non-gel toothpaste directly onto the ink stain. Make sure the entire stain is covered. Don’t be shy!
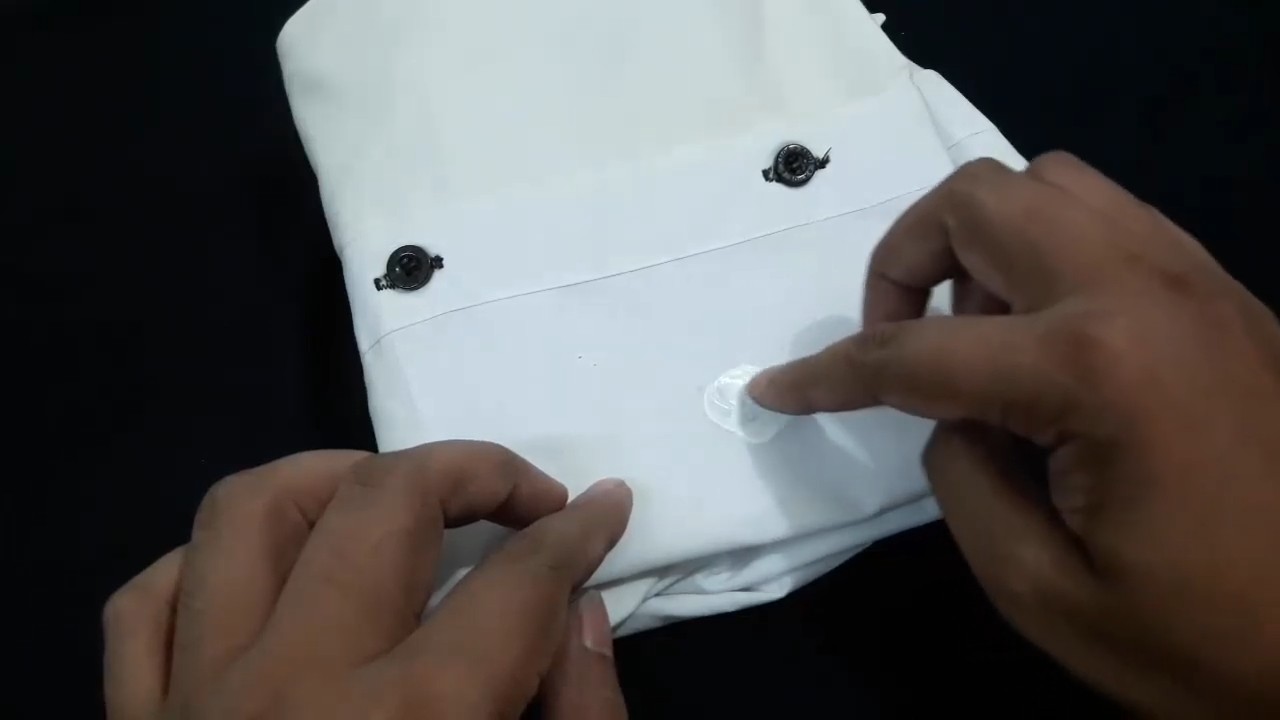
3. Gently Scrub or Dab:
* Using your soft-bristled toothbrush or clean cloth, gently scrub or dab the toothpaste into the stain.
* If using a toothbrush, use small, circular motions. Avoid scrubbing too vigorously, as this could damage the fabric.
* If using a cloth, dab the toothpaste into the stain, working from the outside in to prevent the stain from spreading.
4. Let it Sit:
* Allow the toothpaste to sit on the stain for about 10-15 minutes. This gives the toothpaste time to break down the ink particles. For older, more stubborn stains, you can leave it on for up to 30 minutes, but keep an eye on the fabric to ensure it doesn’t get damaged.
5. Rinse Thoroughly:
* Rinse the treated area thoroughly with clean, lukewarm water. Make sure all the toothpaste is completely removed. You can hold the fabric under running water or use a clean, damp cloth to rinse.
6. Blot and Repeat (If Necessary):
* Blot the area with a clean, dry cloth or paper towel to remove excess water. Avoid rubbing, as this can spread the stain.
* Inspect the area. If the ink stain is still visible, repeat steps 2-5. You may need to repeat the process several times, especially for stubborn stains.
7. Air Dry or Use a Hairdryer:
* Allow the fabric to air dry completely. Avoid putting it in the dryer until you’re sure the stain is gone, as the heat can set the stain.
* If you’re in a hurry, you can use a hairdryer on a low setting to speed up the drying process. Be careful not to overheat the fabric.
Dealing with Different Fabrics
The type of fabric you’re working with will influence how you approach the stain removal process. Here’s a quick guide:
* Cotton: Cotton is generally quite durable and can withstand a bit more scrubbing. However, always test in an inconspicuous area first.
* Polyester: Polyester is relatively stain-resistant, but ink can still be a problem. Follow the steps above carefully, and avoid using excessive heat when drying.
* Delicate Fabrics (Silk, Wool, Linen): These fabrics require extra care. Use a very soft cloth and dab gently. Avoid scrubbing, and rinse thoroughly. Consider taking the item to a professional cleaner if you’re unsure.
* Upholstery: For upholstery, follow the same steps as above, but be careful not to over-saturate the fabric with water. Use a clean cloth to blot up any excess moisture.
Tips and Tricks for Success
* Act Fast: The sooner you treat the stain, the better your chances of removing it completely. Fresh ink stains are much easier to remove than old, set-in stains.
* Don’t Rub: Rubbing can spread the stain and damage the fabric. Always blot or dab gently.
* Be Patient: Stain removal can be a process. Don’t get discouraged if the stain doesn’t come out immediately. Repeat the steps as needed.
* Consider the Ink Type: Different types of ink may respond differently to toothpaste. Ballpoint pen ink is generally easier to remove than permanent marker ink.
* For Permanent Marker: While toothpaste might help, permanent marker stains often require stronger solvents like rubbing alcohol or nail polish remover (acetone). Always test these solvents in an inconspicuous area first, and use them sparingly.
* Sunlight Can Help: After treating the stain, you can try laying the item in direct sunlight for a few hours. Sunlight can help to fade the stain naturally.
* Professional Help: If you’ve tried everything and the stain is still there, consider taking the item to a professional cleaner. They have specialized equipment and cleaning solutions that can often remove even the most stubborn stains.
Beyond Clothing: Other Uses for Toothpaste Stain Removal
Toothpaste isn’t just for clothing! I’ve successfully used it to remove ink stains from:
* Leather: Gently dab toothpaste onto the stain, let it sit for a few minutes, and then wipe it off with a damp cloth. Follow with a leather conditioner to prevent drying.
* Wood Furniture: Apply toothpaste to the stain, let it sit for a few minutes, and then wipe it off with a damp cloth. Be careful not to scratch the wood.
* Walls: Toothpaste can remove ink marks from painted walls. Apply a small amount to the stain, let it sit for a few minutes, and then wipe it off with a damp cloth.
Troubleshooting
* Stain is Spreading: If the stain is spreading, stop what you’re doing and blot the area with a clean, dry cloth to absorb the excess ink. Then, try using a different stain removal method or take the item to a professional cleaner.
* Fabric is Discoloring: If the fabric is discoloring, stop using the toothpaste immediately and rinse the area thoroughly with water. The toothpaste may be too abrasive for the fabric.
* Stain is Still Visible After Multiple Attempts: If you’ve tried multiple times and the stain is still visible, it may be a set-in stain that is difficult to remove. Consider taking the item to a professional cleaner.
I hope this guide helps you conquer those pesky ink stains! Remember to be patient, test in an inconspicuous area first, and don’t be afraid to repeat the steps as needed. Good luck, and happy stain fighting!
Conclusion
So, there you have it! This simple yet incredibly effective DIY trick using toothpaste for ink stain removal is a game-changer. Forget harsh chemicals and expensive stain removers that might damage your favorite fabrics. This method is gentle, readily available, and, most importantly, it works! We’ve shown you how to tackle those frustrating ink blots with a common household item, saving you time, money, and potential heartache.
Why is this a must-try? Because life happens. Pens leak, kids get creative (sometimes on the wrong surfaces), and accidents occur. Having a reliable and accessible solution like this toothpaste trick empowers you to handle these mishaps quickly and efficiently. It’s a practical skill that will save you from countless laundry disasters and furniture frustrations.
But don’t stop there! Experiment with different types of toothpaste. While plain white toothpaste generally works best, some users have reported success with gel toothpastes, especially on lighter-colored fabrics. You can also try pre-treating the stain with a small amount of dish soap before applying the toothpaste for extra stubborn marks. For delicate fabrics, test the toothpaste on an inconspicuous area first to ensure it doesn’t cause any discoloration. Consider using a soft-bristled toothbrush for gentle scrubbing on more delicate materials.
Beyond clothing, this method can also be effective on other surfaces like carpets, upholstery, and even some types of leather. Remember to always test in a hidden area first to avoid any unwanted surprises. For carpets, blot the area thoroughly after removing the toothpaste to prevent residue buildup. On upholstery, use a damp cloth to wipe away any remaining toothpaste and allow the area to air dry completely.
We’re confident that this DIY ink stain removal toothpaste trick will become your go-to solution for tackling those pesky ink stains. It’s a simple, cost-effective, and surprisingly powerful method that anyone can use.
Now, it’s your turn! We encourage you to try this method the next time you encounter an ink stain. Don’t be afraid to experiment and find what works best for you. And most importantly, share your experience with us! Let us know in the comments below how this trick worked for you, what variations you tried, and any tips you discovered along the way. Your feedback will help other readers and contribute to a community of stain-fighting experts. Together, we can conquer those ink stains and keep our belongings looking their best! We are eager to hear about your success stories and any challenges you might face. Your insights are invaluable and will help us refine this guide even further. So, grab your toothpaste and get ready to say goodbye to those stubborn ink stains!
Frequently Asked Questions (FAQ)
1. What kind of toothpaste works best for ink stain removal?
Generally, plain white toothpaste (not gel) is recommended for ink stain removal. The mild abrasives in the toothpaste help to lift the ink from the fabric or surface. Avoid using heavily colored or flavored toothpastes, as these could potentially stain the material further. Toothpastes with whitening agents can sometimes be effective, but test them on an inconspicuous area first, especially on colored fabrics, to ensure they don’t cause any bleaching. The key ingredient you’re looking for is a mild abrasive that can gently lift the ink without damaging the underlying material.
2. Can I use this method on all types of fabrics?
While this method is generally safe for most fabrics, it’s always best to test it on an inconspicuous area first, especially for delicate materials like silk, wool, or rayon. These fabrics are more susceptible to damage and discoloration. If you’re unsure, consult a professional dry cleaner. For more durable fabrics like cotton, linen, and polyester, the toothpaste method is usually quite effective. However, always proceed with caution and monitor the area closely as you’re working.
3. How long should I leave the toothpaste on the ink stain?
The amount of time you leave the toothpaste on the stain depends on the severity of the stain and the type of fabric. For fresh, light stains, 15-30 minutes may be sufficient. For older, more stubborn stains, you may need to leave the toothpaste on for an hour or even longer. Check the stain periodically and gently rub the toothpaste with a clean cloth or soft-bristled toothbrush. If the stain is still visible, reapply the toothpaste and let it sit for a longer period.
4. What if the ink stain doesn’t come out completely?
If the ink stain doesn’t come out completely after the first attempt, don’t give up! Repeat the process, applying fresh toothpaste and allowing it to sit for a longer period. You can also try pre-treating the stain with a small amount of dish soap or laundry detergent before applying the toothpaste. For particularly stubborn stains, consider using a commercial stain remover specifically designed for ink. Always follow the manufacturer’s instructions carefully and test the stain remover on an inconspicuous area first.
5. Will this method work on ballpoint pen ink, gel pen ink, or permanent marker?
This method is most effective on ballpoint pen ink. Gel pen ink may be more difficult to remove, but it’s still worth trying the toothpaste method. Permanent marker is notoriously difficult to remove, and while toothpaste might help to lighten the stain, it’s unlikely to remove it completely. For permanent marker stains, you may need to use a specialized solvent or consult a professional cleaning service.
6. Can I use this method on leather?
Yes, you can try this method on leather, but proceed with extreme caution. Leather is a delicate material that can be easily damaged by harsh chemicals or abrasive cleaners. Test the toothpaste on an inconspicuous area first to ensure it doesn’t cause any discoloration or damage. Apply a small amount of toothpaste to the stain and gently rub it with a soft cloth. Wipe away the toothpaste with a damp cloth and then dry the area thoroughly. Follow up with a leather conditioner to help restore moisture and prevent cracking.
7. What’s the best way to remove the toothpaste after it’s been applied?
The best way to remove the toothpaste is to use a clean, damp cloth. Gently wipe away the toothpaste, rinsing the cloth frequently to remove any residue. Avoid rubbing the area too vigorously, as this could damage the fabric or surface. Once you’ve removed all the toothpaste, blot the area with a dry cloth to absorb any excess moisture. Allow the area to air dry completely.
8. Is there anything else I can try if toothpaste doesn’t work?
If toothpaste doesn’t work, there are several other options you can try. Rubbing alcohol can be effective on some types of ink stains. Apply a small amount of rubbing alcohol to a cotton ball and gently blot the stain. Be sure to test the rubbing alcohol on an inconspicuous area first, as it can damage some fabrics. Hairspray can also be effective on ink stains, especially on clothing. Spray the hairspray directly onto the stain and then blot it with a clean cloth. Milk is another surprising remedy for ink stains. Soak the stained area in milk for several hours, then wash as usual. As a last resort, you can try a commercial stain remover specifically designed for ink. Always follow the manufacturer’s instructions carefully and test the stain remover on an inconspicuous area first.
9. How can I prevent ink stains in the future?
Prevention is always the best medicine! Store pens with the tip facing up to prevent leaks. Use pen caps when the pens are not in use. Be careful when handling pens near clothing or furniture. Consider using pens with quick-drying ink to minimize the risk of smudging. And, of course, keep this handy toothpaste trick in mind for those inevitable accidents!
10. Does the age of the stain affect the effectiveness of this method?
Yes, the age of the stain significantly impacts the effectiveness of the toothpaste method. Fresh ink stains are generally much easier to remove than older, set-in stains. The longer the ink sits on the fabric or surface, the more deeply it penetrates the fibers, making it more difficult to lift. Therefore, it’s crucial to treat ink stains as quickly as possible for the best results. If you encounter an old ink stain, you may need to repeat the toothpaste treatment multiple times or try a stronger stain removal method.


Leave a Comment