

Plant Bitter Gourd at Home and unlock a world of fresh, homegrown goodness right in your backyard! Have you ever dreamt of harvesting your own vibrant, slightly bitter, yet incredibly healthy vegetables? Well, dream no more! This DIY guide will empower you to cultivate your very own bitter gourd patch, even if you’re a complete beginner.
Bitter gourd, also known as bitter melon, has a rich history, deeply rooted in Asian cultures for centuries. It’s not just a vegetable; it’s a staple in traditional medicine and cuisine, celebrated for its numerous health benefits. From lowering blood sugar to boosting immunity, this humble gourd packs a powerful punch. But beyond its medicinal properties, growing your own bitter gourd offers a unique sense of accomplishment and connection to nature.
Why should you embark on this DIY adventure? Because store-bought vegetables often lack the freshness and flavor of homegrown produce. Plus, you have complete control over what goes into your garden, ensuring a healthy and organic harvest. I know, the idea of starting a garden can seem daunting, but trust me, with these simple tricks and hacks, you’ll be harvesting your own bitter gourds in no time. So, let’s dive in and discover how easy it is to plant bitter gourd at home and enjoy the fruits (or rather, vegetables!) of your labor!
Growing Bitter Gourd at Home: A Comprehensive DIY Guide
Hey there, fellow gardening enthusiasts! I’m so excited to share my experience and guide you through growing your own bitter gourd (also known as bitter melon or karela) right at home. It might seem intimidating at first, but trust me, with a little patience and these simple steps, you’ll be harvesting your own bitter gourds in no time!
What You’ll Need:
Before we dive in, let’s gather all the necessary materials. Having everything ready beforehand will make the process much smoother.
* Bitter Gourd Seeds: You can find these at your local garden center or online. Make sure to choose a variety that suits your climate.
* Seed Starting Tray or Small Pots: These are perfect for starting your seeds indoors.
* Seed Starting Mix: This is a light and airy soil mix specifically designed for seedlings.
* Larger Pots or Garden Bed: Once your seedlings are strong enough, they’ll need a permanent home.
* Well-Draining Soil: Bitter gourd thrives in soil that drains well and is rich in organic matter.
* Compost or Aged Manure: This will enrich your soil and provide essential nutrients.
* Trellis or Support Structure: Bitter gourd is a vine, so it needs something to climb on.
* Watering Can or Hose: For regular watering.
* Fertilizer (Optional): A balanced fertilizer can help boost growth.
* Gloves: To protect your hands.
* Gardening Tools: A trowel, hand rake, and pruning shears will come in handy.
Section 1: Starting Your Seeds
Starting your seeds indoors gives them a head start, especially if you live in a cooler climate. I’ve found this method to be incredibly effective.
1. Soaking the Seeds: To improve germination, I like to soak my bitter gourd seeds in lukewarm water for 24 hours before planting. This helps soften the hard outer shell and encourages sprouting.
2. Preparing the Seed Starting Tray: Fill your seed starting tray or small pots with seed starting mix. Gently press the soil down to remove any air pockets.
3. Planting the Seeds: Make a small hole (about ½ inch deep) in the center of each pot or cell. Place one seed in each hole and cover it with soil. Gently water the soil until it’s moist but not soggy.
4. Creating a Greenhouse Effect: To maintain humidity, I cover the seed starting tray with a clear plastic lid or plastic wrap. This helps create a mini-greenhouse environment.
5. Finding the Right Spot: Place the tray in a warm location with indirect sunlight. A temperature of around 75-85°F (24-29°C) is ideal for germination.
6. Monitoring and Watering: Check the soil moisture daily. Keep the soil consistently moist, but avoid overwatering. Remove the plastic lid or wrap once the seeds start to germinate (usually within 7-14 days).
Section 2: Transplanting Your Seedlings
Once your seedlings have developed a few sets of true leaves (the leaves that look like miniature versions of the adult leaves), they’re ready to be transplanted.
1. Hardening Off: Before transplanting, it’s crucial to “harden off” your seedlings. This means gradually exposing them to outdoor conditions over a period of 7-10 days. Start by placing them outside for an hour or two each day, gradually increasing the time they spend outdoors. This helps them adjust to the sun, wind, and temperature changes.
2. Preparing the Planting Site: Choose a sunny location in your garden or prepare a large pot (at least 12 inches in diameter). Bitter gourd needs at least 6-8 hours of sunlight per day.
3. Soil Preparation: Amend the soil with compost or aged manure to improve drainage and fertility. Bitter gourd prefers well-draining soil with a pH of 6.0-7.0.
4. Creating the Planting Hole: Dig a hole that’s slightly larger than the root ball of your seedling.
5. Carefully Removing the Seedling: Gently remove the seedling from its pot, being careful not to damage the roots. If the roots are tightly bound, gently loosen them with your fingers.
6. Planting the Seedling: Place the seedling in the hole and backfill with soil. Gently press the soil around the base of the plant.
7. Watering Thoroughly: Water the newly transplanted seedling thoroughly.
8. Adding Support: Install a trellis or other support structure near the plant. Bitter gourd vines can grow quite long, so they need something to climb on. I’ve used everything from bamboo stakes to repurposed fencing with great success.
Section 3: Caring for Your Bitter Gourd Plants
Now that your bitter gourd plants are in their permanent home, it’s time to provide them with the care they need to thrive.
1. Watering: Water your bitter gourd plants regularly, especially during hot and dry weather. Aim to keep the soil consistently moist, but avoid overwatering, which can lead to root rot. I usually water deeply a couple of times a week, rather than shallowly every day.
2. Fertilizing: Bitter gourd is a heavy feeder, so it benefits from regular fertilization. You can use a balanced fertilizer (e.g., 10-10-10) every 2-3 weeks, following the instructions on the package. Alternatively, you can side-dress the plants with compost or aged manure.
3. Pruning: Pruning can help improve air circulation and encourage fruit production. Remove any yellowing or dead leaves. You can also prune the tips of the vines to encourage branching.
4. Pest and Disease Control: Keep an eye out for common pests like aphids, spider mites, and squash bugs. You can control these pests with insecticidal soap or neem oil. Bitter gourd can also be susceptible to fungal diseases like powdery mildew. To prevent these diseases, ensure good air circulation and avoid overhead watering. If you notice any signs of disease, treat the plants with a fungicide.
5. Training the Vines: As the vines grow, gently train them to climb the trellis or support structure. You can use plant ties or twine to secure the vines.
6. Pollination: Bitter gourd plants produce both male and female flowers. The female flowers have a small fruit behind them, while the male flowers do not. Bees and other pollinators are essential for pollination. If you’re not seeing many pollinators in your garden, you can hand-pollinate the flowers. To do this, use a small paintbrush to transfer pollen from the male flowers to the female flowers.
Section 4: Harvesting Your Bitter Gourd
The moment you’ve been waiting for! Harvesting your own homegrown bitter gourd is incredibly rewarding.
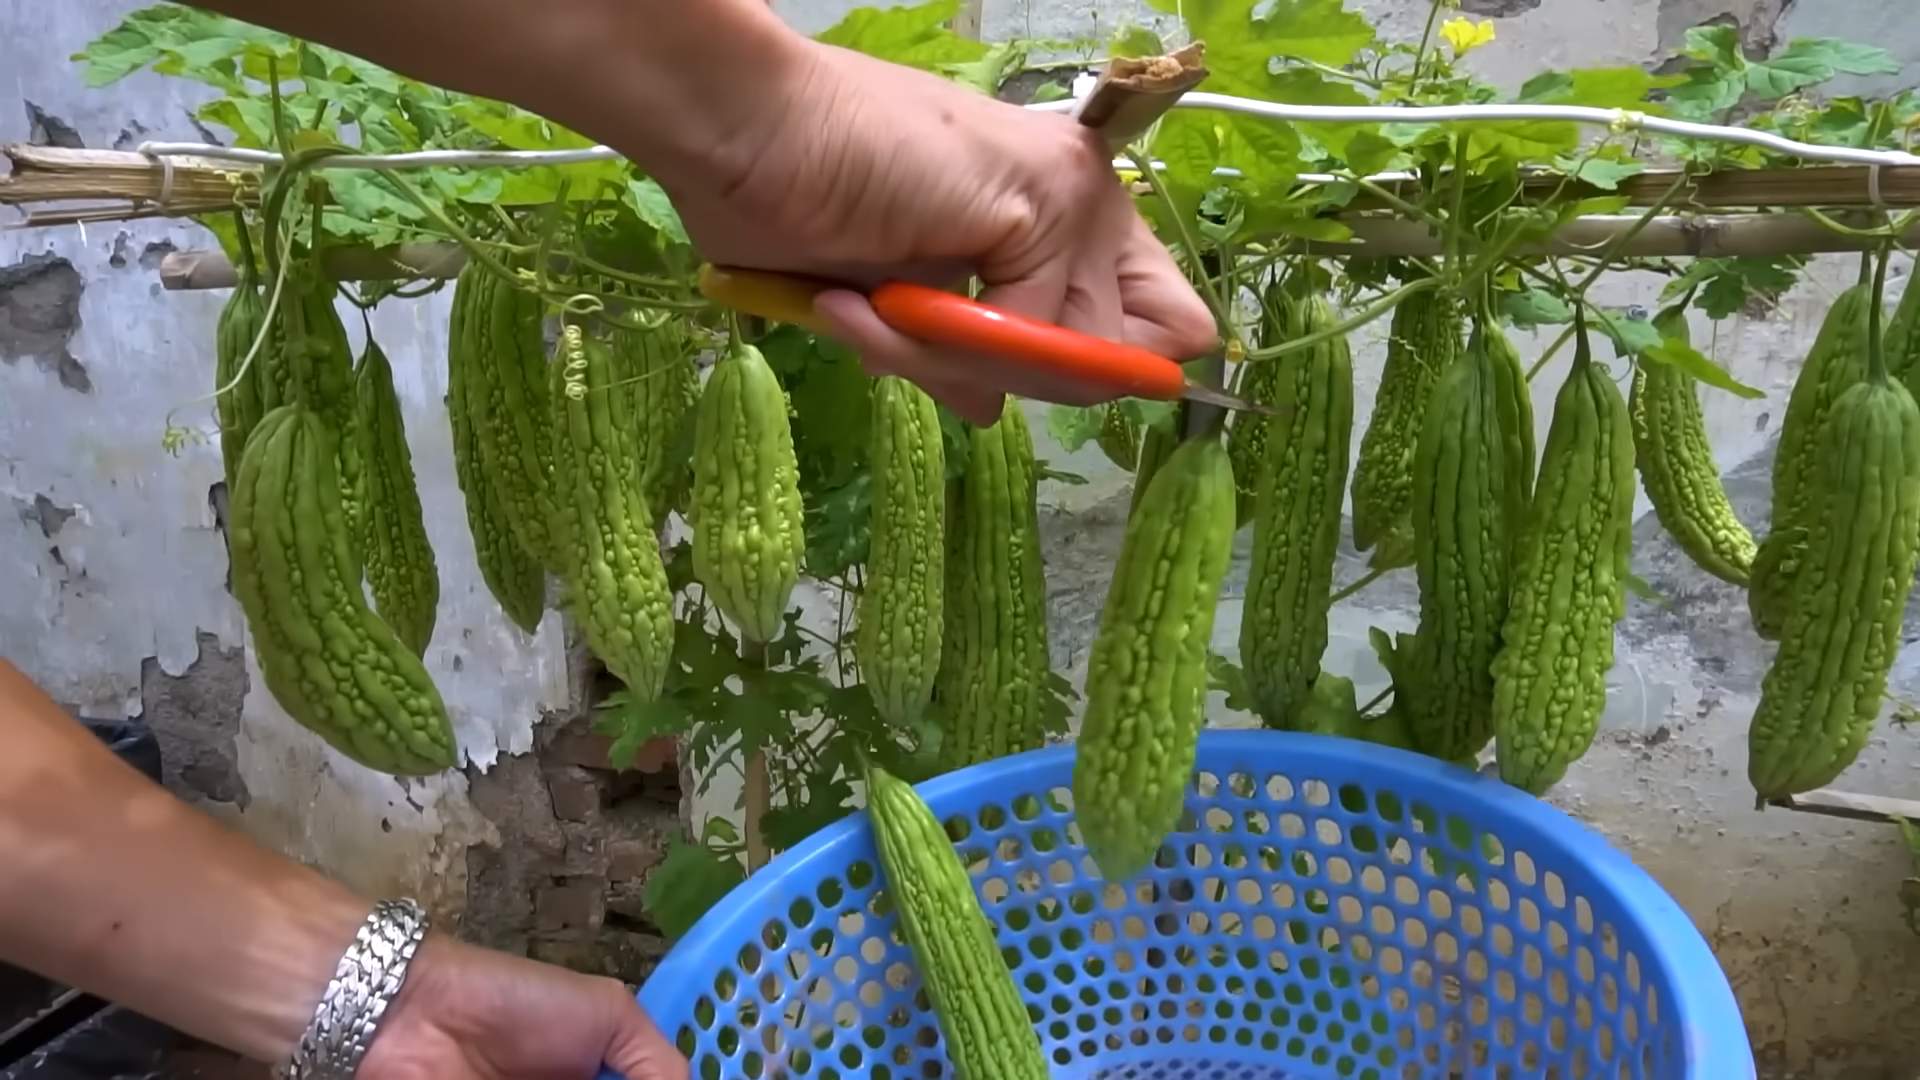
1. Knowing When to Harvest: Bitter gourd is typically ready to harvest about 2-3 months after planting. The fruits should be firm and green, with a slightly waxy coating. The size of the fruit will vary depending on the variety.
2. Harvesting Technique: Use a sharp knife or pruning shears to cut the fruit from the vine. Leave a small stem attached to the fruit.
3. Harvesting Regularly: Harvest the fruits regularly to encourage continued production. If you leave the fruits on the vine for too long, they will turn orange and become very bitter.
4. Storage: Store your harvested bitter gourd in the refrigerator for up to a week.
Tips and Tricks for Success:
* Choose the Right Variety: There are many different varieties of bitter gourd, so choose one that’s well-suited to your climate and growing conditions.
* Provide Adequate Sunlight: Bitter gourd needs at least 6-8 hours of sunlight per day.
* Ensure Good Drainage: Bitter gourd doesn’t like soggy soil, so make sure your soil drains well.
* Water Regularly: Keep the soil consistently moist, but avoid overwatering.
* Fertilize Regularly: Bitter gourd is a heavy feeder, so it benefits from regular fertilization.
* Provide Support: Bitter gourd is a vine, so it needs something to climb on.
* Protect from Pests and Diseases: Keep an eye out for common pests and diseases and take action to control them.
* Harvest Regularly: Harvest the fruits regularly to encourage continued production.
* Don’t Be Afraid to Experiment: Gardening is all about learning and experimenting. Don’t be afraid to try new things and see what works best for you.
Growing bitter gourd at home can be a challenging but rewarding experience. With a little patience and these simple steps, you can enjoy fresh, homegrown bitter gourd all season long. Happy gardening!
Conclusion
So, there you have it! Cultivating your own bitter gourd at home isn’t just a gardening project; it’s an investment in fresh, healthy produce, a connection to nature, and a surprisingly rewarding experience. We’ve walked you through the essential steps, from selecting the right seeds to nurturing your growing vines, and hopefully, dispelled any myths about the difficulty of growing this unique vegetable.
Why is this DIY trick a must-try? Because store-bought bitter gourd simply can’t compare to the vibrant flavor and satisfying crunch of a homegrown variety. Plus, you have complete control over the growing process, ensuring your bitter gourd is free from harmful pesticides and chemicals. Imagine the satisfaction of harvesting your own bounty, knowing exactly where it came from and how it was grown. That’s a feeling you can’t buy in a supermarket.
But the benefits extend beyond just taste and health. Growing bitter gourd is also a fantastic way to learn about plant life cycles, develop your gardening skills, and even reduce your carbon footprint by sourcing food locally. It’s a sustainable and enriching activity that can bring joy and purpose to your life.
Now, let’s talk about variations. While we’ve focused on a general approach, feel free to experiment with different growing methods. Consider using raised beds for improved drainage, or try companion planting with beans or peas to enhance soil fertility. You can also explore different varieties of bitter gourd, each with its own unique size, shape, and flavor profile. Some varieties are more compact and suitable for container gardening, while others are better suited for sprawling vines. Don’t be afraid to get creative and tailor the process to your specific needs and preferences.
For those with limited space, vertical gardening is an excellent option. Train your bitter gourd vines up a trellis or fence to maximize space and create a beautiful green wall. You can even grow bitter gourd in hanging baskets, provided they are large enough to accommodate the plant’s root system.
And remember, success in gardening often comes down to observation and adaptation. Pay close attention to your plants, monitor their growth, and adjust your watering and fertilizing schedule as needed. Don’t be discouraged by setbacks; every gardener experiences challenges along the way. The key is to learn from your mistakes and keep experimenting until you find what works best for you.
We are confident that with a little patience and effort, you can successfully grow your own delicious and nutritious bitter gourd at home. So, what are you waiting for? Grab some seeds, prepare your soil, and embark on this exciting gardening adventure. We encourage you to try this DIY trick and discover the joys of homegrown bitter gourd.
Finally, we’d love to hear about your experiences! Share your photos, tips, and stories in the comments section below. Let’s create a community of bitter gourd enthusiasts and inspire others to embrace the joys of homegrown produce. Happy gardening!
Frequently Asked Questions (FAQ)
Q: What is the best time of year to plant bitter gourd?
A: Bitter gourd thrives in warm weather, so the best time to plant is during the late spring or early summer, after the last frost has passed. The soil temperature should be at least 65°F (18°C) for optimal germination. In warmer climates, you can also plant a second crop in late summer for a fall harvest. Consider your local climate and growing season when determining the ideal planting time.
Q: How much sunlight does bitter gourd need?
A: Bitter gourd requires at least 6-8 hours of direct sunlight per day to thrive. Choose a sunny location in your garden where the plants will receive ample sunlight throughout the day. If you’re growing bitter gourd indoors, supplement with grow lights if necessary. Insufficient sunlight can lead to weak growth, reduced flowering, and smaller fruit.
Q: What type of soil is best for growing bitter gourd?
A: Bitter gourd prefers well-drained, fertile soil that is rich in organic matter. Amend your soil with compost or well-rotted manure before planting to improve its fertility and drainage. A slightly acidic to neutral soil pH (6.0-7.0) is ideal. Avoid heavy clay soils, as they can become waterlogged and hinder root growth.
Q: How often should I water my bitter gourd plants?
A: Water your bitter gourd plants regularly, especially during hot and dry weather. Keep the soil consistently moist, but avoid overwatering, which can lead to root rot. Water deeply at the base of the plants, rather than overhead, to prevent fungal diseases. Mulching around the plants can help retain moisture and suppress weeds. Check the soil moisture regularly and adjust your watering schedule accordingly.
Q: What kind of fertilizer should I use for bitter gourd?
A: Bitter gourd benefits from regular fertilization throughout the growing season. Use a balanced fertilizer (e.g., 10-10-10) at planting time, and then switch to a fertilizer that is higher in phosphorus and potassium to promote flowering and fruit production. You can also supplement with organic fertilizers, such as compost tea or fish emulsion. Avoid over-fertilizing, as this can lead to excessive vegetative growth and reduced fruit yield.
Q: How do I deal with pests and diseases on my bitter gourd plants?
A: Bitter gourd can be susceptible to various pests and diseases, including aphids, spider mites, squash bugs, and powdery mildew. Inspect your plants regularly for signs of infestation or disease, and take action promptly. Use organic pest control methods, such as insecticidal soap or neem oil, to control pests. Ensure good air circulation around the plants to prevent fungal diseases. Remove any infected leaves or fruit to prevent the spread of disease.
Q: How long does it take for bitter gourd to mature?
A: Bitter gourd typically takes 60-90 days to mature after planting, depending on the variety and growing conditions. The fruit is ready to harvest when it is still green and firm, but before it turns yellow or orange. Overripe bitter gourd becomes bitter and less palatable. Harvest the fruit regularly to encourage continued production.
Q: How do I know when to harvest my bitter gourd?
A: The best time to harvest bitter gourd is when the fruit is still young and tender, typically about 6-8 inches long. The skin should be smooth and green, and the fruit should feel firm to the touch. Avoid harvesting overripe fruit, as it will be more bitter and less flavorful. Use a sharp knife or pruning shears to cut the fruit from the vine, leaving a short stem attached.
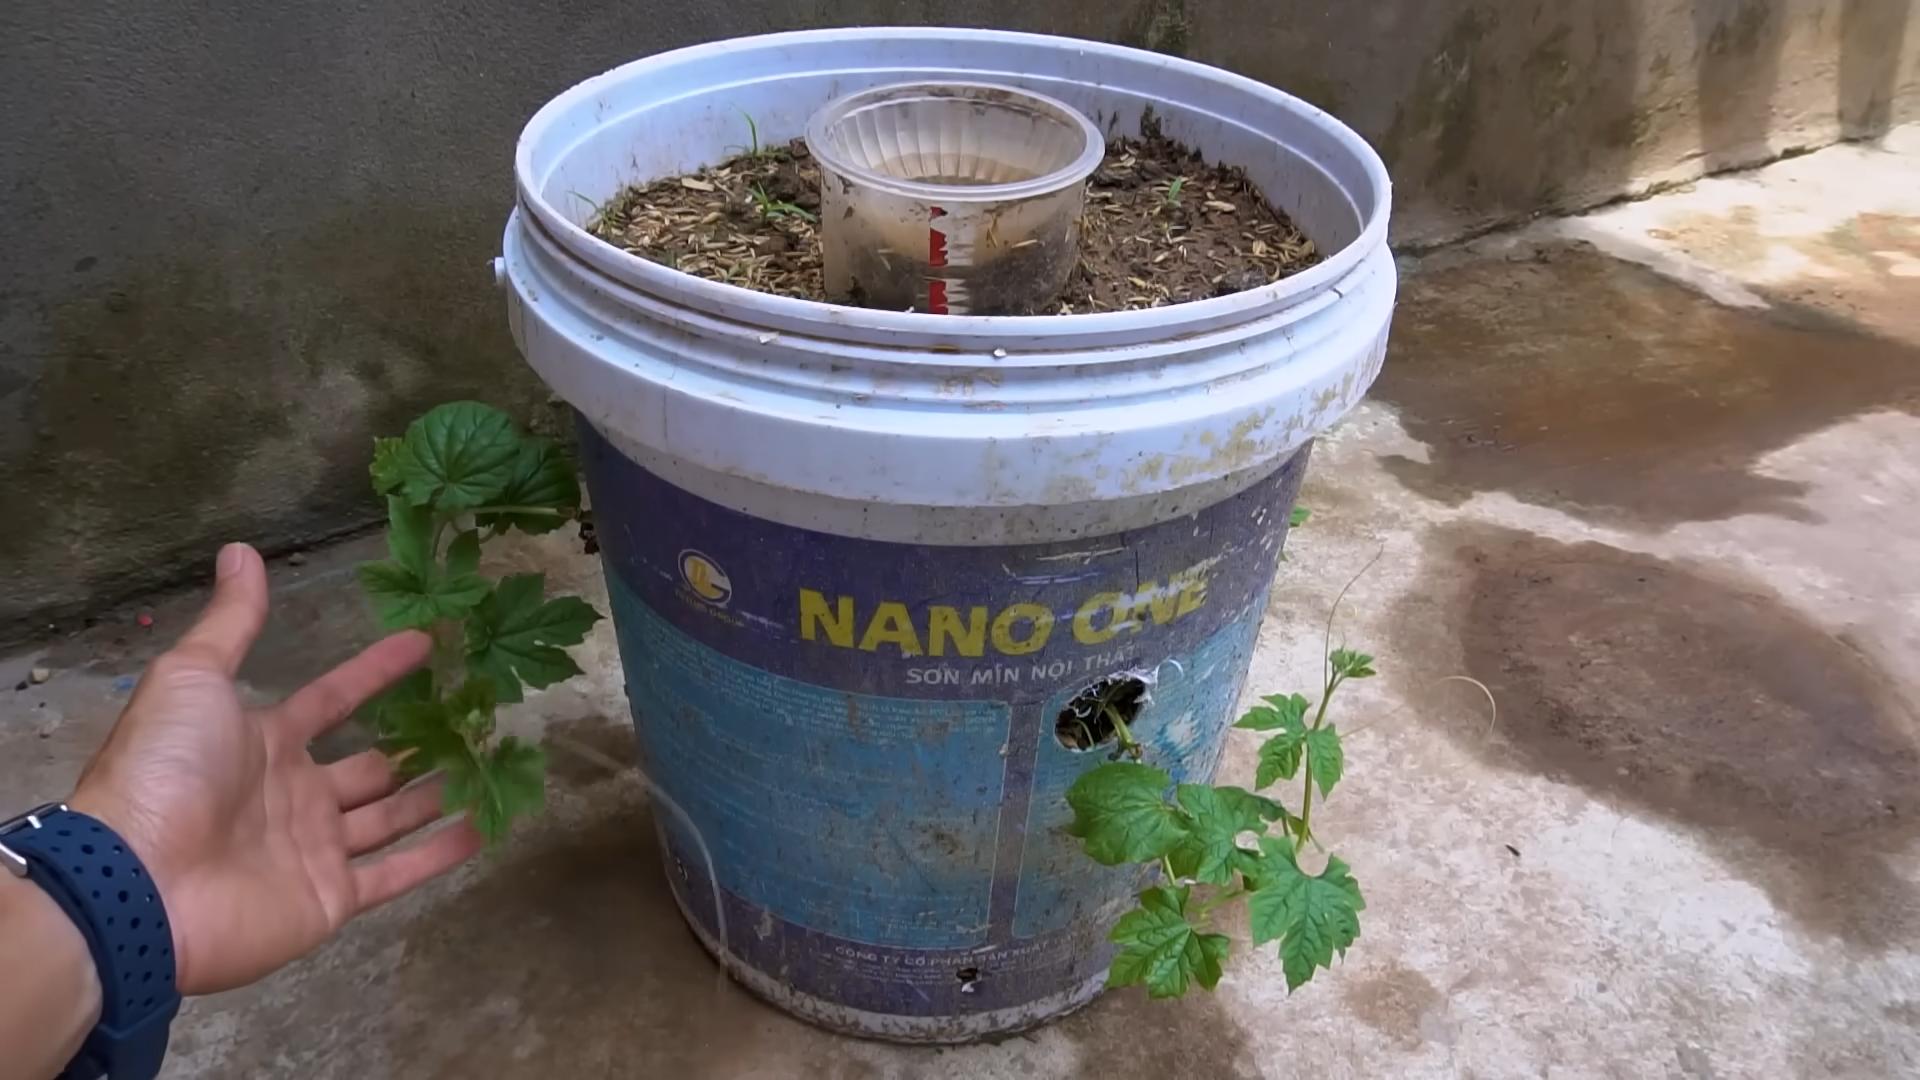
Q: Can I grow bitter gourd in containers?
A: Yes, you can grow bitter gourd in containers, provided they are large enough to accommodate the plant’s root system. Choose a container that is at least 12 inches in diameter and depth. Use a well-draining potting mix and provide a trellis or support for the vines to climb. Water and fertilize regularly, and ensure the plants receive ample sunlight. Container-grown bitter gourd may require more frequent watering and fertilization than plants grown in the ground.
Q: How can I reduce the bitterness of bitter gourd?
A: Bitter gourd is known for its distinctive bitter taste, but there are several ways to reduce the bitterness. Before cooking, soak the sliced bitter gourd in salted water for at least 30 minutes. You can also blanch the bitter gourd in boiling water for a few minutes before cooking. Another technique is to rub the sliced bitter gourd with salt and then rinse it thoroughly before cooking. These methods help to draw out some of the bitter compounds.
Q: Can I save seeds from my bitter gourd for future planting?
A: Yes, you can save seeds from your bitter gourd for future planting, but keep in mind that the resulting plants may not be true to type if the parent plant was cross-pollinated. To save seeds, allow the fruit to fully ripen on the vine until it turns yellow or orange. Remove the seeds from the fruit, wash them thoroughly, and dry them completely before storing them in an airtight container in a cool, dry place.
Q: What are some common uses for bitter gourd in cooking?
A: Bitter gourd is a versatile vegetable that can be used in a variety of dishes. It is commonly stir-fried, stuffed, curried, or added to soups and stews. It can also be juiced or pickled. In many Asian cuisines, bitter gourd is considered a delicacy and is prized for its unique flavor and health benefits. Experiment with different recipes and cooking methods to find your favorite way to enjoy bitter gourd.

Leave a Comment