

Plant Yardlong Beans Backyard: Imagine stepping into your backyard and harvesting vibrant, incredibly long beans that you grew yourself! It’s not just a dream; it’s an achievable reality with a little know-how. For centuries, cultures across Asia have cherished yardlong beans, also known as asparagus beans or Chinese long beans, not only for their unique flavor and impressive length but also for their nutritional value. They’re a staple in stir-fries, curries, and salads, adding a delightful crunch and a boost of vitamins.
But why should you bother planting yardlong beans in your backyard? Well, think about it: fresh, organic produce right at your fingertips! No more questionable supermarket beans; you’ll know exactly where your food comes from. Plus, growing your own food is incredibly rewarding and a fantastic way to connect with nature. This DIY guide is packed with simple, effective tricks and hacks to help you successfully plant yardlong beans backyard, even if you’re a complete beginner. I’m going to share my secrets to ensure you have a bountiful harvest, from choosing the right location to dealing with common pests. Get ready to transform your backyard into a bean-growing paradise!

Growing Yardlong Beans in Your Backyard: A DIY Guide
Hey there, fellow gardening enthusiasts! I’m so excited to share my experience with growing yardlong beans (also known as asparagus beans or Chinese long beans) right in my backyard. These beans are not only delicious but also incredibly fun to grow, thanks to their impressive length. Trust me, harvesting a bean that’s almost as long as your arm is a truly rewarding experience! This guide will walk you through every step, from preparing your soil to harvesting your bounty. Let’s get started!
Choosing the Right Variety and Location
Before we dive into the nitty-gritty, let’s talk about choosing the right yardlong bean variety and finding the perfect spot in your backyard.
* Variety Selection: There are several yardlong bean varieties available, each with slightly different characteristics. Some popular choices include ‘Red Noodle’ (known for its reddish-purple pods), ‘Chinese Red Noodle’, and ‘Orient Wonder’. I personally prefer ‘Orient Wonder’ because it’s a reliable producer and has a fantastic flavor. Do some research and pick a variety that suits your taste and local climate.
* Sunlight: Yardlong beans are sun-loving plants, so they need at least 6-8 hours of direct sunlight each day. Choose a location in your backyard that gets plenty of sunshine throughout the day.
* Soil: These beans thrive in well-drained, fertile soil. Before planting, I always amend my soil with compost or well-rotted manure to improve its structure and nutrient content.
* Support System: Yardlong beans are climbing plants, so they need a sturdy support system to grow on. You can use a trellis, fence, or even a teepee made of bamboo poles. I’ve found that a trellis works best for me, as it provides ample support and allows the beans to grow vertically.
Preparing the Soil and Setting Up Your Support System
Okay, now that we’ve covered the basics, let’s get our hands dirty and prepare the soil and support system.
1. Clear the Area: Start by clearing the area where you plan to plant your yardlong beans. Remove any weeds, rocks, or debris.
2. Amend the Soil: As I mentioned earlier, yardlong beans prefer well-drained, fertile soil. I like to amend my soil with plenty of organic matter. Spread a 2-3 inch layer of compost or well-rotted manure over the planting area.
3. Till the Soil: Use a garden fork or tiller to incorporate the compost into the soil. Till the soil to a depth of at least 12 inches. This will help improve drainage and aeration.
4. Create Rows or Hills: You can plant yardlong beans in rows or hills. If you’re planting in rows, create rows that are about 3-4 feet apart. If you’re planting in hills, create hills that are about 2-3 feet apart.
5. Install Your Support System: Before planting, install your trellis, fence, or teepee. Make sure the support system is sturdy enough to support the weight of the mature plants. I usually bury the base of my trellis a few inches into the ground to provide extra stability.
Planting Your Yardlong Bean Seeds
Now for the fun part – planting the seeds!
1. Timing is Key: Yardlong beans are warm-season crops, so it’s important to wait until the soil has warmed up to at least 60°F (15°C) before planting. In my area, this is usually around late spring or early summer.
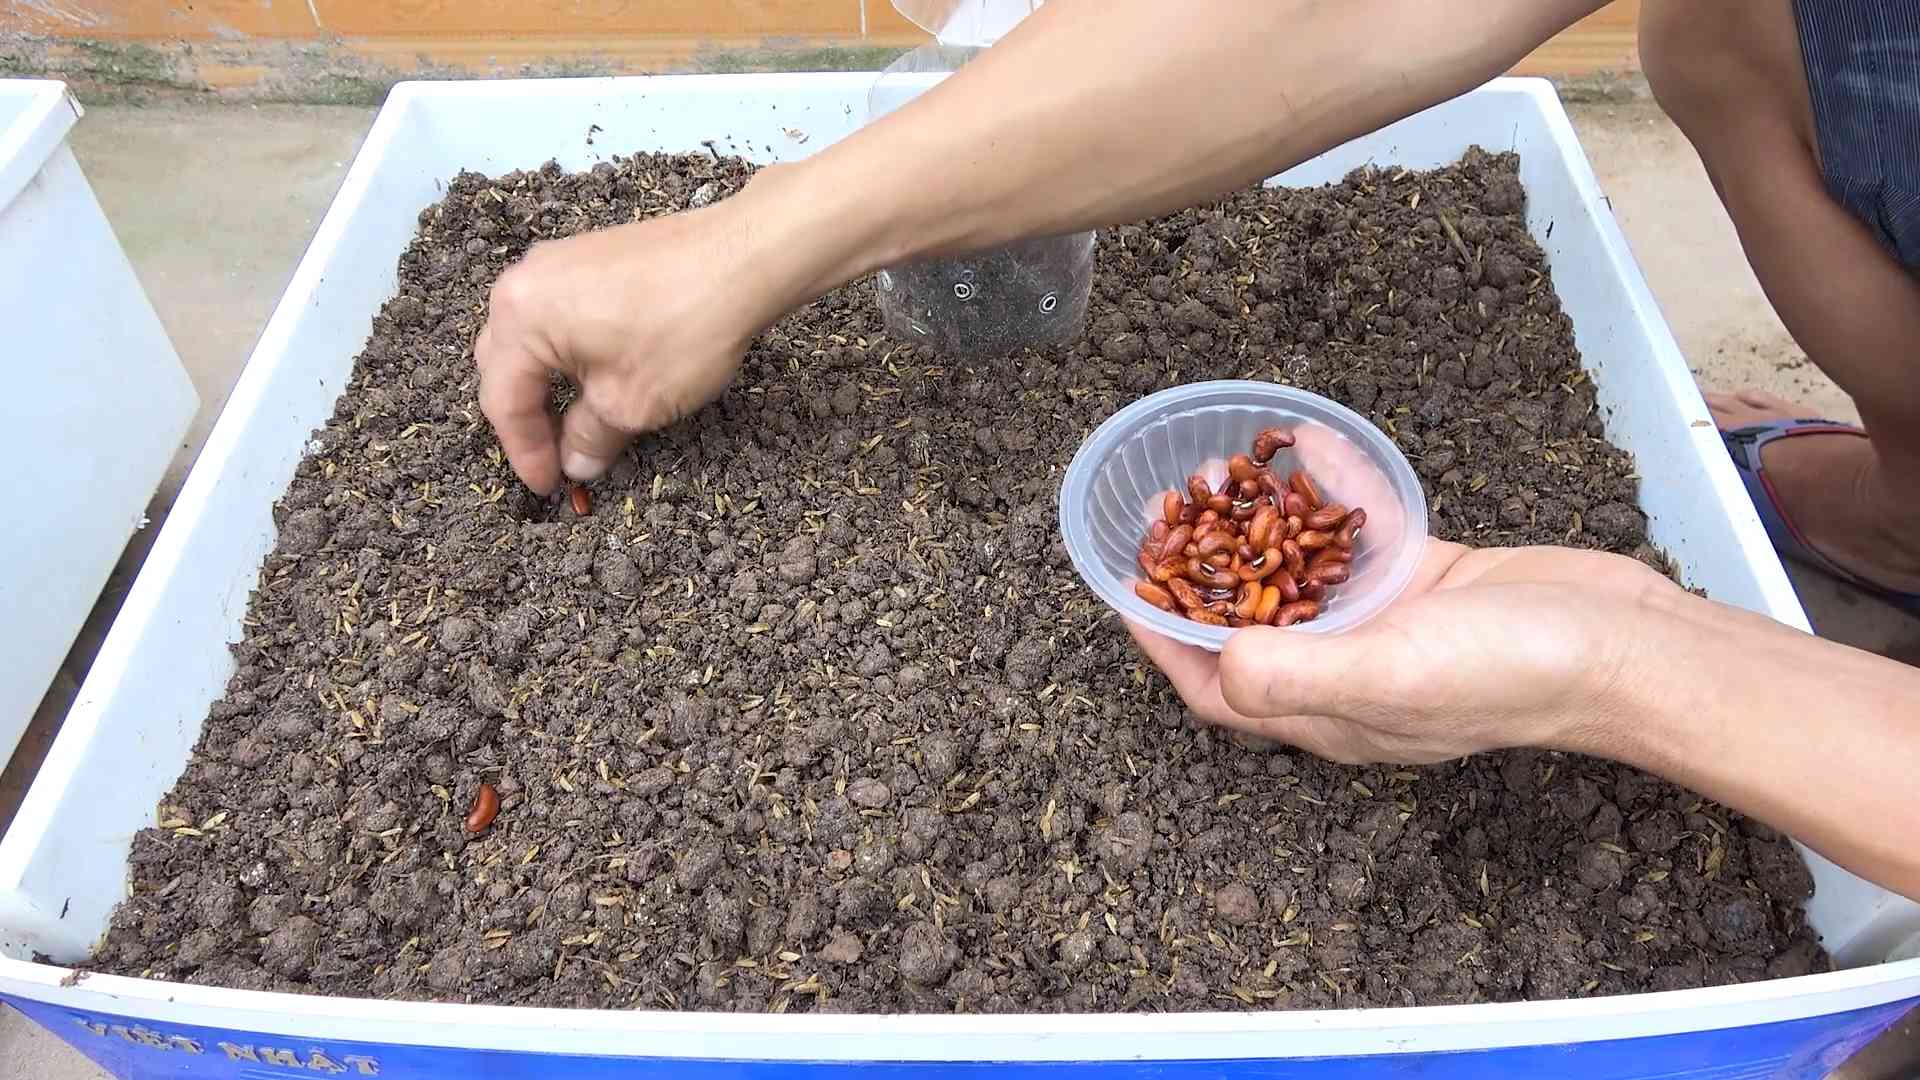
2. Direct Sowing: I prefer to direct sow my yardlong bean seeds directly into the garden. This avoids the hassle of transplanting seedlings.
3. Sowing Depth: Plant the seeds about 1 inch deep and 2-3 inches apart.
4. Watering: After planting, water the soil gently but thoroughly. Keep the soil consistently moist until the seeds germinate.
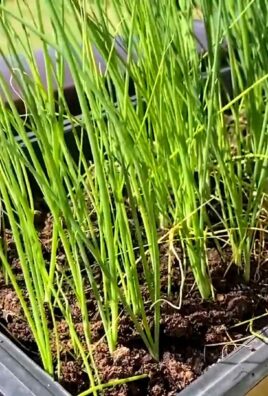
5. Thinning: Once the seedlings emerge, thin them to about 6-8 inches apart. This will give the plants enough room to grow and prevent overcrowding.
Caring for Your Yardlong Bean Plants
Once your yardlong bean plants are established, it’s important to provide them with proper care to ensure a bountiful harvest.
* Watering: Yardlong beans need consistent moisture, especially during hot, dry weather. Water deeply and regularly, aiming for about 1 inch of water per week. I usually water my plants in the morning to allow the foliage to dry before nightfall, which helps prevent fungal diseases.
* Fertilizing: Feed your yardlong bean plants with a balanced fertilizer every 4-6 weeks. I like to use a fertilizer that’s high in phosphorus and potassium, as these nutrients promote flowering and pod development.
* Weeding: Keep the area around your yardlong bean plants free of weeds. Weeds compete with the plants for nutrients and water. I usually hand-pull weeds or use a hoe to cultivate the soil.
* Pest Control: Yardlong beans can be susceptible to certain pests, such as aphids, bean beetles, and spider mites. Inspect your plants regularly for signs of infestation. If you spot any pests, you can try using insecticidal soap or neem oil to control them. I prefer to use organic pest control methods whenever possible.
* Training: As your yardlong bean plants grow, you’ll need to train them to climb the support system. Gently guide the vines up the trellis or fence and tie them loosely with twine if necessary.
Harvesting Your Yardlong Beans
The moment you’ve been waiting for – harvesting your delicious yardlong beans!
1. Harvest Time: Yardlong beans are typically ready to harvest about 60-80 days after planting. The pods should be long, slender, and firm.
2. Harvesting Technique: Use scissors or pruning shears to cut the pods from the vine. Be careful not to damage the plant.
3. Harvesting Frequency: Harvest your yardlong beans regularly to encourage continued production. The more you harvest, the more beans the plant will produce. I usually harvest my beans every 2-3 days.
4. Pod Size: The ideal pod size for harvesting is usually around 12-18 inches long, but you can harvest them at any size you prefer. Just make sure the pods are still tender and haven’t become tough or stringy.
5. Storage: Freshly harvested yardlong beans can be stored in the refrigerator for up to a week. I like to store them in a plastic bag or container to prevent them from drying out.
Troubleshooting Common Problems
Even with the best care, you might encounter some problems while growing yardlong beans. Here are a few common issues and how to address them:
* Poor Germination: If your yardlong bean seeds aren’t germinating, it could be due to several factors, such as cold soil, poor-quality seeds, or overwatering. Make sure the soil is warm enough before planting, use fresh seeds, and avoid overwatering.
* Yellowing Leaves: Yellowing leaves can be a sign of nutrient deficiency, overwatering, or pest infestation. Check the soil pH and nutrient levels, adjust your watering schedule, and inspect the plants for pests.
* Lack of Flowers: If your yardlong bean plants aren’t flowering, it could be due to insufficient sunlight, lack of phosphorus, or excessive nitrogen. Make sure the plants are getting enough sunlight, fertilize with a phosphorus-rich fertilizer, and avoid over-fertilizing with nitrogen.
* Pod Drop: Pod drop can be caused by stress, such as heat, drought, or nutrient deficiency. Provide consistent moisture, fertilize regularly, and protect the plants from extreme temperatures.
Enjoying Your Harvest
Now that you’ve harvested your yardlong beans, it’s time to enjoy the fruits (or rather, vegetables) of your labor! Yardlong beans are incredibly versatile and can be used in a variety of dishes.
* Stir-fries: Yardlong beans are a popular ingredient in stir-fries. They add a delicious crunch and a slightly sweet flavor.
* Salads: You can also add yardlong beans to salads. They pair well with other vegetables, such as tomatoes, cucumbers, and bell peppers.
* Soups and Stews: Yardlong beans can be added to soups and stews for extra flavor and nutrition.
* Steaming or Boiling: You can also steam or boil yardlong beans and serve them as a side dish.
I personally love stir-frying them with garlic, ginger, and soy sauce. They’re also delicious in a simple salad with a vinaigrette dressing.
Growing yardlong beans in your backyard is a rewarding experience that anyone can enjoy. With a little bit of planning and care, you can harvest a bountiful crop of these delicious and unique beans. So, get out there and start planting! Happy gardening!
Conclusion
So, there you have it! Planting yardlong beans in your backyard doesn’t have to be an intimidating endeavor. With a little preparation, the right techniques, and a dash of patience, you can cultivate a thriving vine laden with these delicious and versatile legumes. This DIY approach not only saves you money compared to buying them at the store, but it also provides the immense satisfaction of harvesting your own homegrown produce.
But why is this DIY trick a must-try? Beyond the cost savings and the joy of gardening, growing your own yardlong beans allows you to control the entire process, ensuring that your beans are free from harmful pesticides and herbicides. You know exactly what goes into nurturing your plants, resulting in a healthier and more flavorful harvest. Plus, the vibrant green vines and dangling beans add a touch of exotic beauty to your backyard, transforming it into a mini-farm.
Looking for variations? Consider companion planting to maximize your yield and deter pests. Marigolds, basil, and rosemary are excellent choices to plant alongside your yardlong beans. For a different flavor profile, experiment with different varieties of yardlong beans. Some are sweeter, while others have a more nutty taste. You can also try growing them in containers if you have limited space, just be sure to provide a sturdy trellis for support. If you live in a cooler climate, starting your seeds indoors a few weeks before the last frost can give you a head start on the growing season.
Don’t be afraid to experiment with different trellising methods. While a traditional bamboo trellis works well, you can also use repurposed materials like old ladders, metal fencing, or even sturdy branches. Get creative and find a solution that fits your backyard aesthetic and provides ample support for the vigorous vines.
We wholeheartedly encourage you to give this DIY trick a try. The rewards are well worth the effort. Imagine the delicious stir-fries, curries, and salads you can create with your freshly harvested yardlong beans. The taste of homegrown produce is simply unmatched.
And most importantly, we want to hear about your experience! Share your tips, tricks, and successes (and even your challenges!) in the comments below. Let’s create a community of yardlong bean enthusiasts and learn from each other. Did you try a particular variety? Did you find a unique trellising method that worked wonders? Your insights could be invaluable to other aspiring gardeners. So, grab your seeds, prepare your soil, and get ready to embark on a rewarding gardening adventure. Happy planting!
Frequently Asked Questions (FAQ)
What is the best time to plant yardlong beans?
The ideal time to plant yardlong beans is after the last frost when the soil has warmed up to at least 65°F (18°C). These beans are heat-loving plants and thrive in warm weather. In most regions, this typically falls between late spring and early summer. If you live in a warmer climate with a longer growing season, you may be able to plant a second crop in late summer for a fall harvest. Check your local weather forecasts and planting calendars to determine the best time for your specific area. Starting seeds indoors 3-4 weeks before the last expected frost can give you a head start, especially in cooler climates.
How much space do yardlong beans need?
Yardlong beans are vigorous climbers and require ample vertical space. Provide a trellis that is at least 6-8 feet tall. Plant seeds or seedlings about 4-6 inches apart along the base of the trellis. If you are planting multiple rows, space them about 2-3 feet apart to allow for adequate airflow and sunlight penetration. Container gardening is also an option, but ensure the container is large enough (at least 12 inches in diameter) and provides sturdy support for the vines.
What kind of soil is best for yardlong beans?
Yardlong beans prefer well-draining soil that is rich in organic matter. Amend your soil with compost or well-rotted manure before planting to improve its fertility and drainage. A slightly acidic to neutral soil pH (around 6.0-7.0) is ideal. Avoid heavy clay soils, as they can become waterlogged and hinder root development. If you have clay soil, consider amending it with sand and organic matter to improve drainage.
How often should I water yardlong beans?
Yardlong beans need consistent moisture, especially during hot weather. Water deeply and regularly, aiming to keep the soil consistently moist but not waterlogged. Check the soil moisture regularly by sticking your finger about an inch deep. If the soil feels dry, it’s time to water. Avoid overhead watering, as it can promote fungal diseases. Instead, water at the base of the plants. Mulching around the plants can help retain moisture and suppress weeds.
What are common pests and diseases that affect yardlong beans?
Common pests that can affect yardlong beans include aphids, bean beetles, and spider mites. Regularly inspect your plants for signs of infestation and take action promptly. Insecticidal soap or neem oil can be effective for controlling these pests. Diseases that can affect yardlong beans include powdery mildew, bean rust, and anthracnose. Ensure good air circulation around the plants to prevent fungal diseases. Remove any infected leaves or plants immediately. Consider using organic fungicides if necessary. Companion planting with marigolds or basil can also help deter pests and diseases.
How long does it take for yardlong beans to mature?
Yardlong beans typically take about 60-80 days to mature after planting. You can start harvesting the beans when they are about 12-18 inches long and still tender. Regular harvesting encourages continued production. The beans are best eaten when they are young and slender. Overripe beans can become tough and stringy.
Can I save seeds from my yardlong beans?
Yes, you can save seeds from your yardlong beans for future planting. Allow some of the beans to mature fully on the vine until they are dry and brown. Harvest the pods and shell the seeds. Store the seeds in a cool, dry, and dark place in an airtight container. Properly stored seeds can remain viable for several years. However, keep in mind that if you grew a hybrid variety, the seeds may not produce plants that are true to type.
Are yardlong beans nutritious?
Yes, yardlong beans are a nutritious vegetable. They are a good source of vitamins A and C, as well as fiber, folate, and manganese. They are also low in calories and fat. Yardlong beans are a versatile ingredient that can be used in a variety of dishes, including stir-fries, curries, salads, and soups.
What are some creative ways to use yardlong beans in cooking?
Yardlong beans are incredibly versatile in the kitchen. Try them in stir-fries with garlic, ginger, and soy sauce. Add them to curries for a hearty and flavorful dish. Blanch them and toss them in salads with a vinaigrette dressing. Grill them for a smoky and charred flavor. Pickle them for a tangy and crunchy snack. You can even use them as a substitute for green beans in many recipes. Experiment with different flavors and cooking methods to discover your favorite ways to enjoy yardlong beans.

Leave a Comment