

Sticker Residue Removal Salt: We’ve all been there, haven’t we? You peel off a price tag, a label, or even a fun sticker, only to be left with that sticky, frustrating residue that just won’t budge. It’s a common annoyance that can make even the simplest tasks feel like a Herculean effort. But fear not, fellow DIY enthusiasts! I’m here to share a simple, effective, and surprisingly natural solution that will banish that sticky menace for good.
Throughout history, people have sought out natural remedies for everyday problems. While the specific origins of using salt for sticker residue removal are a bit hazy, the power of salt as an abrasive and absorbent agent has been recognized for centuries. From cleaning cookware to preserving food, salt has always been a versatile tool in our homes. Now, we’re adding another trick to its repertoire!
Why do you need this sticker residue removal salt hack? Because nobody wants to spend hours scrubbing away at sticky goo! Whether it’s on your favorite glass jar, a newly purchased item, or even a delicate surface, this DIY method is gentle, inexpensive, and uses ingredients you likely already have in your pantry. Say goodbye to harsh chemicals and hello to a sparkling, residue-free finish. Let’s dive in and discover how to make this magic happen!

DIY Sticker Residue Removal with Salt: A Surprisingly Effective Hack
Hey there, fellow DIY enthusiasts! Ever been plagued by that sticky, stubborn residue left behind after peeling off a sticker? It’s the bane of every crafter, organizer, and anyone who’s ever tried to remove a price tag. You’ve probably tried everything – scraping, scrubbing, even resorting to harsh chemicals. But what if I told you there’s a simple, natural, and surprisingly effective solution hiding in your pantry? Yep, I’m talking about salt!
This method is fantastic because it’s gentle on most surfaces, readily available, and incredibly budget-friendly. I’ve personally used this trick on glass, plastic, metal, and even some painted surfaces (always test in an inconspicuous area first!). So, ditch the harsh chemicals and let’s get that sticky residue gone with the power of salt!
What You’ll Need
Before we dive in, let’s gather our supplies. This is a super simple project, so the list is short and sweet:
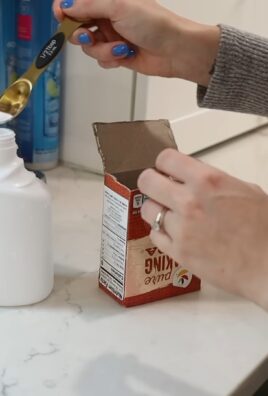
* Table Salt: Regular table salt is perfect. No need for fancy sea salt or Himalayan pink salt here!
* Water: Just plain tap water will do.
* A Soft Cloth or Sponge: Microfiber cloths work wonders, but any soft cloth will do the trick. Avoid abrasive scrubbers, as they can scratch delicate surfaces.
* A Bowl or Small Container: To mix our salt solution.
* Optional: A plastic scraper or credit card (for particularly stubborn residue).
* Optional: Mild dish soap (for cleaning after residue removal).
Step-by-Step Guide: Removing Sticker Residue with Salt
Alright, let’s get down to business! Here’s how to banish that sticky residue using our trusty salt method:
1. Prepare the Salt Solution: In your bowl or small container, mix together salt and water to form a thick paste. The consistency should be similar to wet sand. You want enough water to dissolve the salt and create a slightly abrasive mixture, but not so much that it becomes runny. I usually start with a tablespoon of salt and add water a teaspoon at a time until I reach the desired consistency.
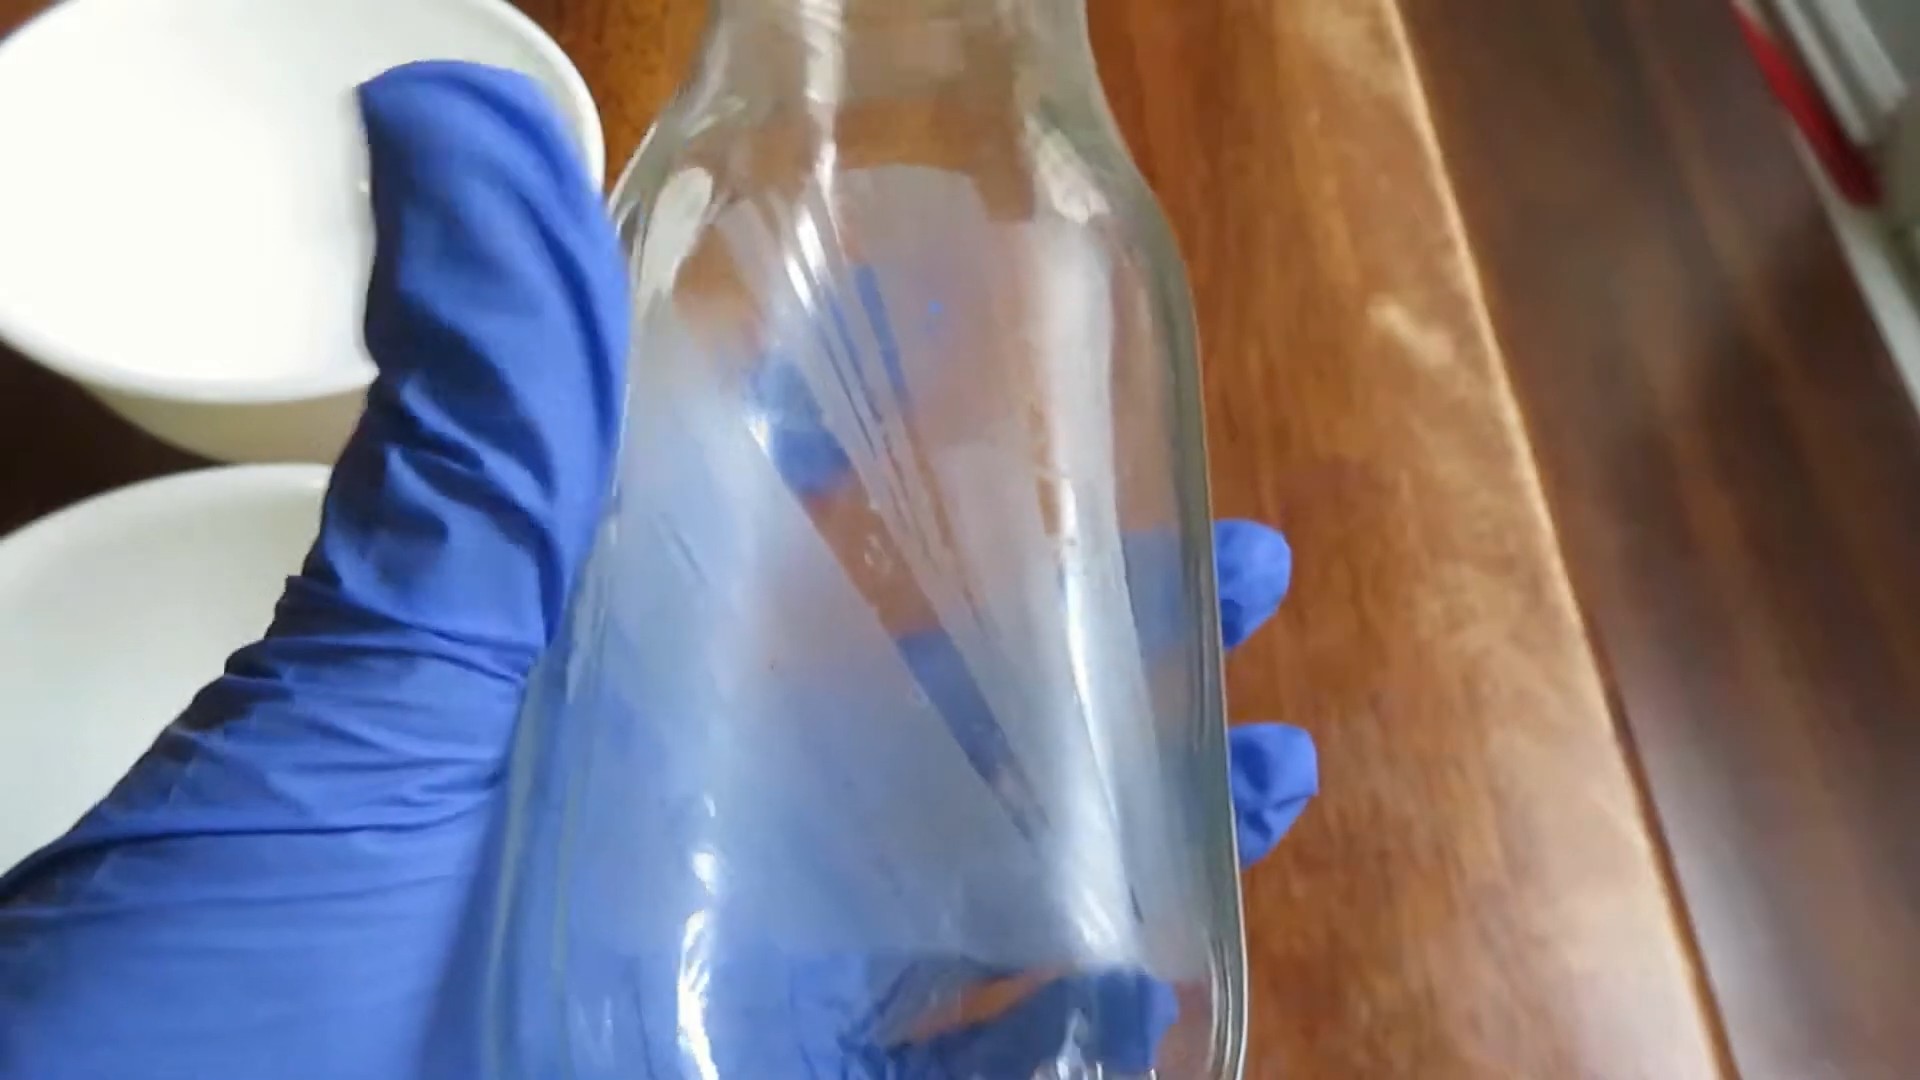
2. Apply the Salt Paste to the Residue: Using your finger or a clean cloth, generously apply the salt paste directly onto the sticker residue. Make sure the entire area is covered. Don’t be shy – the salt needs to make good contact with the adhesive to work its magic.
3. Let it Sit (Soaking Time is Key!): This is the most crucial step! Let the salt paste sit on the residue for at least 15-20 minutes. This allows the salt to penetrate the adhesive and start breaking it down. For particularly stubborn residue, you can even let it sit for an hour or two. The longer it sits, the easier the residue will be to remove. I often set a timer so I don’t forget about it.
4. Gently Scrub the Area: After the soaking time, take your soft cloth or sponge and gently scrub the area in a circular motion. Apply moderate pressure, but avoid scrubbing too hard, especially on delicate surfaces. The salt crystals will act as a gentle abrasive, helping to lift the residue. You should start to see the residue loosening and balling up.
5. Rinse with Water: Once you’ve scrubbed the area thoroughly, rinse it with clean water to remove the salt paste and any remaining residue. Use a clean cloth to wipe away the water and inspect the area.
6. Repeat if Necessary: If some residue remains, don’t fret! Simply repeat steps 2-5 until the residue is completely gone. Sometimes, it takes a couple of applications to fully remove stubborn adhesive.
7. For Stubborn Residue: If the salt paste alone isn’t doing the trick, you can try using a plastic scraper or credit card to gently scrape away the loosened residue after the soaking time. Be careful not to scratch the surface. Hold the scraper at a slight angle and apply gentle pressure.
8. Clean with Dish Soap (Optional): After removing the residue, you can clean the area with mild dish soap and water to remove any lingering salt or stickiness. This is especially helpful for surfaces that will come into contact with food or skin. Rinse thoroughly and dry with a clean cloth.
Tips and Tricks for Success
* Test in an Inconspicuous Area: Before applying the salt paste to the entire area, always test it in a small, inconspicuous spot to ensure it doesn’t damage the surface. This is especially important for painted surfaces, delicate plastics, and fabrics.
* Adjust the Salt-to-Water Ratio: The ideal salt-to-water ratio may vary depending on the type of residue and the surface you’re working with. If the paste is too dry, add a little more water. If it’s too runny, add a little more salt.
* Warm Water Can Help: Using warm water instead of cold water can help dissolve the salt more quickly and may also help loosen the adhesive.
* Patience is Key: Don’t rush the process! Allowing the salt paste to soak for an adequate amount of time is crucial for breaking down the adhesive.
* Avoid Abrasive Scrubbers: Using abrasive scrubbers or steel wool can scratch the surface, especially on glass, plastic, and painted surfaces. Stick to soft cloths or sponges.
* For Delicate Surfaces: If you’re working with a delicate surface, such as antique furniture or fine china, be extra cautious. Use a very gentle scrubbing motion and avoid letting the salt paste sit for too long.
* Try a Salt and Oil Mixture: For particularly stubborn residue, you can try mixing salt with a small amount of oil (such as olive oil or vegetable oil) instead of water. The oil can help to further loosen the adhesive.
* Consider the Type of Adhesive: Some adhesives are more resistant to salt than others. If you’re dealing with a particularly strong adhesive, you may need to try a different method.
When Salt Might Not Be the Best Choice
While salt is a fantastic and gentle option for removing sticker residue, there are a few situations where it might not be the best choice:
* Porous Surfaces: Avoid using salt on porous surfaces like unfinished wood or certain types of stone, as the salt can be absorbed into the material and cause damage.
* Surfaces Prone to Rust: While salt is generally safe for metal, prolonged exposure to salt and water can potentially cause rust. If you’re working with a metal surface that’s prone to rust, be sure to rinse it thoroughly and dry it completely after removing the residue.
* Electronics: Never use salt and water near electronic devices, as the water can cause damage.
* Fabrics: While salt can sometimes be used on fabrics, it’s best to test it in an inconspicuous area first, as it can potentially stain or discolor some fabrics.
Alternative Methods for Sticker Residue Removal
If the salt method doesn’t work or isn’t suitable for your particular situation, here are a few other methods you can try:
* Vinegar: Vinegar is a natural and effective solvent that can help dissolve adhesive. Simply soak a cloth in vinegar and apply it to the residue for a few minutes, then scrub gently.
* Baking Soda: Baking soda is another gentle abrasive that can help remove sticker residue. Mix baking soda with water to form a paste and apply it to the residue, then scrub gently.
* Rubbing Alcohol: Rubbing alcohol is a strong solvent that can dissolve many types of adhesive. Apply rubbing alcohol to a cloth and wipe the residue, then scrub gently. Be careful when using rubbing alcohol, as it can damage some surfaces.
* Hair Dryer: The heat from a hair dryer can soften the adhesive, making it easier to peel off. Simply heat the residue with a hair dryer for a few seconds, then try to peel it off.
* Commercial Adhesive Removers: There are many commercial adhesive removers available that are specifically designed to remove sticker residue. Follow the instructions on the product label carefully.
Final Thoughts
So there you have it! A simple, effective, and natural way to remove sticker residue using just salt and water. I hope this guide has been helpful and that you’re now armed with the knowledge to tackle any sticky situation. Remember to always test in an inconspicuous area first, be patient, and don’t be afraid to try different methods until you find one that works for you. Happy cleaning!
Conclusion
So, there you have it! This simple yet incredibly effective DIY trick using salt to remove sticker residue is a game-changer. Forget spending money on expensive, chemical-laden products that often leave behind a greasy film or damage the surface underneath. This method is not only cost-effective and environmentally friendly, but it’s also surprisingly powerful, tackling even the most stubborn sticker remnants with ease.
Why is this a must-try? Because it works! We’ve all been there, struggling with that sticky, unsightly residue left behind by price tags, labels, or even children’s stickers. It’s frustrating, time-consuming, and often feels impossible to get rid of completely. This salt-based solution offers a simple, readily available answer to that common problem. It’s gentle enough for delicate surfaces yet abrasive enough to lift away the stickiness.
But the beauty of this method lies in its adaptability. While plain table salt works wonders, you can experiment with different types of salt to find what works best for you. Coarse sea salt can provide extra scrubbing power for tougher residues, while finely ground Epsom salt can be gentler on more delicate surfaces. You can also enhance the cleaning power by adding a few drops of essential oil, such as lemon or orange, which are known for their degreasing properties and pleasant scent. For particularly stubborn residue, try creating a paste of salt and baking soda with a little water. The baking soda adds an extra layer of abrasive cleaning power.
Don’t limit yourself to just removing sticker residue from glass or plastic. This method can also be effective on metal, wood (test in an inconspicuous area first!), and even some fabrics. Just remember to adjust the pressure and scrubbing technique accordingly to avoid scratching or damaging the surface.
We are confident that once you try this DIY sticker residue removal salt trick, you’ll be amazed by the results. It’s a simple, effective, and affordable solution that will save you time, money, and frustration.
Now, we want to hear from you! Give this method a try and let us know how it works for you. Share your experiences, tips, and variations in the comments below. Did you find a particular type of salt that worked exceptionally well? Did you discover a new surface that this method is perfect for? Your feedback will help other readers discover the full potential of this amazing DIY trick. Let’s build a community of sticker-residue-free homes together! We encourage you to share your before and after photos on social media using #StickerResidueSaltHack so we can see your success!
Frequently Asked Questions
What kind of salt works best for removing sticker residue?
While common table salt is effective for most sticker residue removal, you can experiment with different types of salt for varying levels of abrasiveness. Coarse sea salt provides more scrubbing power for stubborn residue, while finely ground Epsom salt is gentler on delicate surfaces. Kosher salt is another good option due to its larger crystals, which offer a good balance between scrubbing and gentleness. Ultimately, the best salt depends on the type of surface you’re cleaning and the severity of the residue. Always test in an inconspicuous area first to ensure it doesn’t scratch or damage the surface.
Can I use this method on all surfaces?
This method is generally safe for glass, plastic, and metal. However, use caution when applying it to wood, painted surfaces, or fabrics. Always test in an inconspicuous area first to ensure the salt doesn’t scratch, discolor, or damage the surface. For delicate surfaces, use a finer salt and apply gentle pressure. For fabrics, avoid excessive rubbing and rinse thoroughly with water after removing the residue.
How do I remove sticker residue from delicate surfaces like painted walls?
For painted walls, gentleness is key. Use finely ground Epsom salt and mix it with a small amount of water to create a paste. Apply the paste to the sticker residue and let it sit for a few minutes to soften the adhesive. Then, gently rub the area with a soft cloth or sponge. Avoid using excessive pressure, as this can damage the paint. Rinse the area with a damp cloth and dry it thoroughly. If the residue persists, repeat the process or try a different method, such as using a hairdryer to soften the adhesive before gently peeling it away.
What if the sticker residue is really stubborn and won’t come off?
For particularly stubborn sticker residue, try these tips:
* Pre-soak the residue: Before applying the salt, soak the residue with warm water or a mild soap solution for a few minutes to soften the adhesive.
* Create a paste: Mix the salt with a small amount of baking soda and water to create a paste. The baking soda adds extra abrasive cleaning power.
* Use a hairdryer: Apply heat from a hairdryer to the residue for a minute or two to soften the adhesive before scrubbing with salt.
* Try a different solvent: If salt alone isn’t working, try using a small amount of rubbing alcohol, vinegar, or citrus-based cleaner in conjunction with the salt. Always test in an inconspicuous area first.
* Patience is key: Sometimes, stubborn residue requires multiple applications and gentle scrubbing over time. Don’t give up!
Will this method scratch my surfaces?
The risk of scratching depends on the type of salt you use, the surface you’re cleaning, and the amount of pressure you apply. To minimize the risk of scratching:
* Use a finer salt for delicate surfaces.
* Apply gentle pressure when scrubbing.
* Test in an inconspicuous area first.
* Use a soft cloth or sponge to apply the salt.
* Avoid using abrasive scrubbing pads.
Can I use this method to remove residue from clothing?
Yes, you can use this method to remove sticker residue from clothing, but with caution. First, test the salt on a hidden area of the fabric to ensure it doesn’t damage or discolor it. If it’s safe, gently rub the salt onto the residue using a soft cloth. Avoid excessive rubbing, as this can damage the fabric. Rinse the area thoroughly with water and launder as usual. For delicate fabrics, consider using a gentler method, such as soaking the area in warm water with a mild detergent.
How do I prevent sticker residue in the first place?
Prevention is always better than cure! Here are some tips to prevent sticker residue:
* Peel slowly and carefully: When removing stickers, peel them slowly and at a low angle to minimize the chance of leaving residue behind.
* Use a heat gun or hairdryer: Applying heat to the sticker before peeling can soften the adhesive and make it easier to remove cleanly.
* Choose removable stickers: When possible, opt for stickers that are specifically designed to be removable and leave no residue.
* Clean surfaces before applying stickers: Make sure the surface is clean and dry before applying stickers to ensure they adhere properly and are less likely to leave residue when removed.
* Remove stickers promptly: The longer a sticker stays on a surface, the more likely it is to leave residue behind. Remove stickers as soon as they are no longer needed.
Is this method environmentally friendly?
Yes, using salt to remove sticker residue is a much more environmentally friendly option than using harsh chemical cleaners. Salt is a natural and readily available resource, and it doesn’t contain the harmful chemicals that can pollute the environment. However, it’s still important to use salt responsibly and avoid excessive use.
Can I use this method to remove glue from other things besides stickers?
Yes, this method can be effective for removing other types of glue residue as well, such as from tape, labels, or even some types of craft glue. The key is to adjust the type of salt and the scrubbing technique to match the type of glue and the surface you’re cleaning. Always test in an inconspicuous area first to ensure it doesn’t damage the surface.


Leave a Comment