

Wooden Cutting Board Care: It’s more than just wiping it down! Ever wonder why your beautiful wooden cutting board seems to be losing its luster, or worse, harboring unwanted smells? I know I have! For centuries, wooden cutting boards have been a kitchen staple, prized for their durability and natural beauty. From ancient Roman kitchens to modern-day culinary spaces, they’ve been the trusted surface for chopping, slicing, and dicing. But unlike their plastic counterparts, wooden cutting boards require a little extra TLC to keep them in tip-top shape.
Let’s face it, nobody wants a cutting board that’s a breeding ground for bacteria or one that looks like it’s been through a war. That’s where these simple, yet effective, DIY tricks come in! I’m going to share some easy-to-follow methods for wooden cutting board care that will not only extend the life of your board but also keep it hygienic and looking its best. These aren’t just random tips; they’re tried-and-true techniques that I’ve personally used to revive and maintain my own beloved wooden boards. So, ditch the harsh chemicals and get ready to learn how to naturally clean, condition, and protect your wooden cutting board, ensuring it remains a cherished kitchen companion for years to come!
Revive Your Beloved Wooden Cutting Board: A DIY Guide
Hey there, fellow DIY enthusiasts! I’m so excited to share this guide with you on how to breathe new life into your wooden cutting board. We all know how essential these boards are in the kitchen, but they can take a beating over time. Scratches, stains, and even lingering odors can make them look less than appealing. But don’t worry, you don’t need to toss it out and buy a new one! With a little elbow grease and the right techniques, you can restore your wooden cutting board to its former glory.
Why Restore Your Wooden Cutting Board?
Before we dive in, let’s quickly touch on why restoring your wooden cutting board is so important.
* Hygiene: Scratches and grooves can harbor bacteria, making your cutting board a breeding ground for unwanted guests. Restoring it helps eliminate these hiding spots and keeps your food preparation surface clean.
* Longevity: Regular maintenance and restoration can significantly extend the lifespan of your wooden cutting board. Think of it as an investment in your kitchen tools!
* Aesthetics: Let’s face it, a beautiful cutting board is a joy to use. Restoring it brings back its natural beauty and makes your kitchen look more inviting.
* Sustainability: Instead of throwing away a perfectly good cutting board, restoring it is an eco-friendly choice that reduces waste.
What You’ll Need
Here’s a list of the supplies you’ll need for this project:
* Coarse Sandpaper (80-120 grit): For removing deep scratches and imperfections.
* Medium Sandpaper (150-180 grit): For smoothing out the surface after using the coarse sandpaper.
* Fine Sandpaper (220+ grit): For achieving a super smooth finish.
* Food-Grade Mineral Oil: To rehydrate and protect the wood.
* Beeswax (Optional): To create a protective barrier and add a subtle sheen.
* Clean Rags or Paper Towels: For wiping away dust and applying oil/wax.
* Scraper or Putty Knife (Optional): For removing stubborn residue.
* Lemon (Optional): For deodorizing and disinfecting.
* Salt (Optional): For scrubbing away stains.
* Safety Glasses: To protect your eyes from dust.
* Dust Mask: To avoid inhaling sawdust.
* Work Gloves (Optional): To protect your hands.
Step-by-Step Restoration Process
Alright, let’s get started! Here’s a detailed breakdown of the restoration process:
1. Cleaning and Inspection
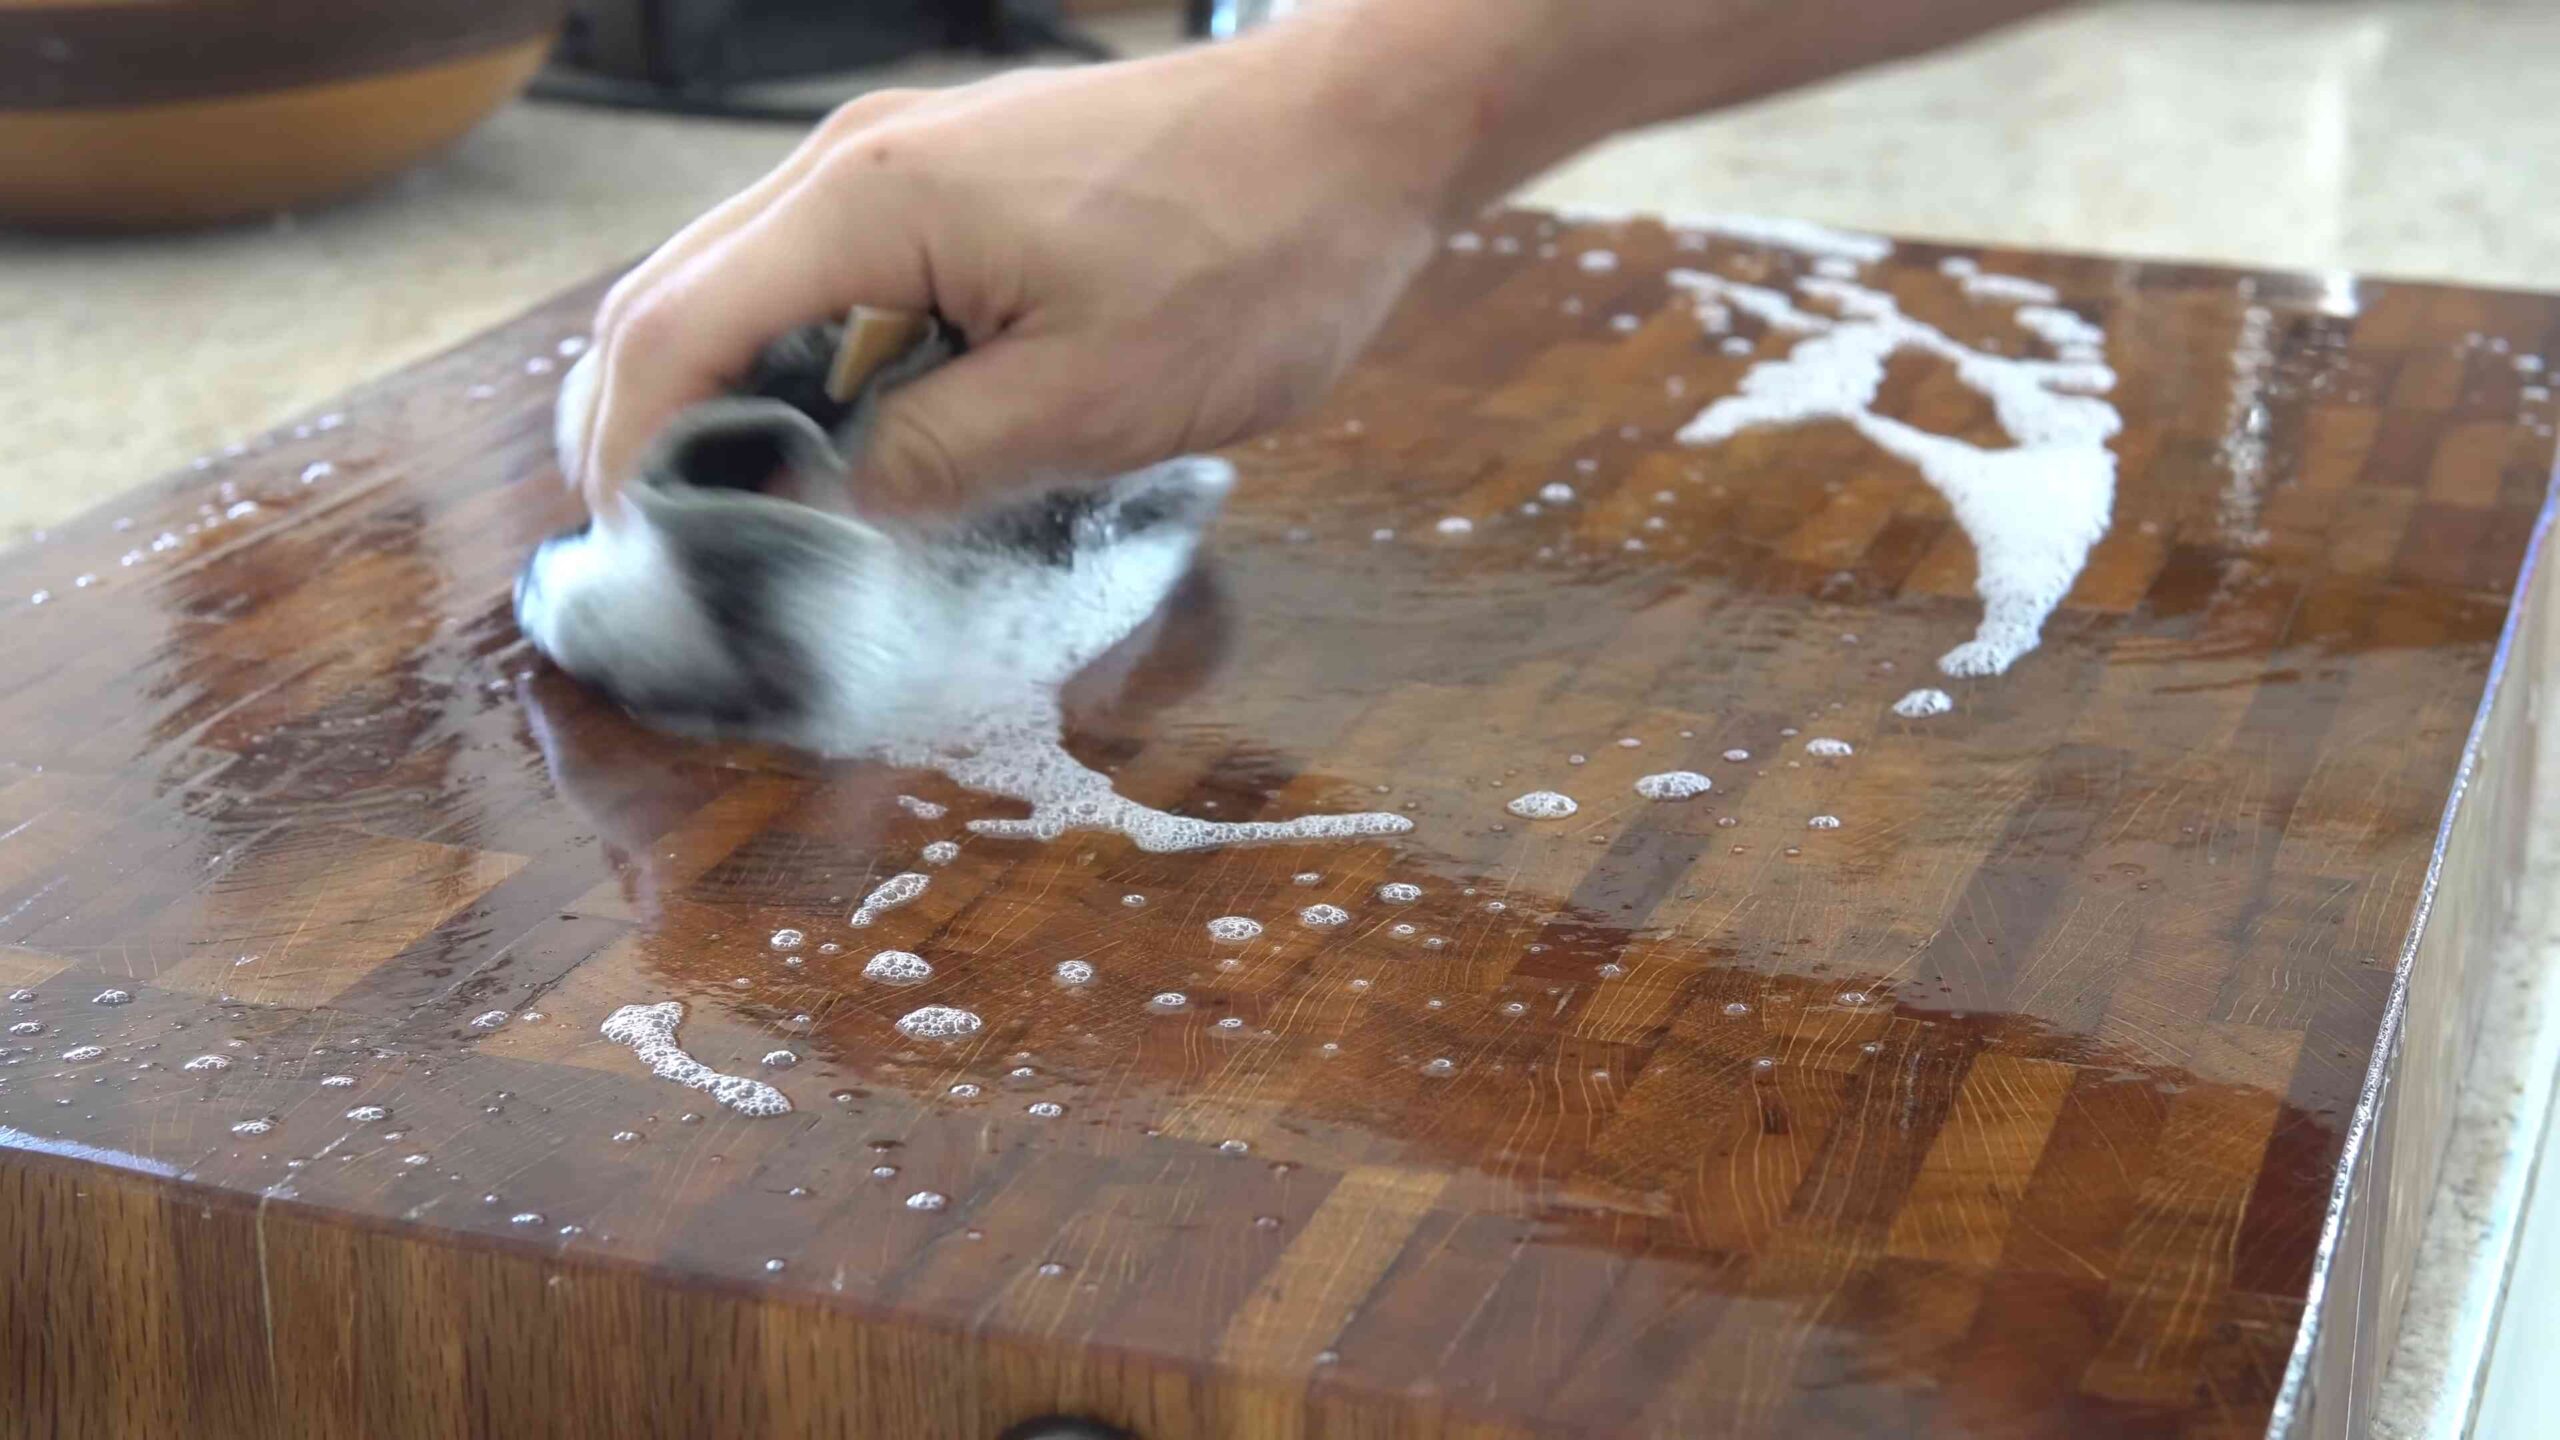
1. Wash the Cutting Board: Begin by washing your cutting board with warm, soapy water. Use a mild dish soap and a non-abrasive sponge or cloth. Rinse thoroughly and pat dry.
2. Inspect for Damage: Carefully examine the cutting board for deep scratches, stains, mold, or any other signs of damage. This will help you determine the extent of the restoration needed. If you find mold, you may need to use a diluted bleach solution (1 part bleach to 10 parts water) to disinfect the area. Rinse thoroughly and allow to dry completely before proceeding.
2. Sanding the Surface
This is the most crucial part of the restoration process. Take your time and be patient!
1. Prepare Your Workspace: Set up your workspace in a well-ventilated area. Put on your safety glasses and dust mask to protect yourself from dust.
2. Start with Coarse Sandpaper: Begin sanding with the coarse sandpaper (80-120 grit). Focus on areas with deep scratches, stains, or imperfections. Sand in the direction of the wood grain to avoid creating new scratches. Apply even pressure and work your way across the entire surface of the cutting board.
3. Switch to Medium Sandpaper: Once you’ve removed the major imperfections, switch to the medium sandpaper (150-180 grit). This will help smooth out the surface and remove any remaining scratches from the coarse sandpaper. Again, sand in the direction of the wood grain.
4. Finish with Fine Sandpaper: Finally, use the fine sandpaper (220+ grit) to achieve a super smooth finish. This step is essential for creating a beautiful and functional cutting board. Sand lightly and evenly across the entire surface.
5. Sand the Edges: Don’t forget to sand the edges of the cutting board! Use the same sandpaper grits as you did for the surface, starting with coarse and ending with fine.
6. Remove Dust: After sanding, thoroughly remove all dust from the cutting board. You can use a clean rag, a tack cloth, or even a vacuum cleaner with a brush attachment. Make sure the surface is completely clean before moving on to the next step.
3. Deodorizing and Disinfecting (Optional)
If your cutting board has lingering odors or you want to give it an extra layer of disinfection, try this:
1. Lemon and Salt Scrub: Cut a lemon in half and sprinkle coarse salt over the surface of the cutting board. Use the lemon half to scrub the salt into the wood, focusing on areas with strong odors or stains. The lemon’s acidity and the salt’s abrasiveness will help remove odors and disinfect the surface.
2. Rinse and Dry: After scrubbing, rinse the cutting board thoroughly with warm water and pat dry with a clean towel. Allow the cutting board to air dry completely before proceeding to the oiling stage.
4. Oiling the Cutting Board
This is where the magic happens! Oiling your cutting board is crucial for rehydrating the wood, protecting it from moisture, and preventing it from cracking.
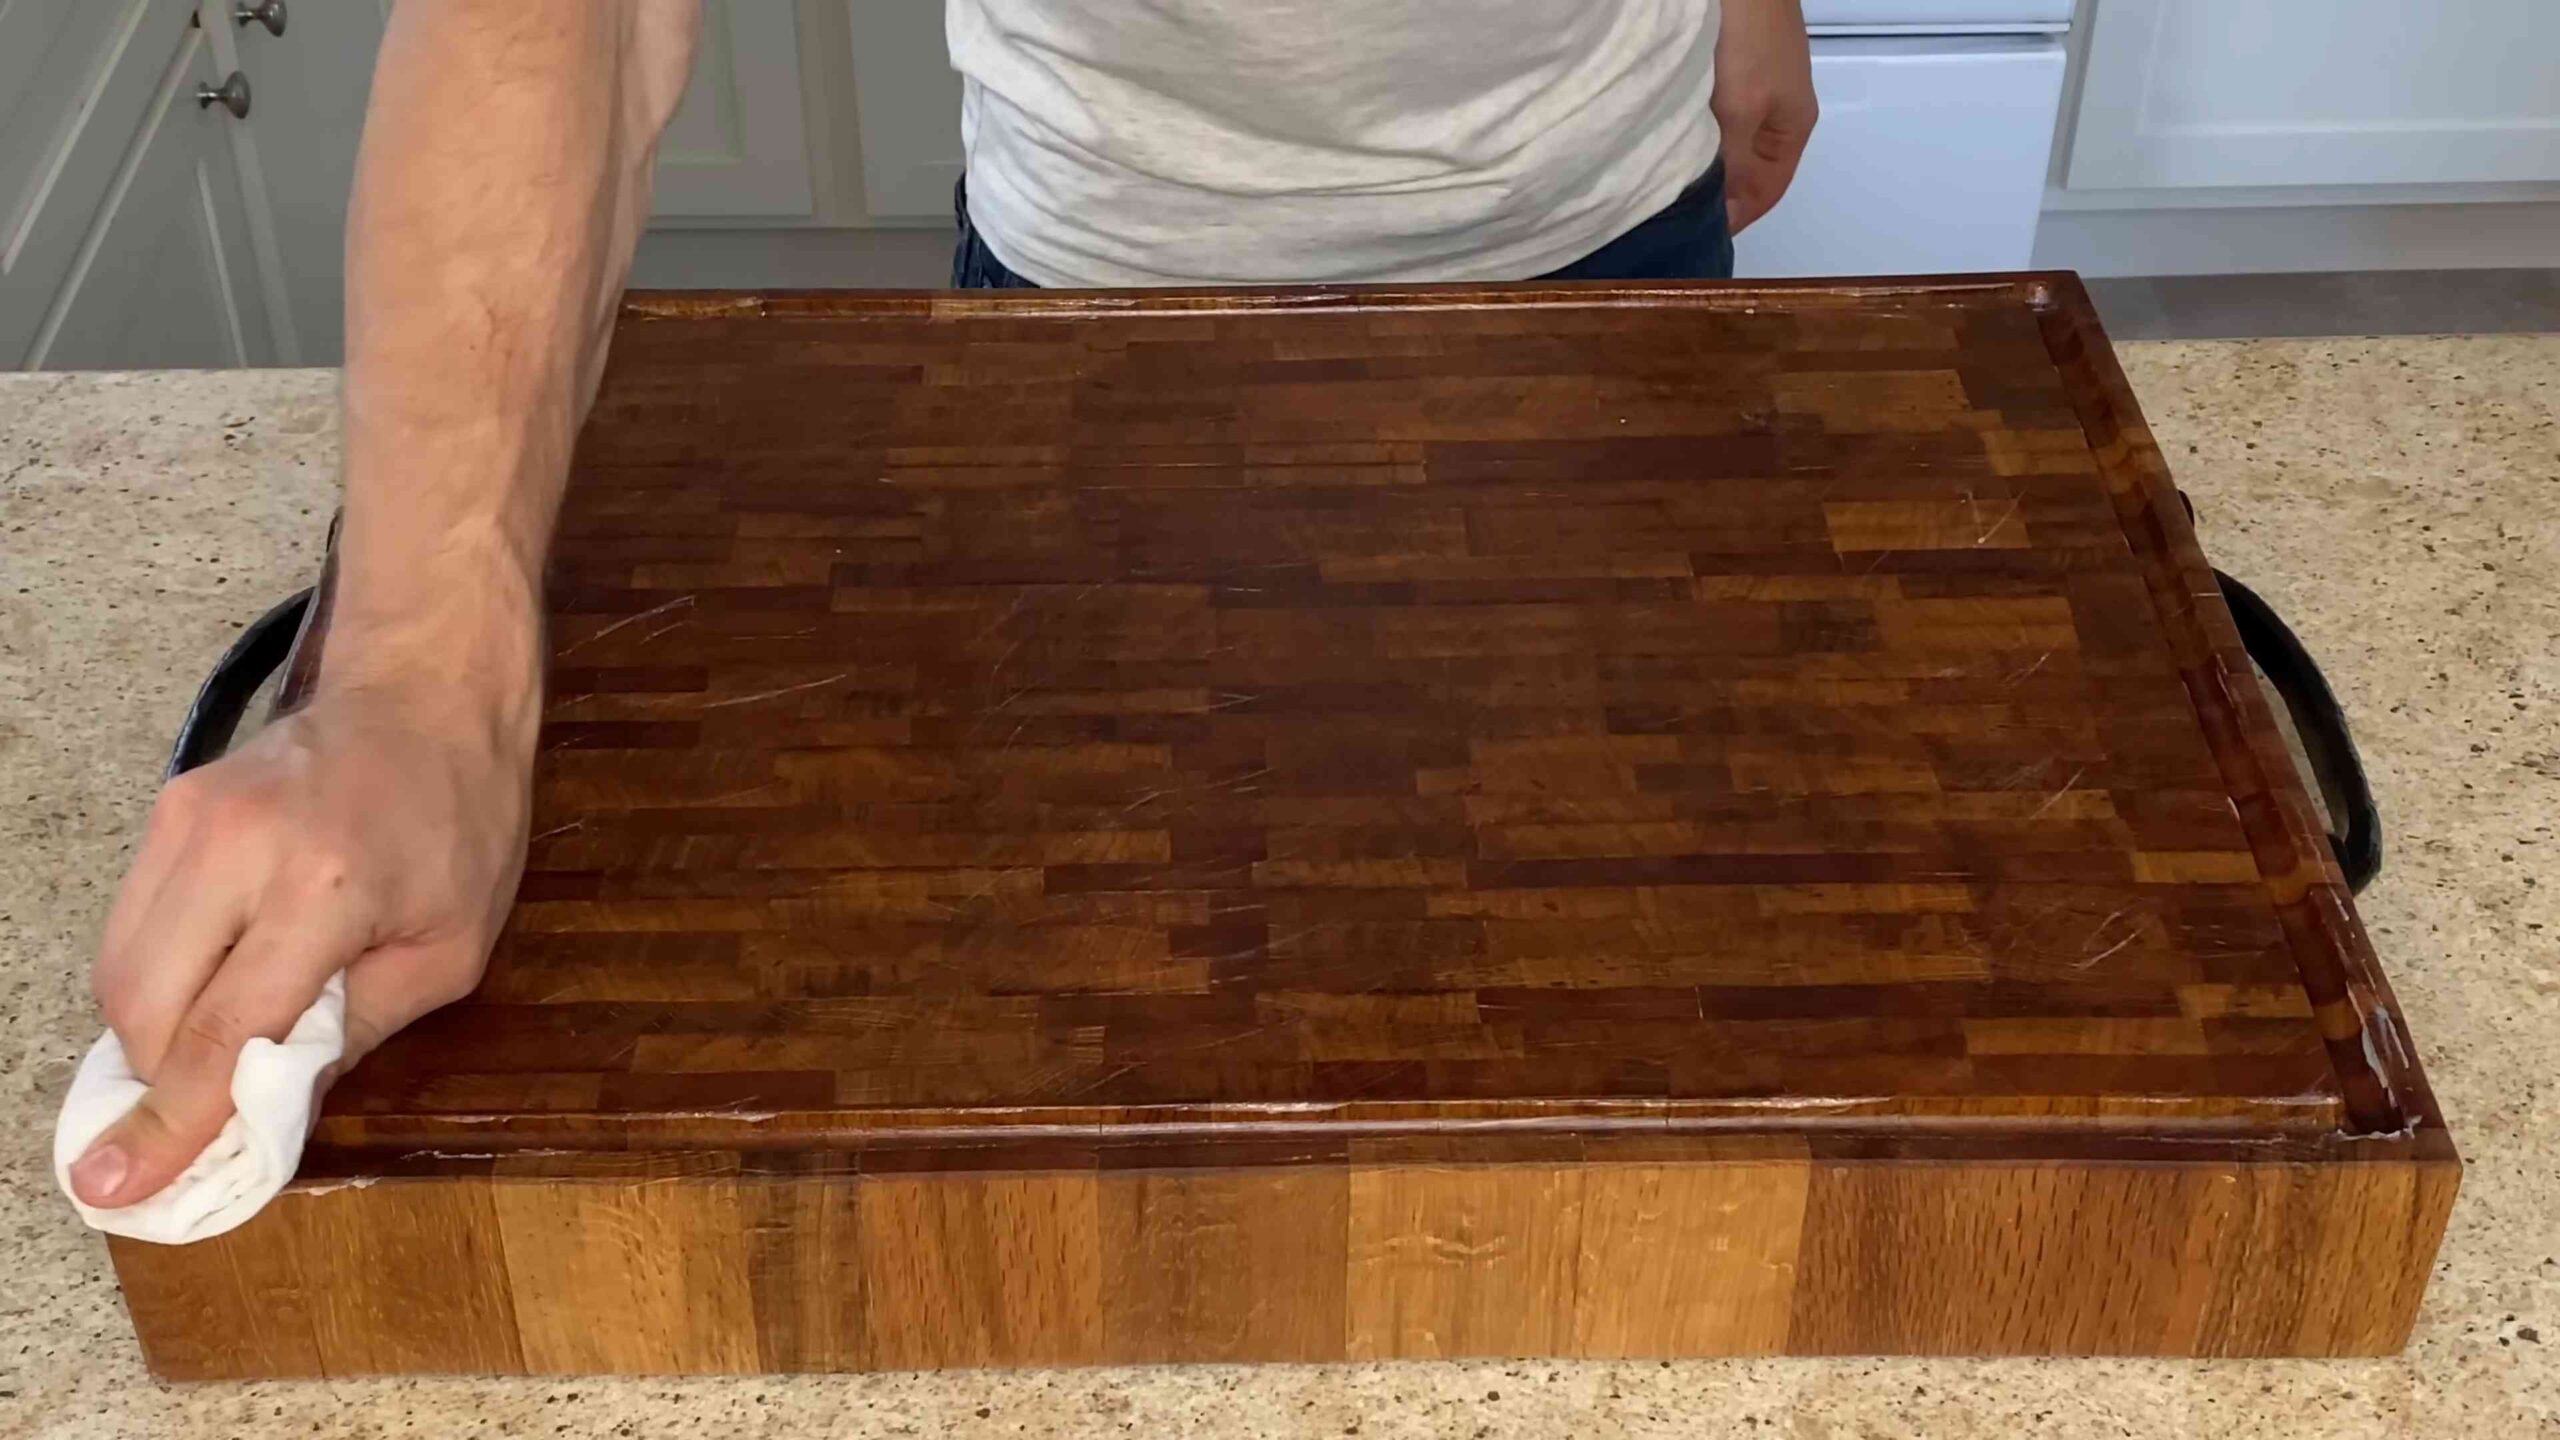
1. Apply Mineral Oil: Pour a generous amount of food-grade mineral oil onto the surface of the cutting board. Use a clean rag or paper towel to spread the oil evenly across the entire surface, including the edges.
2. Let it Soak: Allow the oil to soak into the wood for at least 2-4 hours, or even overnight. The longer you let it soak, the better the wood will absorb the oil.
3. Apply More Oil (If Needed): After the initial soaking period, check the cutting board to see if it has absorbed all the oil. If there are dry spots, apply more oil and let it soak for another hour or two.
4. Wipe Away Excess Oil: Once the wood is saturated with oil, use a clean rag or paper towel to wipe away any excess oil from the surface. You want the cutting board to be well-oiled, but not greasy.
5. Applying Beeswax (Optional)
Applying beeswax after oiling creates a protective barrier that helps repel water and adds a subtle sheen to your cutting board.
1. Melt the Beeswax: You can melt beeswax in a double boiler or in the microwave. If using the microwave, heat it in short intervals (30 seconds) and stir in between to prevent it from overheating.
2. Mix with Mineral Oil (Optional): For a softer beeswax finish, you can mix it with a small amount of mineral oil. A ratio of 4 parts mineral oil to 1 part beeswax works well.
3. Apply the Beeswax: Once the beeswax is melted, use a clean rag or paper towel to apply a thin layer to the entire surface of the cutting board.
4. Let it Dry: Allow the beeswax to dry and harden for at least 30 minutes.
5. Buff the Surface: After the beeswax has dried, use a clean, dry rag to buff the surface of the cutting board. This will remove any excess beeswax and create a smooth, polished finish.
Maintaining Your Restored Cutting Board
Now that you’ve restored your wooden cutting board, it’s important to maintain it properly to keep it looking its best for years to come.
* Wash After Each Use: Wash your cutting board with warm, soapy water after each use. Avoid using harsh detergents or putting it in the dishwasher, as this can dry out the wood.
* Dry Thoroughly: After washing, dry your cutting board thoroughly with a clean towel. Don’t let it air dry, as this can cause it to warp or crack.
* Oil Regularly: Re-oil your cutting board every few weeks, or whenever it starts to look dry. This will help keep the wood hydrated and protected.
* Avoid Cutting Raw Meat on Wood: While wood has natural antibacterial properties, it’s best to avoid cutting raw meat on your wooden cutting board to prevent cross-contamination. Use a separate cutting board for raw meat and poultry.
* Store Properly: Store your cutting board in a dry, well-ventilated area. Avoid storing it in a damp or humid environment, as this can promote mold growth.
Troubleshooting
* Stubborn Stains: For stubborn stains, try making a paste of baking soda and water and applying it to the stained area. Let
Conclusion
So, there you have it! Mastering the art of wooden cutting board care isn’t just about extending the life of your favorite kitchen tool; it’s about embracing a healthier, more sustainable way of cooking. By implementing these simple yet effective DIY techniques, you’re not only protecting your investment but also ensuring that your food preparation surface remains hygienic and safe for years to come.
Why is this a must-try? Because a well-maintained wooden cutting board is a joy to use. It’s gentle on your knives, it’s aesthetically pleasing, and it’s a testament to your commitment to quality in the kitchen. Neglecting your wooden cutting board can lead to warping, cracking, and the harboring of harmful bacteria – none of which are desirable outcomes. This DIY approach empowers you to take control and prevent these issues proactively.
Beyond the Basics: Variations and Enhancements
While the core steps of cleaning, oiling, and waxing are essential, there’s always room for personalization. Consider these variations to tailor your wooden cutting board care routine to your specific needs and preferences:
* Scented Oil Infusion: Add a few drops of food-grade essential oils, such as lemon or rosemary, to your mineral oil for a subtle and refreshing aroma. This can enhance the overall experience of using your cutting board. Be sure to research the safety of any essential oil before using it on a food-contact surface.
* DIY Wax Blend: Experiment with different ratios of beeswax and mineral oil to achieve your desired consistency for the wax. Some prefer a softer wax for easier application, while others prefer a harder wax for greater protection. You can also add a touch of carnauba wax for increased durability.
* Deep Cleaning Power: For boards that have seen heavy use or have stubborn stains, consider using a paste of baking soda and lemon juice as a gentle abrasive cleaner before oiling. This can help to lift stains and neutralize odors. Remember to rinse thoroughly afterward.
* Wood Type Considerations: Different wood types may require slightly different care. For example, bamboo cutting boards are naturally more water-resistant and may not require as frequent oiling as maple or walnut boards. Research the specific needs of your wood type for optimal results.
The Call to Action: Share Your Success!
We wholeheartedly encourage you to try these DIY wooden cutting board care techniques. The results are truly rewarding, and you’ll be amazed at how much longer your cutting board lasts and how much better it looks. Don’t just take our word for it – experience the difference for yourself!
Once you’ve given it a try, we’d love to hear about your experience. Share your before-and-after photos, your favorite variations, and any tips or tricks you’ve discovered along the way. Let’s build a community of wooden cutting board enthusiasts who are passionate about preserving these essential kitchen tools. Use the hashtag #WoodenBoardCareDIY on social media to connect with others and share your success stories. Your insights could help someone else discover the joy of a well-maintained wooden cutting board!
Frequently Asked Questions (FAQ)
What type of oil should I use for my wooden cutting board?
The best oil for your wooden cutting board is food-grade mineral oil. It’s odorless, tasteless, and won’t go rancid. Avoid using vegetable oils like olive oil or sunflower oil, as they can become sticky and attract bacteria over time. You can also use specialized cutting board oils that are a blend of mineral oil and other food-safe ingredients.
How often should I oil my wooden cutting board?
The frequency of oiling depends on how often you use your cutting board and the humidity of your environment. As a general rule, oil your cutting board at least once a month, or more frequently if it looks dry or feels rough. A good way to tell if your board needs oiling is to sprinkle a few drops of water on the surface. If the water beads up, the board is adequately oiled. If the water soaks in quickly, it’s time to oil.
Can I use soap and water to clean my wooden cutting board?
Yes, you can use soap and water to clean your wooden cutting board, but do so sparingly. Use a mild dish soap and warm water, and scrub gently with a soft sponge or cloth. Avoid soaking the board in water, as this can cause it to warp or crack. After washing, rinse thoroughly and dry immediately with a clean towel.
How do I disinfect my wooden cutting board?
To disinfect your wooden cutting board, you can use a solution of white vinegar and water (1 part vinegar to 5 parts water). Apply the solution to the board, let it sit for a few minutes, and then rinse thoroughly with water. You can also use a solution of hydrogen peroxide (3%) to disinfect the board. Apply the hydrogen peroxide, let it sit for a few minutes, and then rinse thoroughly with water.
How do I remove stains from my wooden cutting board?
For stubborn stains, you can use a paste of baking soda and lemon juice. Apply the paste to the stain, let it sit for a few minutes, and then scrub gently with a soft sponge or cloth. Rinse thoroughly with water. You can also use a commercial cutting board cleaner that is specifically designed to remove stains.
How do I prevent my wooden cutting board from warping?
To prevent your wooden cutting board from warping, avoid soaking it in water and dry it immediately after washing. Store the board on its side to allow air to circulate around it. Avoid placing the board near heat sources, such as the stove or oven. Oiling the board regularly will also help to prevent warping by keeping the wood hydrated.
Can I put my wooden cutting board in the dishwasher?
No, never put your wooden cutting board in the dishwasher. The high heat and harsh detergents can cause the board to warp, crack, and dry out. Always wash your wooden cutting board by hand.
What is the purpose of waxing my wooden cutting board?
Waxing your wooden cutting board provides an extra layer of protection against moisture and helps to seal in the oil. It also gives the board a smooth, polished finish. A beeswax and mineral oil blend is a popular choice for waxing wooden cutting boards.
How often should I wax my wooden cutting board?
You should wax your wooden cutting board every few months, or as needed. If the board starts to look dull or feels dry, it’s time to apply a fresh coat of wax.
Is it safe to cut raw meat on a wooden cutting board?
Yes, it is safe to cut raw meat on a wooden cutting board, as long as you clean and disinfect the board thoroughly afterward. Use a separate cutting board for raw meat and poultry to prevent cross-contamination. After cutting raw meat, wash the board with hot, soapy water and disinfect it with a solution of white vinegar and water or hydrogen peroxide.
How do I store my wooden cutting board?
Store your wooden cutting board on its side in a dry, well-ventilated area. This allows air to circulate around the board and helps to prevent warping. Avoid storing the board flat on a countertop, as this can trap moisture underneath.
What if my wooden cutting board develops cracks?
Small cracks can be filled with a mixture of wood glue and sawdust. Apply the mixture to the crack, let it dry completely, and then sand it smooth. For larger cracks, you may need to consult a professional woodworker. Regular oiling and waxing can help to prevent cracks from forming in the first place.
Leave a Comment